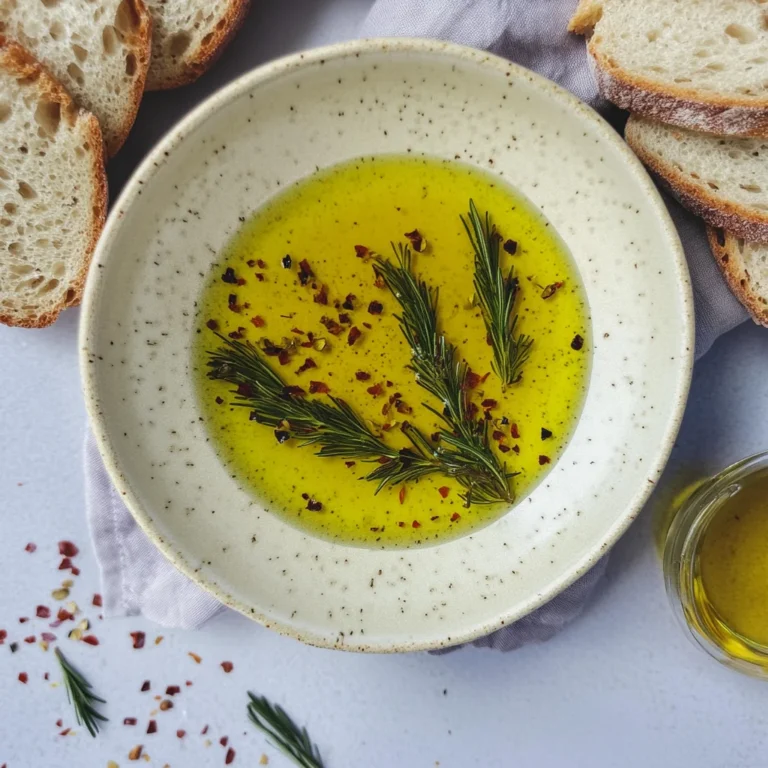
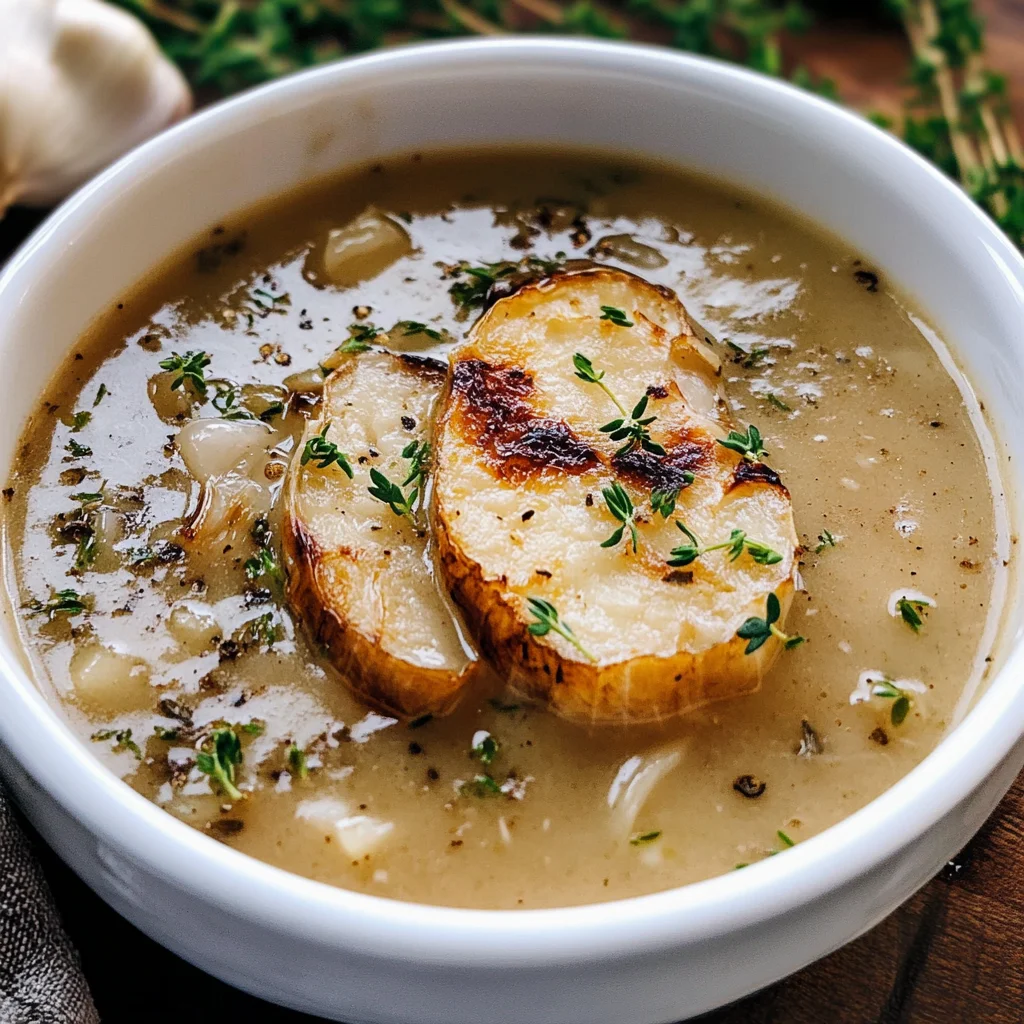
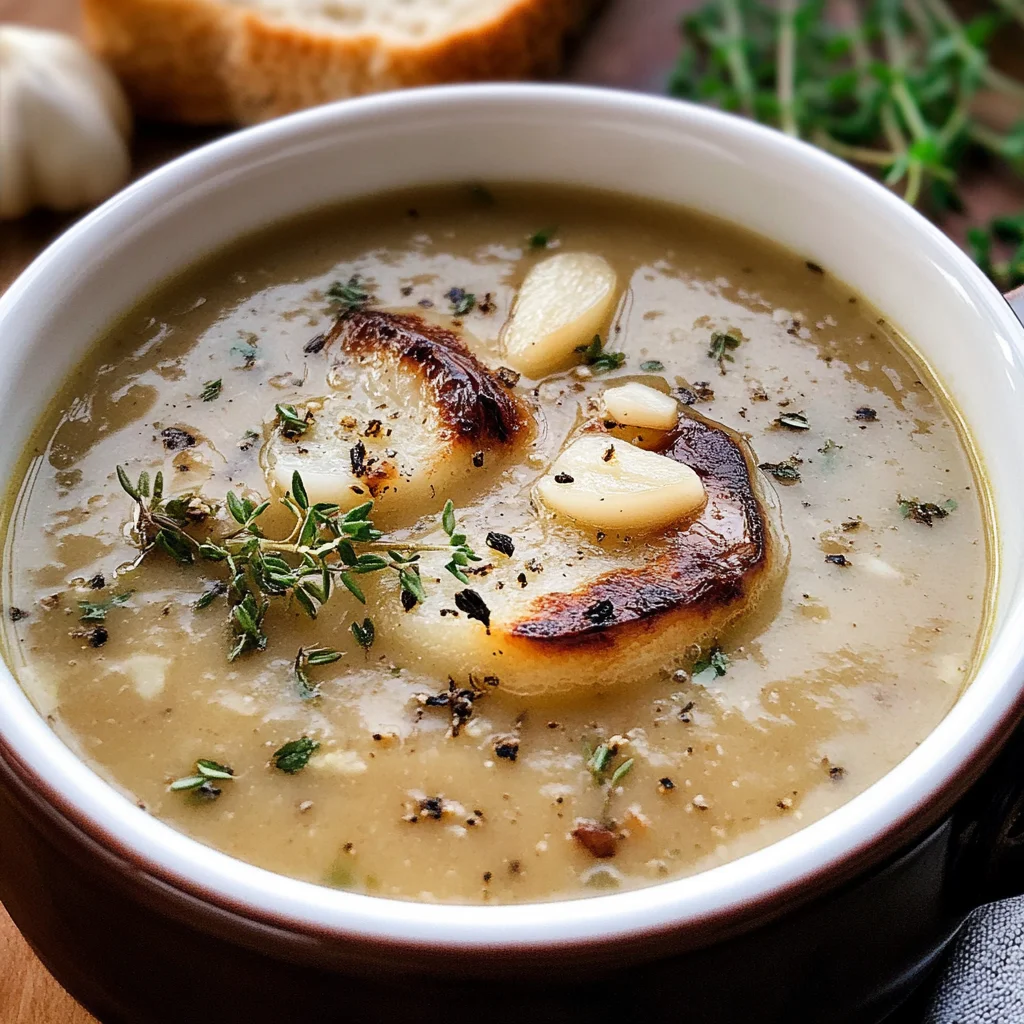
Rustic Country French Garlic Soup
Oh, my dear friend! Today, I am thrilled to share with you a recipe that feels like a warm embrace on a chilly evening: Rustic Country French Garlic Soup. This isn’t just any soup; it’s an experience that transports you straight to the rolling hills of the French countryside, where the aroma of slow-roasted garlic dances in the air and mingles beautifully with sweet onions and fragrant thyme. Imagine yourself cradling a bowl of this velvety concoction, each spoonful enveloping you in comfort as it warms your soul from the inside out. The deep, aromatic flavors are not just nourishing; they are utterly intoxicating, making this soup an essential part of your culinary repertoire.
What makes this Rustic Country French Garlic Soup so special is not just its simplicity but the profound satisfaction it brings. Each ingredient plays a crucial role in creating a symphony of flavors that celebrates rustic elegance. The creamy texture meets the earthiness of roasted garlic and fresh herbs, transforming humble ingredients into something truly extraordinary. Whether it’s a chilly weeknight or an elegant dinner gathering, this dish has an innate ability to elevate any occasion. I promise you, once you taste it, you’ll want to make it again and again!
Rustic Country French Garlic Soup: A Cozy Hug in a Bowl
Now, let’s embark on this delightful culinary journey together! This soup is incredibly forgiving and easy to whip up, making it perfect for both seasoned cooks and those who are just beginning their kitchen adventures. With just a handful of ingredients and a little bit of love, you’ll create something that warms not only your body but also your heart.
Ingredients:
As we gather our ingredients, I want you to think about how each one adds its own unique character to our Rustic Country French Garlic Soup. Let’s take a closer look at what we’ll need:
- 10 garlic cloves (about 50 g), whole and unpeeled. Oh, garlic—the star of our show! Roasting these cloves transforms their sharpness into sweet, caramelized goodness that adds depth and complexity to our soup. When selecting garlic, look for firm bulbs without any soft spots or sprouts; fresh garlic will yield the best flavor. If you’re feeling adventurous or want to experiment with different varieties, try using black garlic for a uniquely sweet twist!
- 1 large yellow onion (about 150 g), chopped. Sweet and aromatic, the yellow onion serves as the perfect base for our soup’s flavor profile. It caramelizes beautifully when sautéed, adding sweetness and richness that balances the boldness of the garlic. Choose onions that feel heavy for their size with dry skins; they should have no blemishes or soft spots.
- 4 cups (960 ml) vegetable or chicken broth. The choice of broth is non-negotiable here—it’s what gives our soup its body and richness. A high-quality homemade broth will elevate your soup immensely! If using store-bought broth, opt for low-sodium varieties so you can control the seasoning later on.
- 1 cup (240 ml) heavy cream. This is where we bring in that luscious creaminess that makes every spoonful feel indulgent yet comforting at the same time. Heavy cream provides a velvety texture that’s simply irresistible; if you’re looking for lighter options, full-fat coconut milk can work wonders too—just be mindful of its distinct flavor.
- 1 tbsp (15 ml) olive oil. A drizzle of good-quality olive oil not only helps sauté our onions but also contributes healthy fats that enhance flavor absorption throughout the soup. Extra virgin olive oil adds a fruity note that beautifully complements all the other ingredients.
- 4–5 sprigs fresh thyme (or 1 tsp dried thyme). Thyme introduces an earthy aroma reminiscent of sunny gardens in France—absolutely paramount for achieving authentic rustic flavor! Fresh thyme is always preferable for its vibrant taste—make sure to strip the leaves off before adding them into your pot.
- 1 small baguette or 4 slices crusty bread (about 150 g), for serving. Ahh…nothing pairs better with this soup than crusty bread! It’s not just about eating; it’s about tearing off pieces to soak up every last drop of this liquid gold! Look for a baguette with a crisp crust and soft interior.
- Salt and black pepper, to taste. Simple yet essential seasonings! They bring out all those wonderful flavors we’ve worked so hard to create—don’t skip them!
- Fresh herbs or croutons, for garnish. These little touches add brightness and texture—what makes each bowl visually appealing and even more inviting.
Equipment You’ll Need:
Now that we have everything prepped and ready to go, let’s talk about some essential tools you’ll need to craft this beautiful Rustic Country French Garlic Soup effortlessly! Having the right equipment can make all the difference in ensuring everything goes smoothly in your kitchen adventure.
- Large pot – This is where all the magic happens! A sturdy pot allows for even heat distribution while simmering our ingredients together—a must-have for developing those deep flavors.
- Oven-safe baking dish or foil – We will be roasting our garlic first before adding it to the soup base; wrapping them up tightly keeps all those delicious juices contained while they become wonderfully soft.
- Wooden spoon or spatula – For stirring things up gently without scratching your pot’s surface; it’ll help coax out those lovely flavors as we sauté our onions.
- Immersion blender (or regular blender) – Pureeing our soup until smooth is crucial after simmering—it ensures every bite has that silky texture we’re striving for! An immersion blender is fantastic because it allows you to blend directly in the pot without transferring hot liquid elsewhere.
With these ingredients gathered and tools at hand, let’s start preparing our Rustic Country French Garlic Soup!
Step 1: Roast That Beautiful Garlic
Preheat your oven to 400°F (200°C). While it heats up, take those glorious whole garlic cloves—don’t peel them yet—and slice off their tops just enough so they’re exposed but still intact within their skins. Drizzle them generously with olive oil before wrapping them snugly in aluminum foil like little presents waiting to be opened! Roast them in your preheated oven for about 30 minutes or until they turn golden brown and soft—the aroma wafting through your kitchen will be nothing short of heavenly! Trust me on this step; roasting enhances garlic’s natural sweetness while mellowing out its pungency—a transformation that elevates our soup beyond compare.
Step 2: Sauté Those Aromatics
While that garlic is working its magic in the oven, grab your large pot and place it over medium heat on your stovetop. Add another drizzle of olive oil—just enough to coat the bottom—and let it warm slightly before tossing in your chopped yellow onion. Now comes one of my favorite parts: gently cooking these onions until they’re translucent and fragrant takes about 5–7 minutes while stirring occasionally so they don’t stick or burn! Watch as they soften beautifully—their natural sugars begin caramelizing gently—which adds layers upon layers of flavor when combined later with roasted garlic!
Step 3: Add Broth & Herbs
Once those onions have turned translucent—a sign they’re ready—it’s time to squeeze all that roasted goodness from their skins into your pot like magic! You’ll see how easily they come out—so buttery soft now—and immediately add depth into our aromatic base along with four cups of vegetable or chicken broth plus those lovely sprigs of thyme too! Give everything a good stir before bringing this mixture up gently towards simmering point—the bubbling action will help meld those incredible flavors together over roughly fifteen minutes while keeping an eye out so nothing sticks at all!
Step 4: Blend It All Together
After letting our soup simmer away blissfully for around fifteen minutes—you’ll know it’s time when aromas fill every corner—you’ll want carefully remove any thyme sprigs left behind by giving them gentle tugging motion as if saying goodbye before blending away! Use either an immersion blender directly inside OR carefully transfer batches into a regular countertop blender until everything becomes wonderfully smooth—this puree process transforms what started as simple elements into something velvety rich beyond belief!
As we continue through this journey together making Rustic Country French Garlic Soup—keep in mind how each step builds on itself patiently crafting something extraordinary worth savoring deeply when served piping hot alongside slices of warm baguette waiting nearby…
Step 5: Blend Until Silky Smooth
Now that your soup has simmered for a good 15 to 20 minutes, it’s time for one of the most satisfying steps: blending. This step transforms your rustic garlic and onion concoction into a velvety masterpiece. First, you’ll want to remove those thyme sprigs, as they’ve done their job infusing flavor but aren’t pleasant to eat. If you’re using an immersion blender, simply submerge it into the pot and start blending away. Make sure to move it around gently; you want to achieve a harmonious texture without any chunks. If you’re using a traditional blender, allow the soup to cool slightly before transferring it in batches—this is crucial because hot liquids can create dangerous splashes when blended too vigorously. Trust me on this: ensuring a smooth blend will elevate your Rustic Country French Garlic Soup from good to truly extraordinary. You’re aiming for something reminiscent of satin; it should glide off the spoon and practically melt in your mouth.
As you blend, pay attention to the aroma wafting up—this is the magic of roasted garlic mingling with sweet onions and herbs, creating an intoxicating scent that promises warmth and comfort. Take a moment to appreciate how this soup has transformed from simple ingredients into something profound and satisfying. The blending process isn’t just about texture; it’s about uniting all those flavors into one cohesive experience that speaks to your soul. Once you’ve achieved that silky consistency, set the blended soup back on low heat while we move onto the next tantalizing step.
Step 6: Creamy Indulgence
With your beautifully blended soup ready for its final flourish, it’s time to introduce the heavy cream—a truly non-negotiable element if you desire that rich and luscious mouthfeel! Pour in one cup of heavy cream and stir gently until it’s fully incorporated. As you do this, watch how the color transforms into a warm ivory hue, almost like liquid gold shimmering under candlelight. This addition not only enhances the flavor profile but also adds an extraordinary depth that complements the roasted garlic perfectly. You might wonder why cream is essential here; well, it balances out the robust earthy notes of garlic while giving your soup that lush texture everyone craves.
Once the cream is incorporated, season generously with salt and freshly cracked black pepper. Here’s where your taste buds come into play—give it a gentle stir and then taste! Adjusting seasoning at this stage is paramount; don’t shy away from adding more salt or pepper until those flavors are singing in harmony. Letting these ingredients meld together over low heat for just a few more minutes allows everything to marry beautifully—so don’t rush this step! The result is a broth that feels like a warm hug on a chilly evening.
Step 7: Presentation Perfection
Now comes one of my favorite parts—the presentation! Ladle generous amounts of your Rustic Country French Garlic Soup into beautiful bowls; I recommend shallow ones as they showcase this creamy delight so well. But don’t stop there! It’s time for those finishing touches that make all the difference. Grab some fresh herbs—perhaps some finely chopped parsley or chives—and sprinkle them over each serving for an added pop of color and freshness. A sprinkle of croutons can provide that delightful crunch against the velvety smoothness of the soup, enhancing every bite with texture.
You could even drizzle a little extra virgin olive oil on top—think of it as adding a finishing stroke to your culinary canvas! This not only elevates flavor but also creates an attractive sheen that catches the eye and invites everyone to dig in. Remember, presentation is key when serving food; it sets expectations and creates excitement about what lies ahead. So take those extra moments to make each bowl look irresistible, because let’s be honest—your friends won’t just be tasting with their mouths; their eyes will feast first!
Step 8: The Baguette Experience
Before diving into this comforting bowl of Rustic Country French Garlic Soup, don’t forget about your crusty bread! A small baguette or thick slices of rustic bread are perfect companions for this dish—not merely as sides but as vital components of the experience itself! Slice your baguette diagonally so each piece has maximum surface area for soaking up all that delectable broth. You might even consider lightly toasting them in the oven at 350°F (175°C) for about 5-10 minutes until they’re warm and slightly crispy on the outside yet soft within.
This simple act does wonders—it transforms ordinary bread into an essential tool for savoring every last drop of soup from those bowls! The crunchiness creates an engaging contrast against the silkiness of your garlic soup, making each bite feel like an indulgent treat rather than just sustenance. Plus, there’s something utterly charming about dunking warm bread into creamy soup—it’s cozy, satisfying, and deeply nostalgic—a real celebration of comfort food at its finest!
Final Touches: Savoring Every Sip
Now that everything is prepared—from blending your silky soup to garnishing with fresh herbs—it’s time for you to embrace this moment fully! Serve immediately while it’s still steaming hot because nothing beats enjoying food at its peak temperature when flavors are most vibrant and aromas most enticing. As you gather around the table with loved ones or curl up on your couch with a good book, I promise you’ll find each spoonful profoundly satisfying.
Remember, cooking isn’t just about filling bellies—it’s about creating connections through shared experiences filled with love and warmth. So pour yourself a generous bowlful, grab that toasted baguette, and let every sip transport you straight to those picturesque French countrysides where rustic elegance reigns supreme. Enjoy every moment—you’ve earned it!
Storage and Enjoyment Tips for Your Rustic Country French Garlic Soup
Now that you’ve lovingly crafted your Rustic Country French Garlic Soup, it’s time to savor every velvety spoonful! This soup, embodying the essence of comfort and warmth, is not just a dish but an experience meant to be shared. As you indulge in its rich flavors, you might find yourself wanting to hold on to that cozy feeling for a little longer. The good news is that this delightful soup stores beautifully, allowing you to relive those comforting moments whenever you crave it.
Storing Leftover Rustic Country French Garlic Soup
To preserve the lusciousness of your Rustic Country French Garlic Soup, transfer any leftovers into an airtight container. Glass containers are particularly ideal since they maintain temperature well and are easy to reheat. Make sure it’s sealed tightly to keep out unwanted air and moisture; after all, protecting those wonderful flavors is absolutely paramount! When stored in the refrigerator, this creamy concoction will stay fresh for up to three days. However, if you’re like me and love savoring a bowl of this goodness beyond that time frame, consider popping it into the freezer instead. To maintain quality, I recommend using parchment paper between layers if you’re storing multiple servings or simply placing a slice of bread in with the soup — it helps absorb excess moisture and keeps everything tasting fresh! When reheating your soup, trust me on this: do so on low heat in a saucepan rather than the microwave for the best results; this way, you’ll enjoy every last drop as if it were just made!
Freezing for Later
Freezing your Rustic Country French Garlic Soup is such a brilliant option for those busy weeks when time slips away from us! To freeze properly, allow the soup to cool completely before transferring it into freezer-safe bags or containers—don’t forget to leave some space at the top as liquids expand when frozen. If stored correctly, this soup can last up to three months in the freezer without losing its charm. When you’re ready for a warm embrace of garlic goodness again, simply thaw it overnight in the fridge or use a quick stovetop method over low heat until it’s heated through. The convenience factor here is truly magnificent; having a homemade meal ready at a moment’s notice feels like winning a culinary jackpot! Plus, as you take that first spoonful after reheating, you’ll be reminded of those cozy evenings spent stirring your pot while breathing in those heavenly aromas.