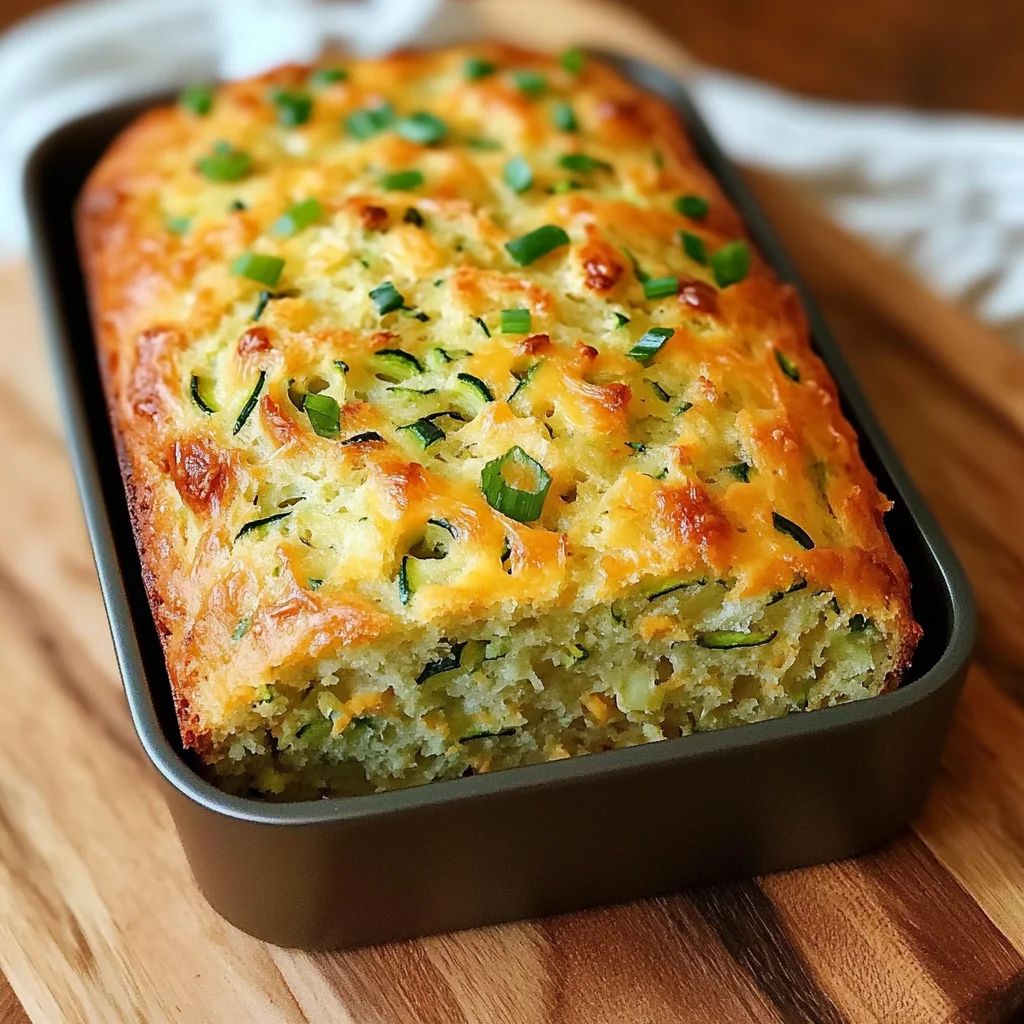
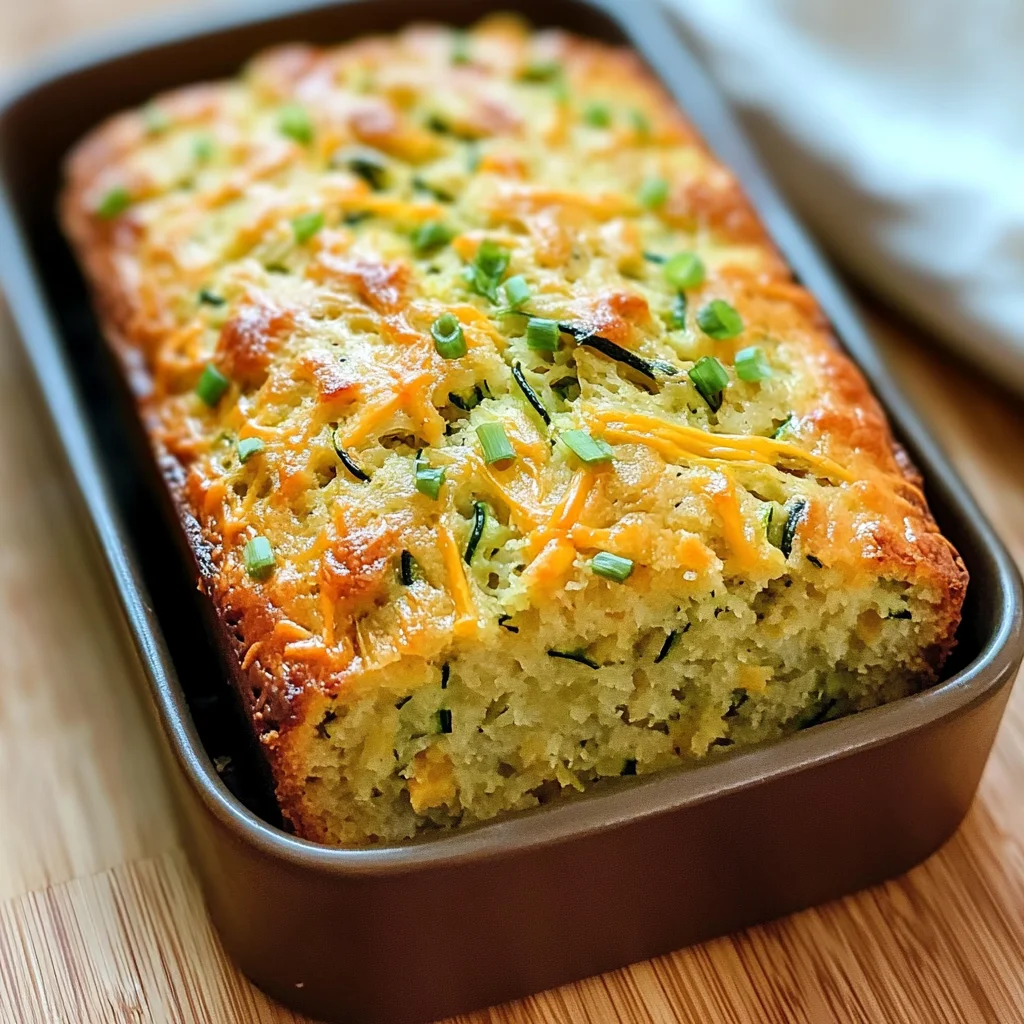
Green Onion Zucchini Cheddar Quick Bread
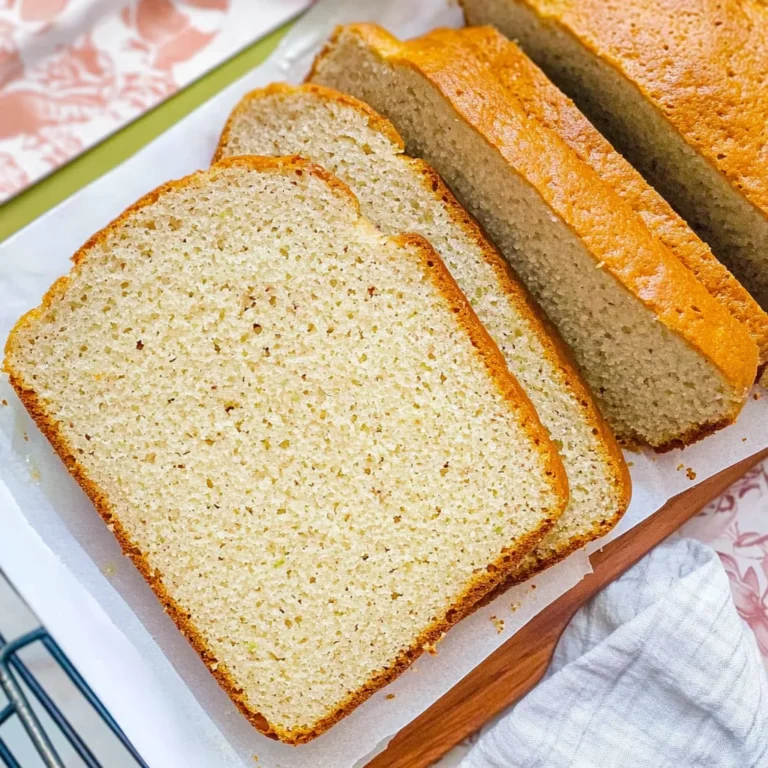
I never thought zucchini would work in a quick bread until my neighbor handed me a slice one summer afternoon. The sun was setting, casting warm golden rays on the kitchen table, and as I took that first bite, I felt an explosion of flavors come together in perfect harmony. The moistness of the zucchini intertwined with the rich sharp cheddar cheese and the subtle bite of green onions created a symphony of flavors that danced on my palate. This wasn’t just a loaf; it was a revelation, a delightful surprise that transformed my understanding of what quick bread could be. The Green Onion Zucchini Cheddar Quick Bread is not just food; it evokes memories of summer gardens, laughter among friends, and cozy evenings spent sharing stories over warm slices slathered with butter. I promise you, once you make this delightful dish, it will become a cherished recipe in your own kitchen.
As I reflect on this dish, I can’t help but marvel at its versatility. This quick bread serves as a delicious accompaniment to soups or salads, but it also shines on its own, enjoyed for breakfast or as an afternoon snack with a cup of tea. It embodies both tradition and innovation: zucchini, often relegated to the role of a side vegetable or salad filler, takes center stage here. When mixed into this moist batter, zucchini not only lends moisture but also enhances the bread’s nutritional profile without overpowering its flavor—a true champion of subtlety and finesse! This Green Onion Zucchini Cheddar Quick Bread speaks to the heart of culinary creativity—transforming humble ingredients into something truly extraordinary.
Green Onion Zucchini Cheddar Quick Bread: A Flavorful Twist on Tradition
Welcome to the wonderful world of quick breads! Today, we’re diving into a recipe that beautifully bridges comfort and creativity: Green Onion Zucchini Cheddar Quick Bread. This recipe is incredibly simple yet so satisfying that you’ll find yourself coming back to it time and time again. The combination of fresh zucchini and sharp cheddar creates an utterly intoxicating aroma as it bakes—trust me, you won’t be able to resist peeking into the oven long before it’s done!
Let’s embark on this culinary journey together! Baking this quick bread is not just about following steps; it’s about immersing yourself in the process and relishing each moment spent in your kitchen.
Ingredients:
As we prepare to create this stunning Green Onion Zucchini Cheddar Quick Bread, let’s take a moment to appreciate each ingredient that contributes to its magic. Each element plays an essential role in crafting those delicious flavors and textures we’re after!
- 1 1/2 cups shredded zucchini: Here lies the star ingredient! Fresh zucchini brings incredible moisture to our quick bread while adding subtle earthy notes that balance perfectly with the sharpness of cheddar cheese. When choosing your zucchini, look for firm ones with smooth skin; they should feel heavy for their size. You can even grate extra zucchini when you have some left over from another recipe—it freezes beautifully if you want to save it for later!
- 2 cups plain white flour: This is your structure builder! All-purpose flour provides stability and texture for our quick bread. It absorbs moisture during baking while allowing our other ingredients—like cheese and green onions—to shine through without becoming overly dense. If you’re looking for alternatives due to dietary preferences, feel free to experiment with whole wheat or gluten-free blends; just keep in mind that this might slightly alter the texture.
- 2 tsp baking powder: Essential for leavening, baking powder works wonders by creating tiny bubbles of carbon dioxide when mixed with wet ingredients. This reaction causes our batter to rise beautifully in the oven, giving us that light texture we all crave in quick bread! Be sure your baking powder is fresh; if it has been sitting around for too long, its effectiveness diminishes.
- 1/2 tsp baking soda: Baking soda complements our baking powder by providing an additional lift while also helping neutralize any acidity from ingredients like vinegar or buttermilk (which we’ll get to next). Together with baking powder, they create the perfect balance for lightness—we definitely want our bread fluffy!
- 1/2 tsp table salt: Salt is absolutely paramount in enhancing flavor—it accentuates every note within our bread by making those rich savory flavors sing! Even though it seems small compared to other ingredients, using quality salt can transform an ordinary loaf into something memorable.
- 1 cup milk (2%, whole, or nonfat): Milk adds moisture and richness while ensuring our dough binds together smoothly without becoming too dry. Different types of milk will impart subtle differences in flavor—whole milk will yield creamier results while nonfat keeps things lighter without sacrificing taste.
- 1 tbsp white or apple cider vinegar: Adding vinegar may seem unconventional at first glance; however, it plays a crucial role by reacting with baking soda to create lift! Plus, it helps balance out flavors without leaving any tangy aftertaste behind.
- 1 large egg: Eggs contribute richness and act as a binder within our batter—helping everything stay together beautifully while also adding an enticing golden hue once baked. When choosing eggs for your recipe, look for high-quality eggs from chickens raised in humane conditions—they truly make all the difference!
- 3 tbsp unsalted butter, melted: Butter infuses our quick bread with warmth and flavor like no other ingredient can! It adds that irresistible buttery aroma as it bakes—a scent that fills your home with cozy feelings reminiscent of family gatherings around the table.
- 1 1/2 cups sharp cheddar cheese, grated: Cheese brings depth and richness alongside its signature tanginess that elevates this dish beyond mere sustenance into something spectacular! Opt for high-quality sharp cheddar—it melts beautifully while imparting bold flavor throughout every slice.
- 2 chopped green onions: These little gems add freshness plus a mild oniony punch without overwhelming excitement—perfectly balancing out richer elements like cheese! Look for vibrant green onions at your market; they should feel firm with no wilting leaves.
Equipment You’ll Need:
Before we dive headfirst into mixing up our delicious batter, let’s talk about some essential tools that will help make this experience smooth sailing! Having the right equipment makes all the difference in achieving great results—and trust me; you’ll want these partners by your side!
- Mixing bowls – A sturdy mixing bowl allows you ample space to combine ingredients comfortably without risk of spills or splatters when whisking up your batter together nicely! Consider having both medium-sized bowls (for wet ingredients) plus larger ones (for dry), which prevents cross-contamination between substances during prep time.
- Grater or food processor – For shredding those zucchinis effortlessly! While grating by hand can provide satisfaction (and arm workout!), using a food processor saves time—especially if you’re whipping up multiple loaves at once!
- Measuring cups & spoons – Accurate measurements are absolutely critical when baking—too much flour or salt can lead us astray from perfection! Invest in good quality measuring tools so every ingredient shines through precisely as intended.
- Loaf pan (9×5 inches) – A reliable loaf pan ensures even cooking across all sides while holding enough batter snugly during bake time—not allowing anything overflow outside where it shouldn’t be!
Preparing the Green Onion Zucchini Cheddar Quick Bread
Step 1: Prepping Your Ingredients
Let’s start by prepping all those wonderful ingredients before diving into mixing them together! Begin by washing your zucchini thoroughly under cool running water; any dirt lingering from the garden will affect taste if left unchecked. Once clean and dried off gently using paper towels or dish cloths ready nearby—you’ll want them free from excess moisture so nothing interferes later on during prep time—the next step involves grating them finely either using box grater methodically downwards against each side until fully shredded (this will yield roughly 1½ cups) OR popping them straight into food processor fitted with shredding attachment which speeds things along significantly if doing larger batches ahead-of-time too!
Once grated successfully place them aside momentarily whilst gathering remaining components needed here such as cheeses chopped green onions etc., making sure everything else prepped neatly beforehand minimizes chaos later down road when actually assembling mixture itself ensuring smooth workflow throughout entire process leading towards ultimate goal achieving scrumptious end result everyone loves sharing amongst friends family alike after baked golden brown perfection emerges oven moments eventually soon enough!
Step 2: Mixing Wet Ingredients
Now we move onto combining all those beautiful wet ingredients together—this part feels like pure alchemy unfolding right before our eyes! In one mixing bowl combine milk along with white/apple cider vinegar whisk gently until well combined forming slight curdled effect which helps enhance overall fluffiness texture achieved ultimately later throughout bake cycle itself once finished properly too thanks given careful consideration timing regarding these initial stages involved here beforehand ensuring nothing overlooked throughout entire journey itself leading up arrival final destination savoring deliciousness shortly thereafter ahead awaiting eagerly everyone around table anticipating goodness forthcoming soon enough afterwards instead waiting impatiently longer than necessary perhaps considering how tantalizing aromas wafting through air already beckoning nearby noses drawn close intrigued wanting more immediately despite knowing patience required still vital part success recipe especially now moving forward next steps await further down line ahead towards glorious outcomes shared happily amongst loved ones gathered altogether around communal spaces afterwards enjoying comforts created lovingly nurtured kitchens everywhere!
Step 3: Mixing Dry Ingredients
While those wet delights mingle beautifully over there patiently awaiting their turn next round let’s shift focus onto assembling dry portions meanwhile allowing blending process flow seamlessly across board throughout entire operation ensuring proper balance maintained each side involved equally respected importance matters greatly shaping overall outcome achieved later upon serving guests assembled eagerly anticipating delightful morsels produced fresh from oven soon enough too preparing minds hearts alike ready indulge mouthwatering creations arise shortly forthwith thereafter accordingly bringing smiles faces present gathering near tables filled bounty treasures earned through hard work dedication fulfilled amid joyful spirits exuding warmth love shared amongst fellow companions seated closely gathered amidst vibrant energy flowing freely filling rooms decorated lovingly showcasing familiar touches reflecting homesites visited countless times past present futures promised forever bonding experiences created lasting impressions forming memories treasured deeply held dear forevermore just like traditions passed down generations past onwards shared continuously embraced wholeheartedly enriching lives lived fully immersed within moments cherished dearly indeed…
Step 4: Combining Everything Together
The moment has arrived where all elements come together harmoniously uniting forces inside one glorious vessel ready emerge victorious forthwith shortly thereafter baked golden perfection awaits destined fulfill cravings hearts souls alike yearning satisfaction achieved only through painstaking efforts undertaken previously diligently paving pathways lead here today culminating fruitful endeavors finally culminating wondrous journeys embarked upon previously exploring fascinating realms filled exploration discovery new tastes sensations experienced firsthand nourished souls alike…as we blend these separate experiences cultivating unity forming cohesive structure bonds crafted carefully intertwining layers intricately woven fine fabrics woven bold flavors textures delightfully contrasting yet complementarily balanced beautifully orchestrated symphony unfold before eyes eager anticipation mounting steadily heightened excitement palpable lingering air thickened aromas wafting tantalizing senses beckoning forthwith beckoning indulgence awaited expectantly…
Now that we’ve got ourselves started on this incredible journey toward creating Green Onion Zucchini Cheddar Quick Bread let’s continue exploring more steps leading toward completion soon arriving culmination sweet labor love effort pouring forth shared experiences blossoming brightly illuminating lives enriched full circle returning back rooted foundations built strong nurturing communities fostering connections enduring timelessly cherished always…
The Joyful Journey of Making Green Onion Zucchini Cheddar Quick Bread
Step 5: Mix the Wet Ingredients with Love
Now that you’ve grated your zucchini and prepped your dry ingredients, it’s time to bring all those beautiful components together. In a separate mixing bowl, combine your milk and vinegar—trust me, this is where the magic starts to happen! Allowing the vinegar to sit in the milk for about five minutes creates a homemade buttermilk effect, which will lend a delightful tanginess to your bread while ensuring it rises beautifully. After five minutes, whisk in the large egg and melted butter until it’s all smooth and velvety. This creamy, luscious mixture is what will bind everything together, so don’t rush this step! You want every drop to be perfectly incorporated. Just picture how glorious that rich butter flavor will meld with the sharpness of cheddar and the freshness of green onions—it’s utterly intoxicating!
Step 6: Combine Wet and Dry Ingredients
Once your wet ingredients are singing their harmonious tune, it’s time to introduce them to the dry ingredients. Pour that gorgeous mixture into your bowl of flour, baking powder, baking soda, and salt. Now, here comes a crucial part: gently fold them together using a spatula or wooden spoon. I can’t emphasize this enough—don’t overmix! The batter should be slightly lumpy; think of it as being just cozy enough without being too tightly packed. Overmixing can lead to tough bread because you’ll develop the gluten too much—it’s all about finding that sweet spot where everything is combined yet still tender. As you fold, watch for that heavenly symphony of colors—the golden hues from the flour mingling with flecks of vibrant green zucchini and bright green onion pieces. It’s like nature painted this dish just for you!
Step 7: Add in the Good Stuff
With your batter beautifully mixed but still a bit rustic in texture, it’s now time for my favorite part—the cheese and green onions! Sprinkle in that generous amount of sharp cheddar cheese; I recommend using freshly grated cheese if you can because it melts so much better than pre-shredded varieties. Let’s be honest: there’s nothing quite like biting into warm bread and having gooey cheese stretch out with every pull! Next, fold in those chopped green onions—they add such a fresh bite that balances wonderfully with the richness of the cheddar. Again, take your time with this step; you want every ounce of cheesy goodness and each little piece of green onion distributed throughout your batter like a hidden treasure waiting to be discovered with each slice.
Step 8: Prepare for Baking Bliss
Now that your batter is ready, it’s time to transfer it into a greased loaf pan (I love using a standard 9×5-inch pan). Make sure to scrape every last bit from your mixing bowl; we don’t want any of that magical mixture left behind! Once you’ve poured it into the pan, smooth out the top gently with a spatula—this helps create an even bake and allows for some lovely crust formation on top later on. Preheat your oven to 350°F (about 175°C) while you set everything up; this is absolutely paramount as starting with an adequately heated oven ensures proper rising and browning. As you slide that loaf pan into the warm embrace of the oven, take a moment to inhale deeply—the anticipation will build as aromas begin swirling through your kitchen like an enchanting perfume!
The Home Stretch – Baking Your Perfect Green Onion Zucchini Cheddar Quick Bread
Step 9: Baking Your Masterpiece
Now we wait—and oh boy, is patience required here! Bake your quick bread for approximately 55-65 minutes. You’ll know it’s close when you start smelling that heavenly aroma wafting through your home—it’s truly extraordinary how something so simple can fill you with warmth and nostalgia! To test for doneness, insert a toothpick or skewer into the center; if it comes out clean or with just a few moist crumbs clinging on (but no wet batter), then congratulations—you’ve accomplished something magical! If there’s still wet batter clinging on after an hour, pop it back in for another five minutes before testing again. Remember not to rush this step either; letting it bake properly ensures that beautiful golden crust forms while keeping all that moisture inside.
Step 10: The Final Touch – Cooling Time
Once baked to perfection, remove your Green Onion Zucchini Cheddar Quick Bread from the oven and let it cool in its pan for about ten minutes—this step allows residual heat to continue cooking the edges gently without drying them out too much. After those precious moments pass (and trust me, they will feel like an eternity), carefully transfer it onto a wire rack or cutting board. Allowing it to cool completely before slicing is crucial; while I know it’s tempting to dive right in when it’s warm from the oven—the flavors deepen as they meld during cooling. Plus, slicing too early might result in squished slices rather than those perfect wedges we’re aiming for! When finally ready to cut into those golden pieces adorned with melting cheese and flecks of green onion—oh my goodness! Each bite embodies summer’s essence while providing comfort akin to a warm hug on a chilly day.
And there you have it—your very own Green Onion Zucchini Cheddar Quick Bread ready to share (or savor all by yourself if you prefer!). Whether enjoyed fresh from the oven slathered in butter or toasted slightly later on—you’ll find each bite profoundly satisfying and undeniably delicious! Enjoy every moment as this quick bread becomes not just another recipe but perhaps even part of your cherished family traditions. Happy baking!
Storage and Enjoyment Tips for Your Green Onion Zucchini Cheddar Quick Bread
Now that your kitchen is filled with the intoxicating aroma of freshly baked Green Onion Zucchini Cheddar Quick Bread, it’s time to dive into the joyous world of enjoying and preserving this delightful creation! Trust me when I say that this bread not only tantalizes your taste buds upon its first warm slice but also keeps giving even after the initial baking bliss. With a few simple storage strategies, you can maintain its moistness and flavor so every bite feels like a warm hug from the oven, even days later. Whether you’re savoring it fresh or saving some for later, you’ll find that each piece remains a wholesome delight.
Storing Leftover Green Onion Zucchini Cheddar Quick Bread
To keep your Green Onion Zucchini Cheddar Quick Bread fresh and flavorful, wrap it tightly in plastic wrap or place it in an airtight container at room temperature. This simple step is crucial; the more air you keep out, the better your bread will stay moist! Generally, it will hold up beautifully for about 3-4 days on your kitchen counter. If you’re looking to maintain that just-baked texture, try slicing individual pieces and placing parchment paper between them before storing. That way, when you’re ready to enjoy another slice, they won’t stick together. After those few days, you may notice a deliciously deepened flavor as the ingredients marry even further—it’s simply extraordinary! When it comes time to indulge again, pop a slice in the toaster or microwave for just a few seconds; you’ll be amazed at how quickly it revives its former glory!
Freezing Green Onion Zucchini Cheddar Quick Bread for Later
If you’re anything like me and love having homemade goodies on hand at all times, freezing your Green Onion Zucchini Cheddar Quick Bread is an absolute game-changer! To freeze properly, let the bread cool completely before wrapping it tightly in foil or placing slices in a freezer-safe bag—removing as much air as possible is key here. When stored correctly, this delightful quick bread can last up to three months in the freezer without losing its essence. Whenever the craving strikes—or perhaps when unexpected guests arrive—you can simply pull out a slice or two and let them thaw at room temperature or gently reheat them in an oven set to 350°F (175°C) until warmed through. The convenience factor here can’t be overstated; you’ll have that homey aroma wafting through your kitchen again in no time!
Green Onion Zucchini Cheddar Quick Bread
Experience the delightful flavors of Green Onion Zucchini Cheddar Quick Bread at home—easy to make and utterly delicious. Bake today!
- Prep Time: 15 minutes
- Cook Time: 60 minutes
- Total Time: 1 hour 15 minutes
- Yield: Approximately 10 servings 1x
- Category: Breakfast
- Method: Baking
- Cuisine: American
Ingredients
- 1 1/2 cups shredded zucchini
- 2 cups plain white flour
- 1 cup milk (2%, whole, or nonfat)
- 1 large egg
- 3 tbsp unsalted butter, melted
- 1 1/2 cups sharp cheddar cheese, grated
- 2 chopped green onions
- 2 tsp baking powder
- 1/2 tsp baking soda
- 1/2 tsp table salt
- 1 tbsp white or apple cider vinegar
Instructions
- Preheat your oven to 350°F (175°C) and grease a standard loaf pan (9×5 inches).
- In one bowl, combine milk and vinegar; let sit for five minutes. Whisk in egg and melted butter until smooth.
- In another bowl, mix flour, baking powder, baking soda, and salt.
- Fold the wet ingredients into the dry ingredients gently until just combined (batter should be slightly lumpy).
- Stir in shredded zucchini, cheddar cheese, and green onions until evenly distributed.
- Pour batter into the prepared loaf pan and smooth the top.
- Bake for 55-65 minutes until golden brown and a toothpick inserted comes out clean.
- Let cool in the pan for ten minutes before transferring to a wire rack to cool completely before slicing.
Nutrition
- Serving Size: 1 slice (60g)
- Calories: 150
- Sugar: 2g
- Sodium: 260mg
- Fat: 7g
- Saturated Fat: 4g
- Unsaturated Fat: 3g
- Trans Fat: 0g
- Carbohydrates: 18g
- Fiber: 1g
- Protein: 5g
- Cholesterol: 30mg