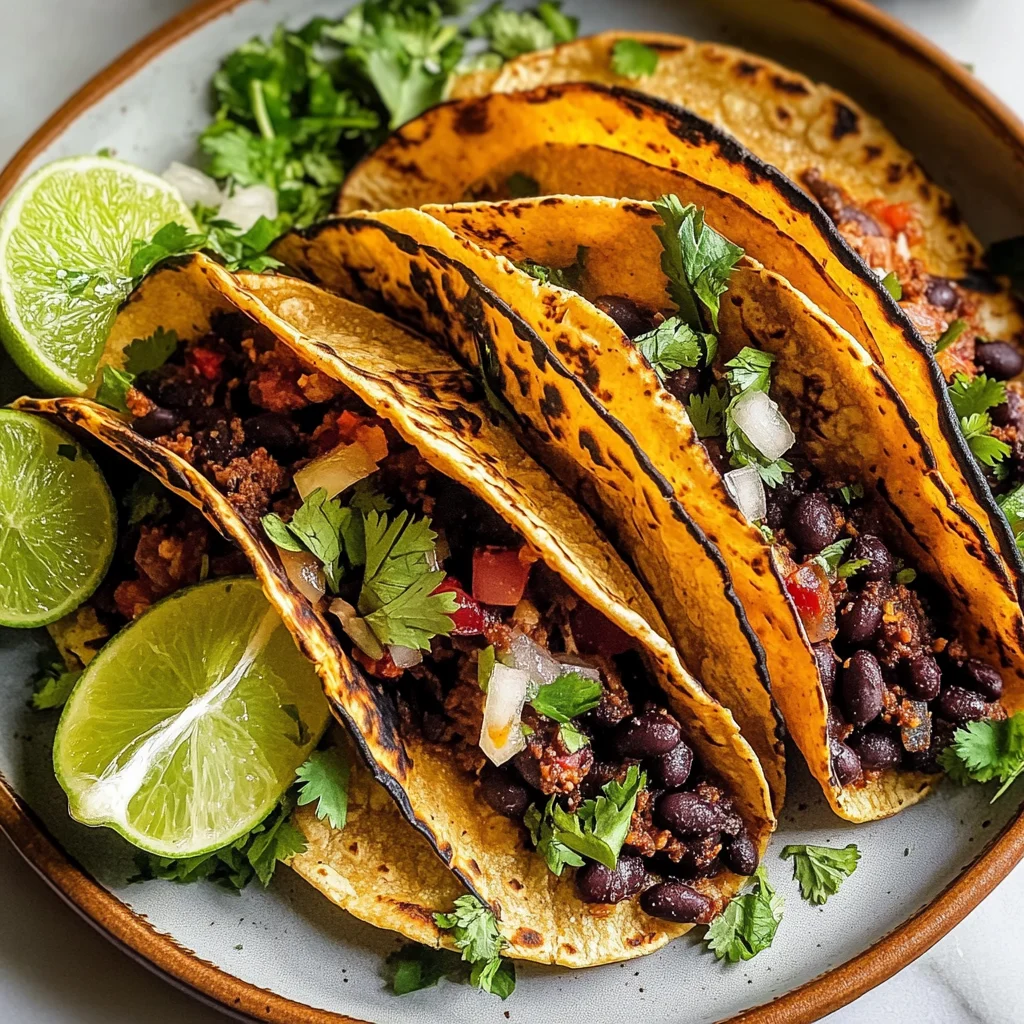
Crispy Sheet Pan Black Bean Tacos (Vegetarian)
There’s something truly magical about sitting down to a plate of tacos, isn’t there? It’s more than just a meal; it’s an experience that brings people together, evoking warmth and nostalgia with every bite. Now, imagine those tacos transforming into a delightful fusion of crispy textures and rich flavors. I’m talking about Crispy Sheet Pan Black Bean Tacos—a dish that doesn’t just satisfy your hunger but also warms your soul. Picture golden-brown tortillas enveloping a savory black bean filling, oozing with melted cheese, each bite revealing a symphony of spices that dance on your palate. This recipe is so much more than food; it’s a bridge between tradition and innovation, perfect for any weeknight dinner or casual gathering.
When I first discovered this recipe, I was captivated by the idea of taking simple pantry staples and transforming them into something utterly extraordinary. The beauty lies in its simplicity—each ingredient plays a vital role in creating a dish that feels indulgent yet remains approachable. Whether you’re cooking for family or sharing with friends, these tacos become the centerpiece of laughter-filled conversations and happy memories. Trust me when I say that these Crispy Sheet Pan Black Bean Tacos are not only vegetarian but easily adaptable to vegan preferences as well, making them a versatile option for everyone at the table.
Crispy Sheet Pan Black Bean Tacos (Vegetarian): A Crunchy Delight
Let’s dive into this culinary adventure together! These Crispy Sheet Pan Black Bean Tacos will quickly become a favorite in your household. They’re perfect for those busy nights when you want something delicious without spending hours in the kitchen. With just 45 minutes from start to finish and using ingredients you likely already have at home, you’ll find yourself making these again and again!

Ingredients:
As we embark on this tasty journey, let’s gather our ingredients! Each component is not just a checklist item; it’s part of what makes these tacos truly special—so let’s explore why they matter.
- 3 tablespoons olive oil, divided. Olive oil is not just a cooking fat; it’s liquid gold! It adds richness and depth to our filling while helping achieve that coveted crispy texture on the outside of the tortillas. Look for extra virgin olive oil for its superior flavor profile—it enhances everything from sautéed vegetables to baked goods. Remember, this oil helps create that beautiful golden crust on our tacos, making it absolutely paramount.
- 1 medium yellow onion, diced. Onions are the backbone of flavor in many dishes, including our black bean filling. When cooked down, they caramelize beautifully, imparting sweetness and an aromatic base that elevates every other ingredient. Choosing a fresh onion is key here; it should feel firm and heavy for its size. Dicing them evenly ensures even cooking throughout—trust me; nobody wants a crunchy piece of onion in their taco!
- 4 cloves garlic, finely chopped or grated. Garlic is the heart’s desire of many dishes! It brings an intoxicating aroma as it cooks down with onions and adds layers of flavor that are simply irresistible. Fresh garlic cloves will have more potency than pre-minced options; look for plump bulbs with tight skins. When you grate or finely chop garlic, you release more oils and flavor—just don’t let it burn as it can turn bitter!
- Optional: 1 chipotle pepper (from a can), finely chopped OR 1 tablespoon adobo sauce for less spice. Chipotles in adobo sauce offer an exciting kick that transforms ordinary black beans into something sensational! The smoky heat complements the earthiness of the beans perfectly. If you’re sensitive to spice or cooking for little ones, feel free to use just the adobo sauce instead—it’s all about balancing flavors to suit your taste buds.
- 2 tablespoons tomato paste. Tomato paste is like concentrated sunshine in a tube—it deepens flavors and adds richness to our filling without any excess liquid that could make things soggy. Opt for high-quality tomato paste without added sugars or preservatives if possible; it’ll make all the difference in achieving an authentic taste.
- 1 ½ teaspoons chili powder. This blend is not merely one spice but rather a mix of spices often including cumin and oregano among others! It adds depth while offering gentle heat that complements the black beans beautifully—think warming rather than overwhelming.
- 1 ½ teaspoons ground cumin. Cumin is essential when crafting Mexican-inspired dishes; its earthy notes create an aromatic foundation that’s simply irresistible when combined with other spices like chili powder or smoked paprika.
- 1 ½ teaspoons smoked paprika. Smoked paprika introduces complex sweetness along with its signature smokiness—a perfect accompaniment to our black beans! It lends an unexpected twist to traditional flavors while enhancing color too.
- Two 14-ounce cans black beans, drained and rinsed. Black beans are the star of our show! They provide protein and fiber while being incredibly satisfying and versatile—they absorb flavors beautifully during cooking too! Rinse them well before using to remove excess sodium from canned varieties—it makes your dish healthier without compromising taste.
- ½ cup vegetable broth or stock. Vegetable broth acts as both moisture and flavor enhancer here! Using homemade stock would be extra special if you have some on hand—it can really elevate the overall taste experience by enriching our taco filling.
- 1 lime, juiced. Lime juice brightens up every element in this recipe! It’s like adding sunshine to your dish—the acidity cuts through richness while adding zest that’s refreshing against hearty ingredients like black beans.
- 8-10 corn tortillas. Corn tortillas are traditional favorites—they’re gluten-free (if that’s essential for you) while providing wonderful texture when toasted just right! Warm them up before assembly to keep them pliable—this step prevents cracking when folding!
- 6 ounces Pepper Jack or melty cheese of choice, freshly shredded. Cheese brings everything together wonderfully—look for high-quality Pepper Jack cheese for its melting qualities along with creamy flavor profiles! Shredding cheese yourself yields better results than pre-packaged options since you’ll avoid anti-caking agents which prevent optimal melting.
- Kosher salt and ground black pepper, to season generously according to taste preferences throughout preparation steps!
Now that we’ve gathered our ingredients let’s talk about tools because having the right equipment can make all the difference in creating these delicious tacos!
Equipment You’ll Need:
Cooking becomes such an enjoyable process when you have the right tools at your fingertips! While these items may not be ingredients, they play crucial roles in ensuring success—and trust me; using quality equipment makes everything smoother!
- Large rimmed baking sheet – This trusty tool will be our best friend throughout this recipe! Its size allows us ample room to assemble multiple tacos simultaneously while also accommodating their necessary crisping time in the oven without overcrowding—which could lead to sogginess!
- Medium skillet – You’ll need this versatile pan for sautéing onions and garlic before mixing everything else into our delightful filling mixture! A non-stick skillet works wonders here as it helps prevent sticking during cooking stages—making clean-up easier post-meal too!
- Spatula or wooden spoon – A good spatula comes handy during taco assembly as well as stirring up those mouthwatering fillings once they’ve been cooked down properly—you’ll appreciate having something sturdy enough won’t bend under pressure as we mash up those black beans slightly later on!
With all our tools ready and waiting alongside beautifully vibrant ingredients laid out before us—we’re prepared now dive deeper into preparing those crispy sheet pan black bean tacos!
Step 1: Preheating Your Oven & Preparing Ingredients
First things first: let’s get that oven preheated to 450 degrees F because we want maximum crunch from our tacos! Make sure you position one rack in center—not too high where they could burn nor too far down where they might remain soft instead of crispier goodness we’re aiming toward creating here today… Once that’s done (and trust me—it doesn’t take long), gather all aforementioned ingredients together since we will be moving fast once we start cooking since flavor comes alive quickly once sautéed together!
Step 2: Sautéing Aromatics
Next up: grab your medium skillet and pour in 1 tablespoon olive oil over medium heat until shimmering brightly—that’s how you know it’s ready! Add diced yellow onion seasoned lightly with kosher salt (about 1 teaspoon) which draws out moisture while promoting even browning over next few minutes—stir occasionally until translucent yet fragrant—this usually takes around three to four minutes depending on stove temperature variations so keep an eye out here!
Step 3: Adding Garlic & Spices
Once those onions reach perfection (that sweet smell wafting through kitchen), toss minced garlic along with chipotle pepper if using into pan briefly allowing aromas meld together—only about thirty seconds will do here before adding tomato paste alongside chili powder/cumin/smoked paprika blend ensuring everything gets coated nicely by stirring vigorously over heated surface which releases essential oils within spices enhancing overall flavor profiles immensely… Let cook another minute or two until everything seems utterly intoxicatingly fragrant!
Step 4: Incorporating Beans & Stock
Afterward comes my favorite part: adding those glorious black beans straight from their cans after draining/rinsing thoroughly beforehand followed by vegetable broth poured gently around edges bringing mixture back up toward simmer state allowing moisture absorption/deepening flavors at same time… Use spatula/wooden spoon now mashing some beans slightly binding mixture beautifully together whilst adjusting consistency level accordingly ensuring thickened texture achieved perfectly suited inside next tortilla folds… Finish off squeeze zesty lime juice over top while tasting/seasoning appropriately finishing off said filling explosion needed right before assembly stage begins shortly thereafter…
Stay tuned as we continue crafting these delicious Crispy Sheet Pan Black Bean Tacos together—I promise you’ll love every crunchy bite filled with warmth & joy shared amongst family/friends alike!
Step 5: Preparing the Tortillas – The Heart of the Taco
Before we dive into the magic of assembly, let’s ensure our tortillas are perfectly prepped. This step is crucial because warm, pliable tortillas are the foundation of a great taco experience. To achieve this, wrap your corn tortillas snugly in a damp paper towel—this creates a mini steam bath that softens them beautifully. Then, pop them in the microwave for about 30 seconds. You’re looking for that soft, steamy feel; they should be warm but not too hot to handle. If you skip this step, you might end up with brittle tortillas that crack and crumble when you try to fold them around your delicious filling, and nobody wants that heartache.
Once out of the microwave, gently set the tortillas aside. It’s important to keep them wrapped until you’re ready to use them to maintain their moisture and warmth. Trust me on this: the joy of biting into a fresh taco made with pliable tortillas cannot be overstated! They will cradle your filling perfectly and offer that delightful texture contrast between crispy edges and soft insides once baked.
Step 6: Assembling Your Tacos – A Dance of Flavors
Now comes the fun part—assembly! Preheat your oven to 450 degrees F if you haven’t already; this high heat is what will give us those crispy, golden-brown tacos we crave. On a large rimmed baking sheet, drizzle the remaining two tablespoons of olive oil across its surface like a painter preparing a canvas. This step is non-negotiable—it ensures our tacos won’t stick and helps achieve that gorgeous crispiness as they bake.
With your warmed tortillas at hand, it’s time to fill them with that intoxicating black bean mixture! Grab your spatula and spread a generous amount over one half of each tortilla—don’t skimp here; we want those flavors bursting through every bite. Next, sprinkle on some freshly shredded cheese—think of this as adding a layer of deliciousness that will melt into gooey perfection as it bakes. Now, fold each tortilla over itself to create a taco shape; I like to flip them so the cheese side faces down against the baking sheet. This way, it gets that lovely sear which adds even more flavor!
Step 7: Baking Your Tacos – The Transformation
Transfer your beautifully assembled tacos into the preheated oven now! You’ll want to bake them for about 8-10 minutes initially. During this time, keep an eye on them—the aroma will start wafting through your kitchen, sending everyone into a delightful frenzy! After about 10 minutes, using a spatula, carefully flip each taco over; this is where magic happens! By flipping them halfway through baking, both sides get equal love from the heat which results in an irresistible crunch.
Return them to the oven for another 8-10 minutes until they’re golden brown and utterly crisp—the visual cue you’re looking for is a gorgeous deep color on both sides. Don’t rush this step; patience here means everything! Allowing those tacos to crisp up properly transforms their texture entirely—from ordinary to extraordinary—as they go from soft little pockets to crispy delights that are begging for toppings!
Step 8: The Cooling Phase – Crispy Perfection Awaits
Once your tacos have reached crunchy perfection—golden brown with tantalizing melted cheese oozing from within—remove them from the oven but don’t dive in just yet. Letting them cool for about 2-3 minutes might feel torturous (I know!), but it’s absolutely paramount for achieving peak crispiness. As they cool slightly on the pan, they will firm up even more than when they first come out of the oven.
During this cooling phase, those beautiful flavors meld together beautifully while allowing any steam trapped inside to escape—a crucial step in ensuring each bite is as crispy as possible rather than soggy from moisture buildup. It’s so easy to rush ahead in anticipation; however, giving these gems just a moment will elevate your dining experience tremendously!
Final Touches: Elevating Your Crispy Sheet Pan Black Bean Tacos
Now that your tacos have cooled slightly and are bursting with flavor and texture, it’s time for my favorite part—the toppings! This is where you can truly make these Crispy Sheet Pan Black Bean Tacos (Vegetarian) shine with personal flair. Think creamy cashew crema drizzled lovingly across each taco or perhaps some zesty guacamole piled high; every topping adds its own layer of deliciousness!
Chopped cilantro offers an herbal freshness that lifts all those rich flavors while lime juice provides an invigorating zing that balances everything beautifully. And don’t forget salsa—whether you prefer something mild or fiery hot—you can customize these tacos to suit any palate. Remember: there are no rules when it comes to toppings; let your creativity run wild!
Serve these beauties warm alongside extra lime wedges or maybe even some homemade tortilla chips if you’re feeling extra indulgent! I promise you; once you’ve taken that first bite—the crispy shell crunching under your teeth followed by a mouthful of savory black beans and melted cheese—you’ll understand why I adore these tacos so much! Enjoy every moment spent savoring these delights—you’ve earned it!
Storage and Enjoyment Tips for Your Crispy Sheet Pan Black Bean Tacos (Vegetarian)
Now that your kitchen is filled with the intoxicating aroma of crispy, cheesy tacos, it’s time to dig in! Trust me when I say that the joy of biting into these crispy sheet pan black bean tacos is something you simply cannot rush. But what happens if you find yourself with a few leftovers? No worries at all! These delightful tacos not only taste amazing fresh out of the oven but also store beautifully, allowing you to savor their deliciousness even days later.
Storing Leftover Crispy Sheet Pan Black Bean Tacos (Vegetarian)
To keep your leftover crispy sheet pan black bean tacos at their best, I recommend transferring them to an airtight container. This way, they’ll maintain their crunch and flavor while stored in the refrigerator for up to three days. If you want to take it a step further, consider placing a piece of parchment paper between layers of tacos to absorb excess moisture—this little trick works wonders! While they’re still delightful after a day or two in the fridge, I promise you that reheating them will bring back that glorious crispiness. When you’re ready to enjoy them again, just pop them back in a preheated oven at 350°F for about 10-15 minutes until they’re warmed through and resuscitated to their former glory!
Freezing Components for Later
If you’ve made a big batch or just want to prepare ahead, freezing these tacos is a fantastic option! To freeze them properly, let the cooked tacos cool completely before wrapping each one tightly in plastic wrap or aluminum foil. Then, place them in a freezer-safe bag or container—removing as much air as possible is key here! They can be kept frozen for up to three months without losing their tantalizing flavors. When you’re ready to enjoy one (or several), simply thaw them overnight in the fridge and reheat as mentioned above. This makes dinner planning a breeze and ensures that you always have a delicious meal ready at your fingertips!
Crispy Sheet Pan Black Bean Tacos (Vegetarian)

Enjoy Crispy Sheet Pan Black Bean Tacos (Vegetarian) bursting with flavor! Easy weeknight recipe ready in 45 minutes—give it a try today!
- Prep Time: 15 minutes
- Cook Time: 30 minutes
- Total Time: 45 minutes
- Yield: Serves 4 (approximately two tacos per serving) 1x
- Category: Dinner
- Method: Baking
- Cuisine: Mexican
Ingredients
- 3 tablespoons olive oil, divided
- 1 medium yellow onion, diced
- 4 cloves garlic, finely chopped or grated
- Optional: 1 chipotle pepper (from a can), finely chopped OR 1 tablespoon adobo sauce for less spice
- 2 tablespoons tomato paste
- 1 ½ teaspoons chili powder
- 1 ½ teaspoons ground cumin
- 1 ½ teaspoons smoked paprika
- Two 14-ounce cans black beans, drained and rinsed
- ½ cup vegetable broth or stock
- 1 lime, juiced
- 8–10 corn tortillas
- 6 ounces Pepper Jack or melty cheese of choice, freshly shredded
- Kosher salt and ground black pepper, to season generously
Instructions
- Preheat oven to 450°F (230°C).
- In a skillet, heat 1 tablespoon olive oil over medium heat. Sauté diced onion until translucent.
- Add minced garlic and optional chipotle pepper; cook briefly until fragrant.
- Stir in tomato paste, chili powder, cumin, and smoked paprika; cook for another minute.
- Add drained black beans and vegetable broth; mash slightly to combine, then stir in lime juice.
- Warm corn tortillas in the microwave wrapped in damp paper towels for about 30 seconds.
- On a baking sheet, drizzle remaining olive oil. Fill each tortilla with the black bean mixture and top with cheese; fold over.
- Bake for 8–10 minutes, then flip tacos and bake an additional 8–10 minutes until golden brown.
- Allow cooling for 2–3 minutes before serving with your favorite toppings.
Nutrition
- Serving Size: 1 taco
- Calories: 220
- Sugar: 2g
- Sodium: 350mg
- Fat: 10g
- Saturated Fat: 3g
- Unsaturated Fat: 7g
- Trans Fat: 0g
- Carbohydrates: 29g
- Fiber: 8g
- Protein: 9g
- Cholesterol: 15mg