Red White and Blue Cake with Semi-Naked Icing
There’s something profoundly magical about baking a cake, wouldn’t you agree? It’s not just the delightful aroma that fills your kitchen or the way the ingredients come together to create a masterpiece; it’s the experience itself that turns something simple into something extraordinary. When you take your first slice of this Red White and Blue Cake with Semi-Naked Icing, you’re not just tasting a dessert; you’re savoring a symphony of flavors and colors that dance together, evoking memories of summer celebrations, laughter with friends, and heartfelt gatherings. With each bite, you can almost hear the echoes of joyous moments shared around a table, feeling every ounce of love that went into creating this beautiful treat.
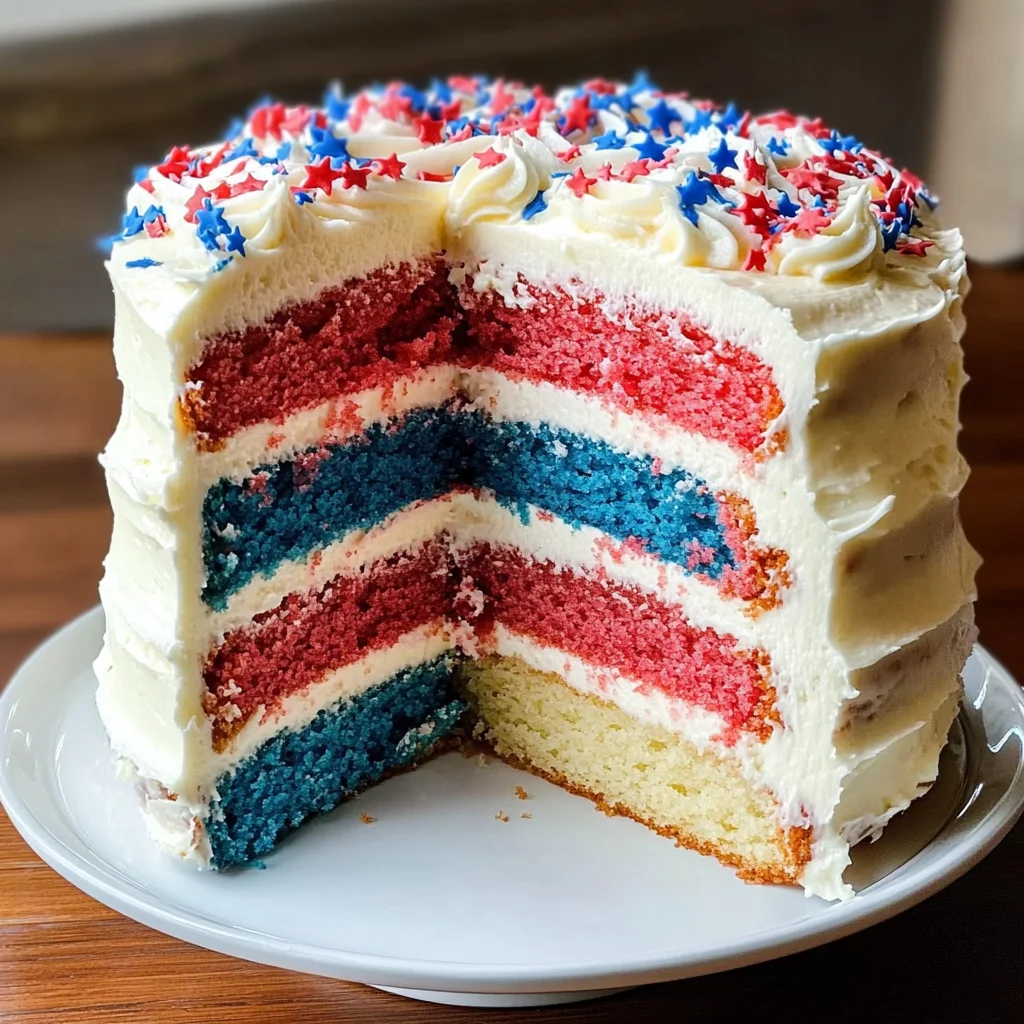
This cake is particularly special for those moments when we gather to celebrate our unity and spirit—think Fourth of July barbecues, family reunions, or any occasion that calls for a touch of patriotism. The vibrant red and blue layers are not only visually stunning but also create an unforgettable experience for your taste buds. As you slice through the cake, revealing those luscious layers, it becomes a centerpiece that draws everyone in with its inviting charm. Trust me on this: whether it’s a birthday party or a simple afternoon tea with friends, this Red White and Blue Cake will be the talk of the table!
Red White and Blue Cake with Semi-Naked Icing: A Festive Delight for Every Occasion
Let’s embark on this delightful journey together! This three-layer cake is as much an expression of creativity as it is about flavor; it’s perfect for celebrating all things patriotic—or really any occasion where joy is in the air! The beauty of this recipe lies in its versatility; while we’re embracing these vibrant colors today, feel free to switch them up for birthdays or other holidays. I promise you’ll impress everyone who gets to enjoy a slice.
Ingredients:
As we dive into creating this stunning cake, let’s take a moment to appreciate each ingredient that plays its part in making this masterpiece come together. Every component has its role to ensure our Red White and Blue Cake with Semi-Naked Icing turns out perfectly delicious and utterly gorgeous.
- 3 3/4 cups all-purpose flour. This humble ingredient forms the backbone of our cake. The right flour is crucial because it provides structure while allowing us to achieve that light texture we all love in cakes. When measuring flour, be sure to spoon it into your measuring cup and level it off gently; packing too tightly can lead to a dense cake — definitely not what we want! If you’re looking for alternatives, whole wheat pastry flour can add a nutty flavor.
- 2 tablespoons baking powder. Think of baking powder as the magic behind our cake’s rise. It’s essential for giving our layers that fluffy lift we crave! The combination of acid (from cream of tartar) and base (baking soda) helps create carbon dioxide bubbles during baking, which expand and make our cake airy. Just remember to check the expiration date on your baking powder—the fresher it is, the better!
- 3/4 teaspoon salt. Salt may seem like an afterthought in desserts but trust me; it’s absolutely paramount! It enhances flavors beautifully, balancing sweetness and bringing out the natural flavors in our ingredients. Always use fine sea salt if possible; it’s easier to dissolve into batters compared to coarse salt.
- 2 1/4 cups granulated sugar. Here’s where things get sweet! Sugar not only sweetens our batter but also helps tenderize it by preventing gluten formation when mixed with wet ingredients—keeping our cake soft and moist. Look for fine granulated sugar here because it blends seamlessly into your batter.
- 3/4 cup unsalted butter, softened to room temperature. This liquid gold is where the magic begins! Softened butter creams beautifully with sugar to provide rich flavor and moisture while helping create that desirable airy texture in our cake layers. Be sure it’s at room temperature—if it’s too cold or melted, you won’t achieve that perfect creamy consistency.
- 6 eggs. Eggs are another key player in our recipe—they contribute richness, moisture, and structure while aiding in leavening when whipped properly. Room-temperature eggs blend more easily into your batter than cold ones from the fridge—so if you’ve forgotten to take them out ahead of time, simply place them in warm water for about ten minutes!
- 2 tablespoons vanilla extract. Ahh… vanilla—the aromatic essence that’s truly intoxicating! It adds depth and complexity to any sweet treat. Always opt for pure vanilla extract over imitation if possible; you’ll notice an incredible difference in flavor quality—plus those fragrant notes will waft through your kitchen as you bake!
- 1 1/2 cups heavy cream. This thick cream will become our luxurious icing—a true indulgence! Heavy cream whips up beautifully into fluffy peaks when chilled properly before beating—so keep it cold until you’re ready to use it! If you’re looking for lighter options without sacrificing taste, try using coconut cream instead—it adds a delightful subtle flavor!
- Food coloring (optional). While optional, food coloring allows us to craft those vibrant red and blue layers that make this cake so festive and fun! If you’re concerned about artificial dyes, there are natural alternatives available made from fruits or vegetables—just be aware they may yield slightly different shades.
- 6 cups powdered sugar. This will form the base of our icing—it whips up smoothly for easy spreading over our semi-naked layers. Powdered sugar dissolves quickly when mixed with butter or cream—making it ideal for frosting—but remember: sift before use for best results; no one wants gritty icing compromising their creation!
- 3/4 cup butter (at room temperature). Yes, we’re using more butter here! For frosting purposes specifically—this addition provides creaminess alongside sweetness resulting in smooth spreads over each layer without being overly sugary.
- 3 tablespoons milk. Milk adds moisture back into our frosting mixture while also helping achieve desired consistency when mixing powdered sugar—it should flow easily but still hold shape well enough once spread across those lovely layers.
- 1 tablespoon vanilla extract (for icing). Just like before—the extra splash enhances flavor throughout while ensuring every bite offers hints of warmth amidst sweetness!
Equipment You’ll Need:
Having the right tools makes all the difference in creating deliciousness—and let me tell you: baking becomes so much more enjoyable when you’re equipped with quality equipment! While they may not be ingredients, these tools are essential partners on your culinary adventure toward perfection.
- Mixing bowls (various sizes). Investing in good mixing bowls is wise since you’ll find yourself reaching for different sizes depending on tasks at hand—from whisking dry ingredients to blending wet ones together before combining later down line!
- Electric mixer (stand or hand). I can’t stress how much easier life becomes with an electric mixer—it saves time whisking everything by hand while ensuring proper aeration needed during creaming processes—definitely non-negotiable!
- Measuring cups & spoons (dry & liquid). Accurate measurements are vital when baking anything; having dedicated sets ensures precision every time instead of guessing amounts—you’ll thank yourself later!
- Baking pans (round 9-inch). Choose high-quality aluminum pans that conduct heat evenly—this guarantees even baking across all layers without burning edges prematurely!
- Parchment paper (for lining pans). Don’t skip this step—it prevents sticking allowing easy removal post-baking plus helps maintain shape throughout cooling process!
Now that we’ve gathered all our ingredients and tools together let’s dive into preparing this scrumptious Red White and Blue Cake with Semi-Naked Icing—it’s going to be an adventure worth every moment spent!
Step 5: Whip Up That Heavenly Buttercream
Now that your cakes are perfectly cooled, let’s dive into the world of frosting—specifically, a luscious buttercream that will embrace our layers with a gentle, semi-naked finish. Begin by taking your 3/4 cup of room temperature butter and placing it in a large mixing bowl. Using an electric mixer fitted with paddle attachments (or a sturdy whisk if you’re feeling adventurous!), beat the butter on medium speed until it transforms into a creamy, pale wonder—this should take about 2 to 3 minutes. It’s crucial to achieve this light and airy texture because it creates the perfect base for your icing; it ensures that every bite will be not just sweet but also wonderfully smooth.
Once your butter is beautifully whipped, gradually sift in those 6 cups of powdered sugar—trust me, sifting is non-negotiable here! This step eliminates any pesky lumps and will keep your frosting silky-smooth. As you incorporate the sugar, start on low speed to avoid an avalanche of sweetness clouding your kitchen. After about a minute, let the mixer pick up the pace and blend in 3 tablespoons of milk and an additional tablespoon of vanilla extract for that decadent flavor boost. The milk is not just for moisture; it helps to loosen the mixture so that it spreads easily without compromising its structure. Whip everything together until you achieve a creamy consistency that’s thick yet spreadable—a visual cue to look out for is when it holds soft peaks but still flows gracefully from the spatula.
Step 6: Assemble Your Layers with Love
With your cakes cooled and your buttercream ready, it’s time for the most satisfying part: assembling your Red White and Blue Cake with Semi-Naked Icing! Start by placing one layer of cake on a serving platter or cake stand—this is where all the magic happens! Using an offset spatula or a butter knife, spread a generous amount of buttercream over the top of this first layer. You want to apply enough frosting so that it pokes out slightly at the edges when you add the next layer—that little peek is what gives this cake its charming semi-naked appearance.
Once you’ve frosted that first layer to perfection, gently place your second layer on top. Repeat the same process: slather on more buttercream and then crown it with your final layer. Don’t stress if things get a little messy; after all, baking is all about joy and creativity! It’s during this assembly phase where you can really express yourself—feel free to add in fresh fruits or berries between layers if you’re looking for an extra pop of flavor and color! Just remember to ensure even distribution across each layer so every slice has that delightful balance.
Step 7: Create That Signature Semi-Naked Look
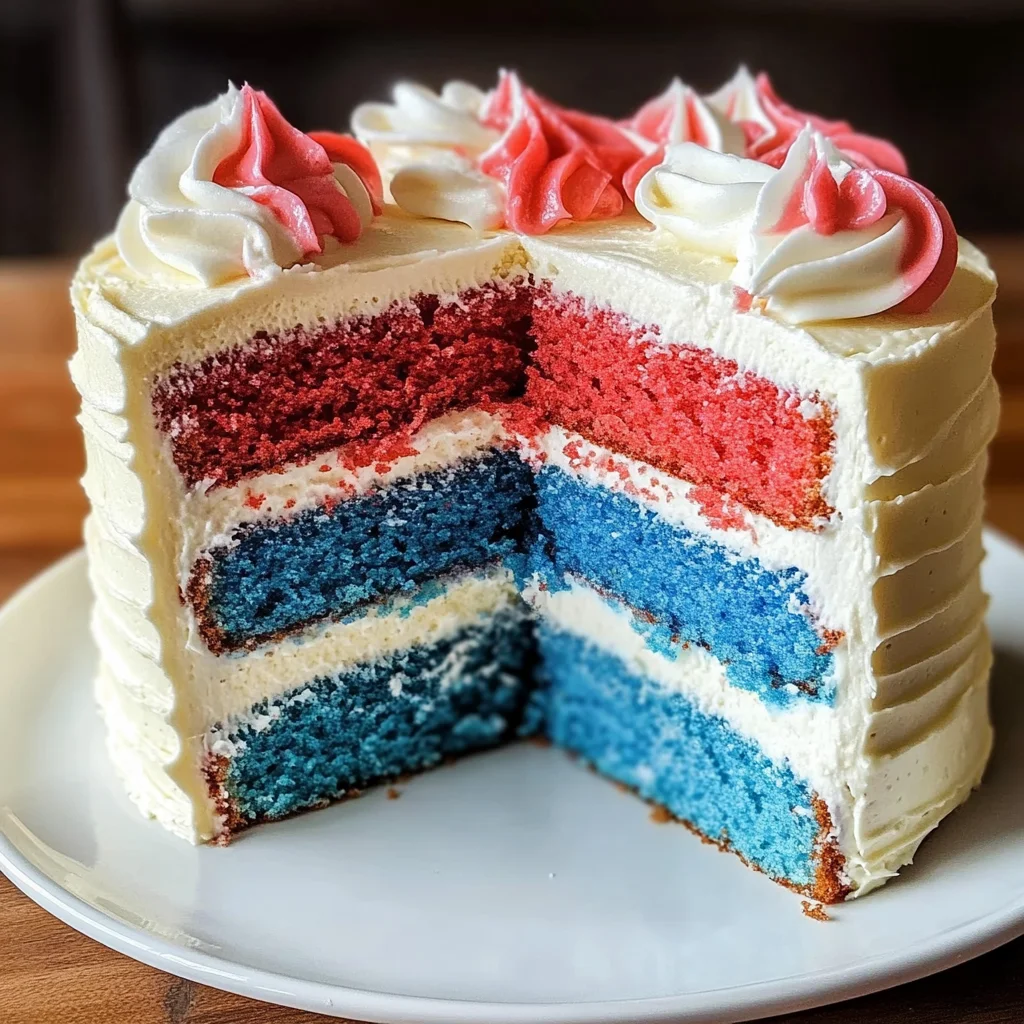
Now comes the transformative moment—the semi-naked icing technique! This method allows us to showcase our beautiful layers while still providing some coverage with our luscious buttercream. Using a clean spatula or bench scraper (a baker’s best friend!), apply a thin coat of frosting around the sides of the cake, letting some of the cake show through beautifully. This isn’t just about appearance—it also creates texture and visual interest while allowing everyone to see those vibrant colors peeking through.
As you work around the cake, rotate your stand (if you have one) or move around as needed to maintain an even touch. The key here is patience; don’t rush this step! Take time to smooth out any areas that need love and attention—it’s okay if it’s not perfect; that’s part of its charm! If any crumbs mix into your frosting (which they might!), don’t fret; they add character! Plus, believe me when I say this rustic appearance is what makes semi-naked cakes so trendy—they’re casual yet elegant all at once.
Step 8: Chill for Perfect Stability
After achieving that lovely semi-naked look, it’s essential to chill your assembled cake before serving—this step often gets overlooked but trust me on this one! Place your cake in the refrigerator for at least 30 minutes; this resting period solidifies those layers and gives everything time to meld together beautifully. Why chill? Well, when chilled, buttercream firms up slightly which allows for cleaner slices later on—not only does it make cutting easier but it also means every piece will hold its shape when served.
While waiting patiently (and perhaps indulging in some leftover batter—no judgment here!), consider prepping any additional decorations like fresh berries or edible flowers that could elevate this beauty even further. When you’re ready to serve, simply pull it from the fridge and marvel at how stunningly cohesive everything looks after chilling—it’s truly extraordinary how a little patience can create such profound satisfaction!
Final Touches: Garnishing Your Masterpiece
Step 9: Dress It Up & Serve
Now comes my favorite part: garnishing your Red White and Blue Cake with Semi-Naked Icing! Once chilled, take another look at how inviting your cake appears—those layers are practically begging to be showcased! To add those finishing touches, consider decorating the top with fresh strawberries or blueberries for pops of vibrant color against the creamy backdrop. Not only do they look stunning, but they also add a burst of freshness that complements all that rich vanilla flavor!
If you’re feeling extra ambitious (and why wouldn’t you?), drizzle some homemade berry coulis over each slice when serving—it’s an utterly intoxicating addition that elevates each bite into something heavenly! As you cut into this masterpiece, take a moment to breathe in all those aromas—the sweet notes from vanilla mingling with hints of creaminess will envelop you like a warm hug.
And there you have it—a beautiful Red White and Blue Cake with Semi-Naked Icing that’s not just visually captivating but also filled with love and flavor in every single bite. Share it at gatherings or simply treat yourself—you deserve incredible moments like these in life. Celebrate every occasion with this stunning creation; I promise you’ll be basking in compliments and requests for seconds long after it’s gone! Happy baking!
Storage and Enjoyment Tips for Your Red White and Blue Cake with Semi-Naked Icing
Now that you’ve created this stunning masterpiece, it’s time to dig in and celebrate! Imagine gathering your loved ones around a beautifully set table, the vibrant layers of your Red White and Blue Cake with Semi-Naked Icing sparking joy and excitement as you slice into it. Trust me, the moment you lift that first piece onto a plate, the anticipation will swirl around the room like sweet music. But what happens when there’s a slice or two left? Don’t worry; this cake is just as delightful later on!
Storing Leftover Red White and Blue Cake with Semi-Naked Icing
To keep your delicious creation fresh after the festivities, store any leftover slices in an airtight container at room temperature for up to three days. If you anticipate enjoying it over a longer period, consider refrigerating it to extend its life to about a week. Just make sure to wrap it tightly with plastic wrap before placing it in the container; this non-negotiable step helps retain moisture and keeps that lovely icing intact. You’ll be pleasantly surprised at how well this cake holds its flavor even after storage—the layers remain moist, and the icing stays creamy and indulgent. For an extra touch of freshness before serving, feel free to bring it back to room temperature or give it a quick pop in the microwave for just 10 seconds—this little trick revitalizes the cake’s texture and brings back that freshly-baked warmth!
Freezing for Later
If you find yourself with more cake than you can handle (and let’s be real, who doesn’t want some of this beauty on hand?), freezing is an excellent option! To do this properly, slice your cake into individual servings and wrap each piece tightly in plastic wrap, followed by aluminum foil to prevent freezer burn—like wrapping little gifts of joy! When stored this way, your cake will maintain its delightful flavor for about three months in the freezer. When you’re ready to indulge again, simply remove a slice from the freezer and let it thaw overnight in the refrigerator or leave it out at room temperature for about an hour. This method allows you to savor that utterly intoxicating taste without having to bake again! The convenience factor here is absolutely paramount; imagine having your favorite dessert ready whenever those sweet cravings hit!
Red White and Blue Cake with Semi-Naked Icing
Indulge in the festive spirit with our Red White and Blue Cake with Semi-Naked Icing, a stunning dessert perfect for any celebration! This three-layer vanilla cake is not only a visual delight with its vibrant colors but also a delicious treat that will leave your guests raving. The light, fluffy layers are complemented by a creamy buttercream frosting that showcases the charming semi-naked style, allowing the colorful layers to peek through. Whether you’re celebrating Independence Day or hosting a birthday party, this cake will be the centerpiece of joy and laughter. Each slice captures the essence of summer gatherings, making it a memorable experience for all.
- Prep Time: 30 minutes
- Cook Time: 30 minutes
- Total Time: 1 hour
- Yield: Approximately 12 servings 1x
- Category: Dessert
- Method: Baking
- Cuisine: American
Ingredients
- 3 3/4 cups all-purpose flour
- 2 tablespoons baking powder
- 3/4 teaspoon salt
- 2 1/4 cups granulated sugar
- 3/4 cup unsalted butter (softened)
- 6 eggs (room temperature)
- 2 tablespoons vanilla extract
- 1 1/2 cups heavy cream
- Food coloring (red and blue)
- 6 cups powdered sugar
- 3/4 cup butter (at room temperature)
- 3 tablespoons milk
- 1 tablespoon vanilla extract (for icing)
Instructions
- Preheat your oven to 350°F (175°C) and prepare three round 9-inch baking pans by greasing and lining them with parchment paper.
- In a mixing bowl, whisk together flour, baking powder, and salt.
- In another bowl, cream together softened butter and granulated sugar until light and fluffy. Add eggs one at a time, followed by vanilla extract.
- Gradually mix in dry ingredients until just combined.
- Divide batter into three bowls; tint one red, one blue, and leave one plain.
- Pour each color into prepared pans and bake for 25-30 minutes or until a toothpick comes out clean.
- Cool layers completely before frosting with the buttercream made by beating softened butter with powdered sugar, milk, and vanilla extract until smooth.
- Assemble layers with frosting in between each layer. Apply a thin coat of frosting around the sides for a semi-naked look.
- Chill for at least 30 minutes before serving.
Nutrition
- Serving Size: 1 slice (85g)
- Calories: 350
- Sugar: 40g
- Sodium: 180mg
- Fat: 15g
- Saturated Fat: 9g
- Unsaturated Fat: 5g
- Trans Fat: 0g
- Carbohydrates: 54g
- Fiber: 1g
- Protein: 4g
- Cholesterol: 65mg