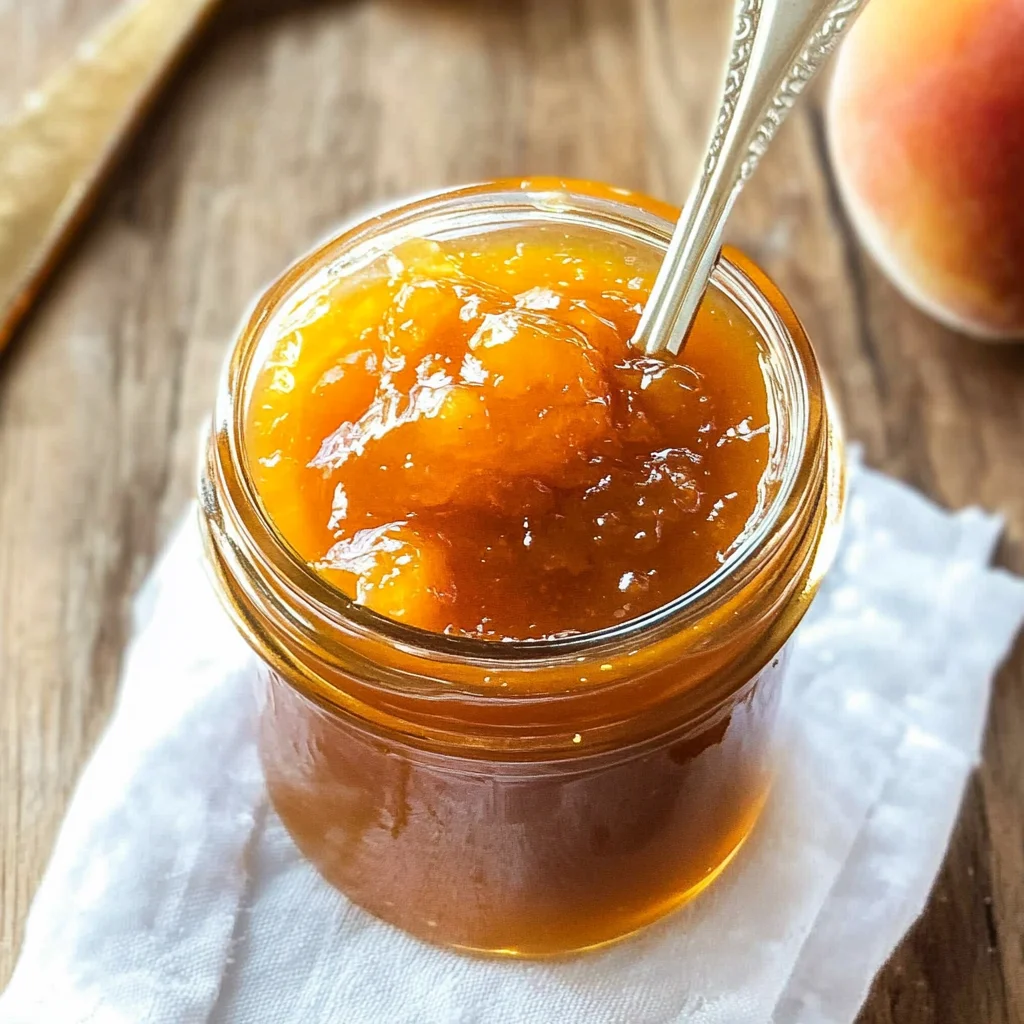
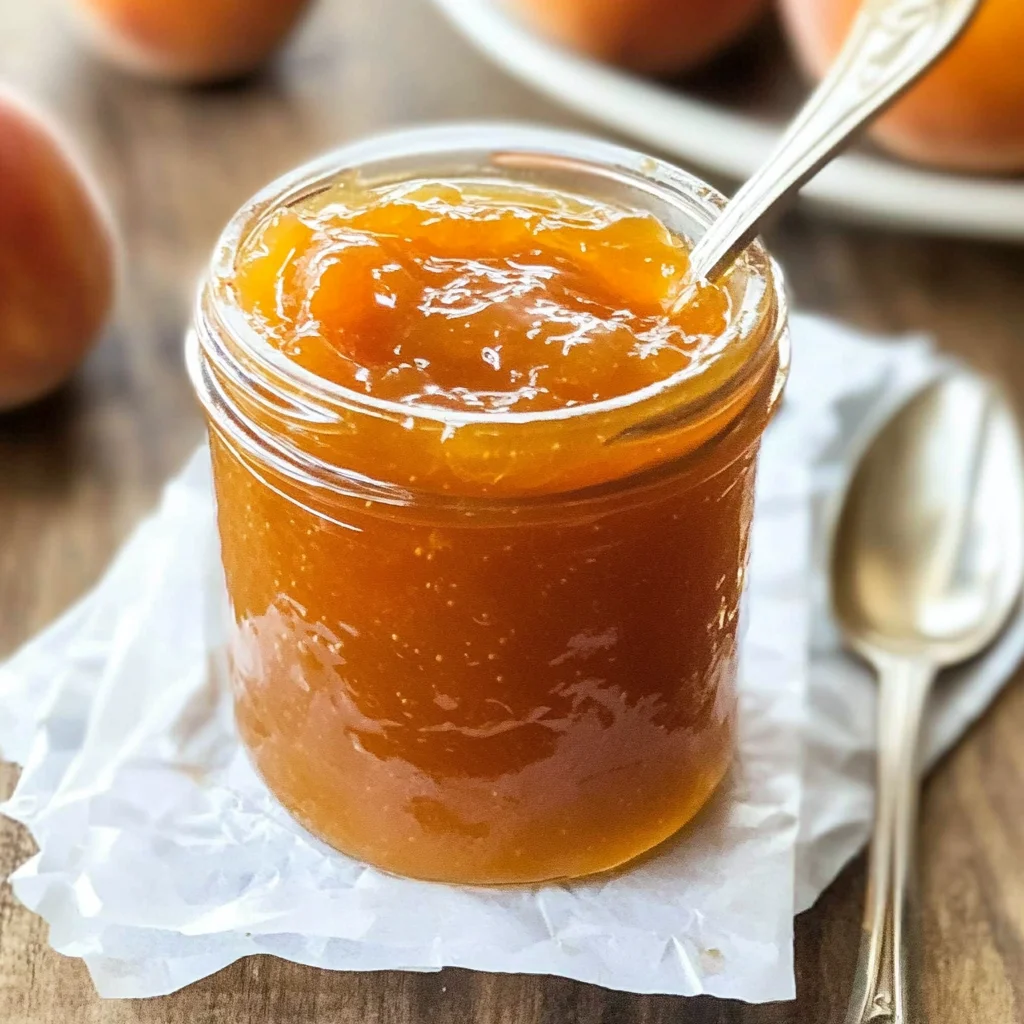
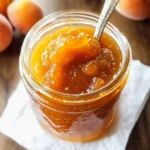
Apricot Jam
There’s something utterly magical about the alchemy of cooking, especially when it comes to transforming fresh, vibrant fruits into homemade preserves. This recipe for Apricot Jam encapsulates that enchantment beautifully, turning sweet, sun-kissed apricots into a luscious spread that can brighten your mornings and elevate your desserts for months to come. The vibrant orange hue of this jam glistens in the jar like liquid gold, whispering promises of summer sunshine even on the dreariest of winter days. Each spoonful is a burst of flavor that dances on your tongue, a reminder of those warm afternoons spent picking apricots under the generous sun, and I can’t wait to share this delightful experience with you.
Creating apricot jam is not just about the ingredients; it’s about embracing a tradition that has been passed down through generations. The process is as much about connection and memory as it is about preserving fruit. As you gather around your kitchen counter, chopping and stirring, you’re not just making jam; you are weaving a tapestry of experiences filled with laughter, conversation, and perhaps even a little bit of mischief as you taste along the way! Trust me when I say this: every step is worth it. You’ll find yourself completely engrossed in the sweet aroma that fills your kitchen, creating an utterly intoxicating atmosphere that invites everyone to join in.
Apricot Jam: A Taste of Summer All Year Round
This recipe for Apricot Jam is simple yet profoundly satisfying, allowing you to capture the essence of summer in a jar. With just three primary ingredients—fresh apricots, sugar, and lemon juice—you’ll create a beautiful preserve that requires no pectin at all! It’s an easy way to embrace home cooking while ensuring that you’re enjoying only the best flavors nature has to offer. So grab your apron and let’s embark on this delicious journey together!
Ingredients:
As we begin our culinary adventure into making apricot jam, let’s take a moment to appreciate the beautiful ingredients we’ll be using. Each one plays a crucial role in crafting this delightful spread.
- 2.5 kg (5.5 lb) fresh apricots – prepared weight. When selecting apricots for your jam, look for those that are ripe but still firm to touch; they should yield slightly when pressed but not feel mushy or overripe. The flavor of your jam hinges on the quality of your fruit—ripe apricots will impart their natural sweetness and vibrant color into the jam. If possible, seek out local or organic varieties during their peak season to ensure you’re capturing their full potential. Remember to wash them thoroughly and remove any blemishes before chopping them up; this attention to detail ensures your final product tastes truly extraordinary.
- 1/4 cup (60 ml) water. This seemingly simple ingredient acts as a gentle medium for cooking down our apricots without scorching them on the bottom of the pan. It’s crucial because it helps release moisture from the fruits as they heat up, creating that perfect consistency we’re after without drying out any flavors during cooking. Don’t skip this step; it sets up a beautiful foundation for our jam!
- 1/4 cup (60 ml) freshly squeezed lemon juice. The acid from lemon juice serves two vital purposes here: it brightens and balances the sweetness from our sugar and contributes natural pectin that aids in thickening our mixture without needing store-bought pectin packets. Freshly squeezed is non-negotiable; bottled varieties simply cannot replicate the fresh zing brought by real lemons! Make sure to strain out any seeds or pulp—though we love texture in our jams, we want it to be smooth enough for spreading.
- 1.8 kg (4 lb) granulated sugar. Ahh… sugar—the sweet magic that transforms our mixture into a velvety jam! Sugar not only adds sweetness but also helps preserve our apricot delight by inhibiting microbial growth once sealed in jars. It’s important to use granulated sugar here because its fine crystals dissolve easily into our mixture while cooking down; alternatives like brown sugar may alter both flavor and color significantly.
Equipment You’ll Need:
Before we dive into preparing our apricot jam, let’s make sure we have all our trusty tools at hand. Having the right equipment will make this process smoother and more enjoyable.
- Large pot – A heavy-bottomed pot is essential for evenly distributing heat while cooking your jam so nothing scorches on the bottom! This pot should be spacious enough to allow room for bubbling without spilling over—trust me; no one wants sticky cleanup after such a rewarding endeavor!
- Wooden spoon – This classic tool isn’t just nostalgic; it’s perfect for stirring hot mixtures without scratching your pot’s surface! A wooden spoon allows you total control when mixing ingredients together as they cook down; plus, there’s something comforting about using such an age-old utensil.
- Jar funnel – While optional, having a funnel makes filling jars less messy and ensures every drop of your precious jam goes exactly where it’s meant to be—in those jars! It saves time cleaning up later too!
- Sterilized jars with lids – Using clean jars is non-negotiable when preserving food at home! Sterilizing ensures any unwanted bacteria are eliminated so your homemade preserves stay fresh longer. You can achieve sterilization by boiling them or running them through a hot cycle in your dishwasher.
Now that we’ve assembled our ingredients and equipment let’s move on to what really gets us excited: preparing this heavenly Apricot Jam!
Step 1: Preparing Your Apricots with Love
Start by washing each apricot thoroughly under cold running water—this removes any dust or residue left from picking or storing them at home. Once washed, slice each one open along its seam and gently pull apart to remove their pits—their inner flesh should feel tender yet firm against your fingers! Chop these beautiful fruits into smaller chunks; I usually aim for pieces about an inch wide because they’ll break down nicely during cooking while still providing texture in every bite you take later on.
Step 2: Cooking Down Your Apricots
In your large pot over medium heat, combine those freshly chopped apricots with 1/4 cup water and let it simmer gently until they start releasing their juices—which will happen quite quickly! You’ll want to keep stirring occasionally here; this helps prevent sticking or burning—both of which would ruin our dreamiest apricot jam! As they soften after about 10 minutes or so, you’ll notice how fragrant everything becomes—it’s like summer itself has decided to linger just a bit longer in your kitchen!
Step 3: Sweetening Things Up
Once those lovely fruits have softened beautifully (they should feel tender enough to mash), it’s time for some sweetness! Gradually add in all 1.8 kg granulated sugar while stirring continuously until fully dissolved—this might take some time but trust me when I say it will all come together beautifully eventually! As soon as everything starts bubbling again after adding sugar—you’ll notice how thickening begins occurring almost immediately—it can feel exhilarating seeing how transformation takes place right before our eyes!
Step 4: Adding Zest with Lemon Juice
Now comes my favorite part: adding freshly squeezed lemon juice! Pour it slowly into the bubbling mixture while mixing well; you’ll hear delightful sizzling sounds as acidity brightens up those rich flavors we’ve cultivated together thus far! Allow everything to gently simmer again for another 20 minutes or so until thickened properly—don’t forget about regular stirring during this phase too because burnt undertones aren’t anyone’s idea behind making delicious preserves!
Stay tuned as we continue crafting this delightful jam together—I promise every moment spent will be worth savoring once we seal those jars filled with summer’s bounty!
Step 5: Cooking the Apricot Mixture to Perfection
Now that you’ve prepared your lovely apricots, it’s time for the magic to happen! In a large, heavy-bottomed pot, combine your chopped apricots, the 1/4 cup of water, and 1/4 cup of freshly squeezed lemon juice. This combination is not just about melding flavors; it’s crucial for creating the right texture and consistency in your jam. As you heat this beautiful mixture over medium-high heat, stir gently but confidently; you want to coax those juices out of the apricots while ensuring nothing sticks to the bottom of the pan. You’ll notice that after a few minutes of cooking, the apricots will start to soften and release their sweet nectar, transforming into a warm, inviting sauce.
Why is this step so vital? Well, it’s during this gentle cooking process that the apricots begin to break down, releasing their natural sugars and forming a syrupy base for your jam. The water helps to create steam, which allows the fruit to cook evenly without burning—a common pitfall when making jams or preserves. Keep an eye on it as you stir; you’re looking for that delightful bubbling action where it begins to resemble a saucy compote rather than just raw fruit. This should take about 10-15 minutes. Don’t rush this step; let those flavors deepen and intensify!
Step 6: Adding Sugar for Sweetness
Once your apricot mixture has reached that luscious state of soft and syrupy goodness, it’s time for the star ingredient—sugar! Gradually add in your 1.8 kg (4 lb) of granulated sugar while stirring constantly. This is where things get really exciting! The sugar not only sweetens your jam but also acts as a preservative and contributes to that irresistible glossy finish we all love in homemade jams. As you mix it in, keep stirring until every grain is dissolved; trust me when I say this is absolutely paramount for achieving that smooth texture.
While this might seem like a straightforward step, it’s essential for creating balance in your jam. The sweetness from the sugar beautifully complements the tartness of the lemon juice and enhances the apricot’s natural flavor profile. As you continue heating this mixture over medium heat, pay attention to how it transforms: you’ll see it start bubbling vigorously after roughly 5-10 minutes. This bubbling indicates that it’s time to bring out our trusty candy thermometer! You want your jam to reach a temperature of about 220°F (104°C). This is where we enter jam-making territory—this temperature ensures proper gelling without adding any artificial pectin.
Step 7: The Gelling Test – A Moment of Suspense
As we approach our target temperature, it’s time for one of my favorite moments—the gelling test! When your mixture hits around 215°F (about 100°C), take a small spoonful and place it on a chilled plate from your freezer (this is why chilling plates are so essential!). Let it sit for about a minute before running your finger through it; if it holds its shape and doesn’t immediately run back together, congratulations—you’ve officially made jam! If not quite ready yet? No worries! Just give it another few minutes on the heat until you achieve that perfect consistency.
But here’s where patience comes into play—don’t rush this step! The science behind gelling involves both temperature and sugar concentration working harmoniously together. If you remove it too soon, you’ll end up with something more akin to syrup than jam—though I must admit there’s nothing wrong with homemade syrup either! Conversely, leaving it on too long could lead to an overly thick texture that’s less spreadable on toast. So keep an eye on both the thermometer and that glorious spoonful on your chilled plate!
Step 8: Transforming Your Jam into Liquid Gold
Once you’ve passed the gelling test with flying colors (and hopefully let out an excited squeal!), it’s time to get ready for canning! Remove the pot from heat and let it sit for about five minutes; this resting period allows any foamy bubbles on top to settle down a bit—though I promise you those bubbles are harmless—they’re just eager little guys wanting some attention! Meanwhile, get your sterilized jars ready: I love placing them in a hot oven at about 200°F (95°C) for about 10-15 minutes before filling them up to ensure they’re perfectly clean.
Using a ladle or funnel (which makes life so much easier), carefully pour that vibrant apricot jam into each jar while leaving about a half-inch headspace at the top—this space is essential for expansion as they cool down later on. As you’re filling each jar with this utterly intoxicating jam, take a moment to appreciate its vibrant color and aroma wafting through your kitchen—it truly feels like capturing summer sunshine in glass jars! Once filled, wipe any excess jam from the rims with a clean cloth—this step prevents any sticky situations later when sealing them up.
Final Touches – Sealing Your Labor of Love
Step 9: Sealing Your Jars with Love
Now comes one of those non-negotiable steps: sealing up those beautiful jars! Place sterilized lids atop each jar while ensuring they fit snugly but don’t overtighten them just yet—this allows steam to escape during processing if needed while still creating an airtight seal once cooled down completely. If you’re feeling particularly adventurous or want extra assurance against spoilage, consider processing them in a water bath canner for about 10-15 minutes; this will help further preserve their freshness while ensuring they’re shelf-stable throughout those colder months ahead.
After processing (if you choose that route), let these little treasures cool completely at room temperature before storing them away in pantry bliss or gifting them lovingly wrapped with twine or tags attached—they make such delightful presents! As they cool down, be sure to listen closely—you might hear some satisfying “pops”—that sound means they’re sealing properly!
And there you have it—a stunning array of homemade Apricot Jam ready for indulging or sharing with friends and family alike! Trust me when I say there’s nothing more rewarding than spreading this joy across warm bread or simply enjoying spoonfuls straight from its jar like liquid gold bursting with flavor memories from summer days gone by. Enjoy every last bite—you’ve earned it!
Storage and Enjoyment Tips for Your Apricot Jam
Now that you’ve crafted this delightful jar of sunshine in a bottle, it’s time to talk about how to savor and preserve your homemade Apricot Jam. I can hardly contain my excitement as I envision you spreading this golden goodness on warm toast or dolloping it onto pancakes for a delicious breakfast treat. But let’s not forget the importance of proper storage to keep your jam tasting just as fresh as the day you made it! The key to enjoying your Apricot Jam for months to come lies in how you store it, ensuring that each spoonful remains a burst of sweet, tangy flavor.
Storing Leftover Apricot Jam
When it comes to storing your Apricot Jam, glass jars are truly the way to go. They not only look lovely on your pantry shelf but also provide an airtight seal that helps preserve freshness. Make sure your jars are sterilized before filling them—this is crucial because any lingering bacteria can spoil your precious jam. Store your filled jars in a cool, dark place (like a pantry or cupboard), and if you’re feeling particularly proactive, consider keeping one jar in the fridge right away for immediate enjoyment. If stored properly in a sealed container, your jam can last up to a year! However, you might find that the flavors deepen and intensify over time, creating a symphony of taste that’s utterly intoxicating with each bite. Just remember not to rush this step; let the flavors meld together beautifully. If you find any leftover jam sitting around after a few months, simply give it a sniff—if it smells good, it’s still good! When you’re ready to indulge again, feel free to gently reheat the jam on low heat; this will revive its luscious consistency and make those aromas waft through your kitchen once more!
Freezing Apricot Jam for Later
But wait—if you find yourself with an abundance of apricot joy that you simply can’t consume right away, freezing is an excellent option! To freeze your Apricot Jam, ensure it’s completely cooled before transferring it into freezer-safe containers or even resealable plastic bags. Make sure to leave some space at the top of each container; liquids expand when frozen! You can expect your jam to hold its delightful flavors for up to a year in the freezer without losing its charm. The convenience factor here is absolutely paramount: imagine being able to pull out a jar of summer sweetness mid-winter when you’re craving something bright and uplifting! When you’re ready to use it again, simply let it thaw overnight in the refrigerator or pop it into the microwave for a quick defrost—trust me, there’s nothing quite like having homemade Apricot Jam at your fingertips whenever the mood strikes!
Apricot Jam
There’s nothing quite like the joy of crafting homemade Apricot Jam, a delightful preserve that captures the essence of summer in each jar. This simple recipe transforms ripe apricots into a luscious spread, perfect for elevating your breakfasts and desserts throughout the year.
- Prep Time: 15 minutes
- Cook Time: 30 minutes
- Total Time: 45 minutes
- Yield: Approximately 30 servings (or about 1 liter of jam) 1x
- Category: Dessert
- Method: Preserving
- Cuisine: American
Ingredients
- 2.5 kg fresh apricots
- 1/4 cup water
- 1/4 cup freshly squeezed lemon juice
- 1.8 kg granulated sugar
Instructions
- Wash apricots thoroughly and slice them open to remove pits. Chop them into smaller chunks.
- In a large pot, combine chopped apricots, water, and lemon juice over medium heat. Stir gently until the fruit softens, about 10 minutes.
- Gradually add sugar while stirring continuously until fully dissolved. Bring the mixture to a boil.
- Cook for about 20 minutes, stirring regularly, until the jam thickens. Perform the gelling test by placing a spoonful on a chilled plate—if it holds its shape, it's ready.
- Remove from heat and let sit for five minutes before pouring into sterilized jars, leaving space at the top.
- Seal jars with lids and process in a water bath if desired for extra preservation.
Nutrition
- Serving Size: 1 tablespoon (20g)
- Calories: 50
- Sugar: 12g
- Sodium: 0mg
- Fat: 0g
- Saturated Fat: 0g
- Unsaturated Fat: 0g
- Trans Fat: 0g
- Carbohydrates: 13g
- Fiber: 0g
- Protein: 0g
- Cholesterol: 0mg