Easy Apricot Jam
There’s something undeniably magical about making your own jam, isn’t there? It’s an experience that transcends mere cooking; it’s a ritual, a celebration of fruits at their peak, and a way to bottle up the warmth of summer sunshine for those chilly winter mornings. When I think of Easy Apricot Jam, I’m reminded of my grandmother who would gather us around her kitchen table every summer, the sweet scent of ripe apricots filling the air as she guided us through the process with gentle hands and an even gentler heart. The vibrant orange hue of the jam bubbling away in the pot was more than just a treat; it was a promise of shared breakfasts, laughter, and memories made. Trust me when I say that making this jam is not just about putting fruit into jars—it’s about creating something profoundly satisfying that you can savor long after the last spoonful has been enjoyed.
With each batch, you learn something new: how to balance sweetness with acidity, how to coax the natural flavors out of the fruit, and how to turn simple ingredients into liquid gold. This Easy Apricot Jam recipe captures the essence of those lessons beautifully. The beauty here lies not only in its simplicity but also in its versatility. You can spread it on fresh-baked bread, swirl it into yogurt, or even use it as a delightful topping for your favorite desserts! Each jar is like a time capsule filled with summer bliss, waiting to be opened during those cold months when we most need a taste of sunshine.
Easy Apricot Jam: A Taste of Summer in Every Jar
Making your own apricot jam is an adventure that beckons you into the world of home preserving—a craft so rewarding that you might find yourself hooked from the moment you take that first spoonful. As we embark on this culinary journey together, let’s gather our ingredients and tools and prepare to create something truly extraordinary. This recipe will not only give you delicious apricot jam but also fill your home with an utterly intoxicating aroma that will have everyone asking what’s cooking!
Ingredients:
As we step into this jam-making adventure, let’s take a closer look at our star players—the ingredients that will come together to create this velvety-smooth apricot jam.
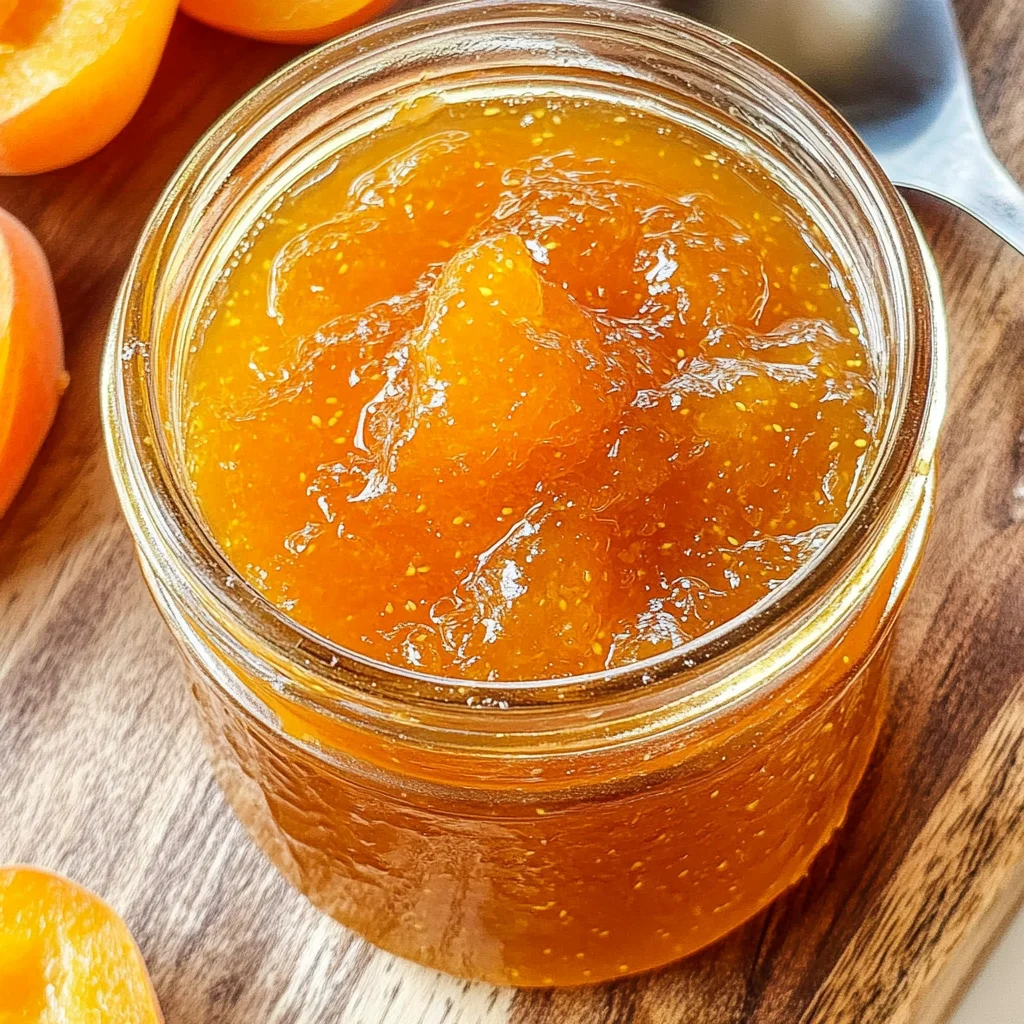
- 8 cups apricots (or 2 quarts). Choosing ripe apricots is absolutely paramount for achieving that luscious flavor we all crave in homemade jam. Look for fruits that are slightly soft to the touch with a warm golden hue; they should smell sweet and fragrant! Avoid any bruised or overly firm specimens as they’ll lead to tougher texture and less flavor in your final product. The natural sugars in these fruits will mingle beautifully with our other ingredients, yielding a jam that’s both fruity and refreshing.
- 1/3 cup lemon juice. This ingredient acts as both a brightener and a natural preservative—trust me on this! The acidity from lemon juice not only enhances the flavor but also helps maintain the vibrant color of our jam while ensuring it thickens properly during cooking. Always opt for fresh lemon juice over bottled if possible; it brings an unparalleled brightness that elevates each spoonful. You can easily substitute lime juice if you’re feeling adventurous!
- 7 cups white sugar. Now I know what you might be thinking: “That’s quite a bit of sugar!” But here’s why it matters: sugar is crucial for both flavor and preservation in jams. It balances out the tartness from our apricots while also helping achieve that perfect gel-like consistency we’re aiming for. If you’re looking for alternatives due to dietary preferences or health concerns, consider using pectin-based sweeteners designed specifically for canning—just make sure to follow their specific instructions since they may require different ratios.
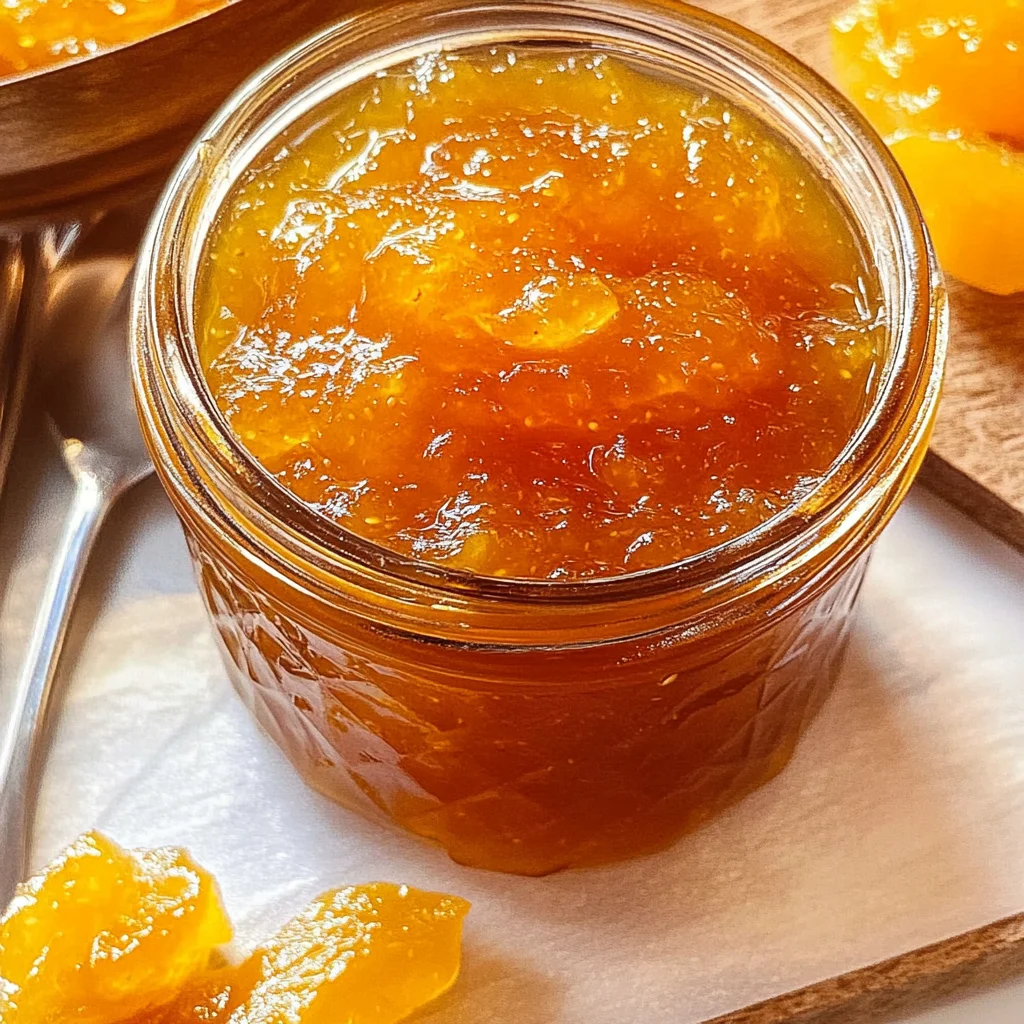
- 5 canning jars (1 pint each). Having proper storage vessels is essential because they will keep your beautiful creation fresh and safe from spoilage! Make sure these jars are sterilized before use—this step ensures no unwanted bacteria spoil your hard work later on! I prefer glass jars because they don’t impart any strange flavors into your jam like some plastics might.
Equipment You’ll Need:
Having the right tools at your disposal makes all the difference when crafting something as delightful as apricot jam! While these may not be ingredients, they are indeed essential partners in bringing our culinary dreams to life.
- Large pot – A heavy-bottomed pot is vital for evenly distributing heat while cooking down our fruit mixture without scorching it. Look for one that holds at least eight quarts; this will give you plenty of room to stir without worrying about overflow.
- Canning jars – It’s important to have jars specifically designed for canning; these come with proper sealing lids that create an airtight seal once processed! Ensure they’re thoroughly cleaned beforehand—sterilization is non-negotiable here.
- Soup ladle – A sturdy ladle helps transfer hot jam into jars without fuss or mess! Opting for one with a long handle keeps your hands safely away from any potential splashes.
- Jar holder – This handy tool allows you to safely lower jars into boiling water during processing without risking burns or spills. If you don’t have one on hand, consider using tongs instead—but be extra careful!
- A regular kitchen knife – This simple yet effective tool serves multiple purposes: removing air bubbles trapped in jars before sealing and helping cut away any blemishes on the apricots themselves during prep.
Preparing the Easy Apricot Jam / Making the Magic Happen
Step 1: Prepare Your Apricots
Let’s start by breaking those gorgeous apricots in half and removing their pits; this process is surprisingly satisfying! Use a paring knife to gently cut around each pit—don’t rush this step; taking your time ensures you get every last bit out without unnecessary bruising to the flesh. If you’re fortunate enough to have farm-fresh apricots bursting with flavor straight off the tree, you’ll appreciate their sweetness even more once they’re transformed into jam! After de-stoning them, take a moment to inspect each fruit carefully; any blemishes or bruises should be trimmed away so they don’t compromise our delightful mixture later on.
Step 2: Sterilize Your Jars
While you’re preparing those juicy halves, let’s talk about sterilizing our jars—a crucial step that protects against spoilage down the line! Fill up your largest pot with water and bring it to a rolling boil before adding in your clean jars and lids—let them bubble away for about ten minutes or so while we focus on cooking down our fruit mixture. Keeping them warm until we’re ready ensures they won’t crack under pressure when filled with hot jam—a small detail but absolutely paramount!
Step 3: Cook Your Apricots
Now comes one of my favorite parts—the magic begins as we combine those beautiful apricot halves with fresh lemon juice and heaps of sugar inside our large pot over medium-high heat! Stir gently but consistently until everything melds together beautifully—this initial heating allows us to extract ample juices from our fruits while dissolving sugar completely (which takes about five minutes). Once bubbling occurs—watch closely—you’ll want to reduce heat slightly so we’re left with controlled yet lively simmering rather than full-on boiling chaos!
Step 4: Achieving That Perfect Consistency
After about twenty-five minutes under gentle boil conditions (keep stirring occasionally!), we reach what feels like pure alchemy—a thickened mixture where flavors have danced harmoniously together! You might notice foam rising atop—we want to scoop away this white froth using either spoon or ladle—it doesn’t affect taste but can impact texture if left unattended! Keep an eye out here; trust me when I say patience pays off immensely because skipping this step could lead us astray from achieving silky perfection!
As we continue mixing love into every jar filled with passion-fueled labor soon enough… stay tuned for more steps ahead where we’ll guide you through jarring up this treasure trove soon enough!
Step 5: Jarring the Liquid Gold
Now that your apricot mixture has been simmering away, transforming into a beautifully thickened jam, it’s time to jar up this liquid gold! You’ll want to use a clean soup ladle for this part—trust me, it makes the process so much easier and less messy. Carefully scoop the jam into your sterilized jars, filling them until you leave about a quarter-inch of space at the top. This small gap is absolutely paramount to allow for proper sealing during the canning process; if you fill them too high, you might end up with a sticky mess and compromised seals. As you ladle the jam in, take a moment to appreciate that intoxicating aroma wafting up from the pot—there’s something profoundly satisfying about creating your own preserves that I simply can’t describe.
But we’re not done just yet! Once you’ve filled each jar, it’s crucial to remove any air bubbles trapped inside—this little step can make all the difference in ensuring your jam stays fresh and delightful for months to come. Grab a clean knife or a thin spatula and gently run it around the inside edge of each jar. You should see those pesky bubbles pop to the surface! Wipe down the rims of the jars with a damp cloth before placing on the lids; this ensures a snug seal that keeps your delicious creation safe from unwanted contaminants. Trust me on this—this meticulousness helps preserve not just flavor but also quality, creating an experience your future self will thank you for.
Step 6: The Water Bath Canning Magic
Here comes an exciting part: it’s time for water bath canning! This method is essential as it creates an airtight seal that prevents spoilage while allowing you to enjoy your Easy Apricot Jam well into winter. To begin, set up a large stockpot with a rack at the bottom—this keeps your jars elevated above direct heat so they won’t crack during processing. Pour in enough water to cover about halfway up the sides of your jars when they’re placed inside. Bring that water to a rolling boil; this is where patience comes in handy, as you’ll need to keep it boiling before introducing those precious jars.
Once you’ve reached that beautiful boil, carefully lower each jar into the pot using jar lifters—these tools are not just handy; they’re vital for avoiding potential burns or spills. It’s important that the jars don’t touch each other or the sides of the pot; if they do, it could lead to uneven heating or even breakage. If needed, add more boiling water until it’s just above the jar tops. Put on that lid and let it boil away for 15 minutes. This duration ensures that any bacteria are eliminated and creates an ideal vacuum seal as they cool down later—safety first is always my motto in preserving!
Step 7: Cooling Down & Sealing Your Creation
After those fifteen minutes of bubbling excitement have passed, turn off the heat and carefully remove each jar from the pot using your jar lifters—it’s like unearthing hidden treasure! Allow them to rest on a cloth-covered countertop or cooling rack without disturbing them too much; this quiet time is essential for letting them cool at their own pace and forming those lovely vacuum seals we’re after. As they cool, you might hear delightful little “pops” as lids seal tightly—it’s one of my favorite sounds! It signifies success and safety for your homemade treats.
Now here’s where some people might get impatient—I truly encourage you not to rush this step! Letting your jars cool completely on their own will help solidify those seals and lock in all those incredible flavors we’ve worked so hard to create together. You can expect them to cool down within an hour or two depending on room temperature; however, I often leave mine overnight just to be extra sure everything has set properly. Once cooled, check each lid by pressing down in the center—if it doesn’t pop back up, congratulations! You’ve successfully sealed another batch of Easy Apricot Jam.
Step 8: Storing Your Jam Safely
With your jars now filled with vibrant apricot goodness and sealed tight like treasured heirlooms, it’s time to think about storage! Finding a suitable spot is crucial; aim for a cool, dark place like a pantry or cupboard away from any direct sunlight or heat sources which can diminish flavors over time. Proper storage conditions are non-negotiable if you want your homemade jam to last months without losing its bright taste or tempting texture.
As you store these colorful jars away, take pride in what you’ve accomplished—you’ve created something truly extraordinary! Each jar represents not just fruit but memories waiting to be made: breakfasts spread generously on warm toast, sweet gifts for friends who visit unexpectedly, or simply moments savoring spoonfuls straight from the jar (not judging if you do!). I promise you’ll feel such joy every time you open one—a delightful reminder of summer’s bounty captured in every spoonful.
Next Major Phase – The Joy of Enjoying Your Easy Apricot Jam
Now that we’ve wrapped up this entire journey of crafting Easy Apricot Jam together—from selecting ripe fruit all the way through canning—I can practically hear you asking how best to enjoy it! So let me share some ideas that’ll elevate those glorious flavors even further as we embrace every last drop of this nectarous creation together…
Step 9: Savoring Every Spoonful
The beauty of having homemade apricot jam at hand is how versatile it truly is! Imagine spreading it generously on freshly baked scones or buttery croissants—the sweetness paired with flaky textures creates an utterly intoxicating breakfast experience! Or perhaps dollop some atop creamy yogurt for elevating your morning routine into something special—a simple indulgence brimming with flavor while providing nourishment.
And let’s not forget about using it as an exciting glaze for roasted vegetables or grilled chicken alternatives where its sweet-tart profile will dance harmoniously with savory notes—you’ll be amazed by this symphony of flavors transforming everyday meals into unforgettable culinary experiences! Whatever way you choose to enjoy your Easy Apricot Jam, remember each bite carries with it love infused through every step we took together in crafting something uniquely yours.
So go ahead—unwrap those jars proudly displayed upon shelves—and dive into another delightful adventure centered around sharing good food with good company because nothing brings people together quite like homemade treats crafted from passion and creativity!
Storage and Enjoyment Tips for Your Easy Apricot Jam
Now that you’ve crafted your own batch of luscious Easy Apricot Jam, it’s time to talk about how to savor and store this delightful creation! There’s something so satisfying about seeing those beautiful jars lined up in your pantry, each one a promise of summer’s sweetness waiting patiently for the perfect moment. Trust me when I say, this jam makes every breakfast feel like a special occasion and can turn an ordinary afternoon snack into a truly extraordinary experience. So, let’s dive into how we can keep this liquid gold at its best!
Storing Leftover Easy Apricot Jam
When it comes to storing your Easy Apricot Jam, the right container can make all the difference. I recommend using clean, sterilized glass jars with airtight lids, as they help preserve the vibrant flavors and lovely texture you’ve worked so hard to create. Keep your jam in a cool, dark place—like a pantry or kitchen cupboard—where it can thrive away from heat and light. If stored properly, your apricot jam should maintain its delicious quality for up to a year! Here’s a little pro tip: if you want to keep your jam tasting just as fresh as the day you made it, consider placing a slice of bread on top before sealing—this helps absorb any excess moisture. When you finally pop open a jar after some time, you’ll be greeted by that unmistakably sweet aroma; it’ll taste like sunshine captured in a jar! Whether slathered on warm toast or spooned over creamy yogurt, reheating gently will bring back that delightful spreadability and flavor.
Freezing Easy Apricot Jam for Later
Feeling like you might not finish all your delicious Easy Apricot Jam right away? No problem! Freezing is an excellent option that allows you to enjoy that fantastic flavor long after apricot season has passed. To freeze properly, simply scoop the cooled jam into freezer-safe containers or resealable plastic bags; make sure to leave about an inch of space at the top since liquids expand when frozen. If stored properly in your freezer, expect your jam to maintain its quality for around 6-12 months. The best part is that when you’re ready to use it, there’s no need to defrost the entire batch—you can simply take out what you need and let it thaw in the fridge overnight or gently warm it on the stove while stirring until it’s perfect again. This convenience factor means you’ll have homemade joy waiting for you whenever those sweet cravings hit!
Easy Apricot Jam
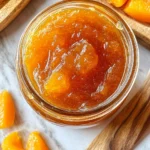
Capture the essence of summer with this Easy Apricot Jam recipe! Perfect for brightening up your breakfasts or as a delightful topping for your favorite desserts, this homemade apricot preserve is a treat that brings warmth and sunshine into your kitchen. With ripe apricots, fresh lemon juice, and just the right amount of sugar, you’ll create a velvety-smooth jam that’s bursting with flavor. The process is simple and satisfying, making it an ideal project for both novice and experienced cooks alike. So gather your ingredients, roll up your sleeves, and embark on this delicious journey to savor summer’s sweetness all year long!
- Prep Time: 30 minutes
- Cook Time: 25 minutes
- Total Time: 55 minutes
- Yield: Approximately 40 servings 1x
- Category: Dessert
- Method: Canning
- Cuisine: American
Ingredients
- 8 cups ripe apricots
- 1/3 cup fresh lemon juice
- 7 cups white sugar
- 5 sterilized canning jars (1 pint each)
Instructions
- 1. Prepare the apricots by halving them and removing pits. Trim any blemishes.
- 2. Sterilize jars by boiling them in water for about 10 minutes.
- 3. In a large pot, combine apricots, lemon juice, and sugar over medium-high heat. Stir until the mixture boils gently.
- 4. Simmer for about 25 minutes while stirring occasionally until it thickens.
- 5. Fill sterilized jars with the hot jam, leaving a quarter-inch headspace at the top.
- 6. Remove air bubbles with a knife around the edges of the jars and wipe rims clean.
- 7. Seal jars with lids and process in a boiling water bath for 15 minutes.
- 8. Let jars cool completely before storing in a cool, dark place.
Nutrition
- Serving Size: 1 tablespoon (20g)
- Calories: 52
- Sugar: 13g
- Sodium: 0mg
- Fat: 0g
- Saturated Fat: 0g
- Unsaturated Fat: 0g
- Trans Fat: 0g
- Carbohydrates: 14g
- Fiber: 0g
- Protein: <1g
- Cholesterol: 0mg