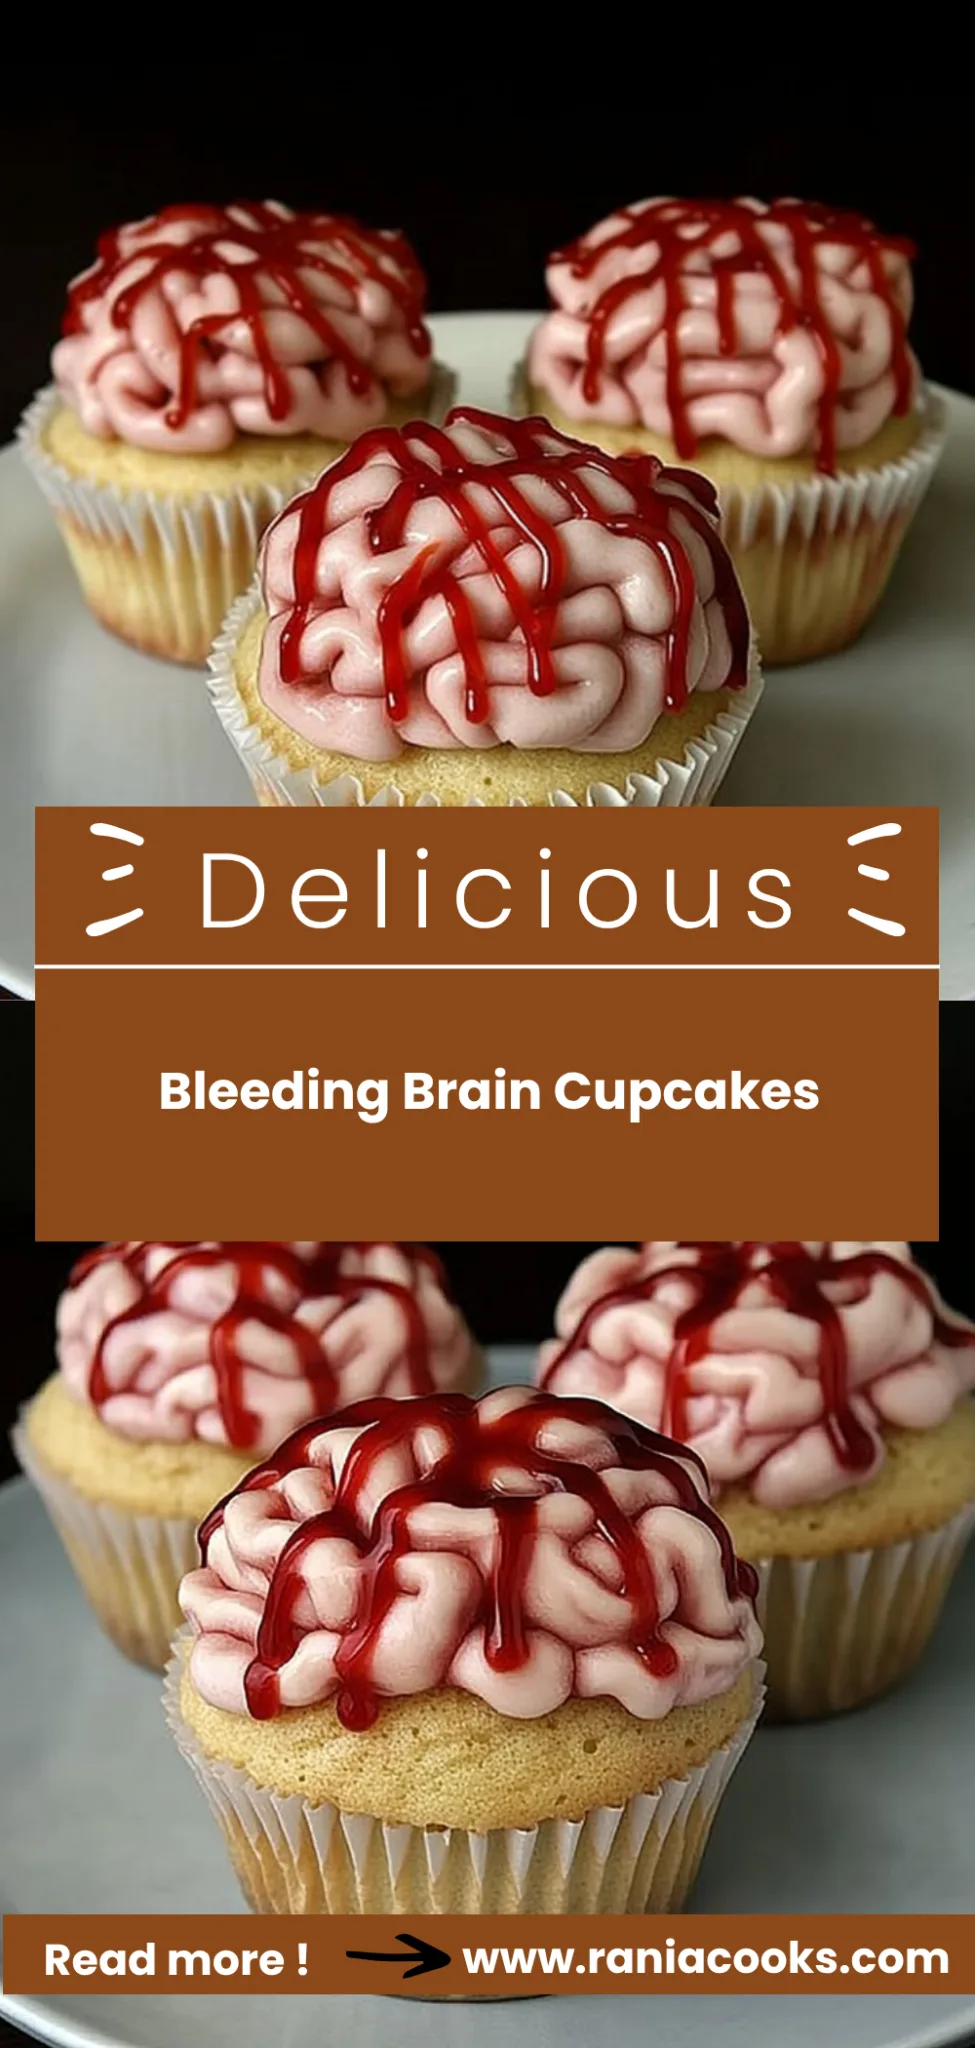
Bleeding Brain Cupcakes: Spookily Delicious Treats
Get ready to unleash your inner mad scientist with my Bleeding Brain Cupcakes! These spooky treats are not only visually striking but also irresistibly delicious, boasting a rich, moist cake complemented by a creamy brain-like frosting that oozes a tantalizing raspberry filling. With every bite, you’ll experience a delightful blend of sweet and tart flavors, perfectly balanced and utterly addictive. Plus, at 320 calories each, they’re surprisingly protein-packed—ideal for satisfying those cravings while keeping your macros in check. I whipped up this recipe during a busy Halloween week when I wanted something fun yet nutritious for my kids’ school party.
The first time I made these cupcakes was on a chilly October afternoon, just as the leaves were turning and Halloween decorations began to creep into our neighborhood. As I pulled the cupcakes from the oven, my youngest exclaimed, “Mom, they look like real brains!” The unique twist on this recipe comes from the raspberry filling that adds an unexpected burst of flavor and a deliciously gooey effect. When my teenagers took their first bites, they couldn’t stop asking for more—one even said it was the best treat I’d ever made! It’s moments like these that remind me why I love creating fun and wholesome treats for my family.
Ingredients for the Bleeding Brain Cupcakes
Each ingredient in this dish plays an essential role in flavor and texture. Here’s what you’ll need:
- 1 cup all-purpose flour: Provides structure and lightness to the cupcakes.
- 1 cup granulated sugar: Sweetens the batter and helps create a tender crumb.
- 1/2 cup unsweetened cocoa powder: Infuses rich chocolate flavor into the cupcakes.
- 1 tsp baking powder: Acts as a leavening agent for a fluffy texture.
- 1/2 tsp baking soda: Enhances browning and adds rise to the cupcakes.
- 1/4 tsp salt: Balances sweetness and enhances overall flavors.
- 1 large egg: Binds ingredients together while adding moisture.
- 1/2 cup milk: Keeps the batter moist and contributes to a soft texture.
- 1/2 cup vegetable oil: Adds richness and keeps the cupcakes tender.
- 1 tsp vanilla extract: Introduces warmth and depth of flavor.
Step-by-Step Instructions
I recommend starting by preheating your oven since it takes some time to reach the right temperature, ensuring your cupcakes bake evenly as you prepare the batter. Step 1: Preheat your oven to 350°F (175°C) to create the perfect baking environment for your cupcakes. While the oven heats up, line a muffin tin with cupcake liners to make for easy removal later. This way, you’re multitasking effectively and maximizing your time in the kitchen.
Step 2: In a mixing bowl, combine 1 cup of all-purpose flour, 1 cup of granulated sugar, 1/2 cup of unsweetened cocoa powder, 1 teaspoon of baking powder, 1/2 teaspoon of baking soda, and 1/4 teaspoon of salt. I find that whisking these dry ingredients together helps prevent clumps and ensures an even distribution of flavors. Mixing them thoroughly at this stage builds a solid foundation for your cupcakes.
Step 3: Add in one large egg, 1/2 cup of milk, 1/2 cup of vegetable oil, and 1 teaspoon of vanilla extract to the dry ingredients. Mix until smooth; I usually use a hand mixer for about a minute to ensure there are no lumps left behind—this makes for a lighter cupcake. The batter should be glossy and slightly thick; if it’s too runny, you may have added too much liquid.
Step 4: Pour the batter into the prepared muffin tin, filling each liner about two-thirds full. I find that using an ice cream scoop makes this step cleaner and more efficient. It also helps maintain uniformity in cupcake size, which is crucial for even baking.
Step 5: Bake your cupcakes for 18-20 minutes or until a toothpick inserted into the center comes out clean. The tops should look set and slightly spring back when touched; golden brown edges indicate they’re ready. Once done, let them cool in the pan for about five minutes before transferring them to a wire rack to cool completely.
Step 6: In a small saucepan over medium heat, combine 1 cup of fresh raspberries, 1/4 cup of granulated sugar, 1 tablespoon of cornstarch, and 1 tablespoon of water. Stir constantly as you cook this mixture until it thickens and bubbles—this should take about 5-7 minutes. I love watching it transform into a syrupy goodness! Once thickened, remove from heat and allow it to cool as you prepare the frosting.
Step 7: In another mixing bowl, beat one cup of softened unsalted butter until creamy—this typically takes about two minutes with a hand mixer on high speed. Step in gradually with four cups of powdered sugar while alternating with 1/4 cup of milk until you reach your desired consistency. This method prevents lumps from forming in your frosting and gives it that smooth texture we all crave.
Step 8: Mix in one teaspoon of vanilla extract along with one tablespoon each of red and pink food coloring until you achieve a light pink color reminiscent of brains! You can adjust the food coloring based on how vibrant you want your frosting to be—my family loves it when it’s extra colorful!
Step 9: Once your cupcakes are completely cool, use a small knife to carefully cut out a cone shape from the center of each cupcake. This creates space for that delicious raspberry filling we made earlier; I like to save those little tops because they can be used as ‘caps’ later on or just eaten as is!
Step 10: Fill each hole generously with raspberry filling; don’t be shy here! It’s what makes these cupcakes special—a luscious burst when bitten into is always my goal!
Step 11: Use a piping bag fitted with a round tip to pipe the brain frosting over each cupcake in swirling motions for that spooky effect. I find that practicing my technique on parchment paper first helps me get comfortable before decorating my actual treats.
Step 12: Finally, drizzle additional raspberry filling on top for that irresistible ‘bleeding’ effect—this is what truly brings these Bleeding Brain Cupcakes to life! It’s all about presentation here; don’t hold back on making them look eerie yet enticing!
What to Serve with Bleeding Brain Cupcakes
This dish is already incredibly filling and balanced, but these sides add extra variety and nutrition to round out your meal perfectly.
Dark Chocolate Avocado Mousse: This creamy mousse blends ripe avocados with cocoa powder and a touch of maple syrup for a rich dessert that mirrors the chocolatey goodness of the cupcakes. The healthy fats in avocados provide about 5 grams of protein per serving, making it a great option for those looking to up their macro game while satisfying their sweet tooth. My kids love this treat as an alternative to ice cream during our spooky movie nights.
Cranberry-Lime Quinoa Salad: A refreshing mix of fluffy quinoa, tart cranberries, zesty lime juice, and crunchy pecans creates a light side that contrasts beautifully with the sweet and rich Bleeding Brain Cupcakes. Quinoa packs a protein punch with around 8 grams per cup, offering a nutritious boost alongside the cupcakes. We often prepare this salad in advance for family gatherings, making it easy to serve amidst all the festive treats.
Spicy Roasted Chickpeas: Seasoned with smoked paprika and cayenne, these crispy roasted chickpeas provide a crunchy texture that complements the soft cupcakes while adding a spicy kick. With about 6 grams of protein per ounce, they’re an excellent source of plant-based nutrition. Whenever we have friends over for Halloween parties, these make for an addictive snack that balances out all the sweets.
Creamy Garlic Mashed Potatoes: These buttery mashed potatoes infused with roasted garlic offer a comforting side that echoes the richness of the cupcake’s frosting. While they don’t pack as much protein—around 3 grams per serving—they do provide essential vitamins and minerals from the potatoes. I like serving them on spooky-themed dinner nights; they’re always a hit with my family who appreciates hearty comfort food.
Storage & Serving Tips
To store your Bleeding Brain Cupcakes, place them in an airtight container and keep them in the refrigerator for up to 5 days. Since the cupcakes have a delicate raspberry filling, it’s best to store the cupcake base separately from the brain frosting. Place the unfrosted cupcakes in one container and cover them tightly. For the raspberry filling, use a small jar or an airtight container to keep it fresh, and store the brain frosting in another container, making sure it’s well-sealed to prevent it from drying out.
When you’re ready to enjoy your cupcakes, it’s best to reheat them gently. If you’re reheating the cupcake bases, do so in a preheated oven at 350°F for about 5-7 minutes until they are warmed through without losing their moisture. The raspberry filling can be warmed briefly in the microwave for about 15-20 seconds; just ensure it doesn’t overheat. Avoid microwaving the frosted cupcakes altogether, as this will make the frosting melt and lose its shape.
Pro tip: To batch cook these spooky treats for meal prep throughout the week, consider doubling the recipe on Sundays and portioning them into individual containers for easy grab-and-go desserts. Family members can self-assemble their own cupcakes by adding fresh raspberry filling and frosting just before serving. For variety, swap out half of the all-purpose flour in the cupcake batter with almond flour for added flavor or try using different fillings like strawberry or blueberry compote. To maintain optimal freshness, store the brain frosting separately and only frost your cupcakes right before enjoying them to keep that perfect texture intact.
Conclusion
These Bleeding Brain Cupcakes have become a regular rotation recipe for me, and I whip them up at least once a month because they’re spooky, delicious, and packed with 320 calories of pure indulgence. The unique brain-like frosting not only adds an eerie touch but also perfectly complements the rich chocolate cupcake base, making them stand out from your average sweet treat. Give this one a try this week. I promise it’ll become a regular rotation dessert in your house too.