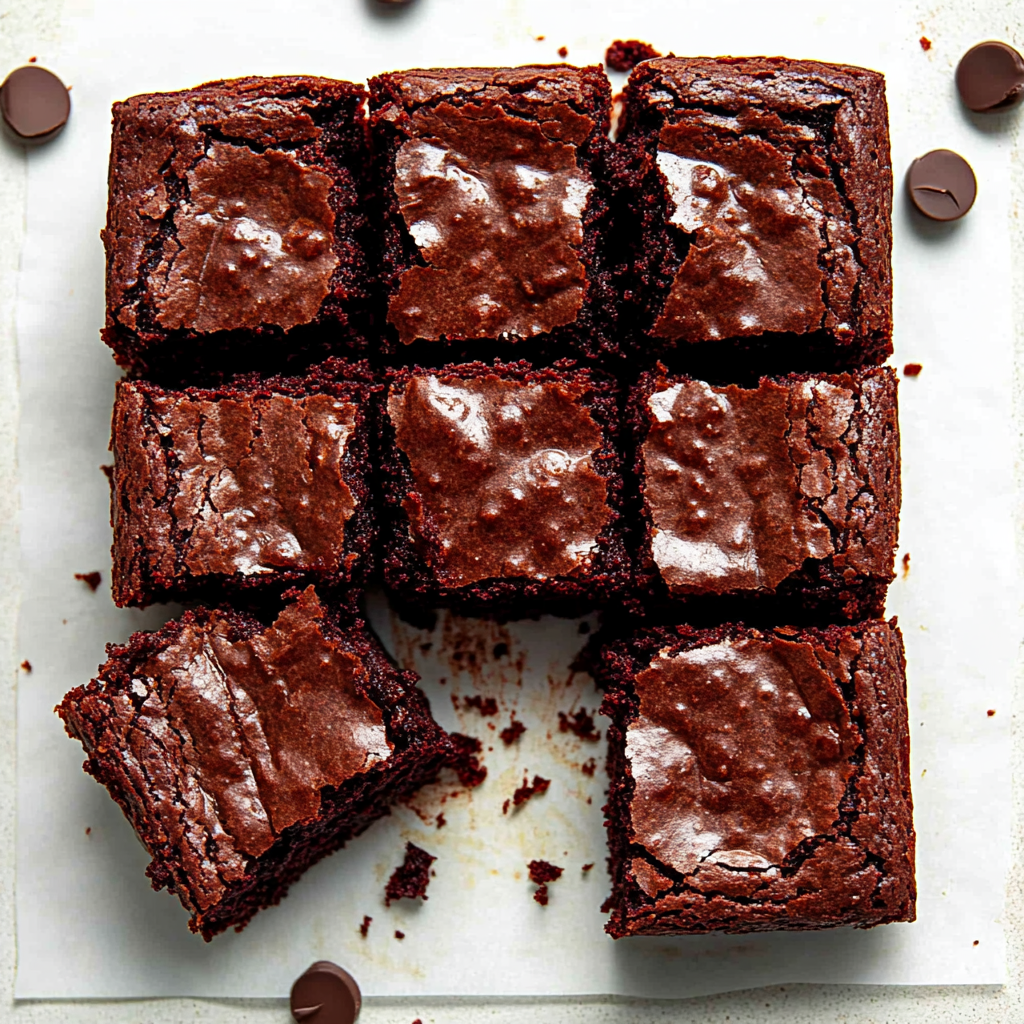
Indulge in Decadent Red Velvet Brownies Today!
There’s something undeniably delightful about the rich, velvety texture of Red Velvet Brownies that makes them a favorite treat for many. Whether it’s for a special occasion like a birthday or simply an afternoon pick-me-up, these brownies fit the bill perfectly. The combination of chocolate and that iconic red hue not only pleases the palate but also captures the eye, making them an impressive dessert to share with friends and family.
What I love most about this recipe is how easy it is to whip up a batch in no time at all. With just a few simple ingredients, you can create fudgy red velvet brownies that will have everyone coming back for seconds. So grab your mixing bowl and let’s dive into this sweet adventure!
Why You’ll Love This Recipe
– Rich and Chocolatey: These brownies deliver a deep chocolate flavor that satisfies any sweet tooth.
– Easy to Make: With simple steps and minimal fuss, you’ll have delicious brownies ready in under an hour.
– Perfect for Any Occasion: Whether it’s a potluck or movie night at home, these brownies are sure to impress.
– Eye-Catching Color: The vibrant red color makes these brownies stand out on any dessert table.
– Customizable Toppings: You can add white chocolate chips or drizzle melted white chocolate on top for extra flair.
Ingredients You’ll Need
Before you start baking, let’s gather all the ingredients you’ll need for these scrumptious Red Velvet Brownies. Having everything prepped will make the process smooth and enjoyable.
For the Brownies
– 3/4 cup unsalted butter (melted)
– 2 oz chopped semi-sweet chocolate bar
– 1 & 1/4 cup granulated sugar
– 2 large eggs
– 2 teaspoon vanilla extract
– 1 teaspoon white vinegar
– 1/2 tablespoons red gel food coloring
– 2 tablespoons unsweetened cocoa powder
– 1 & 1/4 cup all-purpose flour
– 1/4 teaspoon salt
Optional Toppings
– 1/2 cup white chocolate chips (for mixing in or drizzling on top)
Variations
This recipe is wonderfully flexible, allowing you to get creative with your flavors and toppings. Here are some fun ideas to customize your Red Velvet Brownies:
– Swap the chocolate: Use dark chocolate instead of semi-sweet for a more intense flavor.
– Add nuts: Chopped walnuts or pecans can add a nice crunch to your brownies.
– Try different colors: If you’re feeling adventurous, use blue or green food coloring for a fun twist.
– Top with cream cheese frosting: Elevate your brownies by adding a layer of creamy frosting on top.
How to Make Red Velvet Brownies
Step 1: Preheat and Prepare the Pan
Preheat your oven to 350°F and line an 8×8 inch baking pan with parchment paper. This step ensures even baking and prevents the brownies from sticking to the pan, making it easier to cut them into squares later.
Step 2: Melt Butter and Chocolate
In a large microwave-safe mixing bowl, melt the butter along with the chopped chocolate in 30-second increments. Stir until fully melted and smooth. This mixture forms the base of our brownie batter, providing richness and depth of flavor.
Step 3: Mix in Sugar and Eggs
Add in the granulated sugar and mix until well combined. Then incorporate the eggs one at a time, beating well after each addition. Stir in the vanilla extract, white vinegar, and red food coloring. This creates that signature red velvet taste while keeping our brownies moist and fudgy.
Step 4: Combine Dry Ingredients
In a separate bowl, sift together the cocoa powder, flour, and salt. Sifting helps remove any lumps and ensures that your dry ingredients are well mixed before combining them with wet ingredients.
Step 5: Combine Wet and Dry Ingredients
Gradually add the dry ingredients to the wet mixture, mixing until just combined. Be careful not to overmix as this can lead to dense brownies instead of light and fudgy ones. If desired, fold in white chocolate chips for added sweetness.
Step 6: Bake
Pour the batter into your prepared pan and spread it evenly. Bake in the preheated oven for approximately 30–35 minutes or until a toothpick inserted into the center comes out with a few moist crumbs—this indicates they are perfectly baked.
Step 7: Cool Before Cutting
Allow the brownies to cool completely in the pan before cutting into squares. This step is crucial as it allows them to set properly so they won’t fall apart when served.
Step 8: Optional Drizzle
If you want an extra indulgent touch, melt some white chocolate and drizzle it over the cooled brownies before slicing them up. Allow it to set for an aesthetically pleasing finish that everyone will love!
Enjoy every bite of these delightful Red Velvet Brownies!
Pro Tips for Making Red Velvet Brownies
Making red velvet brownies is a delightful experience, and with a few pro tips, you can elevate your baking game to ensure they turn out perfectly every time. Here are some actionable suggestions to help you achieve the best fudgy texture and vibrant color.
– Use room temperature ingredients: Let your eggs and butter come to room temperature before mixing. This helps create a smooth batter that combines easily and results in even baking.
– Don’t overmix the batter: Once you combine the dry ingredients with the wet, mix just until incorporated. Overmixing can lead to tough brownies instead of soft and fudgy ones.
– Check for doneness carefully: Since ovens vary, start checking your brownies at the 30-minute mark. A toothpick should come out with a few moist crumbs but not wet batter for the perfect texture.
– Experiment with food coloring: If you’re feeling adventurous, add a bit more red gel food coloring for deeper color or try different shades to create a unique look. Just be mindful of not adding too much liquid!
– Allow them to cool: Let the brownies cool completely in the pan before cutting them into squares. This helps them set properly and makes slicing easier.
How to Serve Red Velvet Brownies
These red velvet brownies are not only delicious but also visually stunning, making them perfect for various occasions. Here are some ideas on how to present these treats beautifully.
Garnishes
– Whipped coconut cream: A dollop of whipped coconut cream on top adds an extra layer of sweetness and complements the rich flavor of the brownies.
– Fresh berries: Garnish each brownie with fresh raspberries or strawberries for a pop of color and a burst of freshness that balances the sweetness.
Side Dishes
– Vanilla ice cream: Serve alongside a scoop of creamy vanilla ice cream for an irresistible dessert combination that everyone will love.
– Coffee or espresso: Pair your brownies with a cup of coffee or espresso to enhance their chocolatey flavor and provide a nice contrast.
– Fruit salad: A light fruit salad can be a refreshing side dish that offsets the richness of the brownies.
– Milkshake: A thick milkshake serves as a fun drink option that pairs wonderfully with these decadent treats.

Make Ahead and Storage
Preparing ahead is always a great idea when it comes to desserts like these red velvet brownies. They store well, making them perfect for meal prep or special occasions!
Storing Leftovers
– Cool completely: Ensure that your brownies have cooled completely before storing them in an airtight container. This prevents moisture buildup that could make them soggy.
– Use parchment paper: Place parchment paper between layers if stacking brownies in a container. This helps keep them from sticking together.
Freezing
– Cut into squares: For easy access later, cut your brownies into squares before freezing. Wrap each square individually in plastic wrap or foil.
– Store in freezer bags: Place wrapped squares in freezer-safe bags or containers, labeling them with the date so you can keep track of freshness.
Reheating
– Microwave method: To enjoy warm brownies again, microwave individual squares for about 15–20 seconds until warmed through.
– Oven method: For larger portions, reheat in an oven preheated to 350°F for about 5–10 minutes until warm without drying them out.
FAQs
If you have questions about making and enjoying red velvet brownies, you’re not alone! Here are some common inquiries along with helpful answers.
Can I substitute the all-purpose flour?
Yes, you can use gluten-free all-purpose flour as an alternative if you’re looking for a gluten-free option. The texture may vary slightly but should still yield delicious results.
What can I use instead of white vinegar?
If you don’t have white vinegar on hand, lemon juice works as an excellent substitute. It provides similar acidity which helps activate baking soda and enhances flavor.
Can I add nuts to this recipe?
Absolutely! Chopped walnuts or pecans can be folded into the batter for added crunch and flavor. Just be sure to chop them finely so they mix well throughout the brownies.
Final Thoughts
I hope you feel inspired to try making these delightful red velvet brownies! They are perfect for any occasion—whether it’s a party, family gathering, or simply satisfying your sweet tooth at home. Enjoy every bite and share this treat with loved ones; they’ll surely be asking for seconds! Happy baking!
Red Velvet Brownies
Ingredients
Method
- Preheat your oven to 350°F and line an 8x8 inch baking pan with parchment paper.
- In a large microwave-safe mixing bowl, melt the butter along with the chopped chocolate in 30-second increments. Stir until fully melted and smooth.
- Add in the granulated sugar and mix until well combined. Then incorporate the eggs one at a time, beating well after each addition. Stir in the vanilla extract, white vinegar, and red food coloring.
- In a separate bowl, sift together the cocoa powder, flour, and salt.
- Gradually add the dry ingredients to the wet mixture, mixing until just combined. If desired, fold in white chocolate chips.
- Pour the batter into your prepared pan and spread it evenly. Bake for approximately 30–35 minutes or until a toothpick inserted into the center comes out with a few moist crumbs.
- Allow the brownies to cool completely in the pan before cutting into squares.
- If desired, melt some white chocolate and drizzle it over the cooled brownies before slicing them up.