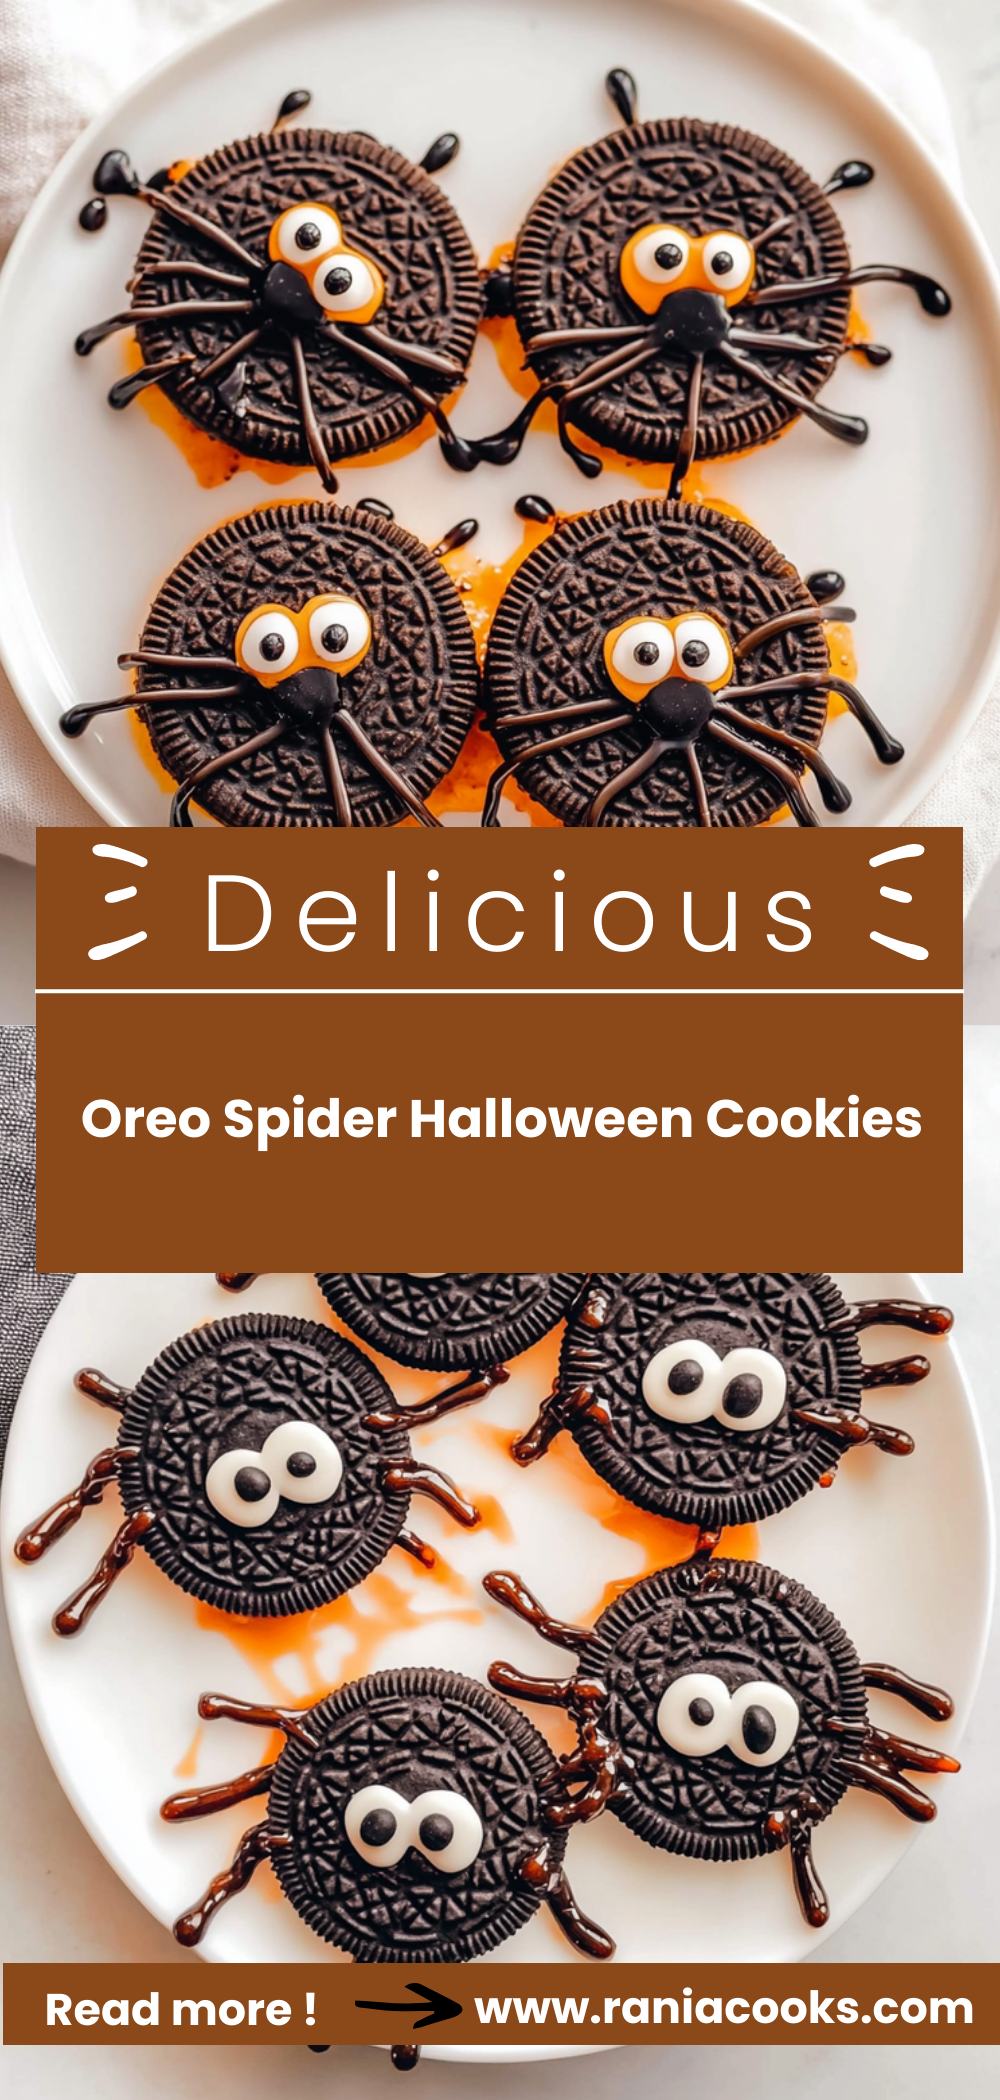
Spooktacular Oreo Spider Halloween Cookies Recipe
Get ready for a fang-tastic treat that will have everyone buzzing with excitement! These Oreo Spider Halloween Cookies are not just adorable; they’re a delightful combination of chocolatey goodness and fun creativity. Whether you’re hosting a Halloween party, making special treats for your little ghosts and goblins, or simply looking to get into the spirit of the season, this recipe is sure to be a hit. The best part? They’re super easy to make and even more fun to decorate!
What I love most about these cookies is how they bring people together. You can easily enlist the help of your kids or friends to create these spooky delights, turning baking into a fun-filled activity. Plus, who can resist the charm of those little spider legs made from pretzels? So grab your ingredients and let’s dive into making these Oreo Spider Halloween Cookies!
Why You’ll Love This Recipe
– Simple and quick: With just 20 minutes of prep time, you can whip up a batch in no time.
– Fun for all ages: Decorating these cookies is a fantastic activity for kids and adults alike.
– No baking required: Just melt, assemble, and enjoy—perfect for those who prefer not to turn on the oven!
– Deliciously cute: The combination of Oreos and chocolate is irresistible, making them a crowd favorite.
– Perfect for any occasion: While they shine at Halloween parties, these cookies can also be enjoyed year-round.
Ingredients You’ll Need
Before we jump into the cooking process, let’s gather our ingredients! This simple list will set you on your way to creating these delightful treats.
For the Cookies
– 1/2 cup chocolate chips (dairy free)
– 1 teaspoon coconut oil
– 12 Oreo cookies (Halloween kind or double stuffed)
– 36 pretzel sticks
– 12 dozen small candy eyeballs
– 3 tablespoons sprinkles
Variations
Feel free to get creative with this recipe! Here are some fun variations to customize your Oreo Spider Halloween Cookies:
– Swap the Oreos: Use gluten-free Oreos if you’re catering to dietary restrictions.
– Change up the toppings: Try using different colored sprinkles or candy eyes for a unique look.
– Add flavor: Mix in some crushed peppermint or orange zest into the melted chocolate for an exciting twist.
– Make it festive: Use seasonal cookie cutters to create different shapes instead of just spiders.
How to Make Oreo Spider Halloween Cookies
Step 1: Melt the Chocolate
To start off, add 1/2 cup of chocolate chips along with 1 teaspoon of coconut oil to a small bowl. Microwave this mixture for about one minute or until it’s fully melted. Melting the chocolate with coconut oil helps create a smooth texture that’s perfect for dipping and decorating.
Step 2: Assemble the Spiders
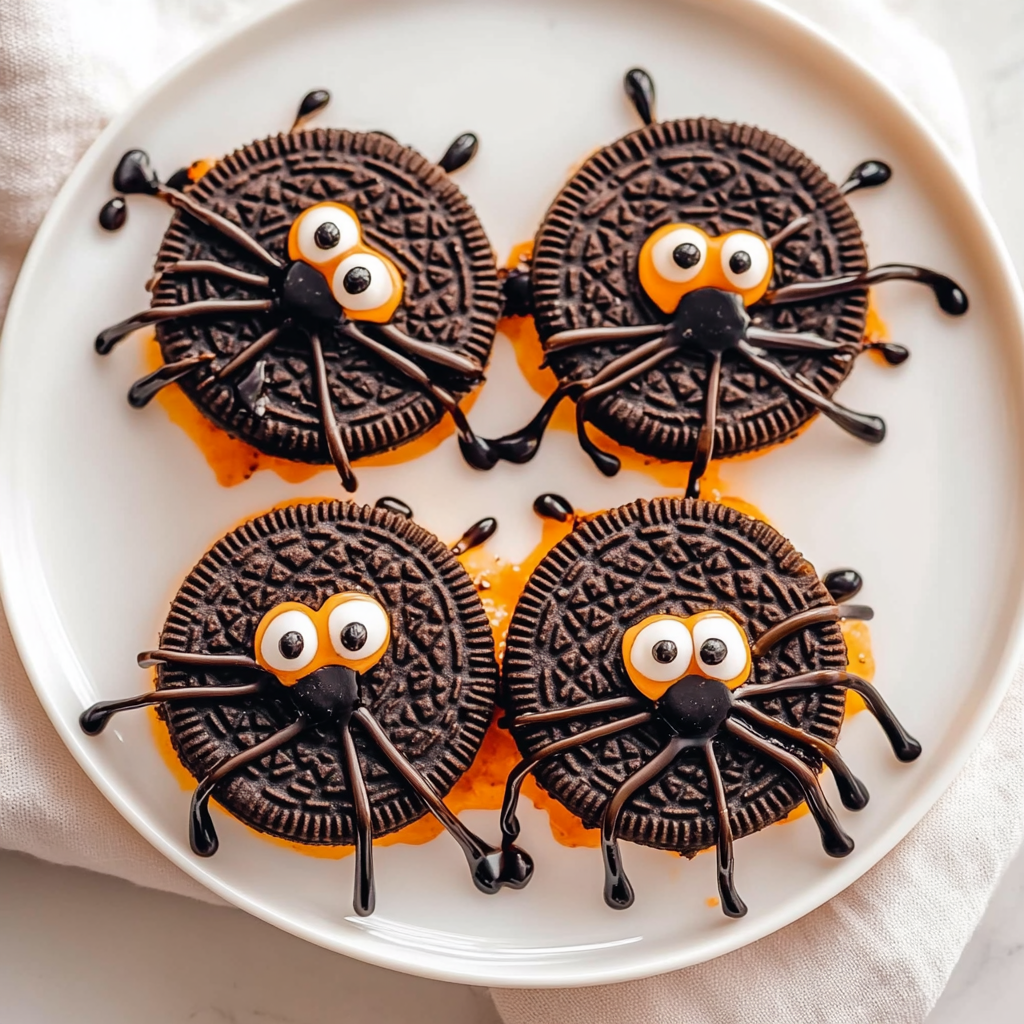
Next, break three pretzel sticks in half. Carefully twist each Oreo cookie to separate its two halves—make sure to keep the cream side intact! Insert the broken pretzel sticks into the cream side as spider legs. Drizzle about half a teaspoon of melted chocolate over the pretzel legs before placing the blank Oreo wafer back on top. This step secures everything together while adding an extra layer of deliciousness.
Step 3: Decorate Your Cookies
Now comes the fun part! Dip one side of each assembled cookie into the remaining melted chocolate. Once dipped, place a couple of candy eyeballs on top and sprinkle with colorful sprinkles. This adds not only flavor but also visual appeal, transforming each cookie into a spooktacular creation!
Step 4: Set and Enjoy
Finally, place your finished cookies in the fridge for at least ten minutes so that the chocolate can harden properly. Once set, these delightful Oreo Spider Halloween Cookies are ready to be enjoyed by all!
Pro Tips for Making Oreo Spider Halloween Cookies
Making these Oreo spider Halloween cookies can be a delightful experience, especially when you involve the kids! Here are some tips to ensure your cookie-making adventure goes smoothly and results in a spook-tacular treat.
– Use high-quality chocolate chips: The flavor of your chocolate will shine through, so opt for dairy-free chocolate chips that you love.
– Don’t rush the melting: Ensure the chocolate is fully melted and smooth. If it’s too thick, add a tiny bit more coconut oil to achieve the right consistency.
– Be gentle with the Oreos: When twisting apart the Oreos, do it slowly to avoid breaking them. A clean separation makes for better spider legs!
– Customize your spiders: Feel free to use different colored sprinkles or even swap out pretzel sticks for other crunchy treats, like bugles, for a fun twist.
– Get creative with eyes: You can use mini chocolate chips instead of candy eyeballs if that’s what you have on hand; it’ll give your spiders a different look.
How to Serve Oreo Spider Halloween Cookies
Presenting these cookies in a fun way can make them even more exciting for your Halloween gatherings. Here are some ideas to elevate your serving game.
Garnishes
– Use edible glitter: A sprinkle of edible glitter can add an enchanting sparkle to your spooky treats.
– Fresh mint leaves: A few mint leaves around your cookies can provide a pop of color and freshness.
Side Dishes
– Pumpkin spice donuts: These seasonal favorites complement the flavors of Halloween perfectly.
– Apple slices with caramel dip: A crunchy and sweet side that pairs well with your cookies.
– Ghost-shaped cheese crackers: Add some savory snacks alongside your sweet treats for balance.
Make Ahead and Storage
Preparing ahead can make hosting easier. These cookies store well, allowing you to enjoy the festivities without last-minute stress.
Storing Leftovers
– Store in an airtight container at room temperature for up to three days. They’ll stay fresh and delicious!
Freezing
– If you want to prepare them further in advance, freeze the assembled cookies in a single layer on a baking sheet. Once frozen solid, transfer them to a freezer-safe bag for up to one month.
Reheating
– To refresh slightly stale cookies, pop them in the microwave for 5–10 seconds before serving. This will help soften them up again.
FAQs
Here are some common questions about making Oreo spider Halloween cookies:
Can I use regular Oreos instead of Halloween-themed ones?
Yes! Regular Oreos will work just as well; however, using Halloween-themed ones adds extra fun and festivity.
How long do these cookies last?
When stored properly in an airtight container, these cookies will last up to three days at room temperature or one month in the freezer.
Can I make these gluten-free?
Absolutely! Simply use gluten-free Oreos and ensure any other ingredients are also gluten-free.
Final Thoughts
These Oreo spider Halloween cookies are not only easy to make but also incredibly fun and delicious! Whether you’re making them for a party or just enjoying time with family, they’re sure to be a hit. I encourage you to try this recipe and let your creativity shine—happy baking!
Oreo Spider Halloween Cookies
Ingredients
Method
- Melt the chocolate by adding chocolate chips and coconut oil to a small bowl and microwaving for about one minute until fully melted.
- Assemble the spiders by breaking three pretzel sticks in half, twisting apart the Oreo cookies, and inserting the pretzel sticks into the cream side as legs. Drizzle melted chocolate over the legs and place the blank Oreo wafer back on top.
- Decorate the cookies by dipping one side of each assembled cookie into the remaining melted chocolate, adding candy eyeballs and sprinkles on top.
- Set the cookies in the fridge for at least ten minutes to allow the chocolate to harden.