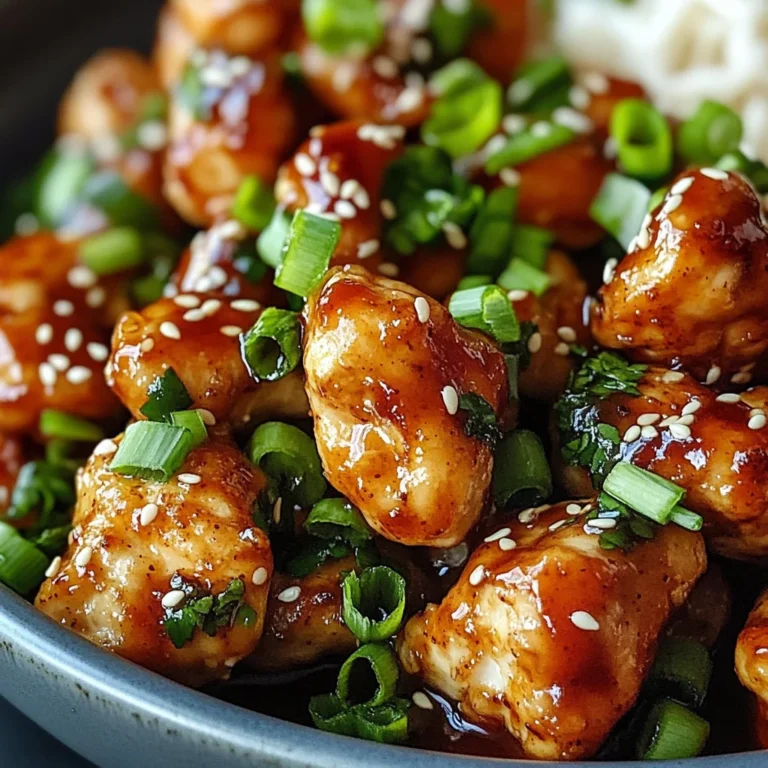
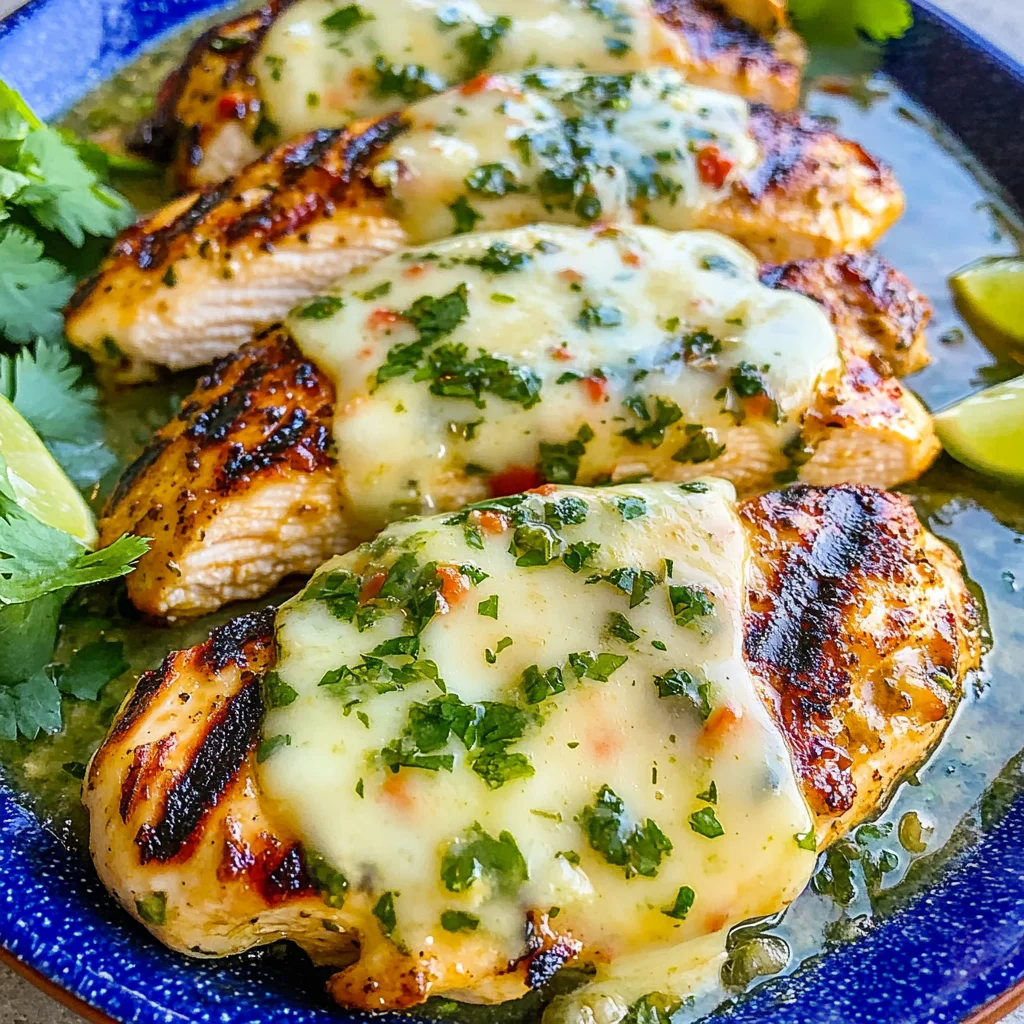
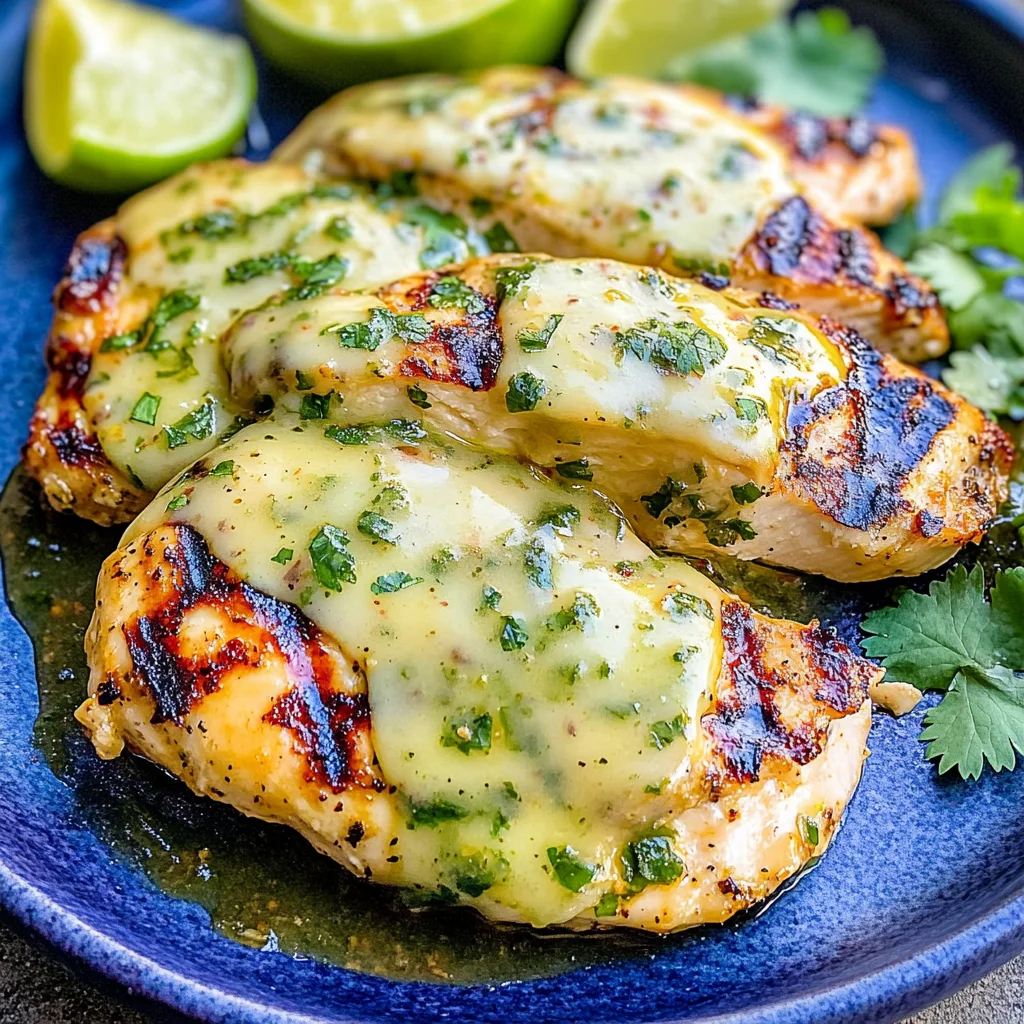
Grilled Salsa Verde Pepper Jack Chicken
There’s something utterly intoxicating about the warm embrace of summer, isn’t there? The sun-kissed days and balmy evenings call for gathering around the grill, sharing laughter and stories while the tantalizing aroma of food wafts through the air. One dish that perfectly embodies this spirit is Grilled Salsa Verde Pepper Jack Chicken. This is more than just a recipe; it’s a delightful journey into vibrant Tex-Mex flavors that brings joy to your table and warmth to your heart. As you take each bite, the juicy chicken meets the creamy pepper Jack cheese and zesty salsa verde in a symphony of flavors that dances across your palate. Trust me when I say, this dish will not only impress your guests but will also leave you with memories etched in flavor.
What makes this grilled chicken so special? It’s about the marinade—a beautiful blend of bold ingredients that infuse every inch of the chicken with flavor. The marriage of tangy salsa verde with olive oil and lime juice creates a liquid gold that transforms simple chicken breasts into a mouthwatering delight. Just imagine biting into a succulent piece of chicken, where the creamy cheese melts seamlessly over the top, and you taste that perfect balance between spice and richness. It’s truly extraordinary! Whether you’re preparing for a summer barbecue or seeking a quick weeknight meal, this recipe fits seamlessly into any occasion.
Grilled Salsa Verde Pepper Jack Chicken: A Flavorful Fiesta on Your Plate
Embarking on this culinary journey is not only about cooking; it’s about creating experiences that linger long after the last bite has been savored. The beauty of Grilled Salsa Verde Pepper Jack Chicken lies in its simplicity paired with bold flavors. You’ll find that it’s not just easy to prepare but also allows for creativity—feel free to serve it over salads, use it in tacos, or alongside grilled vegetables for an unforgettable meal.
Ingredients:
As we dive into our ingredient list, let’s take a moment to appreciate each component’s role in crafting this flavorful masterpiece. Each ingredient adds its unique touch to ensure your dish is memorable.
- 1 ½ pounds thin-sliced boneless skinless chicken breasts. Choosing thin-sliced chicken breasts is essential because they cook quickly and evenly on the grill, ensuring tenderness without drying out. When selecting your chicken, look for pieces that are firm and have a consistent color—this indicates freshness. If you can find organic options, they often provide better flavor as well!
- 12 ounces salsa verde. This zesty sauce is what truly elevates our dish from ordinary to spectacular! Salsa verde offers a bright acidity from tomatillos combined with fresh herbs like cilantro and green chili heat, creating layers of flavor in every bite. Opt for a high-quality brand or even better—make your own if you’re feeling adventurous! Homemade salsa verde allows you to control the ingredients and tailor it to your taste preferences.
- 3 tablespoons olive oil. Olive oil isn’t just a cooking fat; it serves as an emulsifier in our marinade that helps all those vibrant flavors stick to our chicken while keeping it moist during grilling. Extra virgin olive oil is ideal because its rich taste complements the other ingredients beautifully. Always reach for cold-pressed varieties when possible; they offer more robust health benefits and flavor.
- 2 tablespoons lime juice. Now let’s talk about brightness! Lime juice brings an essential zing to our marinade—it cuts through richness and enhances all those wonderful flavors at play here. Freshly squeezed lime juice is non-negotiable; bottled versions simply can’t match the vibrancy of freshly squeezed limes.
- 1 teaspoon cumin. This earthy spice adds depth and warmth to our dish, making every bite feel like a cozy hug from within! Cumin pairs beautifully with chicken and gives it that hint of smokiness reminiscent of summer barbecues. When buying cumin, consider whole seeds if you want maximum freshness—just toast them lightly before grinding for enhanced aroma!
- 1 teaspoon salt (or more, to taste). Salt is often overlooked but is truly one of the most crucial elements in any recipe! It amplifies flavors and balances sweetness or acidity present in dishes like ours. Start with one teaspoon but always taste as you go—you can always add more but never take it away!
- 1 teaspoon freshly ground black pepper. Freshly ground black pepper adds not only heat but complexity to our dish without overwhelming it. If you’re using pre-ground pepper, consider switching over; you’ll be amazed at how much more fragrant freshly ground pepper can be.
- 4 slices pepper Jack cheese (or as desired). Ahh, cheese—the glorious finishing touch! Pepper Jack provides that perfect creamy texture along with just enough heat to keep things exciting without overpowering your palate. Feel free to swap this out for Monterey Jack or cheddar if that’s what you have on hand!
- Fresh cilantro, finely minced (optional). Cilantro adds a lovely freshness when sprinkled on top before serving; it’s like adding confetti on your culinary creation! If you’re not a fan of cilantro due to its polarizing flavor profile (you either love it or hate it!), feel free to skip this step altogether.
- Lime wedges (optional, for serving). These little wedges are perfect for squeezing over each piece of grilled chicken right before savoring them—they brighten up everything on your plate!
Equipment You’ll Need:
Before we embark on this delicious adventure together, let’s gather our trusty kitchen companions—the equipment that will help us create magic on the grill! Having the right tools makes everything smoother and enhances your cooking experience immensely.
- Grill (Charcoal or Gas) – Whether you opt for charcoal or gas doesn’t matter as much as ensuring your grill is well-maintained and ready for action! A good quality grill allows for even heating which is crucial when cooking meats like chicken that benefit from consistent temperature control.
- Mixing Bowl – A large mixing bowl is essential for marinating our chicken properly; look for one that’s big enough so that all pieces can be coated evenly without overcrowding them.
- Tongs – These handy tools are perfect for flipping and removing our grilled chicken without piercing it—keeping those juices locked in! Choose sturdy tongs with good grip so you can handle hot foods safely.
- Meat Thermometer – An instant-read thermometer takes any guesswork out of ensuring our chicken reaches safe internal temperatures—this step cannot be overstated! Aim for 165°F; trust me—it’s worth investing in one if you plan on grilling regularly.
Now that we have all our ingredients and equipment ready, let’s dive into preparing our Grilled Salsa Verde Pepper Jack Chicken! Each step will guide you through creating something truly wonderful—all while keeping it fun and engaging!
Step 1: Create Your Flavorful Marinade
Begin by pouring 12 ounces of salsa verde into your large mixing bowl—watch how its vibrant green hue immediately brightens up your kitchen! Next up comes the olive oil; drizzle in those three tablespoons while visualizing how each component plays its part in harmonizing flavors during grilling time ahead. Then squeeze two tablespoons of fresh lime juice into the bowl—feel free to adjust according to personal preference if you’d like more zing—but remember: balance is key here! Sprinkle in one teaspoon each of cumin, salt, and freshly ground black pepper before whisking everything together until well combined—the aroma should start enveloping you now!
Step 2: Marinate Your Chicken
Once you’ve created that glorious marinade full of zestiness from lime juice infused salsa verde goodness mixed with earthy spices—all that’s left is adding those lovely thin-sliced boneless skinless chicken breasts into their flavorful bath! Make sure every piece gets coated generously by tossing them gently within—this infusion process isn’t merely about surface flavor; it’s truly about letting those spices penetrate deeply into each bite-sized morsel over time while marinating away happily together inside refrigerated bliss anywhere from thirty minutes up until two hours max if time permits! Don’t rush this step—it’s absolutely paramount for achieving juicy perfection come grilling time!
Step 3: Preheat Your Grill
While we wait patiently (and trust me—I know waiting can be tough), let’s focus on getting our grill ready! Preheat it over medium-high heat while keeping an eye out; aim between 375°F -450°F range ideally suited for optimal searing later on—this stage plays an important role too since higher temperatures help develop those beautiful char marks everyone loves seeing on grilled meats! As soon as preheating completes after around ten minutes or so depending upon type used—it’ll be time to move onto what comes next…
Step 4: Grill Those Breasts
With grill grates now sizzling hot beneath us—we’re finally ready! Carefully remove each marinated piece one by one from their flavorful soak before placing directly onto heated surface but don’t forget—we’ll discard leftover marinade afterward since raw poultry shouldn’t mingle back again post-cooking cycle here either way… Allow them some space apart (about two inches) so air can circulate freely around during cooking time which will ensure evenness throughout all sides involved here too… Grill those beauties roughly four-to-five minutes per side while checking internal temperature regularly until reaching safe mark mentioned earlier at 165°F…
Stay tuned as we continue along this path toward culinary bliss together—and oh boy—is there excitement waiting ahead once melted cheese tops off these glorious grilled creations soon enough…
Step 5: Let the Grill Sizzle to Life
Now that your grill is prepped and ready, it’s time to unleash the magic of high heat! Preheat your grill to medium-high heat, which should ideally be around 400°F to 450°F. This step is absolutely paramount; a hot grill creates those beautiful sear marks while sealing in the juices of our marinated chicken. You want that perfect golden-brown crust that adds texture and flavor to each bite. While the grill heats up, take a moment to visualize how this process transforms our ingredients: the salsa verde clinging lovingly to the chicken, infusing it with its vibrant zest as it cooks. This is where patience pays off, so trust me—don’t rush this stage!
Once you feel that anticipation building and the grill is hot enough, it’s time to remove the chicken from its tangy bath of marinade. Discard any remaining marinade; we don’t want to introduce any raw chicken juices back into our dish. Instead, place those beautifully marinated breasts right onto the grill grates. Listen for that satisfying sizzle! It’s like music—each piece singing as they hit the grill. Grill each breast for about 4-5 minutes on one side before flipping them over. You’ll know it’s time to turn them when you see those gorgeous char marks forming on the bottom—don’t flip too soon! Each minute on that heat builds a deeper flavor profile, creating that delicious caramelization that makes this dish shine.
Step 6: The Melting Moment
As you approach the final minutes of grilling, it’s time for one of my favorite parts—the arrival of pepper Jack cheese! Just about one minute before your chicken reaches perfection at an internal temperature of 165°F (a reliable kitchen thermometer is your best friend here), lay a slice of pepper Jack cheese over each piece. I can almost hear the cheese sighing as it begins to melt into creamy goodness! The combination of spice from the pepper Jack with its rich creaminess complements our zesty chicken wonderfully, creating an utterly intoxicating experience.
But why do we wait until just before finishing? Well, melting cheese at just the right moment allows it to become ooey-gooey without losing its structure completely; you don’t want it drenching all over your grill before you even get to taste it! Keep a close eye on it; after about one minute, you’ll see it starting to bubble and spread ever so slightly over the sides of each breast—this is precisely what we’re aiming for! If you’re feeling adventurous or want an added kick, consider topping with a few jalapeño slices right alongside the cheese for an extra burst of heat.
Step 7: Rest Your Chicken
Once your grilled salsa verde pepper jack chicken reaches that magical internal temperature and looks absolutely irresistible, carefully transfer each piece onto a clean plate or cutting board. Now comes one of my favorite steps that many tend to overlook: letting your chicken rest for about 5 minutes before digging in. Why is resting so important? When meat cooks, its juices move toward the surface due to heat; if you slice into it too soon, all those succulent flavors will escape like steam from a kettle.
By allowing your chicken some downtime, you’re giving those juices time to redistribute throughout the meat—this means every bite will be profoundly satisfying and juicy rather than dry and disappointing. During this time, take a moment to breathe in those lovely aromas wafting from your creation; isn’t cooking such a sensory delight? Trust me on this one: patience truly cultivates flavor!
Step 8: Plating Perfection
Now that you’ve allowed your grilled salsa verde pepper jack chicken some well-deserved rest, let’s talk presentation! I love serving this dish in a way that showcases its vibrant colors and tantalizing textures. Place each piece on a large platter or individual plates; don’t hesitate to garnish with freshly minced cilantro if you’re using it—it adds such a bright pop against the green hues of salsa verde and melted cheese.
For an unforgettable experience, consider serving with lime wedges on the side—squeezing fresh lime juice over your chicken just before taking that first bite elevates everything! It adds brightness and enhances all those bold flavors we’ve worked so hard to coax out during grilling. And remember, whether you’re making tacos with these beauties or enjoying them atop a fresh salad alongside grilled veggies, this dish brings together friends and family around the table like nothing else can.
Putting It All Together
And there you have it—the complete recipe for our Grilled Salsa Verde Pepper Jack Chicken! Each step was crafted with care and intention; I promise you’ll impress everyone at dinner tonight with this easy yet utterly extraordinary meal. From marinating in zesty goodness to achieving perfectly grilled results topped with luscious cheese, every bite reflects heartwarming flavors reminiscent of sunny Tex-Mex days spent surrounded by loved ones!
So go ahead—grab those ingredients and fire up that grill because this dish deserves center stage at your next gathering or weeknight dinner. Enjoy every moment spent creating something beautiful in your kitchen because food is not just about nourishment; it’s about sharing joy and love through every flavorful bite!
Storage and Enjoyment Tips for Your Grilled Salsa Verde Pepper Jack Chicken
Now that your Grilled Salsa Verde Pepper Jack Chicken is sizzling on the grill and filling your kitchen with an utterly intoxicating aroma, it’s time to think about how to enjoy every last bite of this delicious creation. Trust me, this dish is not just a one-time delight; it can transform into delightful leftovers that continue to impress throughout the week. Whether you’re planning a cozy family dinner or packing lunch for work, knowing how to store and reheat your grilled chicken will ensure you savor those flavors again and again. I promise you, the joy of rediscovering this dish later will be just as fulfilling as that first bite.
Storing Leftover Grilled Salsa Verde Pepper Jack Chicken
To preserve the scrumptiousness of your Grilled Salsa Verde Pepper Jack Chicken, start by letting it cool completely before storing. This step is crucial because allowing steam to escape helps keep your chicken from becoming soggy—nobody wants that! Place your perfectly grilled chicken in an airtight container; glass containers are my personal favorite due to their durability and ability to maintain flavor without imparting any unwanted tastes. Stored properly in the refrigerator, your chicken will remain delightful for up to 4 days. For an extra tip, if you’re worried about moisture loss, consider adding a slice of bread inside the container—this little trick works wonders at absorbing excess humidity while keeping your chicken juicy. When you’re ready for round two, simply reheat it in the oven at 350°F until warmed through or toss it onto a skillet over medium heat for a quick rejuvenation.
Freezing Grilled Salsa Verde Pepper Jack Chicken for Later
If you’re looking to extend the life of your culinary masterpiece even further, freezing is a fantastic option! Just make sure your chicken has cooled completely before wrapping it tightly in plastic wrap or placing it in freezer-safe bags—removing as much air as possible is absolutely paramount here to prevent freezer burn. When stored correctly, you can enjoy this zesty delight for up to 3 months! The beauty of freezing is not only does it allow for meal prep convenience, but when you’re ready to indulge again, simply let the chicken thaw in the fridge overnight and then reheat as mentioned above. Imagine pulling out perfectly seasoned chicken from your freezer on a busy weekday; it’s like having a taste of summer grilling at your fingertips year-round!
With these storage tips in hand, you can relish each bite of your Grilled Salsa Verde Pepper Jack Chicken time and time again!