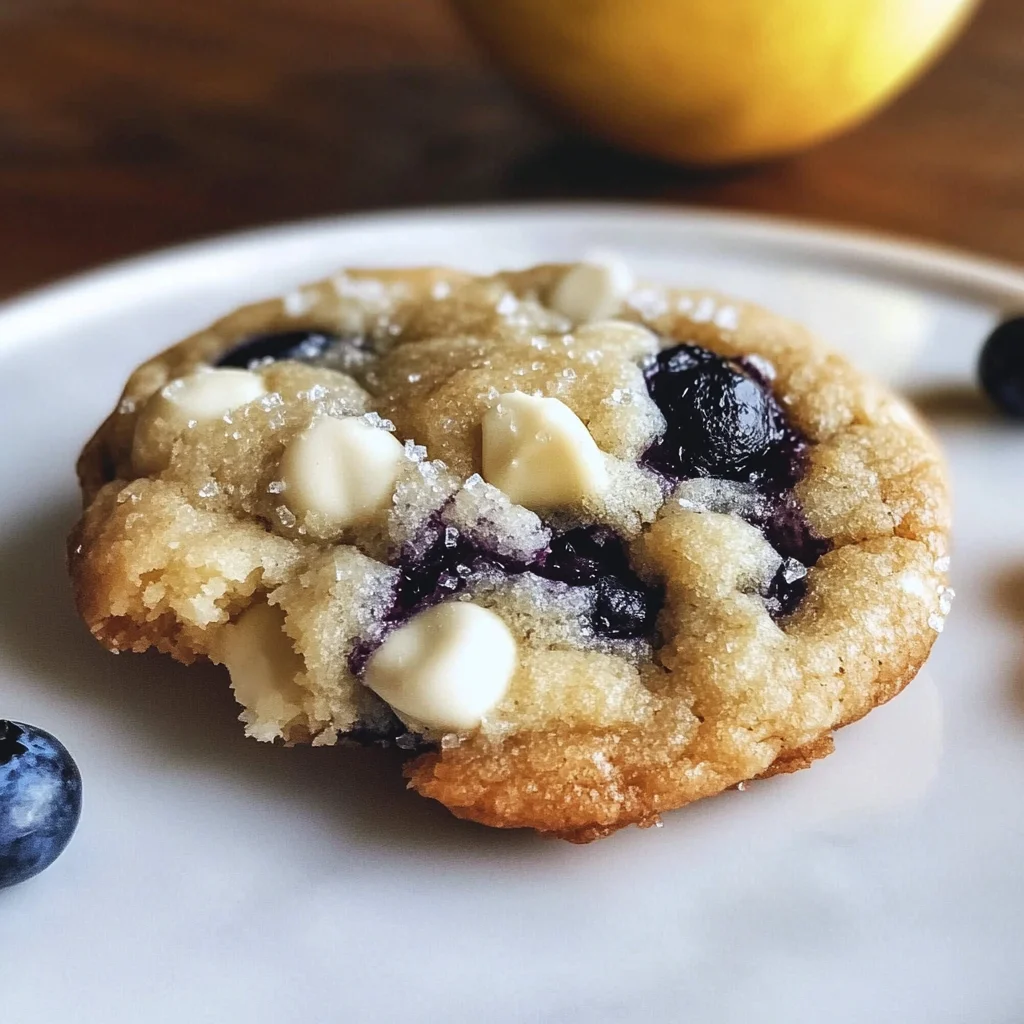
Blueberry Lemon Cookies
There’s something truly magical about baking that transcends mere sustenance; it’s an experience that weaves together memories, emotions, and the promise of warmth. As I reflect on my own culinary journey, I find that some recipes are more than just a collection of ingredients. They’re bridges connecting cherished moments with family and friends, transporting us to sunlit kitchens filled with laughter and sweet aromas. One such recipe is for Blueberry Lemon Cookies—a delightful concoction that captures the essence of summer in each bite. With their light, zesty lemon flavor, juicy blueberries bursting from soft cookie dough, and a hint of sweet white chocolate chips, these cookies aren’t just a treat; they’re an invitation to pause, savor, and share joy.
When you take that first bite of a Blueberry Lemon Cookie, you’ll feel as if you’ve taken a stroll through a sun-drenched orchard—each mouthful bursting with vibrant flavors. The sugar coating gives them a delightful crunch while the inside remains tender and chewy. This recipe has been a beloved staple in my kitchen for years, often making an appearance at gatherings or as a comforting reward after a long day. I promise you, once you share these cookies with your loved ones, they’ll be asking for the recipe themselves!
Blueberry Lemon Cookies: A Delightful Summer Indulgence
Let’s dive into this scrumptious recipe! These Blueberry Lemon Cookies are not only easy to make but also incredibly rewarding. With just the right balance of sweetness and tartness, they are perfect for any occasion—whether it’s a cozy afternoon tea or an outdoor picnic with friends. You’ll love how the combination of flavors dances on your palate, leaving you craving another bite.

Ingredients:
As we embark on this delicious adventure together, let’s explore the ingredients that will transform simple pantry staples into extraordinary Blueberry Lemon Cookies. Each component plays an essential role in creating the symphony of flavors and textures that makes these cookies so special.
- ¾ cup (1 ½ sticks or 170g) unsalted butter, softened to room temperature. Using room temperature butter is absolutely paramount for achieving that light and fluffy texture we’re aiming for in our cookies. When butter is too cold, it won’t cream properly with the sugar; this crucial step creates air pockets that give your cookies their lovely rise. On the other hand, if your butter is melted or overly soft, you’ll end up with flat cookies instead of those delightful puffy morsels we all love.
- 4 ounces cream cheese, at room temperature. Adding cream cheese to our cookie dough lends richness and moisture while also contributing to that wonderfully soft interior texture we want in every bite. Look for full-fat cream cheese for the best results—it makes all the difference! If you’re looking for alternatives due to dietary restrictions or preferences, consider using a plant-based cream cheese spread; just ensure it has a similar fat content.
- 1 ¾ cups granulated sugar, plus an additional 5 tablespoons for rolling the cookie dough balls in before baking. Sugar not only sweetens our cookies but also helps create that delightful crisp exterior when rolled before baking—trust me when I say this extra step is non-negotiable! When selecting sugar, opt for fine granulated sugar as it dissolves better in creaming with butter and cream cheese.
- 1 large egg provides structure to our cookies while adding moisture and richness. The egg acts as an emulsifier here—binding everything together beautifully so each bite feels cohesive rather than crumbly.
- 1 teaspoon vanilla extract elevates the flavor profile of our cookies immensely by adding warmth and depth to the overall taste experience. Be sure to use pure vanilla extract instead of imitation; quality matters here! It truly enhances every other flavor without overpowering them.
- 2 teaspoons lemon extract, along with 2 tablespoons lemon juice and 2 tablespoons lemon zest, create that bright citrusy flavor which defines our cookies! The zest contains essential oils that pack a punch of lemony goodness; don’t skip it! Freshly squeezed lemon juice balances out sweetness while bringing freshness to each cookie.
- 1 teaspoon salt may seem like an odd addition in sweets but trust me—it’s crucial! Salt enhances all flavors present in baked goods; it brings out sweetness while balancing acidity from our citrus ingredients.
- ½ teaspoon baking soda acts as our leavening agent here—helping lift those doughy clouds into gorgeous golden rounds! It’s important to ensure your baking soda is fresh because expired leavening agents can result in flat cookies lacking that enticing lift we seek.
- 3 cups all-purpose flour, measured accurately (I recommend using a kitchen scale if you have one). Properly measuring flour is critical since too much can weigh down your cookies and yield tough results rather than tender bites of bliss.
- 1 cup white chocolate chips add creamy sweetness throughout our batch—the perfect complement to tart blueberries and zesty lemons! If you’re feeling adventurous or have dietary restrictions against dairy products, consider using dairy-free white chocolate chips as an alternative.
- 1 cup fresh blueberries are simply divine—their natural sweetness bursts forth during baking creating little pockets of juicy goodness throughout each cookie! Always choose plump berries when possible; they not only look appealing but also taste better!
Equipment You’ll Need:
Before we dive into mixing up this delectable dough, let’s talk about some essential tools that’ll make your baking journey smoother and more enjoyable. While they aren’t ingredients, having the right equipment at hand makes all the difference when crafting these delightful Blueberry Lemon Cookies!
- Mixing bowls (large & medium) – A good set of mixing bowls allows you to combine ingredients seamlessly without worrying about spills or overflow during mixing processes. Choose glass or stainless steel varieties as they hold up well against heat during mixing phases!
- Electric mixer (stand mixer or hand mixer) – Using an electric mixer saves time and effort when creaming butter with sugar—this process creates air pockets essential for achieving lightness in baked goods! If you don’t have one handy yet still want great results? A sturdy whisk works too—it may take longer but can be quite satisfying!
- Cookie scoop (or tablespoon) – An essential tool for portioning out dough evenly into perfect little balls ready for baking without hassle! A scoop ensures uniformity across your batch resulting in even cooking times from start to finish!
- Baking sheets (2) – Investing in heavy-duty baking sheets can prevent warping during high temperatures ensuring even heat distribution while preventing burnt bottoms on those scrumptious treats!
Step 1: Preheat & Prepare
To kick off this exciting process, first preheat your oven to 350 degrees Fahrenheit while either greasing two baking sheets or lining them with parchment paper—a step you won’t want to overlook! Preparing your pans ahead allows any residual coldness from refrigeration methods applied later on not interfere with how beautifully these cookies will bake up later on! Cream together the softened butter along with 1¾ cups granulated sugar alongside cream cheese until smooth—this process known as creaming is absolutely crucial because it incorporates air into our mixture giving rise during baking time! Aim for about two minutes or until fluffy—don’t rush this step; trust me—it’s worth every second spent waiting for fluffy perfection!
Step 2: Add Wet Ingredients
Once you’ve achieved that dreamy consistency through creaming processes mentioned earlier add in one egg followed by vanilla extract along with both lemon extract AND juice plus zest—we’re building layers upon layers of flavor here folks! Beat everything together vigorously until fully combined—this should take no more than one minute at most! Each element contributes its unique essence transforming simple cookie dough into something extraordinary through harmonious balance between sweetness from sugars paired beautifully alongside tanginess brought forth by zesty citrus notes dancing playfully across palates awaiting those first bites…
Step 3: Combine Dry Ingredients
Now comes time where we combine our dry elements into this glorious mixture—but remember: gently does it! In another bowl mix together salt along with flour plus baking soda until well blended—this ensures even distribution throughout cookie batter preventing any surprises later down line due uneven clumps forming whilst mixing dough directly together… We wouldn’t want pockets filled solely salt now would we?! Slowly incorporate dry mix by hand into wet components taking care not overmix; aim merely until flour disappears completely within sight leaving behind soft luscious mass waiting patiently before next steps unfold…
Step 4: Fold In Chocolate & Berries
At last—the moment we’ve been waiting for has arrived: it’s time fold those heavenly morsels chocolate chips paired alongside fresh blueberries gently into prepared batter ensuring none gets mashed up during process taking care maintain their beautiful integrity intact while still infusing entire batch flavor profiles beyond compare… This gentle folding technique preserves both shape/texture ensuring everyone gets equal share delightful fruitiness alongside creamy sweetness whenever indulging each delicious bite produced thereafter—not forgetting value added health benefits brought forth naturally occurring antioxidants found within berries themselves…
These initial steps will set you firmly on course towards creating unforgettable Blueberry Lemon Cookies—the kind people rave about long after they’ve left your kitchen… Stay tuned as I’ll guide further through remaining stages leading up final product ready serve guests expecting nothing short extraordinary treat worthy sharing amongst loved ones everywhere too…
Step 5: The Magic of Freezing the Dough
Once you’ve carefully rolled your cookie dough into beautiful little spheres, it’s time for a crucial step that will elevate your Blueberry Lemon Cookies from ordinary to extraordinary: freezing the dough. This isn’t just a suggestion; it’s absolutely paramount to achieving that perfect cookie texture! By placing the dough balls in the freezer for at least one hour, you’re allowing the fats—specifically the butter and cream cheese—to solidify. This brief moment of chill will help prevent your cookies from spreading too thin while baking, which is a common pitfall in cookie-making. Imagine biting into a cookie that holds its shape beautifully yet melts in your mouth—this is the transformative power of patience!
As you pop those little dough balls into the freezer, take a moment to appreciate their vibrant colors—the deep blues of the blueberries peeking through the buttery yellow of the lemon-infused dough. It’s such an inviting sight, isn’t it? I promise you, this step is worth every minute you wait. If you skip this freezing phase, you’ll end up with cookies that look more like puddles than delicious treats, and nobody wants that! So go ahead and set a timer for an hour; use this time to sip on some tea or coffee while dreaming about how amazing these cookies will be.
Step 6: Prepping for Baking Bliss
Now that your cookie dough is nice and chilled, it’s time to preheat your oven to 350 degrees Fahrenheit. Setting your oven at just the right temperature is crucial; this ensures even baking throughout and helps develop those lovely golden edges we all love. While that oven works its magic, let’s prepare our baking sheets. You can either grease them lightly or line them with parchment paper—both methods work wonderfully, but parchment paper adds an extra layer of ease when it comes time to transfer those freshly baked cookies.
As you get ready to bake, take a moment to visualize what you want those cookies to look like—golden on the edges but soft and pillowy in the middle. It’s important to keep this vision in mind as we move forward! Once your oven has reached that ideal temperature, pull out those dough balls from their chilly retreat and give each one a gentle roll in granulated sugar before placing them on your prepared baking sheets. This sugary coat not only enhances sweetness but also contributes to that delightful crispy exterior we crave.
Step 7: Baking Your Perfect Cookies
With your dough balls lined up perfectly on the baking sheets—give them enough space (about 2 inches apart) so they can spread without crowding each other—it’s finally time to bake! Slide those sheets into the oven and set your timer for 13-16 minutes. Keep a close eye on them as they bake; visual cues are key here! You want to look for edges that are just barely turning golden brown while ensuring the centers remain soft and slightly undercooked when you pull them out. Remember, these cookies will continue cooking on the baking sheet after being removed from the oven due to residual heat.
The aroma wafting through your kitchen during this time is utterly intoxicating—a heavenly blend of sweet blueberries mingling with zesty lemon notes fills the air. It’s like a warm hug on a plate! As soon as they come out of the oven, resist any urge to dig in immediately; I know it’s tough! Trust me on this one—allowing them to rest on their warm sheet for about 10 minutes is essential for achieving that perfect texture. This resting period allows them to firm up slightly while maintaining their soft interior. What makes these cookies truly special is that balance between chewy and crispy, so patience here pays off big time!
Step 8: The Final Touchdown
After those agonizing ten minutes (I feel ya!), it’s finally time to transfer your glorious Blueberry Lemon Cookies onto a cooling rack. This step might seem simple, but it serves an important purpose: allowing air circulation around each cookie helps prevent sogginess and keeps that delightful crispiness intact. Gently slide a spatula under each cookie and place them onto the rack with care—you don’t want any of those juicy blueberries bursting out prematurely!
As they cool down, take a moment to admire their beauty—their golden edges glimmering under kitchen light and their soft centers calling out for enjoyment. At this point, if you’re feeling indulgent (and who wouldn’t?), consider drizzling some melted white chocolate over top for an extra touch of decadence—it’s like icing on the cake! The creamy sweetness complements both lemon and blueberry flavors beautifully; trust me when I say it elevates these cookies from good to utterly extraordinary.
Bringing Your Blueberry Lemon Cookies Together
And there you have it! Your journey through making Blueberry Lemon Cookies has led you here—to soft, flavorful morsels bursting with sunny notes of lemon and juicy blueberries wrapped in sweet white chocolate goodness. Each bite will be profoundly satisfying—a true testament to what happens when simple ingredients come together with love and attention.
I hope you enjoy every moment spent savoring these cookies as much as I do when I share them with my friends and family. They are perfect for any occasion—whether it’s a cozy afternoon tea or simply because life should be celebrated daily! Remember this recipe whenever you’re craving something bright and joyful; you’ll always have a taste of sunshine waiting for you in every bite!
Storage and Enjoyment Tips for Your Blueberry Lemon Cookies
Now that your kitchen is filled with the delightful aroma of freshly baked Blueberry Lemon Cookies, it’s time to savor every bite! But let’s be honest, who can resist the temptation to save a few for later? Storing these cookies properly will ensure that they remain soft and delicious, ready to brighten your day whenever you need a sweet treat. So, let’s dive into how you can keep these gems fresh and flavorful!
Storing Leftover Blueberry Lemon Cookies
To keep your Blueberry Lemon Cookies in perfect shape, I recommend using an airtight container—this is non-negotiable for maintaining that luscious softness we all love. You can store them at room temperature for about 3-5 days; however, if you want to extend their lifespan, consider refrigerating them where they can last up to a week. A little pro tip is to place a slice of bread in the container with the cookies; this little trick helps absorb excess moisture and keeps them wonderfully soft! After storage, you’ll find that the flavors meld beautifully, creating an even more profound symphony of taste in each bite. If you’re feeling nostalgic, a quick reheat in the microwave for about 10 seconds will make them feel freshly baked again—just enough time to bring back that warm, gooey magic.
Freezing Blueberry Lemon Cookies for Later
If you’re like me and believe that these cookies deserve a permanent spot in your life, freezing them is an excellent option. To freeze your delightful creations properly, just place the cooled cookies in a single layer on a baking sheet and pop them in the freezer until firm. Once frozen solid, transfer them to a freezer-safe bag or container. Trust me when I say they’ll stay fresh for up to three months without losing any of their charm! The beauty of having these cookies on standby is unparalleled; imagine pulling out a couple from the freezer whenever a craving strikes or when unexpected guests arrive. Just let them thaw at room temperature or give them a quick zap in the microwave before serving—it’s all about that convenience factor!
Let’s wrap up this section with excitement: whether enjoyed immediately or savored later, your Blueberry Lemon Cookies are destined to bring joy and sweetness into everyday moments!
Blueberry Lemon Cookies
Indulge in bright and flavorful Blueberry Lemon Cookies! Soft centers meet crispy edges—try this delightful recipe today!
- Prep Time: 20 minutes
- Cook Time: 16 minutes
- Total Time: 36 minutes
- Yield: Approximately 24 cookies 1x
- Category: Dessert
- Method: Baking
- Cuisine: American
Ingredients
- ¾ cup unsalted butter, softened
- 4 ounces cream cheese, softened
- 1 ¾ cups granulated sugar, plus extra for rolling
- 1 large egg
- 1 teaspoon vanilla extract
- 2 teaspoons lemon extract
- 2 tablespoons lemon juice
- 2 tablespoons lemon zest
- 3 cups all-purpose flour
- 1 teaspoon baking soda
- ½ teaspoon salt
- 1 cup fresh blueberries
- 1 cup white chocolate chips
Instructions
- Preheat your oven to 350 degrees Fahrenheit and prepare two baking sheets by greasing or lining them with parchment paper.
- In a large bowl, cream together softened butter, cream cheese, and sugar until fluffy.
- Beat in the egg, vanilla extract, lemon extract, lemon juice, and lemon zest until well combined.
- In a separate bowl, mix flour, baking soda, and salt; gradually add to the wet mixture until just combined.
- Gently fold in blueberries and white chocolate chips.
- Roll dough into balls and coat with granulated sugar before placing on prepared baking sheets about 2 inches apart.
- Freeze the dough balls for at least one hour before baking for optimal texture.
- Bake for 13-16 minutes or until edges are golden brown but centers remain soft. Allow cookies to cool on the sheet for about 10 minutes before transferring to wire racks.
Nutrition
- Serving Size: 1 cookie
- Calories: 140
- Sugar: 10g
- Sodium: 50mg
- Fat: 7g
- Saturated Fat: 4g
- Unsaturated Fat: 2g
- Trans Fat: <0g
- Carbohydrates: 17g
- Fiber: <1g
- Protein: <2g
- Cholesterol: 15mg