High Protein Frozen Peanut Butter Greek Yogurt Bites
There’s something utterly magical about creating frozen treats, especially when they’re as wholesome and delicious as these High Protein Frozen Peanut Butter Greek Yogurt Bites. Picture this: a warm afternoon, the sun drenching everything in golden light, and you reach into your freezer to pull out a little bite of bliss. Each piece is a delightful burst of creamy peanut butter goodness, perfectly balanced by a hint of sweetness from maple syrup and the rich indulgence of dark chocolate. It’s not just food; it’s an experience, a celebration of flavors that dance together in perfect harmony. These bites are more than just a snack; they are a bridge connecting healthful choices with those sweet moments we cherish. I promise you, once you try them, they’ll become a staple in your kitchen.
I’ve always been captivated by how simple ingredients can come together to create something truly extraordinary. The combination of Greek yogurt and powdered peanut butter brings not only high protein but also that satisfying creaminess that makes each bite feel indulgent while nourishing your body at the same time. It’s that beautiful contrast—rich yet light, sweet yet subtly salty—that makes these bites so irresistible. Whether you’re enjoying them as a post-workout treat or just need something to satisfy your sweet tooth without the guilt, these High Protein Frozen Peanut Butter Greek Yogurt Bites will never disappoint. Trust me on this; they’ve become my go-to snack for any occasion!
High Protein Frozen Peanut Butter Greek Yogurt Bites: A Healthy Indulgence
Let’s dive right into this wholesome recipe! Making these delightful bites is not only incredibly easy but also fun—like creating little pieces of joy in your kitchen. Imagine combining creamy textures with crunchy chocolate chips, all while knowing that every bite contributes positively to your wellness journey. As we embark on this culinary adventure together, I encourage you to savor each moment—this is more than just cooking; it’s about crafting something special that nourishes both body and soul.
Ingredients:
Before we get our hands sticky with peanut butter goodness, let’s gather our ingredients. Each one plays a crucial role in elevating our High Protein Frozen Peanut Butter Greek Yogurt Bites from simple snacks to extraordinary treats.
- 1/2 cup Greek yogurt (full fat). This ingredient is absolutely paramount! Full-fat Greek yogurt adds that luscious creaminess we all crave while being packed with protein—a wonderful bonus for those looking to stay full longer or build muscle. When selecting your yogurt, look for brands without added sugars or artificial flavors; the quality will shine through in your final product. Plus, the tangy flavor beautifully complements the sweetness of the other ingredients!
- 1/4 cup powdered peanut butter (like PB Fit or PB2). Now this is where we really amp up our peanut flavor without adding excessive fat! Powdered peanut butter provides all the nutty goodness we love but with fewer calories than traditional peanut butter. It’s made from roasted peanuts that have been pressed to remove most of their oil before being ground into a fine powder, which means you’re getting concentrated protein with less guilt! If you’re looking for alternatives due to allergies or preferences, feel free to play around with almond or cashew powder.
- 1 tablespoon creamy peanut butter. Here’s where we introduce some heavenly richness! A touch of creamy peanut butter ties everything together perfectly; it enhances flavor depth and adds texture that truly elevates each bite to divine status. When choosing your peanut butter, aim for natural varieties with minimal ingredients—just peanuts and maybe a pinch of salt—to avoid any unnecessary additives.
- 1/2 tablespoon maple syrup. Ahh, liquid gold! Maple syrup not only provides natural sweetness but also gives these bites an earthy undertone that pairs beautifully with peanut flavors. Opting for pure maple syrup rather than pancake syrup makes all the difference in taste and quality; you’ll notice its complex flavor profile shining through every time you take a bite!
- 1/2 cup dark chocolate chips (such as Lily’s). Chocolate lovers rejoice! Dark chocolate chips are what make these bites truly irresistible—their slightly bitter notes enhance the sweetness while providing antioxidants beneficial for health. Lily’s chocolate chips are sugar-free if you’re watching your sugar intake; however, regular dark chocolate works beautifully too! Just ensure it’s at least 70% cocoa for that rich flavor.
- 1 teaspoon coconut oil. This ingredient acts like magic glue in our recipe—it helps create a smooth coating when melting the chocolate chips while adding subtle tropical notes to each bite! Coconut oil solidifies when chilled and melts wonderfully when heated, making it ideal for achieving that perfect drizzly texture over our yogurt mixture.
- Flaky sea salt for topping (optional). A sprinkle of flaky sea salt is optional but highly recommended! This non-negotiable step enhances all the flavors present in this recipe—it’s like an orchestra coming together where every note shines brighter against its backdrop.
Equipment You’ll Need:
Having the right tools at your disposal makes whipping up these delightful bites smoother and even more enjoyable. Think of them as essential partners on this culinary journey—we’re creating something wonderful together!
- Mixing bowl – A sturdy mixing bowl is vital because it allows you enough space to blend all your ingredients thoroughly without fear of spillage! Whether you choose glass or stainless steel depends on personal preference; glass offers visibility to check consistency while mixing.
- Whisk or spatula – You’ll need either a whisk or spatula for mixing everything together seamlessly—this step ensures there are no lumps left behind in our creamy yogurt mix! A whisk creates airiness if used vigorously, while a spatula can help fold ingredients gently without losing too much volume.
- Silicone muffin tray or mini ice cube tray – These trays are fantastic because they make removing those frozen bites so much easier! The flexible material allows for effortless popping out once frozen solid—a non-stick option ensures nothing gets left behind.
- Microwave-safe bowl – For melting chocolate chips elegantly without burning them—using short bursts helps control temperature effectively here!
Now that we have gathered our ingredients and equipment together like dear friends meeting up for coffee, let’s move onto preparing those High Protein Frozen Peanut Butter Greek Yogurt Bites!
Preparing the High Protein Frozen Peanut Butter Greek Yogurt Bites
Step 1: Create Your Creamy Base
First things first: let’s mix up that luscious yogurt base that will be the heart and soul of our bites! In your mixing bowl, combine 1/2 cup full-fat Greek yogurt, 1/4 cup powdered peanut butter, 1 tablespoon creamy peanut butter, and 1/2 tablespoon maple syrup. I urge you not to rush this step—take your time blending these ingredients until they’re fully incorporated into one harmonious mixture. You want everything well combined because each spoonful should deliver an explosion of flavor that sings sweetly on your palate! Use either a whisk if you’re feeling energetic or simply grab that trusty spatula—you’re aiming for smoothness here without any lumps left behind.
Step 2: Prepare Your Chocolate Coating
While your creamy base is coming together beautifully, let’s turn our attention towards melting those dark chocolate chips mixed with coconut oil for drizzling perfection later on! In a microwave-safe bowl (or small saucepan), combine 1/2 cup dark chocolate chips with 1 teaspoon coconut oil—the oil will help achieve fluidity so it glides effortlessly over our mixture later on! Microwave in short bursts (about 20 seconds at first) until melted completely—give it good stirring between intervals until smooth consistency develops.
Step 3: Assemble Your Treats
Now comes the fun part—let’s assemble those glorious bites! Grab your silicone muffin tray or mini ice cube tray, whichever you’ve chosen will work wonders here—and begin spooning dollops of that creamy yogurt mixture into each cavity until filled about halfway up; don’t overfill them just yet since we still have room left for delicious melted chocolate goodness on top! Using an offset spatula can help level off each layer nicely if you desire—it all depends on how neat you want them to look!
Step 4: Drizzle With Chocolate Bliss
Once every cavity has received its fair share of yogurt delightfulness, it’s time to drizzle those melted chocolate and coconut oil mixtures generously over each one using either spoon or piping bag (if feeling fancy!). Ensure every corner gets coated since this part truly brings everything together into one cohesive treat—you want those little nooks filled with rich chocolaty goodness! If desired sprinkle lightly atop flaky sea salt now too—it accentuates sweetness beautifully!
Stay tuned as we continue crafting these delectable treats—I promise we’re almost there!
Step 5: Mixing the Creamy Dream
Now that you have all your ingredients gathered, it’s time to create the luscious, creamy mixture that will form the base of our High Protein Frozen Peanut Butter Greek Yogurt Bites. Begin by placing 1/2 cup of full-fat Greek yogurt into a medium mixing bowl. There’s something truly delightful about using full-fat yogurt; it lends a rich, velvety texture that elevates this treat from merely good to utterly intoxicating. Next, add in 1/4 cup of powdered peanut butter—brands like PB Fit or PB2 work wonderfully here. This ingredient is pivotal because it brings that unmistakable peanut butter flavor without the heaviness of traditional peanut butter, allowing us to keep the protein high while reducing excess fat.
Now, scoop out 1 tablespoon of creamy peanut butter and stir it into your bowl. I promise you, this addition is where the magic happens! The combination of powdered and creamy peanut butter creates a symphony of flavors and textures that dance on your palate. Then, drizzle in 1/2 tablespoon of maple syrup for a touch of natural sweetness. This step is non-negotiable; the maple syrup not only adds sweetness but also enhances the overall depth of flavors with its warm, caramel-like notes. Mix everything together well until it transforms into a smooth, cohesive blend—this should take just a couple of minutes. Be sure to scrape the sides of the bowl to incorporate every bit because we want every bite to be as delicious as possible!
Step 6: Folding in Chocolate Bliss
Once your yogurt mixture is beautifully combined, it’s time for one of my favorite parts—adding chocolate! In a microwave-safe bowl, combine 1/2 cup of dark chocolate chips with 1 teaspoon of coconut oil. The coconut oil is crucial here; it helps the chocolate melt smoothly and gives it that glossy finish we all love when it cools down. Microwave them in 20-second intervals until they’re almost fully melted. It’s essential to stir after each interval because residual heat will continue melting the chocolate without burning it—a common pitfall in melting chocolate! You want a perfectly silky consistency that drips like liquid gold.
After you’ve achieved that beautiful melted chocolate concoction, set it aside to cool slightly while you prepare to assemble your bites. This cooling period allows us to avoid any unpleasant melting when we dip our yogurt bites later on—trust me on this! While waiting for the chocolate to cool, give your yogurt mixture another quick stir; this ensures everything remains evenly mixed and ready for action.
Step 7: Forming Perfect Bites
With your mixtures ready and waiting, it’s time to form these little bites of heaven! Grab a silicone ice cube tray or mini muffin tin—both work wonderfully for shaping these treats. Using a spoon or small cookie scoop, carefully fill each compartment with the Greek yogurt mixture until they’re about three-quarters full. This portion size is important—a little expansion occurs during freezing due to water content in yogurt—so leaving some room is absolutely paramount for achieving perfectly formed bites.
As you fill each mold, take a moment to admire how creamy and inviting this mixture looks; I often find myself daydreaming about how delicious they’ll be once frozen! After filling all compartments, gently tap the tray on your countertop; this helps remove any air bubbles trapped inside and ensures an even surface on top—something vital if you want those gorgeous bites to look as tantalizing as they taste!
Step 8: Drizzling Chocolate Heaven
Now comes one of my favorite steps—the decadent drizzle! Once you’ve filled each mold with yogurt goodness, it’s time to bring back that melted chocolate masterpiece we prepared earlier. Using a spoon or piping bag (if you’re feeling fancy), generously drizzle or spoon the melted chocolate over each yogurt-filled compartment until they’re beautifully covered. This step not only adds an irresistible layer but also creates an eye-catching contrast against the white Greek yogurt base—a visual feast that will leave everyone wanting more!
Remember not to rush this step; take your time drizzling so each bite gets its fair share of that chocolate bliss. Once you’ve finished drizzling all compartments, sprinkle a few flakes of sea salt on top if you’re aiming for that sweet-and-salty balance—it truly elevates these bites from ordinary to extraordinary! Now comes perhaps one of the most critical steps: we need to chill these beauties properly before diving in.
Freezing Your Masterpiece
Slide your tray into the freezer and let them chill for at least 2-3 hours, or until completely frozen solid. It’s tempting—I know—but resist peeking too soon! Allowing them ample time in the freezer is absolutely crucial because this is what transforms our creamy mixture into those satisfying little bites we crave so much. If you check too early and they aren’t fully frozen, you risk ending up with mushy bites rather than perfectly firm treats.
While they freeze away into their final form, use this time wisely! Maybe whip up another batch or enjoy some quiet moments reflecting on how amazing homemade treats can be—who knew healthy could taste so good? Once they’ve set firmly (the wait will be worth it!), pop them out from their molds with care—just wiggle them gently at first if they seem stubborn; stubbornness can sometimes be part of their charm!
Step 9: The Final Touch & Enjoyment
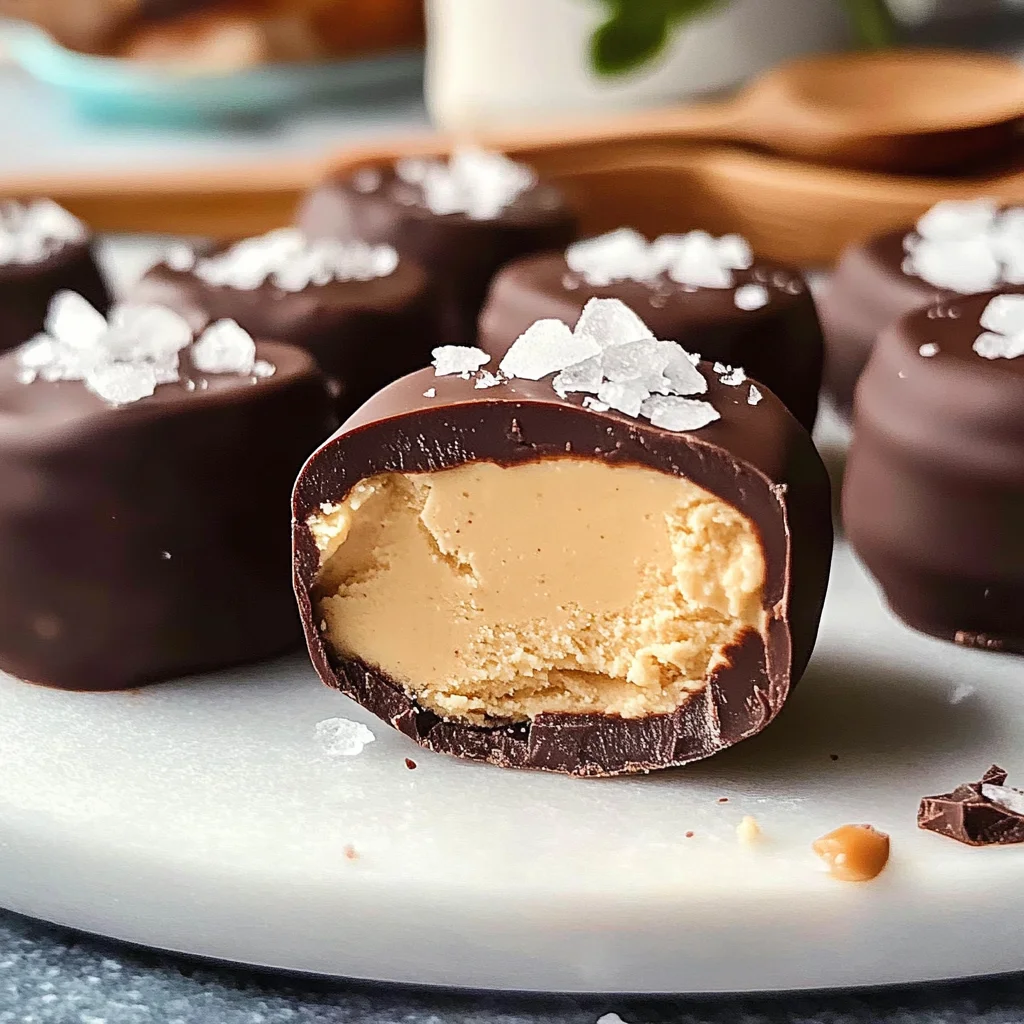
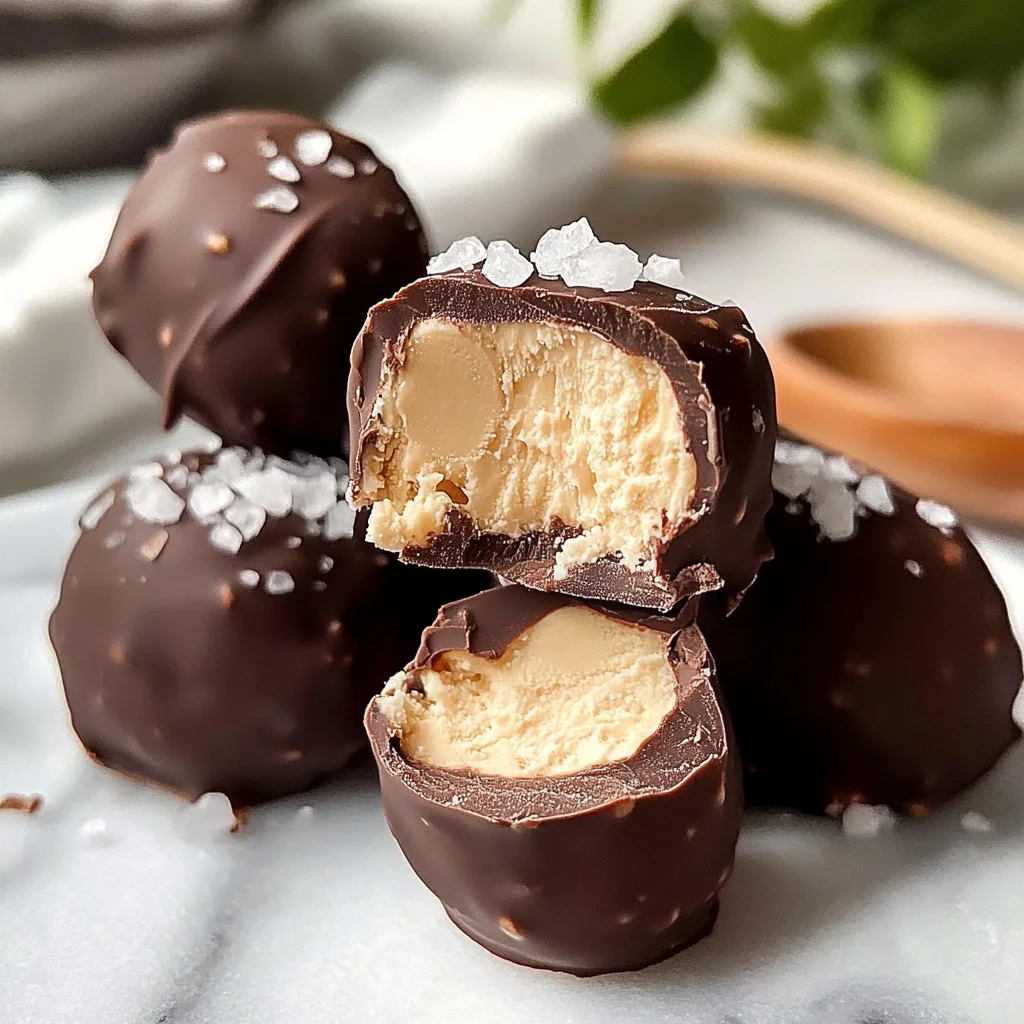
The moment has finally arrived: unveiling your High Protein Frozen Peanut Butter Greek Yogurt Bites! As you pull them from their molds, take a moment to appreciate their glistening surfaces adorned with silky chocolate and perhaps just a hint of sea salt sparkling like tiny diamonds against its cocoa backdrop. These little treasures are not just visually stunning; they’re bursting with flavor and nutrition ready for you and your loved ones.
Place these delectable bites onto a plate or into an airtight container for easy storage—they can last up to two weeks if kept frozen (though I doubt they’ll stick around that long!). When you’re ready for a snack or dessert, simply grab one (or two!) right out from the freezer—they’re perfect straight from there! Each bite promises an explosion of rich peanut butter flavor harmoniously mingled with tangy yogurt freshness—honestly, it’s profoundly satisfying.
I can’t help but feel excited every time I share these treats with my friends—they always rave about how delicious they are while marveling at how simple they were to make! So go ahead and treat yourself—you deserve every indulgent bite without any guilt attached. Enjoy making memories as you savor these High Protein Frozen Peanut Butter Greek Yogurt Bites because cooking isn’t just about food; it’s about love shared through flavors created in our kitchens together!
Storage and Enjoyment Tips for Your High Protein Frozen Peanut Butter Greek Yogurt Bites
Now that you’ve crafted these delightful High Protein Frozen Peanut Butter Greek Yogurt Bites, it’s time to revel in the deliciousness! But wait—before you dive in, let’s ensure these treats remain as delectable as the moment they were made. Proper storage is key to maintaining that creamy, peanut buttery goodness you’ve just created. Trust me on this; you don’t want to risk losing any of that utterly intoxicating flavor or texture. So, let’s talk about how to keep these bites fresh and fabulous!
Storing Leftover High Protein Frozen Peanut Butter Greek Yogurt Bites
To preserve your delightful bites, I recommend using an airtight container or a freezer-safe bag. This will help lock in all those rich flavors while preventing freezer burn—something we definitely want to avoid! Make sure to store them in the freezer, where they can last up to two months if properly sealed. If you’re anything like me and have a tendency to snack a little too often, don’t worry; they’ll still be delicious even after some time has passed. For an extra tip, consider placing a slice of bread in the container with your bites. This little trick helps maintain moisture and keeps your treats from getting too hard or icy! When you pull them out of the freezer, they’ll still taste like a creamy dream—just allow them a minute or two at room temperature for the perfect texture before enjoying.
Freezing for Later
If you find yourself with an abundance of these heavenly bites—or if you’re simply someone who loves being prepared—freezing them is an excellent option! Just make sure that each bite is individually wrapped or separated by parchment paper before placing them into your airtight container. This way, they won’t stick together, and you can grab one (or two!) whenever the craving strikes. These frozen treats can last for up to two months in this state as well, giving you ample time to enjoy them at your leisure. I adore having a stash of these on hand; there’s something wonderfully convenient about being able to indulge in a healthy treat at a moment’s notice! Picture it: coming home after a long day and knowing that all it takes is a quick trip to the freezer for a protein-packed delight that feels indulgent yet nourishing.
High Protein Frozen Peanut Butter Greek Yogurt Bites
Indulge in the guilt-free delight of High Protein Frozen Peanut Butter Greek Yogurt Bites, a perfect treat for warm afternoons or post-workout snacks. These creamy bites are made from wholesome ingredients that not only satisfy your sweet tooth but also keep you feeling energized. The combination of rich Greek yogurt and powdered peanut butter creates a deliciously creamy base, while a drizzle of dark chocolate adds an irresistible finish. Each bite is a harmonious blend of flavors and textures—sweet, salty, and satisfying. Plus, they’re easy to make, making them an excellent addition to your healthy eating repertoire!
- Prep Time: 15 minutes
- Cook Time: None
- Total Time: 0 hours
- Yield: Approximately 12 bites 1x
- Category: Dessert
- Method: Freezing
- Cuisine: American
Ingredients
- 1/2 cup full-fat Greek yogurt
- 1/4 cup powdered peanut butter
- 1 tablespoon creamy peanut butter
- 1/2 tablespoon maple syrup
- 1/2 cup dark chocolate chips
- 1 teaspoon coconut oil
- Flaky sea salt (optional)
Instructions
- In a mixing bowl, combine Greek yogurt, powdered peanut butter, creamy peanut butter, and maple syrup until smooth.
- Melt dark chocolate chips with coconut oil in a microwave-safe bowl in short intervals until fully melted and smooth.
- Fill silicone muffin or ice cube trays halfway with the yogurt mixture.
- Drizzle the melted chocolate over each filled compartment.
- Optionally sprinkle flaky sea salt on top.
- Freeze for 2-3 hours until solid.
Nutrition
- Serving Size: 1 bite (30g)
- Calories: 90
- Sugar: 3g
- Sodium: 25mg
- Fat: 4g
- Saturated Fat: 2g
- Unsaturated Fat: 2g
- Trans Fat: 0g
- Carbohydrates: 10g
- Fiber: 1g
- Protein: 5g
- Cholesterol: 5mg