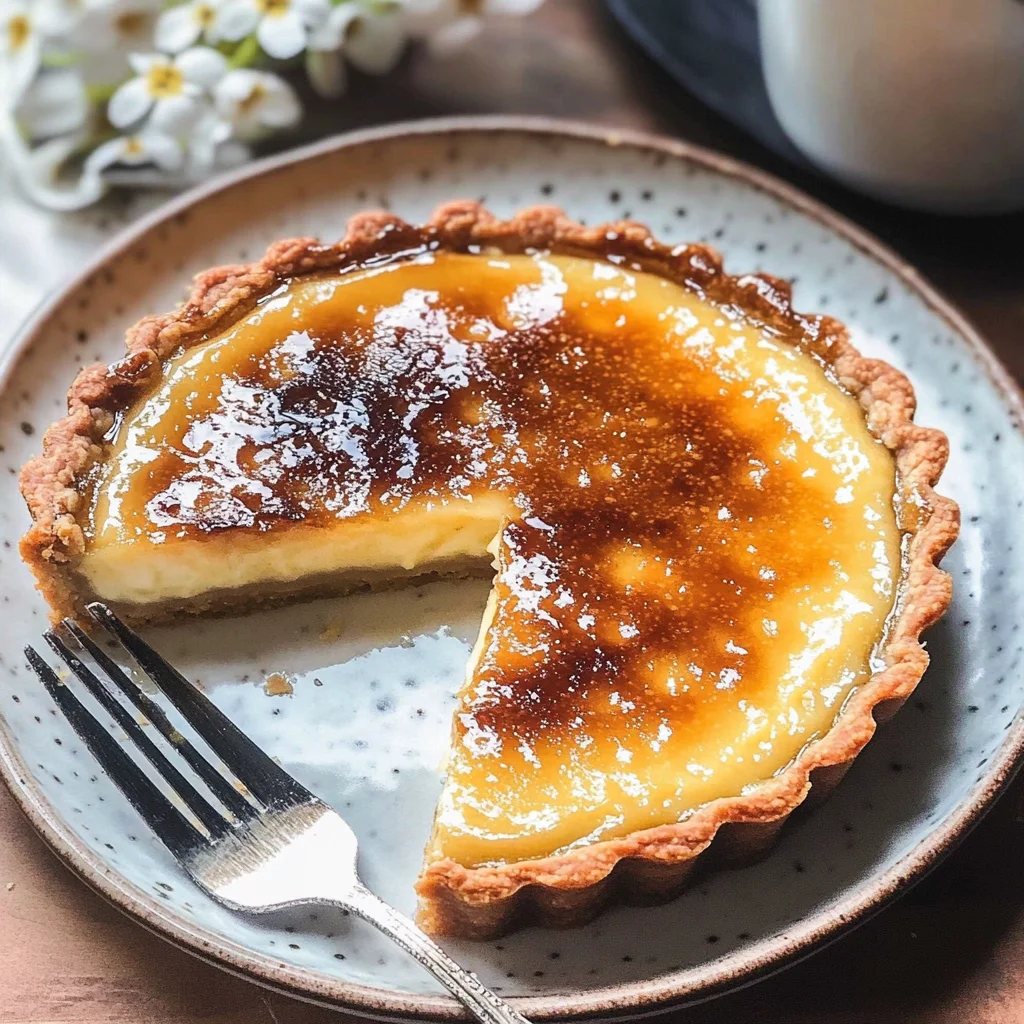
Earl Grey Crème Brûlée Tart Recipe
There’s something undeniably magical about the Earl Grey Crème Brûlée Tart. It’s a recipe that transcends mere sustenance; it’s an experience, a sweet journey that marries tradition with innovation and captures the very essence of comfort. Imagine slicing through a beautifully baked tart, where the delicate crunch of caramelized sugar meets the silky smoothness of Earl Grey-infused custard. The fragrance wafts up to greet you—notes of bergamot mingling with the sweetness of cream, creating an aroma that’s utterly intoxicating and inviting. This tart isn’t just dessert; it’s a celebration of flavors and textures that come together in perfect harmony, making each bite profoundly satisfying.
I’ve always been captivated by the elegant dance between the creamy filling and that signature crack of burnt sugar on top. Each layer tells a story—from the buttery, lightly bergamot-infused shortcrust pastry that cradles it all, to the luscious custard made rich with heavy cream and egg yolks. It feels like a love letter to classic French patisserie, but it also feels distinctly personal, as if I’m sharing a cherished family secret with you. I promise you’ll find joy not just in tasting this tart but in making it—a process that invites warmth into your kitchen and joy into your heart.
Earl Grey Crème Brûlée Tart Recipe: A Symphony of Flavors
This delightful tart is perfect for any occasion—be it a cozy afternoon tea or a celebratory gathering. It encapsulates elegance without being overly complicated, making it accessible for both novice bakers and seasoned pros alike. The beauty lies in its simplicity: a few quality ingredients come together to create something truly extraordinary. So let’s roll up our sleeves and embark on this culinary adventure together!
Ingredients:
As we prepare to create this marvelous Earl Grey Crème Brûlée Tart, let’s take a moment to appreciate each ingredient we’ll be using. Every single one plays an essential role in crafting this luxurious dessert.
- 220 g plain flour (all-purpose). This forms the backbone of our sweet shortcrust pastry. Using high-quality all-purpose flour is crucial as it provides structure while allowing for tenderness in the crust. When measuring your flour, ensure it’s spooned into your measuring cup and leveled off rather than scooped directly from the bag—this little detail prevents packing too much flour and gives us that perfectly crumbly texture we desire.
- 40 g powdered icing sugar (confectioners’ sugar). Unlike granulated sugar, icing sugar dissolves quickly and adds sweetness without grit, which is vital for our delicate pastry crust. It also contributes to the melt-in-your-mouth texture that makes this tart so irresistible. If you can’t find icing sugar, you can easily make your own by blending granulated sugar until it’s super fine!
- 6 g ground Earl Grey tea leaves. This is where our tart gets its signature flavor! Ground tea leaves infuse our pastry with subtle bergamot notes that elevate it from ordinary to extraordinary. Ensure you’re using high-quality loose-leaf tea for the best flavor; if using tea bags, simply cut them open to extract the leaves.
- ¼ tsp fine salt. Salt does more than season our pastry; it enhances sweetness and balances flavors beautifully. Just a pinch goes a long way in lifting all those delicious notes within our tart.
- 110 g unsalted butter (chopped into small cubes). The butter is absolutely paramount here—it’s responsible for richness and flakiness in our crust. Make sure it’s cold when you begin working with it; this ensures that we achieve that desirable texture instead of a tough dough.
- 1 large egg (lightly beaten). Eggs are essential for binding our ingredients together while adding moisture and richness to our crust. Beating the egg before adding it helps evenly distribute its richness throughout the dough.
- 15-30 ml ice-cold water. This is crucial for bringing our dough together without overworking it—a key step in achieving tenderness in baked goods! Add just enough water until the dough holds together; don’t be tempted to add too much at once.
- 1 egg plus 1 tbsp milk (for egg wash). An egg wash gives your tart that beautiful golden sheen after baking—it’s what makes your creation visually appealing! The combination of egg and milk creates an enticing glaze that’s both glossy and inviting.
- 6 large egg yolks. These beauties will enrich our custard filling with their creamy texture while providing stability during baking—a non-negotiable element for achieving that silkiness we crave!
- 70 g caster sugar (superfine). Caster sugar dissolves more easily than granulated sugar, which is important when whisking into our eggs—it helps create a smooth custard without any graininess.
- 480 ml double cream (heavy cream). This liquid gold brings decadence to our filling! The higher fat content means an incredibly rich custard that melts luxuriously in your mouth—using heavy cream ensures we achieve that perfect creamy texture.
- 2 Earl Grey tea bags. Infusing cream with these bags allows us to extract deeper flavors from the tea leaves without having to grind them first—simply steeping them will impart their essence beautifully into our custard mixture.
- 1 tsp vanilla bean paste. Trust me on this one: vanilla enhances everything! Using vanilla bean paste gives us those delightful flecks throughout our custard while adding depth to its flavor profile—a truly worthwhile addition!
- 40-60 g caster sugar (superfine) for topping. This will form that delightful crunchy caramel layer on top—the pièce de résistance! Use superfine sugar here so it melts evenly under heat for an exquisite finish.

Equipment You’ll Need:
Before we dive into making this glorious tart, let’s make sure we have all the right tools at hand because having the right equipment makes each step smoother and more enjoyable.
- 9-inch tart pan – A removable bottom tart pan works wonders here as it allows easy access when it’s time to serve your masterpiece! Look for one with sturdy construction so your crust holds its shape during baking; trust me, you’ll thank yourself later!
- Mixing bowls – You’ll need various sizes for mixing dough, whisking custards, and combining ingredients efficiently; choose sturdy ones that won’t bend or break under pressure as they’ll be your trusty companions throughout this process.
- Whisk – A good whisk is essential for incorporating air into your custards; air pockets help create lightness which balances out richness perfectly! If you have different sizes available, use a larger whisk for mixing batter but switch to smaller ones when dealing with delicate mixtures like eggs or creams.
- Rolling pin – A rolling pin allows us to roll out our pastry evenly without sticking or tearing—it’s like an extension of your hands when shaping dough!
Now that we’ve gathered everything we need—let’s get started on creating this extraordinary Earl Grey Crème Brûlée Tart together!
Step 1: Making the Sweet Shortcrust Pastry
First things first: let’s prepare our sweet shortcrust pastry because it needs some chilling time before baking—a critical step toward achieving that wonderfully flaky texture we’re aiming for! In a large mixing bowl, combine the plain flour, powdered icing sugar, ground Earl Grey tea leaves, and fine salt gently using either your fingertips or a whisk until well mixed; this ensures even distribution of flavors throughout every bite of crust! Now add those cold butter cubes directly into this mixture; using your fingers or a pastry cutter (if you prefer), work them into the dry ingredients until they resemble coarse breadcrumbs—this process creates tiny pockets of butter within which steam will form during baking resulting in lovely layers later on!
Once you’ve reached that desired breadcrumb-like consistency—don’t rush this step as it’s crucial—you can make a well in the center before adding in your lightly beaten egg followed by just enough ice-cold water to bring everything together into a cohesive dough (remember: add gradually!). Mix gently until combined; avoid overworking as doing so would yield tougher results instead of tender goodness! Once formed shape into disc wrap tightly in cling film then refrigerate for at least 30 minutes—this resting period allows gluten relaxation which equates softness when rolled out later!
Step 2: Prepping Your Tart Shell
After patiently waiting while dreaming about how glorious this tart will be—we’re ready for action again! Preheat your oven now at 180°C (350°F) so it’s nice and hot by the time we’re finished rolling out dough—which should happen next! Take out chilled pastry from refrigerator then place onto lightly floured surface rolling gently from center outward achieving approximately 3mm thickness before transferring carefully onto prepared tart pan ensuring no tearing occurs during transfer—don’t forget about trimming any excess edges afterwards—they can be used later if desired!
With shell lined appropriately within pan start pricking base using fork tines all around preventing bubbling whilst baking then line with parchment paper pressing down firmly against edges before filling with baking beans or rice—this weight keeps shape intact while cooking away beautifully underneath until golden brown perfection arrives approximately after 20 minutes at aforementioned temperature! When done remove weights allowing cooling slightly prior removing parchment paper entirely—it’ll now serve as sturdy vessel holding luscious custard soon destined inside soon!
Step 3: Creating Your Flavorful Custard Mixture
Ahh…the heartwarming aroma wafting through kitchen already hints at imminent magic ahead but hold tight because we’re gearing up towards creating velvety smooth custard mixture next! In medium saucepan over low heat combine double cream alongside those two Earl Grey teabags stirring gently ensuring infusion occurs effectively while gradually warming liquid—it should never boil only flirt close enough till aromatic bliss envelops entire area around stove-top making mouths water instantaneously! After several minutes remove from heat letting cool down slightly before straining out used teabags allowing concentrated flavor remaining behind giving life back again once poured later on through final blend stages coming up shortly!
In another bowl whisk yolks along caster sugar vigorously together till pale yellow shade appears resembling thick ribbons forming within mixture proving proper incorporation occurred successfully—with patience comes reward trust me here folks—you want these properties developed properly otherwise final result may lack richness needed rendering ultimately unsatisfactory experience altogether thus don’t skimp on effort required here please! Next fold warm infused cream gradually mixing well ensuring no lumps remain then finish off incorporating vanilla bean paste enhancing notes further than ever imagined possible too—all these elements play pivotal roles establishing depth layering flavors delightfully upon palate once fully baked eventually turning taste buds heavenly ecstatic post-tasting journeys ahead!
Step 4: Baking Your Earl Grey Crème Brûlée Tart
Once everything’s prepped beautifully alongside luscious filling ready waiting patiently—it’s finally time placing assembled creation inside preheated oven where magic unfolds amidst warmth enveloping surroundings enticing everyone nearby yearning taste sensation awaits soon thereafter become reality shortly thereafter let bake away approximately thirty-five forty minutes checking halfway through visual cues indicating jiggly center might still appear post-baking don’t fret though it’ll set nicely once cooled down afterward leaving behind magical transformation occurring right before eyes witnessing colors deepen further bringing elegance forth visually captivating even beyond expectations established earlier beforehand too…
After pulling out allow resting period cool completely room temperature before refrigerating additional hour overnight ideally enhances flavors settles aroma develops further magnifying allure awaiting next steps approaching eagerly tantalizing senses preceding indulging moments anticipated ahead finally fulfilling dreams concocted upon initial inspiration sparked earlier today embarking culinary journey together towards ultimate finish line awaits completing spectacular masterpiece destined turn heads wherever shared across gatherings upcoming surely memorable occasions filled joy laughter friendships enhanced simply through delectable nature found within creations made hearts sing alive forevermore…
Now you have crafted an exquisite Earl Grey Crème Brûlée Tart—a true labor of love worth every moment spent preparing alongside fond memories shared exploring techniques connecting deeper meaning held dear intertwined forevermore amongst friends family alike celebrating life itself deliciously timeless ways imaginable…
Step 5: Crafting Your Sweet Shortcrust Pastry
Now that you have your dry ingredients combined, it’s time to bring this sweet shortcrust pastry to life! Begin by adding the chilled, small cubes of unsalted butter into the flour mixture. This step is absolutely crucial as the temperature of the butter will determine the flakiness of your pastry. Using your fingertips or a pastry cutter, gently work the butter into the flour until the mixture resembles coarse breadcrumbs. Take your time here; don’t rush! The goal is to incorporate the butter without melting it, ensuring those delightful buttery pockets remain intact for an exquisitely tender crust.
Once your mixture is looking like sandy perfection, it’s time to add in the lightly beaten egg. Stir it in with a fork until everything begins to come together. You want to feel that sense of satisfaction as you watch the flour transform into a cohesive dough. If it feels crumbly and isn’t holding together, don’t hesitate to add ice-cold water, one tablespoon at a time, mixing gently after each addition until you reach that perfect consistency—smooth but not sticky. It’s this delicate balance that creates a beautifully textured pastry that can hold its own against that luscious Earl Grey custard we’re making later. After forming it into a disk, wrap it tightly in plastic wrap and let it rest in the fridge for at least 30 minutes. Trust me on this; chilling allows the gluten to relax, which keeps your crust tender and avoids any shrinkage during baking.
Step 6: Rolling Out and Shaping Your Tart Shell
After patiently waiting for your dough to chill (and I know how hard that can be!), it’s finally time to roll out your pastry. Flour your work surface generously and place your cold dough at the center. Using a rolling pin, gently roll outwards from the center, turning the dough frequently to maintain an even thickness—aim for about 3mm (1/8 inch) thick. As you roll, try to keep an eye on those edges; if they start cracking, just press them back together with your fingers. This step is all about love and care; you want every inch of this pastry shell to sing with flavor!
Once you’ve rolled out your dough beautifully, carefully transfer it into a 23cm (9-inch) tart pan. I find it helpful to roll the dough around my rolling pin before unrolling it over the pan—this helps prevent any tears! Gently press the dough into the corners and edges of the pan without stretching it; stretching can lead to cracks during baking later on. Trim off any excess dough hanging over the edges with a sharp knife or kitchen scissors—don’t worry about perfection here; just make sure it’s neat enough! Now comes another important moment: prick the base of your tart shell with a fork all over. This technique, known as docking, prevents air bubbles from forming while baking and helps ensure an even bake.
Step 7: Blind Baking – The Key to Flaky Perfection
With our tart shell beautifully shaped and trimmed, we’re ready for blind baking—a non-negotiable technique that ensures our crust remains crisp and flaky when filled with that dreamy custard later on! Preheat your oven to 180°C (350°F). While waiting for it to reach temperature, line your tart shell with parchment paper or aluminum foil, making sure it overlaps slightly so you can easily lift out later. Fill this lined shell with pie weights or dried beans—these will weigh down your crust during baking so it doesn’t puff up.
Bake in your preheated oven for approximately 15-20 minutes or until you see that lovely golden hue starting to form around the edges. Keep an eye on things because each oven behaves differently! When you see that light golden color peeking through—you’re halfway there! Carefully remove the weights along with the parchment paper and return your tart shell back into the oven for an additional 5-10 minutes until it’s fully set and slightly darker—not too dark though! You want a perfectly baked crust that’s not only visually appealing but will also provide that wonderful crunch against our creamy filling.
Step 8: Preparing Your Heavenly Earl Grey Custard
While our tart shell is cooling—oh my goodness—it’s time to embrace what makes this Earl Grey Crème Brûlée Tart Recipe truly special: that aromatic custard filling! Start by bringing double cream (heavy cream) almost to a simmer in a saucepan over medium heat; watch closely because we don’t want boiling cream splattering everywhere! As soon as you see steam rising and little bubbles forming around the edges—that’s when you’ll want to throw in those two Earl Grey tea bags while also stirring in vanilla bean paste for an extra layer of flavor. Allow them to steep for about 15-20 minutes; this infusion is where all that bergamot magic happens!
After steeping, remove those tea bags but keep an eye on how fragrant and infused your cream has become—it should smell utterly intoxicating! In another bowl, whisk together six large egg yolks and caster sugar until lightened in color—a beautiful pale yellow—that’s exactly what you’re looking for! Gradually pour in half of that warm cream mixture into the egg yolks while continually whisking (this process is called tempering). It’s vital because if you added all at once without whisking, you’d end up with scrambled eggs instead of smooth custard—yikes! Once incorporated smoothly without lumps, combine everything back in with remaining cream in a gentle stir.
Finally, pour this velvety mixture back into your saucepan over low heat and cook gently while stirring constantly until thickened slightly—the custard should coat the back of a spoon but still be pourable—usually takes about 5-7 minutes max. Avoid rushing through this step; patience yields perfection here! Once done cooking, strain through a fine sieve into a jug or bowl—to catch any bits—and then pour straight into your prepared tart shell while keeping some space at top since we’ll be caramelizing sugar later on.
Final Touches – The Perfect Finish
Step 9: The Sweet Caramelized Topping
Now comes one of my favorite parts: transforming our tart into something truly extraordinary with caramelized sugar topping! With our custard poured into its buttery home atop our baked shell, let’s pop this beauty into a preheated refrigerator for at least four hours—or overnight if possible—to allow those flavors to meld together beautifully while firming up nicely. Chilling is not just recommended; it’s essential for achieving that sublime texture we’re aiming for!
When you’re ready for dessert bliss after chilling has worked its magic—you’ll need about 40-60 grams of superfine caster sugar sprinkled evenly across the top of your tart surface. Here’s where patience pays off again: use a culinary torch held about two inches above surface level and move slowly in circular motions until sugar melts and transforms into that gorgeous amber color we adore! If you don’t have access to one (though I highly recommend investing!), broil under high heat in an oven—but keep watch like a hawk because there’s no going back once things start bubbling rapidly!
Let cool briefly before slicing—you want all those layers intact yet still warm enough so when cutting through—you hear that glorious crackling sound announcing something magical awaits inside… Oh my goodness gracious—you’ve made an Earl Grey Crème Brûlée Tart Recipe that’s sure not only please tastes buds but create cherished memories shared around tables filled laughter too! Enjoy every last bite knowing all love poured into making this masterpiece was absolutely worth it—and share generously because good food brings people closer together!
Storage and Enjoyment Tips for Your Earl Grey Crème Brûlée Tart Recipe
Now that you’ve crafted this beautiful Earl Grey Crème Brûlée Tart, it’s time to revel in the delightful journey of flavors that awaits you. I can practically see your friends’ faces light up as they take their first bite, the combination of creamy custard and that exquisite crunch on top is simply irresistible! But let’s talk about how to store any leftovers (if there are any, but trust me, they might disappear faster than you think) to maintain that wonderful texture and flavor, ensuring every slice remains a moment of pure bliss.
Storing Leftover Earl Grey Crème Brûlée Tart Recipe
To preserve your luscious tart, I recommend placing it in an airtight container. This will protect it from unwanted odors in the refrigerator while keeping it fresh. Stored this way, your Earl Grey Crème Brûlée Tart will hold its delightful qualities for about 3-4 days. If you want to maintain that signature crème brûlée texture without sacrificing flavor, consider placing a slice of bread inside the container. It may sound quirky, but it helps absorb moisture and keeps the crust from getting soggy! After storage, the tart remains profoundly satisfying; the flavors meld beautifully over time. When you’re ready to enjoy another slice (because who wouldn’t be?), simply serve it chilled or at room temperature for that perfect balance of creaminess and crunch. Trust me; it will still taste like a slice of heaven!
Freezing for Later
If you find yourself enchanted by this recipe and want to prepare ahead, freezing is a fantastic option! To do so correctly, wrap individual slices tightly in plastic wrap or aluminum foil before placing them in a freezer-safe container. This method prevents freezer burn and retains the rich flavors of your tart. You can keep your Earl Grey Crème Brûlée Tart frozen for up to three months—perfect for those unexpected gatherings or sweet cravings! When you’re ready to indulge again, simply thaw overnight in the fridge or let it sit at room temperature for about an hour before serving. The convenience of having these delectable treats on hand makes all the difference during busy weeks or special occasions!
Earl Grey Crème Brûlée Tart

Indulge in the enchanting flavors of Earl Grey with this delightful Crème Brûlée Tart. Featuring a buttery shortcrust pastry infused with aromatic bergamot, this dessert is a beautiful blend of creamy custard and a satisfying caramelized sugar topping. Each slice is a perfect harmony of textures, from the crisp crust to the silky custard, making it an ideal treat for any occasion—whether it’s an afternoon tea or an elegant dinner party. With simple ingredients and easy-to-follow steps, you’ll find joy not only in the tasting but also in the process of creating this exquisite tart. Get ready to impress your guests and elevate your dessert game!
- Prep Time: 30 minutes
- Cook Time: 60 minutes
- Total Time: 1 hour 30 minutes
- Yield: Serves approximately 8 slices 1x
- Category: Dessert
- Method: Baking
- Cuisine: French
Ingredients
- 220 g plain flour (all-purpose)
- 40 g powdered icing sugar (confectioners’ sugar)
- 6 g ground Earl Grey tea leaves
- ¼ tsp fine salt
- 110 g unsalted butter (cold, chopped into small cubes)
- 1 large egg (lightly beaten)
- 15–30 ml ice-cold water
- 6 large egg yolks
- 70 g caster sugar (superfine)
- 480 ml double cream (heavy cream)
- 2 Earl Grey tea bags
- 1 tsp vanilla bean paste
- 40–60 g caster sugar (superfine) for topping
Instructions
- Preheat oven to 180°C (350°F). Prepare sweet shortcrust pastry by combining plain flour, icing sugar, ground tea leaves, and salt in a mixing bowl.
- Add cold butter cubes and mix until resembling coarse breadcrumbs. Stir in the beaten egg and just enough ice-cold water until dough comes together. Wrap in cling film and chill for at least 30 minutes.
- Roll out chilled dough on a floured surface to about 3mm thick. Transfer to a tart pan, trim excess edges, prick the base with a fork, and blind bake with parchment and weights for about 20 minutes.
- Meanwhile, heat double cream with Earl Grey tea bags until warm; steep for at least 15 minutes. In another bowl, whisk egg yolks and caster sugar until pale; gradually add warm cream while whisking.
- Strain custard mixture into the tart shell and bake for 35–40 minutes until set but slightly jiggly in the center. Cool completely before chilling in the refrigerator for at least four hours.
- Before serving, sprinkle superfine sugar on top and caramelize using a kitchen torch or broiler.
Nutrition
- Serving Size: 1 serving
- Calories: 330
- Sugar: 22g
- Sodium: 70mg
- Fat: 22g
- Saturated Fat: 13g
- Unsaturated Fat: 7g
- Trans Fat: 0g
- Carbohydrates: 29g
- Fiber: 1g
- Protein: 5g
- Cholesterol: 135mg