How to Cook Corn on the Cob
When it comes to cooking, there are few things more enchanting than the simple pleasure of biting into a perfectly cooked ear of corn on the cob. The experience is not just about flavor; it’s an invitation to gather around the table, to share stories, and to relish in the beauty of nature’s bounty. Imagine the sweet, buttery kernels bursting with vibrant sunshine flavors as you sink your teeth into them. This recipe for How to Cook Corn on the Cob is a revelation—a delightful method that transforms fresh corn into a tender masterpiece without the fuss of traditional boiling. The husks act as natural steamers, allowing the corn to cook evenly while preserving its sweet essence, all while keeping that pesky silk at bay. Trust me when I say this is the BEST way to enjoy corn; once you try it, you’ll wonder why you ever did it any other way.
Cooking can be an expression of love, an homage to family traditions or a chance to create new memories with friends. The way we prepare food often carries with it stories from our own lives—perhaps childhood summers spent in the backyard or picnics by a serene lake where laughter danced in the air like fireflies at dusk. Corn on the cob is one of those quintessential summer staples that brings people together. Whether slathered in herb-infused butter or enjoyed simply with a sprinkle of salt, it embodies warmth and joy. So grab your freshest ears of corn, and let’s embark on this culinary journey together!
How to Cook Corn on the Cob: A Sweet Summer Delight
Get ready for a delightful experience as we dive into this incredibly easy and rewarding recipe for corn on the cob—one that will elevate your summer barbecues and family gatherings alike! The method we’re using ensures each kernel retains its natural sweetness while becoming irresistibly tender. By roasting them in their husks, we’re not only simplifying our cooking process but also enhancing their flavors in a way that boiling just can’t compete with.
Ingredients:
As we set off on this culinary journey together, let’s take a moment to talk about our star ingredient: fresh ears of corn. When selecting your corn, look for vibrant green husks that are tightly wrapped around the cobs. This indicates freshness! You want those kernels to be plump and milky when you bite into them—this is what makes each bite so utterly intoxicating. Fresh corn not only tastes better than anything you’ll find pre-packaged but also gives you that beautiful burst of flavor that transports you straight to sunny days spent outdoors. Remember: freshness is key! If you happen upon some local farmer’s market sweet corn, don’t hesitate—grab as many as you can carry!
- Fresh ears of corn (unpeeled and in husks). Fresh ears of corn are essential for this recipe. They provide that sweet crunch and juicy texture we crave during those warm months. Choosing corn that’s still in its husk helps lock in moisture and flavor during cooking, making for a truly extraordinary eating experience. Look for ears that feel heavy for their size; this usually means they’re packed with sweet kernels ready to burst with flavor when cooked.
Equipment You’ll Need:
Now that we’ve got our ingredients lined up like eager guests waiting for their turn at the dinner table, let’s discuss some essential tools that will make our cooking experience smooth and enjoyable. Having the right equipment can elevate your dishes from good to phenomenal!
- Oven – This trusty appliance is going to be our primary source of heat today! Preheating it properly ensures even cooking throughout your corn; starting off at 350°F allows those kernels to steam beautifully within their husks without drying out.
- Baking sheet (optional) – While not strictly necessary since we’re placing our corn directly on the oven rack, using a baking sheet can catch any drips if you’re worried about mess while cooking multiple batches or experimenting with different seasonings later on.
- Kitchen towel or oven mitt – Safety first! These will help protect your hands from those hot ears of corn when it’s time to peel them after roasting. Plus, they’ll give you a sturdy grip when holding onto those slippery husks!
Preparing How to Cook Corn on the Cob
Step 1: Preheat Your Oven Like A Warm Embrace
First things first: let’s get our oven preheating! Place your rack in the center position before cranking up your oven temperature to 350°F (about 175°C). This step may seem trivial but trust me—it’s absolutely paramount because an adequately heated oven will ensure even cooking throughout each ear of corn without risking any sogginess or uneven results.
Step 2: Give Your Corn Some TLC
Now it’s time for some gentle care before putting our precious ears into their oven sanctuary! Start by washing each ear under running water; this helps remove any dirt or debris lingering from its farm-fresh origins. As you wash them, keep an eye out for silk strands peeking out from beneath the husk—don’t worry if there are a few; just trim off any excess hanging from the ends so they don’t burn during roasting. You want these beauties looking clean and presentable without peeling away their protective outer layer!
Step 3: Into The Oven They Go!
Once you’ve pampered your ears of corn and ensured they’re ready for their big moment, place them directly onto your oven rack—no pan needed here! Cooking them in their husks allows every kernel inside to bask in warmth and moisture during their thirty-minute journey towards perfection while infusing them with an aromatic sweetness that’s simply divine.
Step 4: Feel The Magic
After thirty minutes have passed—patience is key here—you’ll want to check if they’re done by gently squeezing one between your fingers (using an oven mitt or kitchen towel). When done correctly, they should give slightly under pressure without being mushy—a perfect sign that they’ve absorbed all those flavors beautifully! Carefully remove them from the oven using your kitchen towel or mitt (remembering about those escaping steam clouds) and allow them to cool slightly before proceeding with peeling away those beautiful husks.
Throughout these steps, remember—the joy lies not just in eating but in savoring every moment spent preparing something deliciously wholesome! Each step contributes uniquely toward crafting what will soon become one of your favorite ways to enjoy corn on the cob!
Step 5: The Art of Checking for Doneness
Now that your corn has been snugly resting in the warmth of your oven for 30 minutes, it’s time to check on our golden treasures. Carefully remove the baking sheet from the oven and let it sit for just a moment; you want to avoid any unnecessary burns from the hot air escaping. Gently squeeze one ear of corn with your kitchen towel or mitt—what you’re looking for is a little give beneath that husk. If it feels firm and resistant, it likely needs a few more minutes to reach that tender perfection. This step is crucial because overcooked corn can become mushy and lose that delightful sweetness we all adore. It’s a delicate balance, so trust your instincts and remember: patience is key here!
If you find yourself unsure, don’t hesitate to put it back in the oven for an additional 5 minutes. Every oven behaves differently; some are slow and steady while others might run hot, so knowing your appliance will serve you well in this journey. Once satisfied with the firmness, allow the ears to cool slightly before handling them, as they will be steaming hot—the kind of steam that feels like an inviting hug but can definitely leave you singed if you’re not careful.
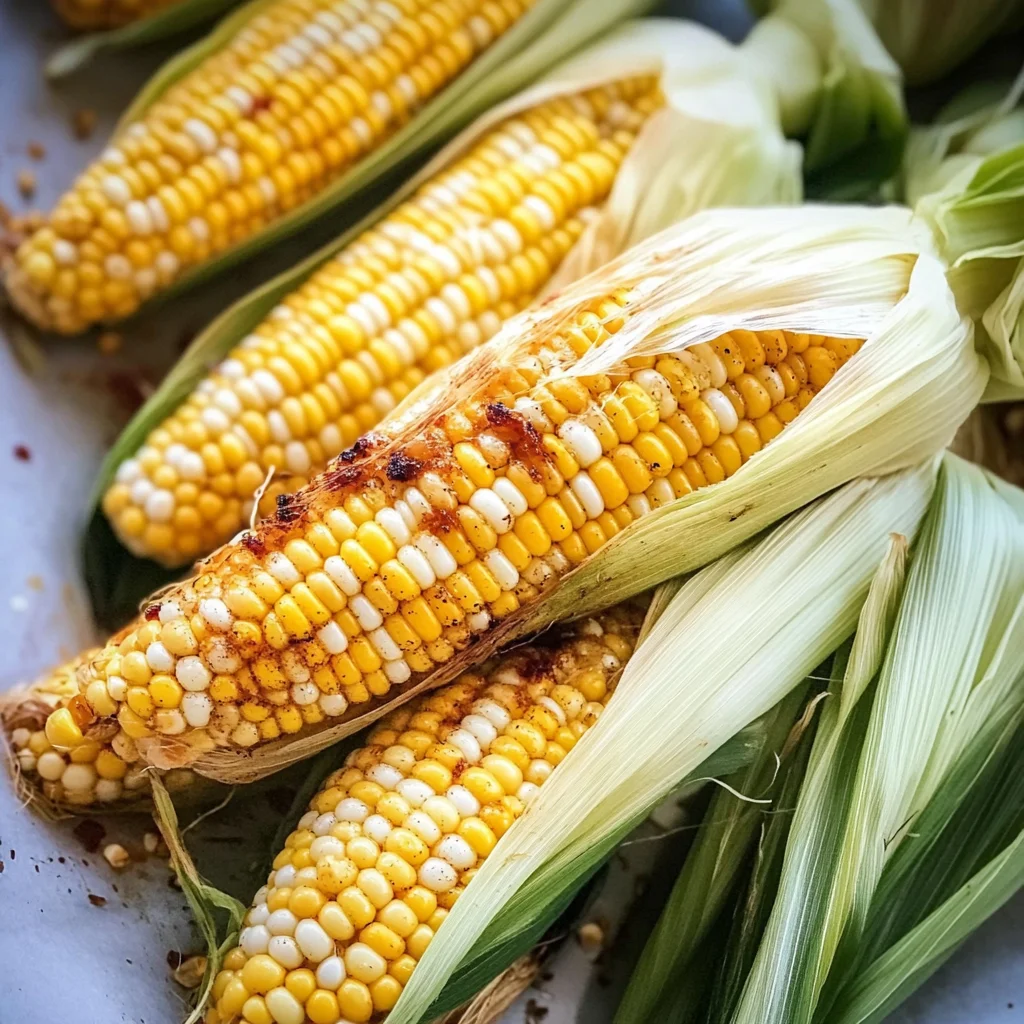
Step 6: The Joyous Shucking
As you let your corn cool down, take a moment to bask in the aroma wafting through your kitchen—it’s utterly intoxicating! When you feel ready to tackle the shucking process, that’s when the real magic begins. Hold each ear by its husk like a handle and gently peel back the layers while being mindful of those silks that cling on like tenacious little friends. You will find that they almost fall away effortlessly after roasting; there’s something so satisfying about this process! If any silk sticks around, just brush it off gently with your fingers or rinse under cool water.
Why is this step special? Well, not only does it reveal those beautiful kernels glistening with moisture and flavor, but it also allows us to appreciate all the work we’ve done thus far. This tactile experience connects you deeply with your food—so embrace it fully! Make sure you have a bowl ready for those husks and silks; you’ll want to keep your workspace tidy as you enjoy this joyous moment.
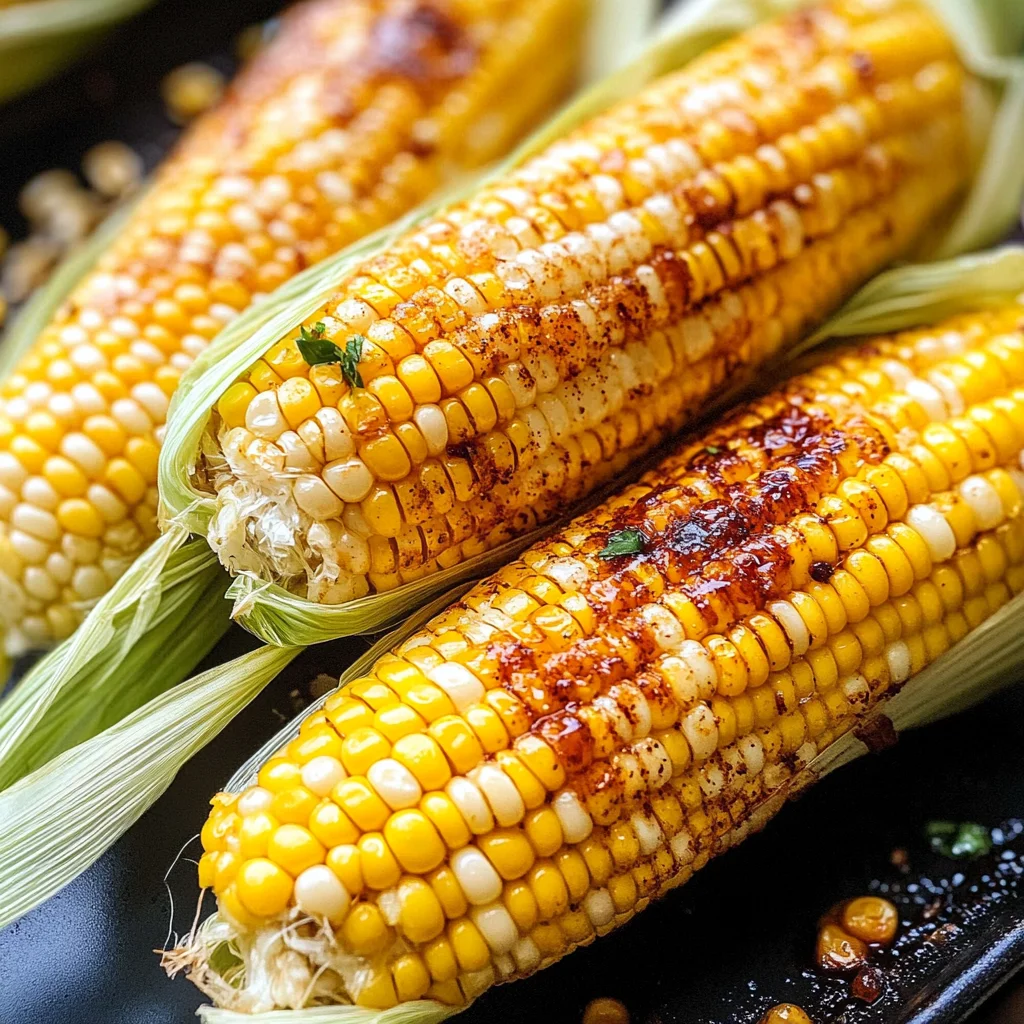
Step 7: The Perfect Seasoning
Now comes one of my favorite parts—seasoning our freshly shucked corn! At this point, I always recommend indulging in a little creativity here; after all, corn on the cob is a blank canvas waiting for your culinary artistry. A sprinkle of sea salt is always delightful because it enhances that natural sweetness beautifully—it’s like giving your corn a warm hug! You might also consider adding a light drizzle of olive oil or even vegan butter to lend it that luscious richness we often crave.
But don’t stop there! Consider experimenting with different flavors: perhaps a dash of smoked paprika for an intriguing depth or even some zesty lime juice if you’re feeling adventurous! Why does this matter? Because seasoning transforms good food into great food—it elevates every bite into an experience worth savoring. So go ahead and taste as you season; let those flavors meld together in perfect harmony before serving.
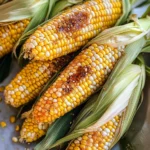
Step 8: Serving Your Corn Like a Star
At last, we’ve arrived at the grand finale—serving up our glorious corn on the cob! Arrange those beautifully cooked ears on a large platter as if they were jewels on display; this simple act makes everything feel special. What makes them shine even more is how visually appealing they are against the backdrop of vibrant greens or colorful summer salads at your table—this is truly what summer dining is all about!
Don’t forget to provide some extra napkins because things can get gloriously messy—you’ll find yourself having fun with each juicy bite! Encourage everyone at your table to dig in immediately while they’re still warm; nothing compares to biting into tender kernels bursting with flavor right off the cob. And trust me when I say this: once you’ve tasted how perfectly sweet and succulent these ears are when roasted in their husks, you’ll never look at boiled corn on the cob quite the same way again!
Conclusion:
As we wrap up our delightful journey through learning how to cook corn on the cob together, I can’t help but feel a sense of excitement about sharing this timeless recipe with you! From choosing pristine ears at your local market to pulling them out of the oven with their husks still intact—every step is filled with anticipation and love. The warm aromas wafting through your kitchen as they roast create an enchanting atmosphere that no one can resist. This method not only elevates the natural sweetness of each kernel but also keeps them plump and juicy—truly extraordinary!
This recipe is a must-try not just because of its incredible flavor but also due to its simplicity and versatility. Imagine serving these heavenly cobs at family barbecues or cozy weeknight dinners. Picture pulling them from the oven with golden husks gently steaming away—your guests’ eyes lighting up at such a deliciously inviting sight! It’s perfect for gatherings or simply enjoying solo while reminiscing about sunny days spent outdoors.
When it comes time to serve, let your creativity shine! Imagine savoring one with a dollop of herb-infused butter melting blissfully over those warm kernels or pairing them alongside grilled veggies for a vibrant plate bursting with color and texture. For an afternoon pick-me-up during those lazy weekends, try sprinkling some chili powder and lime juice over freshly cooked cobs—it adds an utterly intoxicating twist that keeps everyone coming back for more! And if you really want to indulge, why not serve these beauties alongside a rich cheddar cheese dip? The combination is nothing short of magical!
Feeling adventurous? This recipe is wonderfully adaptable—why not experiment with different flavors like garlic herb butter or tangy feta cheese sprinkled atop? You could even go bold by incorporating spices like smoked paprika or curry powder into your seasoning mix! Each variation brings its own unique charm while enhancing that beautiful sweetness inherent in every bite. So I invite you to roll up your sleeves and dive into this culinary adventure; share your creations with friends and family—they’ll be grateful you did!
How to Cook Corn on the Cob
Experience the delightful joy of perfectly cooked corn on the cob with this simple yet transformative method. By roasting fresh ears in their husks, you unlock a world of flavor that retains the natural sweetness and juiciness we all crave during summer months. This technique not only simplifies preparation but also elevates your meals to new heights. Imagine gathering friends and family around a table, enjoying tender, flavorful corn that bursts with sunshine in every bite. Whether dressed with herb-infused butter or a sprinkle of sea salt, this dish is sure to become a favorite at your summer barbecues and cozy dinners alike.
- Prep Time: 10 minutes
- Cook Time: 30 minutes
- Total Time: 40 minutes
- Yield: Serves 4 (1 ear per serving)
- Category: Side Dish
- Method: Baking
- Cuisine: American
Ingredients
- Fresh ears of corn (unpeeled and in husks)
Instructions
- Preheat your oven to 350°F (175°C).
- Rinse each ear of corn under cool water, trimming any excess silk hanging from the ends.
- Place the corn directly on the oven rack and roast for 30 minutes.
- Check doneness by gently squeezing an ear; it should yield slightly without being mushy.
- Remove from the oven, let cool slightly, then shuck the husks and silks.
- Season to taste with salt, butter, or your favorite toppings before serving.
Nutrition
- Serving Size: 1 serving
- Calories: 77
- Sugar: 6g
- Sodium: 0mg
- Fat: 1g
- Saturated Fat: 0g
- Unsaturated Fat: 0g
- Trans Fat: 0g
- Carbohydrates: 17g
- Fiber: 2g
- Protein: 3g
- Cholesterol: 0mg