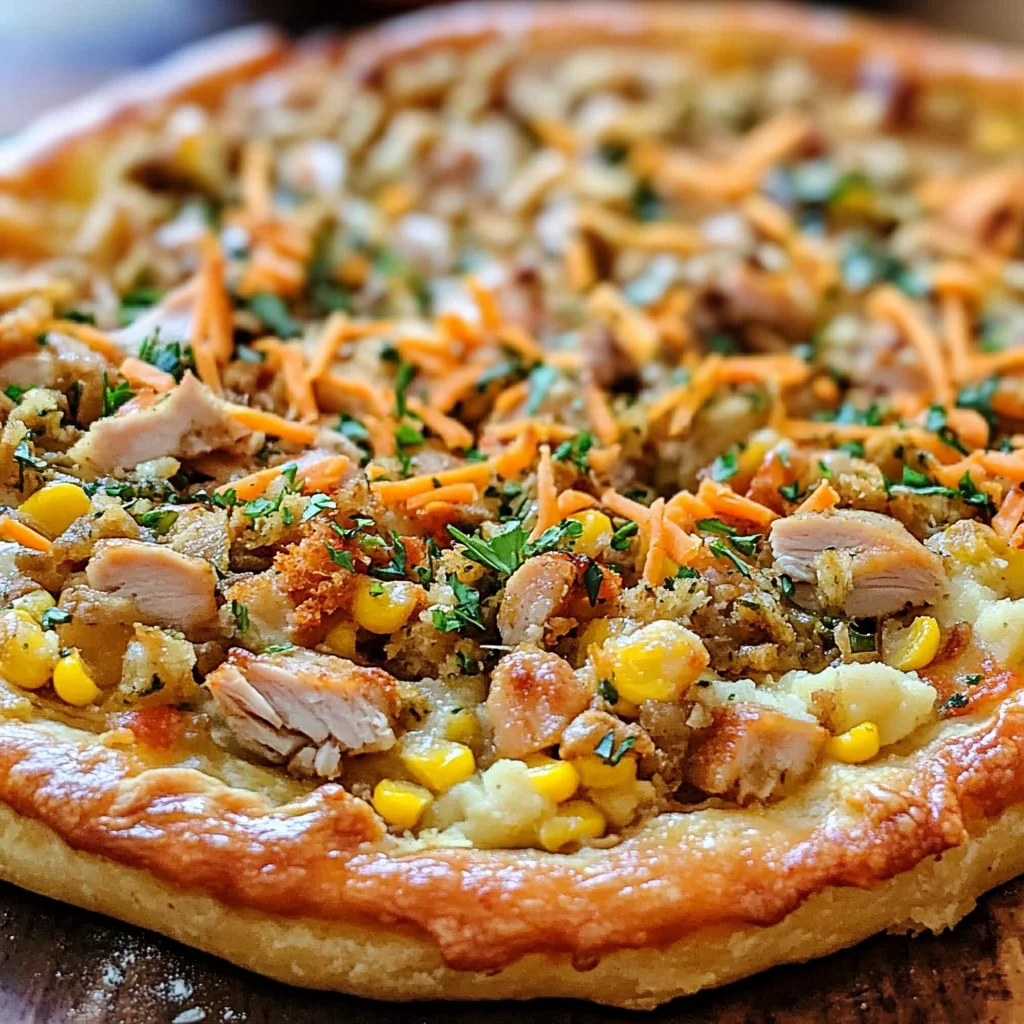
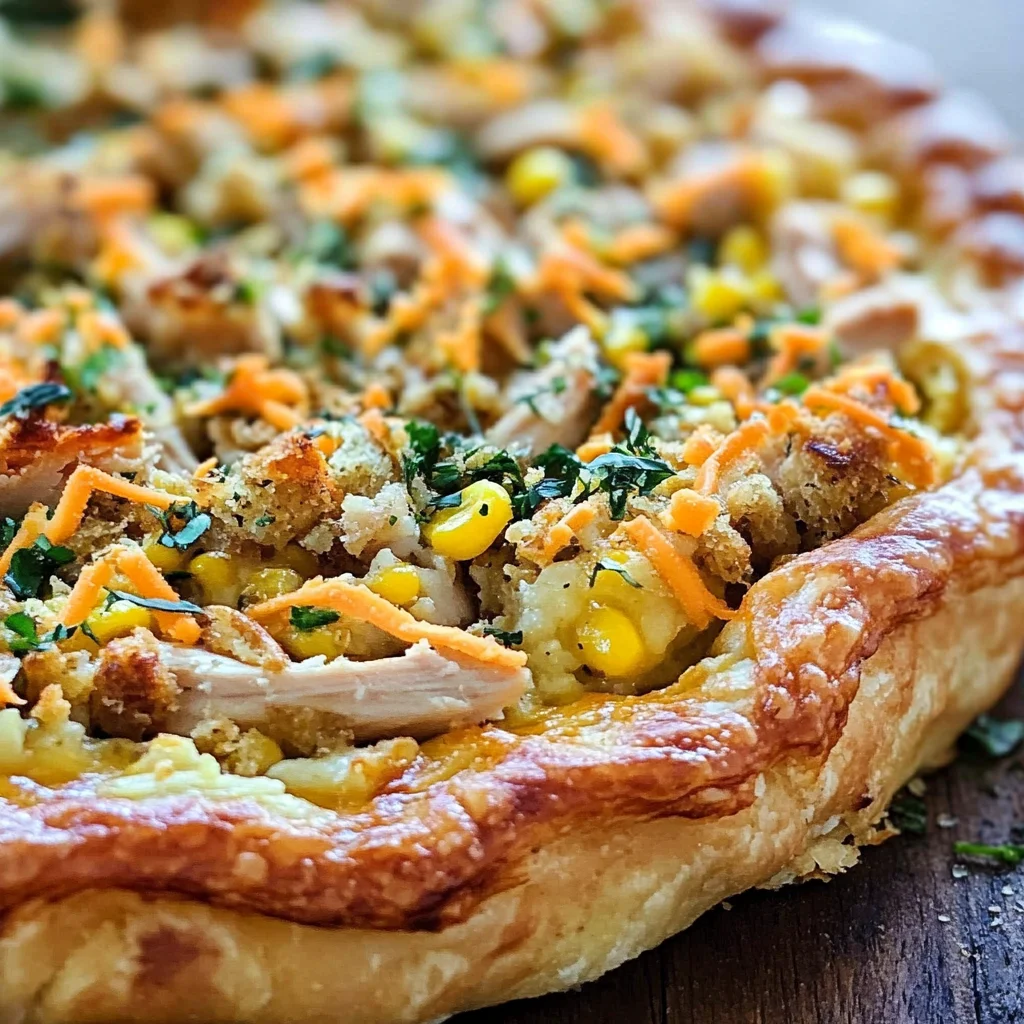
Thanksgiving Pizza
There’s something truly magical about the holidays, isn’t there? As the crisp autumn air fills our lungs and the scent of roasting turkey wafts through our homes, we come together to celebrate traditions that have been passed down for generations. Thanksgiving is not just a day for feasting; it’s an experience steeped in love, laughter, and a little bit of chaos. And as the last remnants of that glorious Thanksgiving feast linger in our fridges, it’s time to get creative with those leftovers. This is where my Thanksgiving Pizza comes into play—a delightful fusion of holiday flavors nestled in a flaky puff pastry crust. Trust me when I say, this isn’t just any leftover dish; it’s a warm embrace of nostalgia and innovation that will have you swooning with delight.
Imagine taking your first bite: the buttery crunch of the puff pastry gives way to creamy mashed potatoes layered with savory turkey, rich gravy, vibrant corn, and that irresistible stuffing we all adore. Each mouthful is like a cozy hug from your grandmother, reminding you of family gatherings filled with joy and gratitude. This Thanksgiving Pizza isn’t merely a recipe; it’s a celebration—a bridge connecting cherished traditions to modern culinary creativity. So roll up your sleeves and let’s dive into this delicious adventure together; I promise you won’t regret it!
Thanksgiving Pizza: A Delicious Twist on Tradition
Allow me to introduce you to one of my favorite ways to repurpose those Thanksgiving leftovers: Thanksgiving Pizza! It’s the ultimate comfort food experience that combines all your holiday favorites into a single slice of heaven. The beauty of this recipe lies not only in its flavor but also in its simplicity—perfect for those post-holiday days when you crave something quick yet utterly satisfying. Every bite offers a symphony of flavors that dances on your palate—the creamy mashed potatoes harmonizing with the tender turkey and zesty green beans, all beautifully encased in golden pastry. This dish is truly extraordinary and will undoubtedly become a beloved tradition in your home.
So let’s gather our ingredients and embark on this culinary journey! You’ll find that each component plays an essential role in crafting this masterpiece, ensuring every bite is packed with flavor. It’s time to take those leftovers from ordinary to extraordinary!
Ingredients:
As we prepare to create this Thanksgiving Pizza, let’s take a moment to appreciate each ingredient’s role in elevating this dish from simple leftovers to a gourmet delight.
- 1 puff pastry sheet (thawed according to the instructions on the package). Puff pastry is like magic in baking—it transforms into an airy, flaky crust that’s perfect for encasing all those delicious fillings. When purchasing puff pastry, look for high-quality options found in the freezer section; they often have better butter content which helps achieve that beautiful rise during baking. Remember always to thaw it properly according to package instructions; rushing this step can lead to tearing and uneven baking.
- ½ cup mashed potatoes. Ahh, mashed potatoes—the soul of any Thanksgiving meal! Creamy and buttery, they serve as a wonderful base for our pizza. When making your mashed potatoes for this dish, opt for homemade if possible—the texture and flavor are simply incomparable to store-bought versions. And if you find yourself with extra from dinner? Perfect! Just make sure they’re well-seasoned; these little pillows of goodness will help hold everything together.
- 5 tbsp gravy (divided). Gravy is like liquid gold at Thanksgiving! It adds moisture and flavor throughout the pizza while helping bind everything together beautifully. I recommend using your favorite homemade recipe or even some high-quality store-bought options if you’re short on time—just ensure it’s full of flavor! Dividing it allows us to drizzle some under the toppings while saving some for later to add richness after baking.
- ¼ cup corn. Sweet corn brings a delightful pop of color and sweetness that balances the savory elements of our pizza perfectly. You can use fresh corn cut from cobs or frozen corn—both work wonderfully here! Sweetness from corn adds layers of flavor that enhance every bite while contributing slightly different textures.
- ¼ cup green bean casserole. If there was ever an iconic side dish from Thanksgiving dinners past, it has certainly got to be green bean casserole! Incorporating it into our pizza not only brings its signature creamy texture but also offers earthy undertones paired with crunchy fried onions on top—what’s not to love? If you don’t have any left over, don’t worry! You can quickly whip up a simple version using cream soup mixed with sautéed green beans.
- ½ cup chopped turkey. The star protein of our pizza! Tender chunks of turkey elevate this dish beyond ordinary leftovers by lending rich depth alongside nostalgic flavors reminiscent of holiday gatherings around family tables. If you’re using previously cooked turkey from dinner preparations or even deli turkey slices—both are acceptable! Just ensure they’re well-chopped so they distribute evenly across the pizza.
- ½ cup stuffing. Stuffing—or dressing—holds such sentimental value during Thanksgiving meals, doesn’t it? Its aromatic blend of herbs provides an earthy foundation within our pizza while adding texture contrast against softer ingredients like mashed potatoes or gravy—it’s absolutely paramount! Feel free to use whatever stuffing recipe you’ve got handy; whether it’s cornbread-based or classic herbed bread crumbs will work just fine!
- ½ cup shredded cheddar cheese. Cheese acts as glue here—melted bliss enhancing flavors while binding everything together beautifully (and who doesn’t love cheese?!). Sharp cheddar works particularly well due its bold taste cutting through richer components nicely—but feel free experiment with other varieties like Monterey Jack or mozzarella based on preference!
- ¼ cup French fried onions. These crispy little gems add crunch and another layer of flavor that elevates each slice beyond basic expectations—they’re simply irresistible! You can find them pre-packaged at grocery stores or make them yourself if you’re feeling adventurous—but trust me when I say their addition here is non-negotiable!
- ¼ tsp freshly ground black pepper. A pinch adds depth without overpowering other ingredients present within each bite—it enhances flavors subtly yet effectively showcasing how important seasoning truly is!
- Basil (parsley or thyme) for garnish. Fresh herbs provide brightness at finishing touches while complementing hearty flavors within our pizza—don’t skip out on garnishing once baked!
Equipment You’ll Need:
Cooking can be such an enjoyable experience when equipped with the right tools at hand! While not technically ingredients themselves, having quality equipment makes all the difference between merely following directions versus creating something truly wonderful together!
- 9-inch tart pan (or pie pan) – A tart pan is ideal as its removable bottom allows easy transfer from pan-to-table without ruining presentation! Opting for one prevents dough shrinkage during baking too since sides are more stable than regular pie plates allowing crusts bake evenly throughout without collapsing inward unexpectedly.
- Parchment paper (optional) – Lining your tart pan with parchment paper ensures easy removal after baking which could be helpful if you’re anxious about sticking issues later down line—this step helps retain shape while providing additional crispiness around edges!
- Mixing bowl & spoon/spatula – Essential tools needed for combining various components before layering them onto crust below—and trust me—you’ll want sturdy mixing bowls so everything stays contained when stirring those creamy mashed potatoes along with gravy without spilling everywhere!
Preparing the Thanksgiving Pizza
Now that we’ve gathered all our ingredients and equipment, let’s dive into crafting this delightful Thanksgiving Pizza step by step; I promise you’ll enjoy every moment!
Step 1: Preheat Your Oven
Before anything else begins unfolding beautifully inside your kitchen… let’s get that oven preheating first thing! Set it to 400˚F (200˚C) because achieving proper temperature ensures perfect cooking throughout resulting golden brown crusts while warming fillings thoroughly inside too—this step sets us up for success right away!
Step 2: Prepare Your Puff Pastry Crust
Once your oven reaches temperature blissfully awaiting its new occupant… gently roll out thawed puff pastry sheet onto greased 9-inch tart pan (or use pie plate). This process requires care as working quickly prevents dough becoming sticky causing difficult shaping later down road—ensure edges fit snugly against sides without gaps appearing underneath filling later on! If you have extra dough hanging off edges don’t fret… simply trim corners then incorporate scraps back into filling spaces where needed–waste not want not after all!
Step 3: Layer Those Mashed Potatoes
Next up comes spreading half-cup creamy lusciousness known as “mashed potatoes” across bottom layer evenly ensuring coverage reaches every inch possible within crust confines—we want everyone enjoying this layer equally without missing out entirely through bites taken thereafter too… As you’re layering those fluffy clouds upon surface drizzle two tablespoons savory gravy atop them before proceeding onward toward next toppings above—isn’t food just poetic?
Step 4: Add Veggies & Turkey Goodness
With mashed potato base set perfectly below… sprinkle quarter-cup vibrant sweet corn followed closely by luscious green bean casserole atop next layer building even further excitement ahead—we’re constructing layers full flavorful memories reminding us why these dishes hold such importance during celebrations year after year… Finally introduce chopped turkey pieces generously filling remaining spaces then follow suit drizzling three tablespoons remaining gravy over entire concoction completing assembly beautifully thus far—the aroma wafting upwards already must be enticing enough tantalizing senses evoking memories shared around dining tables past…
Stay tuned as we continue crafting this delightful dish together in subsequent steps ahead—I know you’ll treasure each moment spent creating something extraordinary here today!
Thanksgiving Pizza: A Culinary Celebration of Leftovers
Step 5: Layering the Flavors
Now that we have our mashed potatoes and gravy lovingly spread over the base of our puff pastry, it’s time to add in the colorful, vibrant layers that will transform this dish into something truly extraordinary. Gently sprinkle the corn and green bean casserole over the potatoes. These ingredients not only introduce a delightful contrast in texture but also bring a burst of color and flavor that complements the rich heartiness of the turkey and stuffing. I can almost hear my friends cheering when they discover these layers—they’re often surprised at how each bite brings back memories of family gatherings.
As you layer these components, take a moment to appreciate how they come together, like pieces of a puzzle fitting snugly into place. The sweetness of the corn pairs beautifully with the savory notes of the green beans, providing a refreshing brightness amidst the other richer flavors. This is crucial because it ensures your Thanksgiving Pizza has depth; it’s what makes each mouthful feel like a celebration rather than just a reheated meal. Remember, don’t rush through this step! Take your time to evenly distribute everything so that every slice offers an explosion of flavors.
Step 6: The Heart of Thanksgiving
Next up, let’s talk about one of the major stars of our dish—yes, it’s time for the turkey and stuffing to shine! Using about half a cup of chopped turkey (make sure it’s shredded or diced into manageable pieces), spread it generously over your layered vegetables. This is where you can truly feel that sense of gratitude for leftovers; nothing quite compares to tender turkey that has soaked up all those delicious flavors from your Thanksgiving feast. Trust me on this—using freshly roasted turkey is non-negotiable here, as its moisture and flavor will meld beautifully with everything else.
Once you’ve added your turkey, it’s time for the stuffing to join the party! Just like a warm hug on a cold day, stuffing brings comfort to this dish. Spread about half a cup evenly over the turkey layer, allowing its savory herbs and spices to mingle with all those other ingredients below. At this point, drizzle three tablespoons of gravy over everything; this acts as both a binding agent and an additional flavor enhancer. As this bakes, the gravy seeps into every corner, creating an utterly intoxicating aroma that’s going to make your kitchen feel like home.
Step 7: Cheese – The Crowning Glory
Ah, cheese—the ultimate crowning glory! Now comes my favorite part: sprinkling shredded cheddar cheese over our layered masterpiece. This isn’t just any cheese; we’re talking about rich, creamy cheddar that melts into gooey bliss as it bakes away in our oven. I always encourage my friends to go generous here; after all, who doesn’t love pulling apart a slice only to find strings of melted cheese dancing joyfully?
Spread about half a cup evenly across your filling, ensuring every bit gets some cheesy goodness because each bite deserves that mouthwatering experience. This step is paramount since cheese will not only add richness but also help hold everything together as it melts and bubbles in the oven. As you watch it transform from solid shreds into molten pools of deliciousness through your oven door’s glass window, take note—the color should turn into that beautiful golden hue we all crave. Don’t worry if you sneak in an extra pinch or two; nobody will judge you here!
Step 8: Baking Perfection
With all our ingredients layered beautifully together and topped with cheese, it’s time to send our culinary creation into the oven! Preheat your oven to 400˚F if you haven’t done so already—this temperature is absolutely perfect for achieving that golden-brown crust while ensuring all those lovely flavors meld together harmoniously during baking. Place your assembled Thanksgiving Pizza in the middle rack and set your timer for 18-20 minutes; this timeframe allows for adequate cooking without burning.
Keep an eye on it during those last few minutes—your patience will be rewarded when you witness that delightful bubbling action happening right before your eyes! The puff pastry should rise majestically around its edges while developing a flaky texture that’s simply irresistible. You’re looking for golden brown on top—if things seem overly pale after 20 minutes, don’t hesitate to let it bake for another couple of minutes until perfection is achieved. It’s important not to rush this step; letting everything bake properly will ensure those flavors fully develop while making sure textures contrast beautifully.
Final Touches: Elevating Your Thanksgiving Pizza
Step 9: A Crispy Finish
As our Thanksgiving Pizza emerges from the oven with its gorgeous golden top—a sight worth celebrating—I know you can hardly wait! But hold on just a moment longer because we’re almost there! Let’s sprinkle French fried onions on top before giving it a quick return trip to bake for an additional 3-5 minutes. This addition might seem simple but trust me—it’s absolutely paramount! Those crispy onions give us that satisfying crunch we crave while adding layers upon layers of flavor—sweetness mingling with savory notes creates an undeniably addictive topping.
When you put it back in for those final moments, watch as they crisp up even more under the heat; you’ll want them just right—not burnt but perfectly golden brown so they lend texture without losing their integrity within seconds after coming out of the oven! Once it’s finished baking again and you can smell those delightful aromas wafting through your kitchen (and probably beyond!), take out your masterpiece and allow it to cool slightly before slicing into those steaming hot pieces.
This is where I get excited because garnishing transforms what could be an ordinary dish into something visually stunning! Whether you choose fresh basil, parsley or thyme—you’ll want something fragrant here—to sprinkle on top adds freshness that cuts through all those rich flavors you’ve been layering throughout cooking while bringing everything together harmoniously in both taste and appearance.
And there you have it—your own Thanksgiving Pizza ready to impress family and friends alike! Slice generously and serve warm; I guarantee each bite will be profoundly satisfying as flavors dance across your palate in celebration of cherished memories shared around tables filled with laughter and love during holiday gatherings past. Enjoy every moment—and don’t forget how incredibly special leftovers can be when treated with care like this wonderful creation we’ve just made together!
Storage and Enjoyment Tips for Your Thanksgiving Pizza
Now that you’ve crafted this extraordinary Thanksgiving Pizza, it’s time to revel in the deliciousness! But what happens if there are leftovers—though I doubt there will be much! If you’re like me, you’ll want to savor every last bite of this comforting creation. Thankfully, storing your Thanksgiving Pizza is a breeze, allowing you to enjoy those delightful flavors long after the last slice is served.
Storing Leftover Thanksgiving Pizza
To keep your Thanksgiving Pizza fresh and flavorful, transfer any leftovers to an airtight container or wrap it tightly in plastic wrap. You’ll want to store it in the refrigerator, where it can stay nice and cozy for up to three days. If you’re looking to maintain that heavenly texture, consider placing a slice of bread within the container; this little trick helps absorb excess moisture while keeping your pizza crust from getting soggy—it’s absolutely paramount for maintaining quality! When you’re ready to indulge again, simply reheat your pizza in the oven at 350°F until heated through. Trust me on this—it tastes just as good, if not better, the next day! The melding of flavors only deepens with a little time.
Freezing Thanksgiving Pizza for Later
If you find yourself with an abundance of this delicious dish—or if you’re just planning ahead—freezing is a fantastic option! Simply slice your pizza into portions and wrap each piece tightly in plastic wrap before placing them in a freezer-safe bag or container. This way, they can live happily in your freezer for up to three months. When you’re ready to enjoy a slice of your Thanksgiving creation from frozen, simply pop it straight into the oven at 375°F without thawing; it takes a bit longer but trust me—the result is so worth it! The convenience of having a meal ready at your fingertips during those busy weeks after the holiday truly makes life easier and more delicious.