Lemon Raspberry Bars
There’s something undeniably magical about the combination of lemons and raspberries. It’s as if two worlds collide, creating a symphony of tartness and sweetness that dances on your palate. When I first tasted Lemon Raspberry Bars, it felt like a revelation—each bite was not just food, but a delightful experience that transported me to sun-kissed afternoons, laughter-filled gatherings, and joyful moments shared with friends and family. The bright citrus notes blend harmoniously with the vibrant raspberries, resulting in a dessert that’s both refreshing and comforting. Trust me when I say these Lemon Raspberry Bars are not just a recipe; they are an invitation to savor life’s fleeting moments.
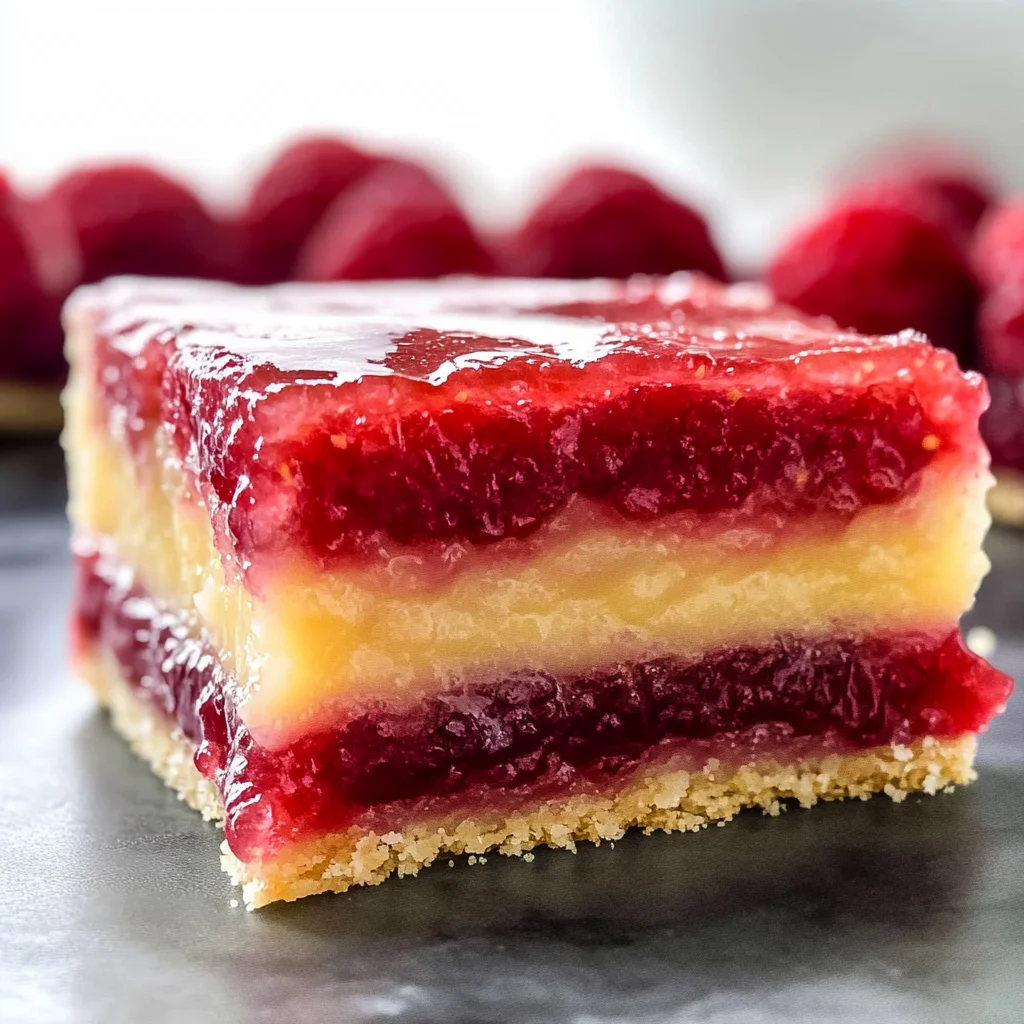
What makes these bars truly special is their delicate shortbread crust, which cradles a luscious layer of tangy lemon raspberry custard. Picture this: buttery goodness meets a creamy filling that feels like liquid gold against your tongue. This twist on traditional lemon bars takes classic flavors and elevates them into something extraordinary—perfect for summer picnics, celebratory gatherings, or even just a cozy night in when you want to indulge yourself. And let’s be honest; who doesn’t want to dive into a dessert that offers such profound satisfaction? So gather around, my friend; let’s embark on this culinary journey together!
Lemon Raspberry Bars: A Zesty Delight Awaits!
I can’t wait for you to try this delightful recipe for Lemon Raspberry Bars! With each step, we’ll weave together the brightness of freshly squeezed lemons and the natural sweetness of ripe raspberries into something absolutely unforgettable. You’ll soon find that making these bars is not only accessible but incredibly rewarding as well. Let’s get started!
Ingredients:
As we set out on this delicious adventure, let’s take a moment to appreciate each ingredient that will bring our Lemon Raspberry Bars to life. Each component plays a vital role in creating the perfect balance of flavors and textures.
- 2 cups (250 grams) raspberries (fresh or frozen). Raspberries are the star of our show here! Their bright color and tangy flavor provide the perfect contrast to the sweet lemon custard. If using fresh raspberries, look for plump, bright berries that are free from blemishes. Frozen raspberries are also fantastic—just be sure to thaw them beforehand so they can integrate beautifully into our filling.
- 2 1/4 cups (281 grams) all-purpose flour. This is our backbone ingredient; it creates structure in our buttery shortbread crust. Opt for high-quality all-purpose flour for the best results—this will ensure your crust is tender yet firm enough to hold its shape when sliced. Remember to spoon it into your measuring cup instead of scooping directly from the bag; this prevents packing too much flour.
- 1/2 cup (100 grams) granulated sugar. Sugar adds sweetness and enhances the flavors of both our crust and filling. It also aids in browning during baking, contributing to that lovely golden hue we all adore in desserts. For extra flavor depth, consider using organic sugar if you can find it—it often has richer caramel notes.
- 1 tablespoon corn starch. This seemingly small ingredient is crucial for giving our crust that melt-in-your-mouth texture we crave! Corn starch helps absorb moisture while providing structural support without becoming dense—a true balancing act for achieving that ideal crust.
- 1/4 teaspoon salt. Though it may seem insignificant at first glance, salt is absolutely paramount in baking! It enhances sweetness and balances flavors across all components of our bars while also adding depth to the buttery crust.
- 1 cup (226 grams) unsalted butter, melted. Ahh, butter—the soul of any great dessert! Melting it ensures even distribution throughout our crust while imparting rich flavor and creating an irresistible texture that’s slightly crisp yet tender at the same time.
- 1 1/2 cups (300 grams) granulated sugar (for filling). Just like before, sugar plays multiple roles here—it sweetens our custard and contributes to its beautiful creamy texture through proper emulsification with eggs.
- 1/3 cup (40 grams) corn starch (for filling). This ingredient will help thicken our luscious custard while keeping it smooth and creamy without becoming overly gelatinous or tough—a true balancing act once again!
- 6 large eggs. Eggs are essential here as they provide richness while acting as binders during cooking—they create that custardy layer we love so much! Make sure your eggs are at room temperature for easier emulsification.
- 1/4 cup (60 ml) reduced raspberry puree (reduced from 2 cups raspberries). This reduced puree intensifies raspberry flavor without adding excess liquid—it’s like harnessing pure fruit essence! To make it easy: simmer those berries down until thickened—this step captures their vibrant taste perfectly.
- 3/4 cup (180 ml) lemon juice (freshly squeezed). Fresh lemon juice is what elevates this recipe from good to truly extraordinary! The acidity balances out sweetness beautifully while offering brightly fragrant notes—trust me when I say bottled juice simply won’t cut it here!
Equipment You’ll Need:
Before diving into creation mode, let’s gather some essential tools that’ll make your baking experience smooth and enjoyable! While they aren’t ingredients per se, having these kitchen companions by your side is key in crafting those tantalizing Lemon Raspberry Bars.
- Mixing bowls – A good set of mixing bowls is indispensable when combining ingredients efficiently without any messes or overflow! Look for glass or stainless steel options—they’re durable and versatile enough for various tasks beyond just this recipe.
- Whisk – A trusty whisk will help you combine ingredients thoroughly—especially when incorporating eggs with sugar or blending your custard mixture until silky smooth! If you’re feeling fancy, consider exploring a balloon whisk; its shape allows air incorporation for lighter batters too!
- Rubber spatula – This tool isn’t just handy for scraping down sides during mixing; it’s also perfect for folding in delicate mixtures without deflating them—a critical skill for maintaining lightness in custards!
- 9×13-inch baking pan – The right size matters here; using an appropriately sized pan ensures even baking throughout so none of those beautiful layers get lost along the way! If you have one with a non-stick surface or lined with parchment paper—that’s even better!
- Fine mesh strainer (optional) – While not mandatory (but highly recommended!), using a fine mesh strainer allows us to remove seeds from raspberry puree effortlessly if desired—resulting in an ultra-smooth filling experience!
Now we have everything we need gathered together; it’s time to bring these beautiful Lemon Raspberry Bars into existence!
Preparing the Lemon Raspberry Bars
Step 1: Creating That Buttery Shortbread Crust
First things first—we’re going to make that utterly intoxicating shortbread crust! Start by preheating your oven to 350°F (175°C) so it’s nice and warm by the time we’re ready to bake. In one mixing bowl, combine your melted butter with ½ cup of granulated sugar—a process known as creaming helps create air pockets within our dough which leads us toward achieving lightness later on! Use either an electric mixer or simply whisk vigorously until it’s well combined but still looks somewhat chunky—that’s perfectly okay because we want some texture here too!
Next up comes adding flour along with salt and corn starch until everything comes together beautifully—this should only take about 2 minutes max as over-mixing could lead us astray towards toughening up our lovely dough instead of maintaining its tenderness! Once combined properly into one cohesive ball, gently press it evenly across the bottom of your prepared pan—it’s okay if it looks rustic; remember perfection isn’t necessary here—it’s all about flavor!
Step 2: Baking That Crust Until Golden
Slide your pan into preheated oven goodness now—and allow it to bake away for approximately 20 minutes until golden brown edges form while releasing heavenly aromas throughout your kitchen space! Keep an eye on things though—the last few minutes matter immensely because this stage determines whether we achieve that delectable crunch versus undercooked softness underneath all those luscious layers ahead!
While waiting patiently (or impatiently!) through those tantalizing scents wafting through your home—take time getting organized by preparing raspberry puree next since we’ll need reduced essence shortly thereafter…
Step 3: Reducing Raspberries Into Liquid Gold
For making reduced raspberry puree simply toss two cups worth directly into saucepan over medium heat stirring occasionally as juices release naturally transforming themselves into syrupy goodness before long! Allow them gentle simmering action until their volume reduces significantly—around fifteen minutes should suffice—but do keep watch closely; no one wants burnt berries ruining anything today right? Once thickened properly remove from heat then strain through fine mesh sieve if desired—this step ensures no pesky seeds sneak their way into final product…
Step 4: Crafting Our Zesty Custard Filling
Now comes my favorite part—the zesty custard filling! Grab another mixing bowl where we’ll whisk together remaining granulated sugar along with cornstarch before adding six large eggs one at time ensuring each egg integrates fully before moving onto next addition… This process builds structure while maintaining richness necessary within final product so don’t rush please—I promise you every second invested pays off big dividends later via creamy texture achieved right here! Once fully incorporated add freshly squeezed lemon juice along with previously prepared reduced raspberry puree then mix gently but thoroughly until everything melds seamlessly together resembling silky sunshine captured inside bowl itself…it looks beautiful already doesn’t it?
With both components prepared—our golden crust now cooling down slightly ideally before pouring vibrant custard atop evenly spreading across surface area making sure every nook gets filled properly ensuring balanced flavors await patiently beneath oven warmth next…
And there we go—we’ve laid strong foundations towards creating unforgettable Lemon Raspberry Bars destined delight taste buds everywhere soon enough!! Keep following along my dear friend—I assure you more joy awaits ahead when we finally slice into sweet rewards shortly after finishing up these steps ahead…
Step 5: Creating the Raspberry Puree Magic
Now, let’s dive into creating the luscious raspberry puree that will be the heart of our Lemon Raspberry Bars. Begin by placing your 2 cups of raspberries—whether fresh or frozen—into a medium-sized saucepan over medium heat. It’s crucial to gently cook the raspberries until they begin to break down and release their juices. This process usually takes about 5-7 minutes, and you’ll know you’re on the right track when the vibrant berries start bubbling and transforming into a thick, juicy mixture. Using a fork or a potato masher, break down any larger chunks; we want this puree to be smooth and velvety.
Once you achieve that dreamy consistency, you’ll want to strain this mixture through a fine-mesh sieve into a bowl, allowing the seeds to be left behind. Trust me when I say this step is non-negotiable; those pesky seeds can disrupt the silky experience of our bars. After straining, measure out 1/4 cup of this beautiful raspberry puree for later use in your custard filling, but hold onto any extra—you might just want to drizzle it over your finished dessert for an extra burst of flavor! Don’t rush through this step; patience here will lead to that profound satisfaction we’re aiming for.
Step 6: The Custard Base – Where All Flavors Unite
With our raspberry puree prepared, it’s time to create that utterly intoxicating custard base that will envelop our shortbread crust in a tangy embrace. In a large mixing bowl, combine 1 ½ cups of granulated sugar with 1/3 cup corn starch and ¼ teaspoon salt. Whisk them together thoroughly until you have a uniform dry mix; this blend is crucial as it ensures that our custard achieves that perfect balance between sweetness and tartness without clumps forming later on. Next, crack in those six large eggs—one at a time—whisking vigorously after each addition until everything is fully incorporated and smooth like liquid gold.
Now comes the best part! Gently fold in your reserved raspberry puree and the freshly squeezed lemon juice—about 3/4 cup—and watch as these ingredients transform before your eyes into a vibrant pink mixture that smells absolutely heavenly. This is where all those flavors come together in harmony; the bright acidity from the lemons beautifully complements the natural sweetness of the raspberries, creating what I like to call a symphony of flavors. Make sure not to overmix at this stage; we want to keep those bubbles intact which will help our bars rise beautifully in the oven.
Step 7: Pouring Over Perfection
Let’s not forget about our shortbread crust! Once it has cooled slightly after baking (about 10-15 minutes should do), remove it from the oven and allow it to rest while we prepare for the next step. This moment is crucial because pouring warm custard over hot crust can lead to an unwanted soggy bottom—a fate we definitely want to avoid! So take a deep breath, savor that buttery aroma still wafting from your crust, and then carefully pour your luscious lemon raspberry custard directly on top of your cooled crust.
Use a spatula or back of a spoon to gently spread it evenly across the surface if needed; we want every bite of these Lemon Raspberry Bars filled with that intoxicating blend of sweet-tart goodness. It’s essential here that you don’t rush—every layer deserves its moment in the spotlight! Once done, pop this beauty back into your preheated oven set at 350°F (175°C) and bake for an additional 25-30 minutes. You’ll know they’re ready when the edges are firm yet still slightly jiggly in the center—a sign of creamy perfection waiting patiently for you.
Step 8: The Art of Cooling – Patience is Key
As tempting as it may be to dig right in once those bars emerge from the oven (I can feel your excitement!), please resist that urge for just a little while longer! Allowing your Lemon Raspberry Bars to cool completely inside their pan is absolutely paramount for achieving that perfect texture. Let them sit at room temperature for about an hour before moving them into the refrigerator for at least another two hours—or even overnight if you can manage it! This cooling time transforms our bars from simply delicious treats into truly extraordinary desserts.
Why chill? During this time, as they cool down gradually, all those flavors meld together beautifully while allowing the custard to set properly. If you skip this step and slice too soon, you risk ending up with runny edges instead of clean cuts showcasing those gorgeous layers! As if by magic during this resting period, your patience will reward you with clean squares or bars that hold their shape beautifully when cut—the ultimate goal we’re striving for!
Final Touches: Presenting Your Masterpiece
Step 9: Slicing & Serving with Love
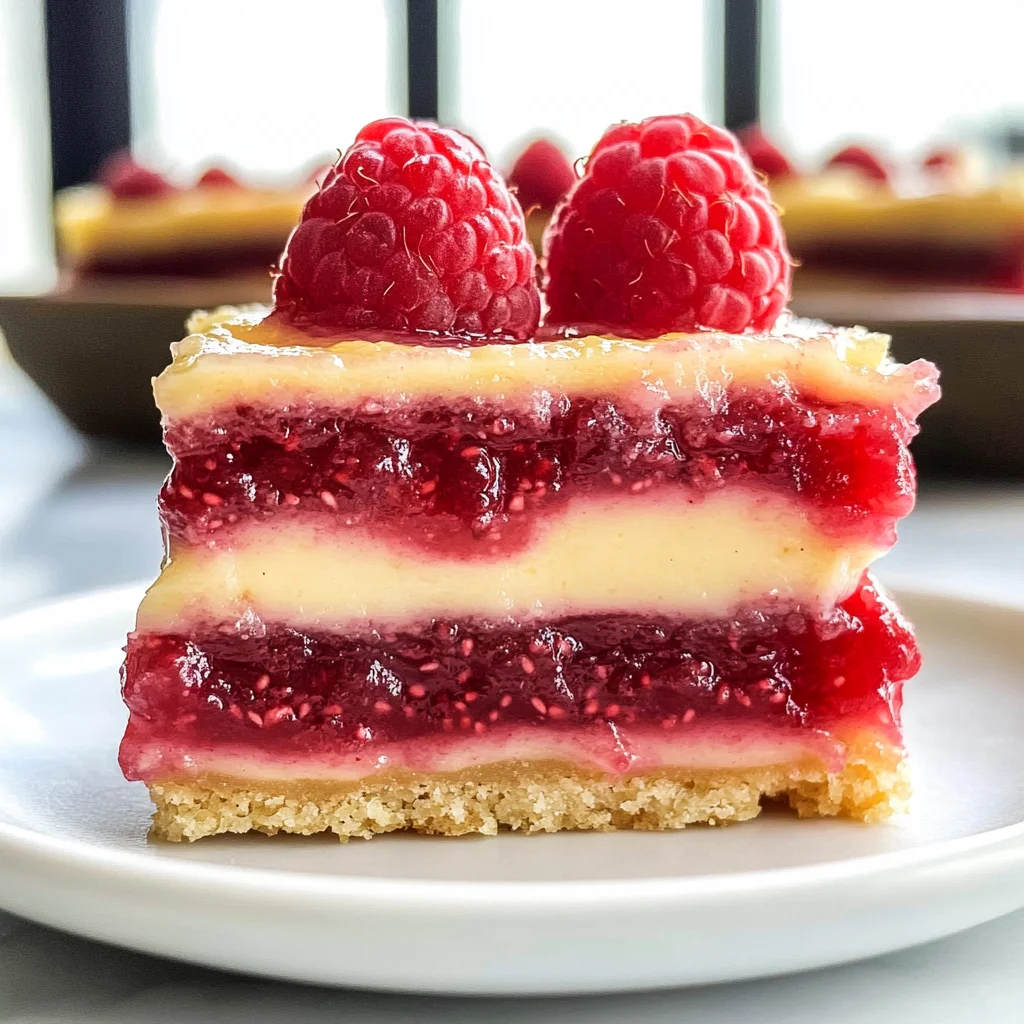
Now comes my favorite part—the moment when all your hard work pays off! Once they’ve chilled thoroughly and are ready for slicing (I recommend using a sharp knife dipped in hot water for clean cuts), carefully lift them out using parchment paper edges if possible. You’ll notice how beautifully they have set up; each slice reveals a stunning contrast between the buttery shortbread crust and that vibrant lemon raspberry filling—it’s truly breathtaking!
When serving these Lemon Raspberry Bars, consider dusting them lightly with powdered sugar for an elegant finish; it adds just enough sweetness without overpowering those divine flavors beneath. And don’t forget about garnishing with fresh raspberries or lemon zest on top—this small touch elevates presentation while whispering promises of what lies within each bite.
Feel free to serve them chilled straight from the fridge or at room temperature—both ways bring out different nuances of flavor worth experiencing! I promise you; every bite will evoke smiles among friends and family alike as they savor these delightful treats bursting with flavor and nostalgia. So go ahead; share your creation proudly—you’ve crafted something truly magical today!
Storage and Enjoyment Tips for Your Lemon Raspberry Bars
Now that you’ve transformed your kitchen into a haven of citrus and berry bliss, it’s time to celebrate the fruits of your labor! These Lemon Raspberry Bars are not just a treat to devour fresh from the oven; they also keep beautifully, allowing you to enjoy their delightful tangy sweetness long after baking. Let’s dive into how to store these beauties so they maintain their vibrant flavors and textures, ensuring that every bite is as delicious as the first.
Storing Leftover Lemon Raspberry Bars
To keep your Lemon Raspberry Bars in tip-top shape, it’s essential to store them correctly. I recommend placing them in an airtight container—this is crucial for preserving their moistness while keeping out unwanted odors. If you’re using a glass dish with a lid, that works wonderfully as the bars will be protected without any chance of absorbing other flavors from your fridge. When stored this way, they can last up to a week in the refrigerator. Trust me on this: if you want to maintain that buttery shortbread crust’s delightful crunch, place a slice of bread in the container with them. It sounds quirky, but it really helps! After a few days in storage, you’ll find that the bars take on a slightly different character; the flavors meld together beautifully, creating an utterly intoxicating experience. When you’re ready to serve them again, simply let them come to room temperature or pop them in the microwave for just a few seconds for that freshly-baked warmth.
Freezing Lemon Raspberry Bars for Later
If you find yourself with more Lemon Raspberry Bars than you can consume within the week (which is often the case because they’re just too good!), freezing is an excellent option to consider. To freeze them properly, cut the bars into squares and wrap each piece tightly in plastic wrap before placing them in a freezer-safe bag or container. This not only prevents freezer burn but also keeps those delightful flavors intact! You can keep them frozen for up to three months—imagine having a stash of these delectable treats waiting for you! When you’re ready for a sweet indulgence, simply thaw them overnight in the refrigerator or leave them at room temperature for about 30 minutes before enjoying. The convenience of having these bars at your fingertips is absolutely wonderful; it’s like pulling out a piece of summer sunshine whenever you need a pick-me-up!
Lemon Raspberry Bars
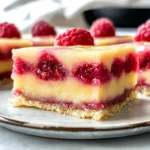
Indulge in the delightful world of Lemon Raspberry Bars, where the zesty brightness of fresh lemons meets the sweet-tart flavor of ripe raspberries. This luscious dessert features a buttery shortbread crust that cradles a creamy lemon raspberry filling, making it the perfect treat for summer picnics, celebrations, or cozy nights in. With each bite, savor the explosion of flavors that transport you to carefree afternoons filled with laughter and joy. Easy to make and utterly satisfying, these bars are an invitation to embrace life’s sweetest moments.
- Prep Time: 20 minutes
- Cook Time: 50 minutes
- Total Time: 1 hour 10 minutes
- Yield: Makes approximately 12 servings 1x
- Category: Dessert
- Method: Baking
- Cuisine: American
Ingredients
- 2 cups raspberries (fresh or frozen)
- 2 1/4 cups all-purpose flour
- 1/2 cup granulated sugar (for crust)
- 1 tablespoon corn starch
- 1/4 teaspoon salt
- 1 cup unsalted butter, melted
- 1 1/2 cups granulated sugar (for filling)
- 1/3 cup corn starch (for filling)
- 6 large eggs
- 3/4 cup freshly squeezed lemon juice
- 1/4 cup reduced raspberry puree
Instructions
- Preheat oven to 350°F (175°C). In a mixing bowl, combine melted butter and ½ cup sugar. Add flour, corn starch, and salt; mix until a dough forms.
- Press the dough evenly into a greased 9×13-inch baking pan. Bake for 20 minutes until golden brown.
- For the filling, whisk together remaining sugar and corn starch in a bowl. Add eggs one at a time, whisking after each addition. Mix in lemon juice and raspberry puree until smooth.
- Pour the filling over the cooled crust and bake for an additional 25-30 minutes until set.
- Cool completely before slicing into bars.
Nutrition
- Serving Size: 1 serving
- Calories: 250
- Sugar: 24g
- Sodium: 150mg
- Fat: 12g
- Saturated Fat: 7g
- Unsaturated Fat: 5g
- Trans Fat: 0g
- Carbohydrates: 34g
- Fiber: 1g
- Protein: 3g
- Cholesterol: 75mg