Dill Pickle Bread Recipe
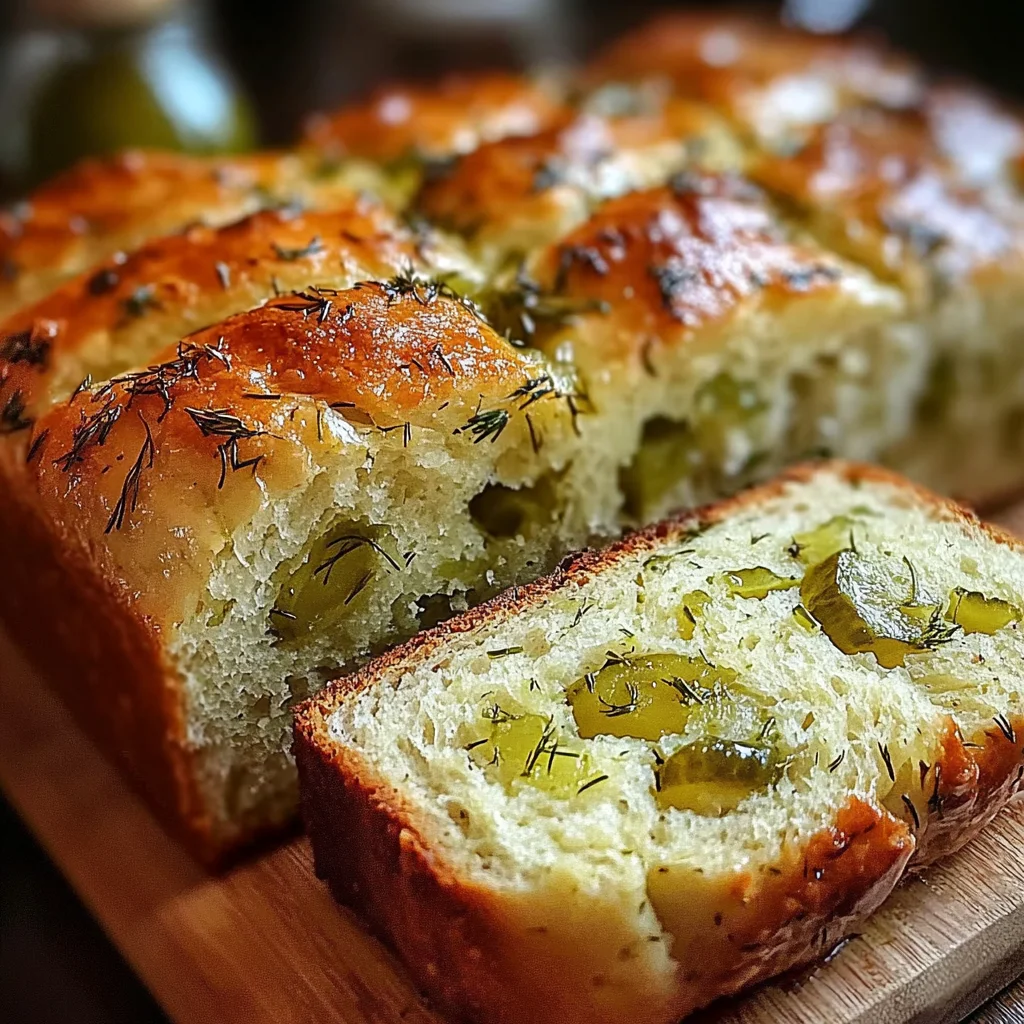
There’s something utterly magical about the aroma of freshly baked bread wafting through your home, isn’t there? It’s a feeling that wraps around you like a warm hug, evoking memories of family gatherings and cozy afternoons. This Dill Pickle Bread Recipe is more than just a delightful loaf; it’s an experience that takes the classic comfort of bread and infuses it with the tangy joy of dill pickles. Imagine slicing into that soft, fluffy interior, revealing specks of bright green pickle bursting with flavor amid each bite. I made this bread last weekend, and I can’t stop thinking about how amazing it turned out. The combination of savory and slightly sour notes melds perfectly with the warmth of freshly baked bread, creating something truly special that my whole family loved.
When I think about what makes this Dill Pickle Bread so extraordinary, I can’t help but reflect on how food can bridge generations. This recipe takes a beloved pantry staple—the humble pickle—and transforms it into something completely new while honoring its roots. It’s the kind of dish that’s perfect for breakfast alongside scrambled eggs or as a unique addition to a picnic spread. What makes this bread even more enchanting is how it sparks curiosity among friends and family alike; everyone wants to know the secret ingredient! So grab your apron and let’s embark on this delicious culinary journey together because I promise you, every step is worth it!
Dill Pickle Bread Recipe: A Tangy Twist on Tradition
If you’re anything like me, you adore trying new twists on classic recipes that surprise your taste buds. This Dill Pickle Bread is no exception! With its unique flavor profile and easy preparation, it’s bound to become a favorite in your household too. Whether you’re serving it warm straight from the oven or enjoying it toasted with some cream cheese spread, every bite will remind you why cooking can be such a joyful experience.
Ingredients:
As we dive into our ingredients, remember that each component plays a significant role in crafting this delightful loaf. Let’s explore what makes each ingredient essential!
- 2 cups all-purpose flour: This is the backbone of our bread, providing the perfect structure for a soft and fluffy loaf. All-purpose flour strikes an ideal balance between protein content and versatility, which means you get that comforting chew without making the bread too dense. When choosing your flour, look for brands that are finely milled for an even texture—this will contribute to the delightful crumb of your finished loaf.
- 1 tablespoon baking powder: A crucial component for our quick bread recipe! Unlike traditional yeast bread that requires time to rise, baking powder works its magic immediately upon mixing with wet ingredients. It produces carbon dioxide bubbles that lift and aerate our dough as it bakes, resulting in a beautifully risen loaf without any waiting around.
- 1/2 teaspoon baking soda: This ingredient serves as a wonderful partner to baking powder by balancing out the acidity from our pickles. When combined with acidic buttermilk in our mixture, baking soda reacts to produce additional lift—think of it as an extra boost for our bread to achieve that magnificent golden-brown crust we all crave!
- 1 teaspoon salt: Often underestimated in baking, salt enhances all flavors while also strengthening the structure of our bread. It creates harmony between sweet and savory elements while ensuring we don’t end up with bland bites. Don’t skimp on this vital ingredient; quality sea salt or kosher salt will elevate your flavors beautifully.
- 1 tablespoon dried dill weed: Here’s where we really start to emphasize the star flavor! Dried dill weed is aromatic and provides that quintessential herbaceous note that pairs so well with pickles. When using dried herbs in your recipes, always choose high-quality brands—freshness matters immensely when it comes to flavor impact.
- 3 large eggs: Eggs add richness and moisture while also acting as binding agents in our dough. They help create an airy texture by trapping air when beaten—a critical step toward achieving that glorious rise in our finished product! Look for fresh eggs when possible; their vibrant yolks will yield even more beautiful results.
- 1 cup buttermilk: Buttermilk brings both tanginess and moisture to our bread. Its acidity not only enhances flavor but also activates both baking soda and baking powder for optimal leavening action—this interplay among ingredients is what creates such profound depth in flavor! If you don’t have buttermilk on hand, feel free to make a quick substitute by mixing regular milk with lemon juice or vinegar.
- 1 cup dill pickles (finely chopped and well-drained): Ahh, here we have the pièce de résistance—the dill pickles! Their briny punchy flavor adds complexity and intrigue to each slice of bread while providing those delightful bursts of crunch amidst soft dough—what’s not to love? Be sure to finely chop them so they distribute evenly throughout without overwhelming any single bite.
- 1/4 cup melted butter (optional): While optional for those watching calories or butter intake levels, melted butter adds richness along with contributing to a gorgeous golden crust when baked! If you’re looking for alternatives, consider using olive oil for a different layer of flavor; however, nothing quite beats good old-fashioned butter when aiming for savory goodness.

Equipment You’ll Need:
Now let’s talk about the tools you’ll need—a kitchen equipped with the right gear makes all the difference when embarking on any culinary adventure! Having reliable equipment ensures not only smoother processes but also greater enjoyment throughout your cooking journey.
- 9×5 inch loaf pan: This size is perfect for shaping and containing our batter as it rises during baking! A good-quality non-stick pan will help prevent sticking issues—however lining it with parchment paper gives added assurance for easy removal once cooled.
- Mixing bowls (large & medium): Trust me; investing in sturdy mixing bowls makes life much easier during prep time! A large bowl allows ample space for combining dry ingredients without worrying about spills while ensuring proper incorporation of wet components later on—less mess equals more fun!
- Whisk: This tool isn’t just essential—it’s practically magical when it comes to blending dry ingredients thoroughly before introducing moisture into them! Using a whisk helps break up lumps faster than stirring alone could achieve—so keep one handy whenever tackling batters or dressings!
- Rubber spatula: Versatile enough for scraping down sides during mixing yet gentle enough not to overwork delicate batters—this tool deserves its place among kitchen essentials! Additionally useful for transferring batter seamlessly from bowl into pan without losing precious remnants stuck along edges.
Preparing the Dill Pickle Bread Recipe
Step 1: Preheat Your Oven & Prepare Your Pan
Start by preheating your oven to 350°F (175°C). This temperature ensures even baking throughout the loaf so you get that lovely golden crust paired with tender insides everyone loves! While waiting for your oven—which may feel like an eternity if you’re eager—take some time greasing your 9×5 inch loaf pan generously using butter or cooking spray before lining it carefully with parchment paper along bottom edges as well; this double protection makes removing finished bread much easier later on!
Step 2: Whisk Together Dry Ingredients
In a large mixing bowl now at hand (that beautiful space you’ve set aside), whisk together flour, baking powder, baking soda, salt, and dried dill weed until everything is well combined—no lumps allowed here! Properly mixing these dry components at this stage prevents uneven texture in your finished product down line; remember loving touches count here too since each element contributes uniquely toward creating symphony flavors within every slice!
Step 3: Beat Eggs & Combine Wet Ingredients
Beat three large eggs gently within another medium-sized bowl until smooth yet frothy—that’s where magic begins happening folks! Add one cup buttermilk next before stirring thoroughly until uniform liquid base forms—you’ll notice how invitingly thickening around edges appears after few seconds’ work…now fold in finely chopped dill pickles being careful not overmix yet ensuring they’re evenly distributed throughout mixture; trust me on this—it’ll be worth every bit effort once tasting those bursts flavor later!
Step 4: Mix Wet Into Dry Ingredients
Pour your newly created wet mixture directly into prepared dry ingredients using rubber spatula gently folding everything together until just combined—don’t overdo itself though since doing would lead tough dense result instead fluffy light goodness we desire…batter should appear slightly lumpy which perfectly normal quick breads—remember patience pays off here too because rushing leads disaster often avoided by taking moment breathe deeply appreciating process unfolding before eyes!
As we move forward through each step together towards creating delectable masterpiece known simply as “Dill Pickle Bread,” let excitement build within hearts knowing soon delightful aromas fill kitchens bringing smiles faces young old alike…stay tuned dear friend—we’ve got more delicious adventures ahead waiting just around corner!
Step 5: The Golden Transformation – Baking Your Dill Pickle Bread
Now that your batter is nestled comfortably in the loaf pan, it’s time for the magic of baking! As you place your loaf in the preheated oven, remember that this step is where all the ingredients come together to create something truly special. The heat from the oven will activate the baking powder and baking soda, causing your bread to rise beautifully. This process is known as leavening, and it’s absolutely paramount for achieving that light and fluffy texture we all crave. You’ll want to keep an eye on your creation, starting at around 50 minutes, when you can check for doneness.
How do you know when it’s ready? Gently press the top of the loaf; it should spring back slightly under your finger—a sure sign of a well-baked bread. Another critical test is the toothpick method: insert a toothpick into the center, and it should come out clean or with just a few moist crumbs clinging to it. If you see wet batter on the toothpick, pop it back in for another few minutes. Don’t rush this step! Patience is key because overbaking can lead to a dry loaf, and nobody wants that. When done correctly, you’ll be greeted with a golden-brown crust that looks like it could be featured in a magazine—trust me, it’s worth every second of waiting!
Step 6: Cooling Down – The Art of Resting
Once out of the oven, resist the temptation to dive right in! I know, I know—this part can be hard because your kitchen smells utterly intoxicating! However, allowing your dill pickle bread to cool in the pan for about 10 minutes is crucial. This resting period lets the steam escape and helps set the structure of your bread while preventing any sogginess at the bottom. After those ten minutes have passed—and believe me, they will feel like an eternity—carefully turn your loaf onto a wire rack to cool completely.
Why is cooling so important? When hot bread cools too quickly or if removed too early from its pan, it may collapse or turn gummy inside due to trapped moisture. By giving it that essential space to breathe on a wire rack, you’re ensuring an even texture throughout and making slicing a breeze later on. I promise you’ll appreciate this small act of restraint when you finally get to enjoy perfectly sliced pieces without any tearing or crumbling.
Step 7: The Slicing Symphony – Preparing for Serving
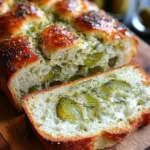
After allowing your loaf to cool completely—a process that usually takes about 30-60 minutes—you’re now ready for perhaps my favorite part: slicing into that warm, golden masterpiece! Use a serrated knife for this task; its saw-like edges are perfect for cutting through soft bread without squishing it down into oblivion. Slice gently and evenly; aim for about half an inch thick slices if you want them substantial enough to hold up against toppings.
I encourage you here to take moment to appreciate what you’ve created—this isn’t just bread; it’s a labor of love infused with tangy dill pickle goodness! The first slice will reveal tender crumb flecked with those delightful bits of pickle glistening throughout like little bursts of joy waiting to surprise your taste buds. As you savor each bite (and trust me, you’ll want more than one slice!), consider what pairings might elevate this experience further—perhaps some creamy vegan cheese spread or even just a bit of butter melting into its warm surface?
Step 8: The Grand Finale – Serving Suggestions and Storage
Now that you’ve beautifully sliced your dill pickle bread recipe masterpiece, let’s talk about how best to enjoy it! This delightful bread shines as an accompaniment at breakfast with avocado toast or sandwiches layered with fresh veggies and plant-based spreads during lunch. It’s also fantastic served alongside soups or salads as a charming side dish—imagine those tangy flavors complementing creamy tomato soup or hearty lentil stew!
If you find yourself with leftovers (which honestly might be unlikely), storing them properly will help retain that wonderful texture and flavor. Wrap slices tightly in plastic wrap or store them in an airtight container at room temperature for up to three days—or freeze them for longer storage! Just make sure they’re cooled completely before freezing; otherwise, condensation can lead to unwanted sogginess upon thawing. When you’re ready to enjoy another slice from frozen state, simply pop it into the toaster or let it thaw overnight on your counter.
Your journey with this Dill Pickle Bread Recipe doesn’t end here—it invites endless creativity and delightful moments shared around your table. So gather loved ones around and create memories together over this extraordinary bread! Happy baking!
Storage and Enjoyment Tips for Your Dill Pickle Bread Recipe
Now that you’ve whipped up this delightful Dill Pickle Bread, it’s time to savor the fruits of your labor! Trust me when I say this bread is not only a masterpiece straight from the oven but also a treasure to enjoy in the days following its creation. With its irresistible aroma lingering in your kitchen and the anticipation of tasting that perfect blend of flavors, you might find yourself wanting to keep some for later. Let’s delve into how you can preserve this scrumptious loaf while ensuring it maintains its moist and flavorful profile.
Storing Leftover Dill Pickle Bread Recipe
To keep your leftover Dill Pickle Bread fresh and delicious, it’s best stored in an airtight container at room temperature. This way, it stays soft and inviting without drying out. Typically, this bread will remain good for about 3 to 5 days, but I assure you, it often disappears much quicker than that! To maintain its quality over those days, consider slicing the loaf before storing; placing parchment paper between slices can help prevent sticking and allows you to grab just what you need without losing freshness. Honestly, even after a few days, this bread retains its unique flavor—a bit tangy with hints of dill that seem to deepen over time. If you ever find yourself with leftovers (which is rare!), simply pop a slice in the toaster or microwave for a quick reheat; I promise you’ll be greeted with that same comforting warmth as if it were freshly baked.
Freezing Your Dill Pickle Bread for Later
If you’re looking to stash away some of this delightful bread for future enjoyment, freezing is absolutely a wonderful option! To freeze your Dill Pickle Bread properly, make sure it’s completely cooled first—no one likes soggy bread! Wrap the loaf tightly in plastic wrap or aluminum foil and place it in a freezer-safe bag. This method helps prevent freezer burn while locking in all those incredible flavors. When stored correctly, your bread can last up to 3 months—how convenient is that? When you’re ready to indulge again, simply remove it from the freezer and let it thaw at room temperature or pop it straight into a warm oven. The joy of having homemade Dill Pickle Bread on hand whenever you crave something special is unmatched!
Dill Pickle Bread Recipe
Dill Pickle Bread is a delightful twist on traditional homemade bread that combines the tangy flavor of dill pickles with a soft, fluffy texture. This unique recipe is simple to make and offers a wonderful addition to any meal, whether enjoyed warm from the oven, toasted with cream cheese, or as part of a picnic spread. The savory notes of dill perfectly complement the pickles, creating a flavorful loaf that is bound to impress family and friends. Experience the joy of baking with this Dill Pickle Bread and elevate your meals with its unmistakable charm!
- Prep Time: 15 minutes
- Cook Time: 50 minutes
- Total Time: 1 hour 5 minutes
- Yield: Approximately 12 slices 1x
- Category: Breakfast
- Method: Baking
- Cuisine: American
Ingredients
- 2 cups all-purpose flour
- 1 tablespoon baking powder
- 1/2 teaspoon baking soda
- 1 teaspoon salt
- 1 tablespoon dried dill weed
- 3 large eggs
- 1 cup buttermilk
- 1 cup finely chopped dill pickles (well-drained)
- Optional: 1/4 cup melted butter
Instructions
- Preheat your oven to 350°F (175°C) and grease a 9×5 inch loaf pan.
- In a large bowl, whisk together flour, baking powder, baking soda, salt, and dried dill weed until well combined.
- In another bowl, beat the eggs then stir in buttermilk. Fold in the finely chopped dill pickles.
- Mix the wet ingredients into the dry ingredients until just combined; do not overmix.
- Pour the batter into the prepared loaf pan and smooth out the top.
- Bake for approximately 50 minutes or until golden brown and a toothpick inserted in the center comes out clean.
- Allow to cool in the pan for about 10 minutes before transferring to a wire rack to cool completely.
Nutrition
- Serving Size: 1 slice (approximately 70g)
- Calories: 150
- Sugar: 2g
- Sodium: 245mg
- Fat: 4g
- Saturated Fat: 2g
- Unsaturated Fat: 2g
- Trans Fat: 0g
- Carbohydrates: 24g
- Fiber: 1g
- Protein: 5g
- Cholesterol: 50mg