3 ingredient high protein greek yogurt bagels
There’s something utterly magical about the scent of freshly baked bread wafting through your home, isn’t there? The way it fills every nook and cranny with warmth and comfort, beckoning you to gather around the kitchen table with loved ones. Today, I want to share a recipe that encapsulates this joy beautifully: 3 ingredient high protein Greek yogurt bagels. These little treasures are not just any bagels; they are soft, chewy, and made with a mere trio of ingredients that work harmoniously to create an experience that is both profoundly satisfying and delightfully simple. Each bite is a testament to how uncomplicated cooking can lead to extraordinary flavors, and I promise you won’t believe how easy they are to whip up!
As someone who has always been captivated by the art of baking, I find these bagels represent a beautiful fusion of tradition and innovation. They burst onto the scene as part of a viral trend, quickly winning hearts for their health-conscious profile without compromising on taste. Imagine waking up on a busy morning and knowing you can have homemade bagels ready in just over half an hour—perfect for busy weekdays or leisurely brunches alike! With only self-rising flour, Greek yogurt, and an egg for washing, you’ll find these ingredients working together in perfect harmony to deliver a treat that’s not just delicious but also packed with protein—a win-win in my book!
3 Ingredient High Protein Greek Yogurt Bagels: A Wholesome Start to Your Day
Let’s dive into these bagels! They are so versatile; dress them up with your favorite toppings or serve them plain. Regardless of how you choose to enjoy them, each bite will remind you why simplicity can be so wonderfully effective in the kitchen.
Ingredients:
Before we roll up our sleeves and get started on this delightful journey, let’s talk about what we need. These ingredients are the foundation upon which our little bagel wonders will rise—quite literally!
1 cup self-rising flour. This ingredient is absolutely paramount for our bagels because it combines flour with baking powder and salt, which means we don’t need any additional leaveners. Using self-rising flour simplifies the process while ensuring our bagels achieve that delightful chewiness we all crave. When purchasing self-rising flour, look for brands that use high-quality wheat to ensure the best texture and flavor. If you’re in a pinch, you can easily make your own by combining all-purpose flour with baking powder and salt—but trust me when I say using store-bought self-rising flour will yield the best results!
1 cup Greek yogurt. Ah, liquid gold! Greek yogurt is not only essential for flavor but also contributes significantly to the protein content of these bagels. The creaminess of Greek yogurt brings moisture into our dough while helping it bind together beautifully—this smooth consistency is what helps us avoid dry bagels! When selecting Greek yogurt, opt for plain varieties without added sugars or flavors; this will help you control what goes into your lovely bagels. And if you’re looking for a dairy-free alternative, try using a plant-based yogurt that has a similar thickness; just check that it contains live cultures!
1 egg (for egg wash). This step might seem like an afterthought, but trust me—brushing your formed bagels with an egg wash before baking is essential for achieving that golden-brown crust we all adore. It adds a beautiful sheen and enhances the overall appearance of your bagels, making them irresistible right out of the oven. If you’re looking for an egg substitute due to dietary preferences or restrictions, feel free to use a mixture of flaxseed meal and water instead—the process remains nearly identical!
Equipment You’ll Need:
Having the right tools at your disposal makes all the difference when it comes to baking success! While these items aren’t technically ingredients, they play crucial roles in bringing our delicious vision to life.
- Mixing bowl: A sturdy mixing bowl is essential for combining your ingredients without making a mess. Choose one that’s large enough so you have room to knead your dough without fighting against the walls!
- Baking tray: A good quality baking tray ensures even heat distribution during baking. You want those lovely bagels to rise uniformly while developing that gorgeous golden color we’re striving for!
- Parchment paper: Lining your baking tray with parchment paper prevents sticking and makes cleanup a breeze. Plus, it gives your bagels an even better chance at achieving that perfect crust.
- Pastry brush: This simple tool allows you to apply your egg wash flawlessly across each bagel’s surface without disturbing their shape. If you don’t have one on hand, don’t fret! A clean kitchen towel will work in a pinch.
- Measuring cups: Accurate measurements are crucial in baking! Ensure you have standard measuring cups handy so that each ingredient is measured precisely—this will guarantee consistent results every time.
Now that we’ve gathered our ingredients and equipment, let’s embark on this exciting culinary adventure together!
Step 1: Embrace Your Dough
First things first: preheat your oven to 180°C (350°F). This step is crucial because having an adequately heated oven ensures those beautiful bagels puff up perfectly once they hit the heat! While your oven warms up, grab your mixing bowl and combine the self-rising flour with Greek yogurt. As you mix them together using either a spatula or your hands (what better way than getting hands-on?), you’ll notice how quickly they come together into a sticky dough—this is where the magic begins! Don’t rush this step; take your time here as you’re allowing those ingredients to bond seamlessly.
Step 2: Knead Your Way
Once you’ve mixed until there are no dry bits left (and trust me—you’ll know when), it’s time to knead! Lightly sprinkle some extra flour onto your work surface to prevent sticking as you turn out your dough onto it. Kneading gently for about 1-2 minutes helps develop gluten strands in the dough which contribute significantly to its chewy texture—the hallmark of any great bagel! Keep in mind; if you over-knead here, you’ll end up with tough bagels instead of soft ones—so be kind! After kneading lightly until smooth (it should feel soft but slightly tacky), divide your dough into four equal pieces.
Step 3: Shape Your Bagels
Now comes one of my favorite parts: shaping those pieces into gorgeous little rings! Take one piece at a time and roll it between your palms until it’s about 6-8 inches long—don’t worry if it’s not perfect; each shape tells its own story! Once rolled out into ropes, bring both ends together carefully and pinch them firmly until well sealed—that creates our iconic ring shape associated with classic bagels. Repeat this process until all four pieces are transformed into delightful rings ready for baking glory!
Step 4: Brush with Love
With our shaped bagels resting comfortably on the prepared baking tray lined with parchment paper (because we want those beauties looking their best!), it’s time for that all-important egg wash. Using your pastry brush—or kitchen towel if improvising—gently coat each ring’s surface entirely; this step will give us that enticing bronzed finish we’re after when they come out of the oven! Finally, pop them into preheated goodness for about 20–25 minutes until they turn golden brown—you’ll want to keep an eye out as they bake since every oven behaves differently.
And just like that, you’re on your way toward creating some unforgettable breakfast treats! Stay tuned as we finish this journey together—it gets even better from here!
Step 5: Kneading the Dough to Perfection
Now that you’ve combined your self-rising flour and Greek yogurt into a rough dough, it’s time to get your hands in there and knead it lightly. This step is absolutely paramount because kneading helps develop the gluten, which gives your bagels that lovely chewy texture we all crave. You don’t need to go into a full workout mode here; just a gentle knead will do. I usually spend about 2 to 3 minutes doing this, just until the dough comes together nicely and feels smooth to the touch. You want it to be cohesive but still soft—think of it as a plush pillow ready to rise!
As you knead, you might notice that the dough is slightly sticky at first. That’s perfectly normal! Just sprinkle a little bit of flour on your work surface and your hands if it starts getting too tacky. The key here is to avoid adding too much flour, as we want our bagels to remain moist and tender inside. Trust me on this: if you overdo it with the flour, you could end up with dense bagels instead of those light, airy ones we’re aiming for. So take your time with this step; it’s worth every moment spent coaxing that dough into shape.
Step 6: Dividing and Shaping Your Bagels
Once your dough has reached that smooth consistency, it’s time to divide it into four equal pieces—this ensures each bagel is uniform in size and bakes evenly. I like to use a sharp knife or a bench scraper for this part because it gives me clean cuts without squishing the dough too much. Each piece should weigh around 90 grams (or about 3 ounces) if you’re looking for precision, but don’t stress too much about being exact; a little variation adds charm!
Now comes the fun part: shaping those pieces into bagels! Start by rolling each piece into a smooth ball in your hands before using your thumb to make a hole right in the center. Then gently stretch that hole out while rolling the dough back and forth on the counter—this technique creates that signature bagel shape. The important thing here is not to rush; take your time ensuring that the holes are big enough so they don’t close up while baking, but not so large that they lose their shape entirely. Remember, these bagels will puff up beautifully in the oven!
Step 7: Preparing for Baking
With your delightful little bagels now shaped and ready for action, it’s time to prepare them for their glorious transformation in the oven! Preheating your oven to 180°C (350°F) is crucial at this stage because we want an even bake which results in those perfectly golden-brown tops we all adore. While that’s happening, line your baking tray with parchment paper; this not only prevents sticking but also makes cleanup a breeze afterward.
Before placing them on the tray, give each bagel a gentle squeeze around its edges one last time to ensure they hold their shape during baking. As you place them on the tray, make sure there’s enough space between each one—about an inch or two apart—to allow for spreading as they rise and bake. This spacing is vital because overcrowding can lead to uneven cooking and wonky shapes. Once they’re all lined up like soldiers ready for battle, let’s move on to an exciting finishing touch!
Step 8: The Egg Wash Magic
Ahh, what’s better than watching those beautiful shapes come together? Now comes an essential step—the egg wash! This simple mixture of beaten egg brushed over the surface of each bagel enhances not only their color but also creates that irresistible shine that makes them look bakery-fresh! It’s truly magical how something so simple can elevate their appearance from homemade to gourmet.
Using a pastry brush or even just a spoon works well here; just be gentle while applying it so you don’t deflate any of that lovely air you’ve worked hard to incorporate into your dough. You want every inch covered but not drowning in egg—just enough for that gleaming finish! If you’d prefer an alternative option for an egg wash, brushing with some non-dairy milk mixed with a bit of maple syrup will also do wonders without compromising on taste or appeal.
Next Major Phase – Baking Your Perfect 3 Ingredient High Protein Greek Yogurt Bagels
Now that our bagels are beautifully shaped and brushed with egg wash, it’s finally time for them to meet the heat! This next step is where all your hard work pays off as they undergo their transformation from raw dough into golden perfection.
Step 9: Baking Until Golden Brown
Place that baking tray lovingly into your preheated oven and close the door like you’re tucking them in for a cozy nap! Set your timer for about 20–25 minutes. As they bake away, you’ll start picking up these utterly intoxicating aromas wafting through your kitchen—it’s nothing short of divine! Keep an eye on them towards the latter half of baking; you’ll want them golden brown on top with slight firmness when gently pressed.
The science behind why we bake at this temperature is fascinating—the heat causes steam within the dough which expands rapidly, giving us those delightful air pockets inside each bagel while simultaneously creating that gorgeous crust outside. When they’re done, you should see a lovely golden hue across their tops—if they’re still pale after 25 minutes, resist temptation just a tad longer and check again after another minute or two until they’re perfect.
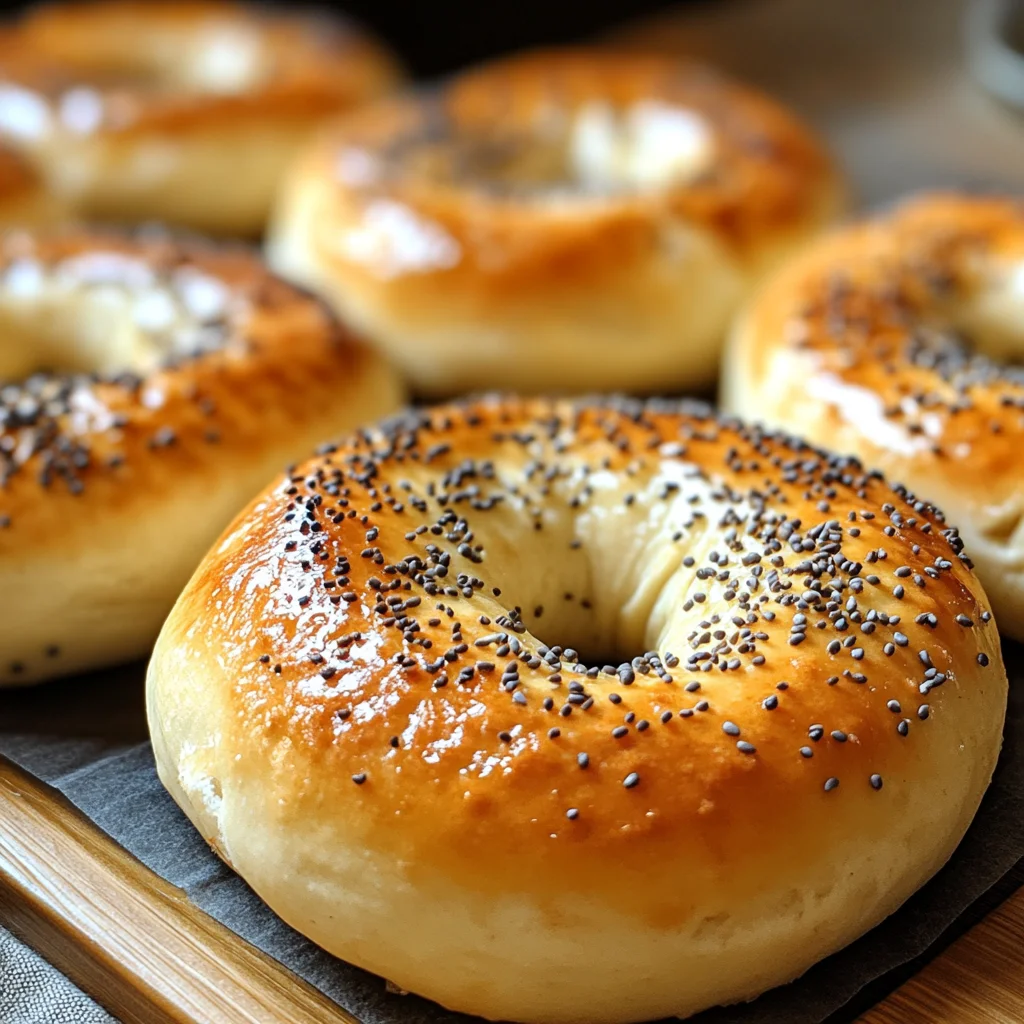
Once out of the oven, let them cool slightly on a wire rack before digging in; I know waiting can be tough when you can already taste those chewy bites filled with goodness—but trust me when I say it’s worth allowing them just a few moments before slicing into one warm from its bath of heat.
And there you have it—the journey from simple ingredients transformed into something truly extraordinary! These 3 ingredient high protein Greek yogurt bagels are not just food; they’re love crafted through patience and care—a delicious way to start any day or enjoy as an afternoon snack topped with whatever delights your heart desires!
Storage and Enjoyment Tips for Your 3 ingredient high protein greek yogurt bagels
Now that your delightful creation is out of the oven and the aroma is wafting through your kitchen, you might be wondering how to best preserve these amazing bagels. I can’t blame you for wanting to enjoy them again! These 3 ingredient high protein Greek yogurt bagels are not just a treat for breakfast; they’re a wonderful snack throughout the day, so knowing how to store them properly is absolutely essential. Trust me, keeping their soft, chewy texture intact means you’ll savor every bite like it was fresh out of the oven!
Storing Leftover 3 ingredient high protein greek yogurt bagels
To keep your bagels as fresh as possible, I recommend storing them in an airtight container at room temperature. This method will preserve their delightful chewiness and keep them from drying out too quickly. They’ll stay fresh for about three days, but here’s a little pro tip: if you want to extend their shelf life slightly, you can wrap them individually in plastic wrap before placing them in the container. If you do this, they’ll stay wonderfully soft, and when you pull one out later, it will taste almost as good as when they were first baked! After storage, these bagels retain their lovely flavor profile—imagine biting into that perfect blend of tangy Greek yogurt and subtle sweetness that greets you with every mouthful. When it’s time to enjoy them again, simply pop one in the toaster or microwave for a few seconds to warm it up; this step makes all the difference in reviving their glorious texture.
Freezing 3 ingredient high protein greek yogurt bagels for Later
If you’re anything like me, sometimes life gets busy and having quick meal options is crucial! Freezing your 3 ingredient high protein Greek yogurt bagels is a fantastic way to ensure you always have a nutritious snack on hand. To freeze them properly, let your bagels cool completely after baking. Then wrap each one tightly in plastic wrap or foil to prevent freezer burn—this step is non-negotiable if you want to maintain their deliciousness! You can store them in the freezer for up to three months without sacrificing flavor or texture. When you’re ready for a quick bite, simply take one out and allow it to thaw at room temperature or pop it straight into the toaster; either way, you’ll be rewarded with that freshly-baked taste! This method not only saves time but also gives you that comforting feeling of having something homemade ready whenever hunger strikes.
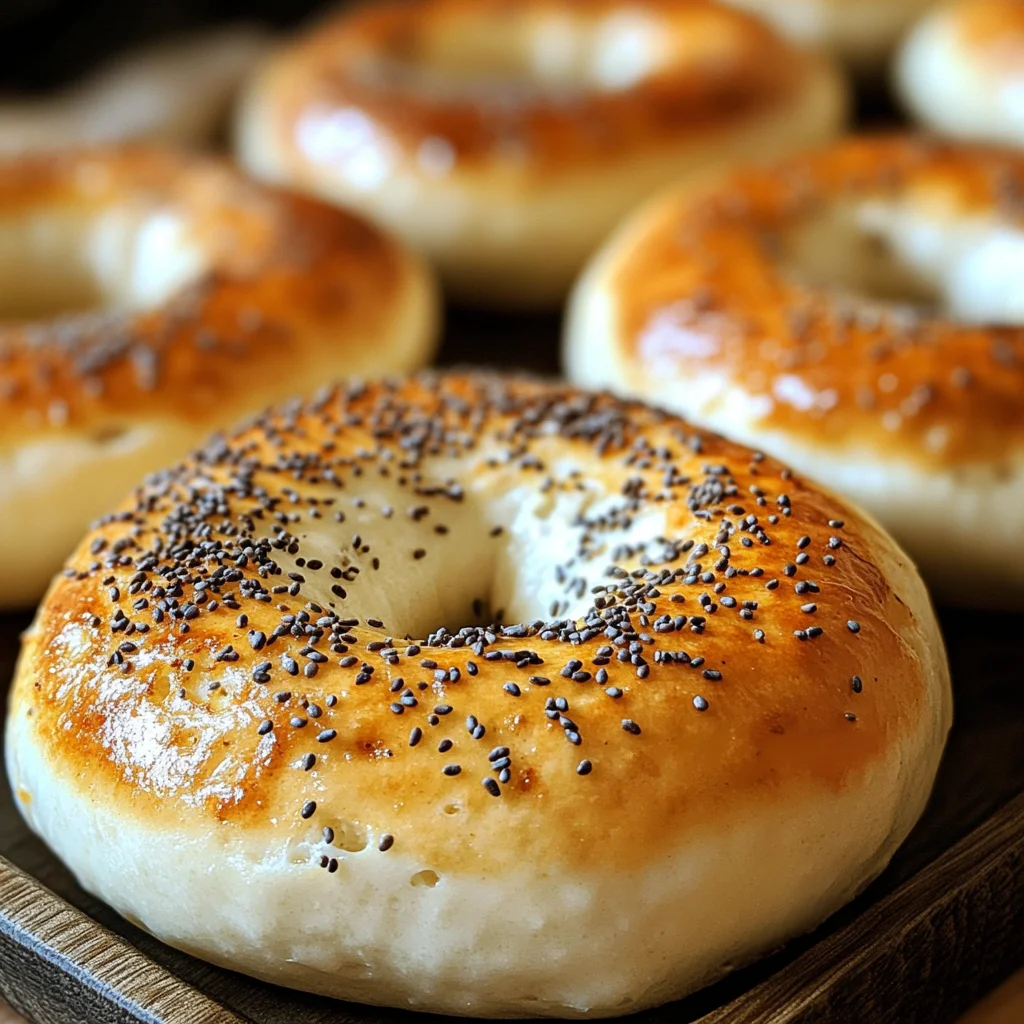
3 Ingredient High Protein Greek Yogurt Bagels

There’s something truly special about the aroma of freshly baked bagels filling your kitchen. These 3 ingredient high protein Greek yogurt bagels are a game-changer, offering a simple and nutritious start to your day. With just self-rising flour, Greek yogurt, and an egg wash, you can whip up soft, chewy bagels in under 30 minutes. They’re not only easy to make but also packed with protein, making them an ideal choice for busy mornings or relaxed brunches with family. Enjoy them plain or topped with your favorite spreads—each bite is a delightful reminder that simplicity can lead to extraordinary flavors.
- Prep Time: 10 minutes
- Cook Time: 25 minutes
- Total Time: 35 minutes
- Yield: Makes 4 servings 1x
- Category: Breakfast
- Method: Baking
- Cuisine: American
Ingredients
- 1 cup self-rising flour
- 1 cup Greek yogurt
- 1 egg (for egg wash)
Instructions
- Preheat your oven to 180°C (350°F).
- In a mixing bowl, combine the self-rising flour and Greek yogurt until a sticky dough forms.
- Lightly knead the dough on a floured surface for around 2-3 minutes until smooth.
- Divide the dough into four equal pieces and shape each into a ring.
- Place the bagels on a parchment-lined baking tray and brush with egg wash.
- Bake for 20–25 minutes or until golden brown.
- Allow cooling slightly before serving.
Nutrition
- Serving Size: 1 serving
- Calories: 220
- Sugar: 2g
- Sodium: 150mg
- Fat: 3g
- Saturated Fat: 1g
- Unsaturated Fat: 2g
- Trans Fat: 0g
- Carbohydrates: 36g
- Fiber: 2g
- Protein: 12g
- Cholesterol: 70mg