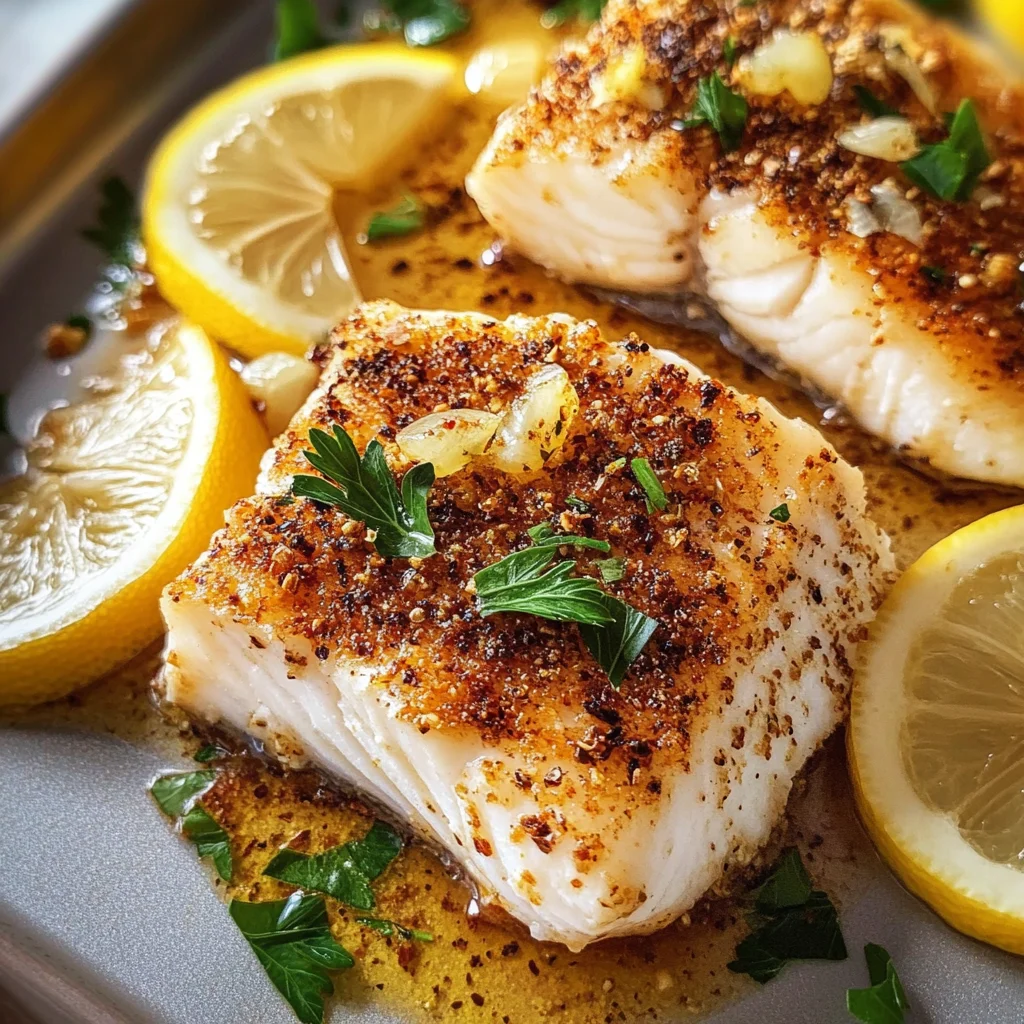
Baked Mahi Mahi
There’s something truly magical about stepping into your kitchen, feeling the warmth of the sun streaming through the window, and knowing that a delicious meal is just a few moments away. Cooking, for me, has always been more than just a means to satisfy hunger. It’s an experience filled with vibrant colors, intoxicating aromas, and the kind of joy that can only come from preparing something special for yourself or for those you love. Today, I’m excited to share my cherished recipe for Baked Mahi Mahi—a dish that perfectly balances taste and simplicity. With its firm fillets seasoned beautifully and baked to perfection, this creation brings the restaurant experience right into your home in under thirty minutes. Trust me when I say, once you try this recipe, you’ll find it hard to resist making it again and again.
The beauty of this Baked Mahi Mahi lies not only in its ease but also in its ability to transport you to sun-soaked shores where fresh seafood is abundant and flavorful experiences await. In every bite, you’ll discover the delicate yet bold flavors that make mahi mahi such a beloved choice for many seafood enthusiasts. This dish is perfect for weeknight dinners when you crave something healthy yet satisfying or for special occasions when you want to impress guests without spending hours in the kitchen. It’s amazing how a simple combination of high-quality ingredients can turn an ordinary evening into an extraordinary culinary adventure! So roll up your sleeves because we’re about to embark on this flavorful journey together.
Baked Mahi Mahi: A Quick and Delicious Seafood Delight
Let me take you through this incredible recipe that promises not just nourishment but also a celebration of flavors. You’ll be amazed at how effortlessly it comes together while still delivering that wow factor we all adore.

Ingredients:
As we dive into our ingredient list, remember that each component plays a vital role in crafting this delightful dish. Let’s embrace these flavor elements like old friends guiding us toward a delicious outcome!
- 2 pieces Mahi Mahi fillets (about 6 ounces each). When selecting your mahi mahi fillets, freshness is absolutely paramount; I cannot stress this enough! Look for fillets with a bright appearance and a mild ocean scent rather than any fishy odor—this indicates freshness. The texture should feel firm yet pliable when gently pressed; if it feels mushy or slimy, that’s a telltale sign to pass them by! Mahi mahi is known for its beautiful meaty texture which holds up wonderfully during baking and absorbs flavors beautifully.
- 2 tablespoons olive oil. This liquid gold does wonders in enhancing our fish’s natural flavors while keeping it moist during cooking. The richness of olive oil contributes not only healthy fats but also adds an aromatic depth that will elevate your dish significantly. Be sure to choose extra virgin olive oil if possible as it offers superior flavor profiles—think grassy notes with a hint of pepperiness! Remember, the quality of your oil matters here; it’s one of those non-negotiables that can truly enhance your final result.
- 2 tablespoons lemon juice. Freshly squeezed is always my go-to—there’s nothing quite like it! The brightness of lemon juice cuts through the richness of the fish beautifully while providing acidity that balances out the dish perfectly. Citrus fruits like lemon have compounds that brighten flavors and offer a refreshing contrast to savory elements; it’s essential to squeeze right before using as bottled varieties often lack that zesty punch we’re after!
- 1 teaspoon garlic powder. This ingredient might seem simple, but oh how impactful it is! Garlic powder brings an earthy warmth without overpowering other flavors—it’s almost like seasoning magic at work! If you happen to have fresh garlic on hand, feel free to use it instead; just remember one clove equals about 1/8 teaspoon of garlic powder! Whichever version you choose will meld beautifully with our other spices.
- 1 teaspoon onion powder. Similar to garlic powder, onion powder adds depth and sweetness without any harshness associated with raw onion. It’s subtle yet profoundly satisfying! This ingredient works harmoniously alongside the garlic powder creating what I like to call the flavor base of our seasoning mix—it’s crucial that we don’t skip this step!
- 1 teaspoon paprika. Often underestimated, paprika brings not only color but also an alluring smokiness or sweetness depending on which variety you select—I’d recommend smoked paprika if you’re looking for something extra special! Its vibrant hue will enhance visual appeal while contributing a lovely warmth without heat; trust me when I say this will take our baked mahi mahi over the top.
- Salt and pepper (to taste). Simple yet essential seasonings are what make everything come together seamlessly! Salt enhances every component’s flavor while pepper adds just enough kick without overwhelming our delicate fish—the key here is balance so sprinkle gradually until satisfied!
- Lemon slices (for garnish). These add an inviting presentation touch plus serve as an additional citrus hit when served alongside your baked mahi mahi—they’re like little bursts of sunshine on your plate!
- Fresh parsley, chopped (for garnish). Adding greenery not only beautifies but also brings freshness that complements seafood so well—it’s visually pleasing and aromatically uplifting! A sprinkle right before serving makes all the difference.
Equipment You’ll Need:
Having the right tools on hand makes cooking feel less daunting and much more enjoyable—a well-equipped kitchen is like having trusted allies ready to assist in your culinary adventure! While these aren’t technically ingredients themselves, they are essential partners in creating something wonderful!
- Baking sheet. A sturdy baking sheet ensures even cooking across your fillets while allowing for easy cleanup afterward—look for one with raised edges so any juices don’t spill over into your oven.
- Parchment paper or aluminum foil. Lining your baking sheet with parchment paper or aluminum foil makes cleanup effortless since nothing sticks—and who doesn’t appreciate less scrubbing later? Plus, it helps retain moisture around our fish during baking.
- Measuring spoons. Accurate measurements are crucial here especially when dealing with spices; they’ll guide you towards achieving those harmonious flavor profiles we’re gushing about!
- Fish spatula or regular spatula. Having a flexible spatula allows you to gently flip or transfer delicate fillets without breaking them apart—this tool is invaluable when plating up; nobody likes crumbling fish on their plate!
Now that we have everything in place let’s dive into preparing our Baked Mahi Mahi—it’s time to bring those delightful flavors together!
Step 1: Preheat Your Oven
First things first—let’s get our oven preheating at 400°F (200°C). Preheating may seem like a small detail but trust me—it’s absolutely crucial for achieving that perfect texture we desire from our baked mahi mahi! When we place our seasoned fillets in a hot oven right off the bat, they will cook evenly throughout while locking in moisture quickly—a critical factor especially when working with leaner cuts like mahi mahi which can dry out easily if mishandled.
Step 2: Prepare Your Fish
While waiting for the oven temperature to rise, let’s prepare those gorgeous mahi mahi fillets! Place them on a clean cutting board lined with parchment paper or even directly onto your greased baking sheet if preferred—it helps keep things tidy too! Gently pat them dry using paper towels; removing excess moisture ensures better seasoning adherence and promotes even cooking later on—a small step with great impact!
Step 3: Season Generously
Now comes one of my favorite parts—the seasoning extravaganza! In small mixing bowl combine olive oil along with lemon juice followed by garlic powder, onion powder, paprika plus generous pinches salt & pepper—mixing until smooth creates what I like to call ‘our flavor paste’. Then apply half of this mixture evenly over each filet using either brush or spoon making sure every inch gets coated beautifully; don’t rush this step—it’s where all those wonderful flavors start coming alive!
Step 4: Bake It Beautifully
With everything seasoned nicely now let’s slide those beautiful fillets into our preheated oven carefully! Bake them uncovered for approximately 20–25 minutes depending upon thickness—you’ll know they’re done once they flake easily with a fork yet remain juicy inside—that perfect balance we’ve been striving towards throughout this process! Keep an eye around minute 18 though—as ovens vary slightly—you want golden edges without losing moisture inside!
And there you have it—a warm embrace from both sea & earth wrapped into one delightful dish ready within no time at all! Trust me when I say once you’ve tasted this Baked Mahi Mahi masterpiece paired alongside some homemade sides—we’re talking pure bliss here—you might never look back again!
Step 5: Preparing Your Flavor Symphony
Now that your Mahi Mahi fillets are prepped and ready to shine, it’s time to create a flavor symphony that will elevate this dish to extraordinary heights. Start by drizzling the two tablespoons of olive oil over the fillets. This isn’t just for flavor; it’s essential for ensuring that your fish retains moisture throughout the baking process. Olive oil acts as a protective barrier, preventing the delicate flesh of the Mahi Mahi from drying out as it bakes in the oven’s heat. You’ll want to use high-quality extra virgin olive oil for its rich taste and health benefits, so don’t skimp on this step.
Next, sprinkle the garlic powder, onion powder, and paprika generously over both sides of the fillets. I can already imagine the intoxicating aroma wafting through your kitchen! The garlic and onion powders not only impart a savory depth but also enhance the natural sweetness of the fish, while paprika lends a subtle smokiness and vibrant color that makes your dish visually stunning. Don’t forget to season with salt and pepper to taste—these are your allies in bringing all these flavors together. Remember, seasoning is not just an afterthought; it’s crucial! It elevates each bite into something profoundly satisfying, tying all elements into a harmonious blend.
Step 6: The Lemon Juice Magic
Now comes one of my favorite parts: drizzling freshly squeezed lemon juice over your seasoned fillets. I can’t emphasize enough how transformative this step is! The acidity of lemon juice brightens everything up—you’ll notice how it cuts through any richness in the fish and enhances its natural flavors. But there’s more! The citric acid in lemon juice also helps tenderize the fish slightly, making every mouthful melt-in-your-mouth tender. You want to let this sit for just a few minutes before baking; give it around five minutes if you can bear to wait! This brief moment allows those flavors to meld beautifully.
While you’re waiting, preheat your oven to 400°F (200°C). Trust me on this—getting your oven hot enough is absolutely paramount for achieving that perfect texture on your Mahi Mahi. When you place those fillets in a hot oven, they will sear slightly around the edges while remaining juicy inside—a culinary miracle that you won’t want to miss! As you prepare for baking, take a moment to visualize how radiant this dish will look once it’s finished: golden edges with a slight caramelization that invites you in like an old friend.
Step 7: Baking Your Perfect Baked Mahi Mahi
With your oven preheated and your fillets seasoned beautifully, it’s time for the grand entrance into the oven! Place your prepared Mahi Mahi onto a lined baking sheet—parchment paper works wonders here as it prevents sticking and makes cleanup a breeze. Ensure there’s some space between each fillet; overcrowding can lead to uneven cooking which we definitely want to avoid. Pop them into that preheated oven and set a timer for 15 minutes.
As they bake, keep an eye on them; this is where magic happens! You’ll start noticing changes—the fish turning opaque as it cooks through beautifully. After about 12 minutes, I suggest peeking inside; using a fork or knife at the thickest part of one fillet, gently flake apart some of that luscious flesh. You’re looking for an opaque center with just a hint of translucence; that’s when it’s done perfectly! Underbaking slightly is much better than overbaking because nobody wants dry fish—it should be flaky yet moist.
Step 8: The Final Touches
As soon as your timer goes off at 15 minutes (or sooner if they’re cooked through), remove those gorgeous fillets from the oven with pride—this is truly where all your efforts culminate into something magnificent! Allowing them to rest for about 2-3 minutes before serving is non-negotiable; during this brief period, juices redistribute throughout the meat which results in each bite being even more succulent than before. While they rest, take advantage of this time to prepare any garnishes—slicing fresh lemons or chopping parsley adds not only aesthetic appeal but also fresh flavors that brighten every mouthful.
When you plate these beautiful Baked Mahi Mahi fillets, don’t forget to drizzle any remaining pan juices over them—a little liquid gold that carries all those spices and seasonings directly onto your plate! Garnish with lemon slices and chopped parsley for that pop of color and freshness. Trust me when I say this final flourish not only entices the eyes but accentuates every bite with vibrant notes that make this dish truly extraordinary.
Now take a moment before diving in—breathe in those aromas—and relish what you’ve created from scratch! Each forkful promises an explosion of flavor that’s both healthy and indulgent—a perfect balance that’s sure to impress anyone lucky enough to share this meal with you. Enjoy every moment—and remember, cooking is about creating lasting memories alongside delicious meals!
Storage and Enjoyment Tips for Your Baked Mahi Mahi
Ah, the moment has arrived! Your Baked Mahi Mahi is ready, beautifully golden and fragrant, just waiting to be enjoyed. But let’s talk about what happens after the feasting begins. I know that sometimes we cook more than we can eat in one sitting, so having a plan for those delightful leftovers is crucial. Trust me when I say that with the right storage methods, you can keep that flavor alive and kicking for days to come!
Storing Leftover Baked Mahi Mahi
When it comes to storing your precious leftover Baked Mahi Mahi, the best approach is to use an airtight container. A glass or BPA-free plastic container works wonders because they seal in moisture while keeping unwanted odors at bay. If you’re planning on enjoying your leftovers within 2-3 days, just pop them in the fridge where they’ll remain fresh and flavorful. For preserving quality even further, consider placing a slice of bread inside the container—yes, really! This little trick absorbs excess moisture and keeps your fish firm rather than soggy. When you finally get around to reheating your mahi mahi, just remember to do it gently; a quick zap in the microwave or a brief stint in a warm oven will work wonders, ensuring you retain that lovely texture without compromising taste.
Freezing Baked Mahi Mahi for Later
Now, if you find yourself with more Baked Mahi Mahi than you can handle (which is often the case because it’s just so good!), freezing is a brilliant option. To freeze properly, allow the fillets to cool completely before wrapping each piece tightly in plastic wrap or aluminum foil. Then place them in a freezer-safe bag—squeeze out as much air as possible before sealing! This method will keep your mahi mahi deliciously intact for up to three months. The best part? When you’re ready to enjoy it again, simply thaw it overnight in the fridge or use the microwave’s defrost setting—easy peasy! Not only does this make meal prep a breeze, but it also means you can indulge in your favorite seafood dish any time the craving strikes. How convenient is that?
Baked Mahi Mahi
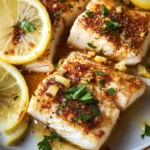
Baked Mahi Mahi is your ticket to a delightful seafood experience right in your kitchen. This simple yet elegant dish features tender mahi mahi fillets marinated in a zesty blend of olive oil, lemon juice, and spices. In just under 30 minutes, you can enjoy a nutritious meal that boasts vibrant flavors and a satisfying texture. Perfect for busy weeknights or special occasions, this recipe is sure to impress your family and friends without consuming hours of your time. Paired with fresh garnishes like parsley and lemon slices, this baked fish not only tastes incredible but also looks stunning on the plate. Dive into this culinary adventure with confidence!
- Prep Time: 10 minutes
- Cook Time: 25 minutes
- Total Time: 35 minutes
- Yield: Serves 2
- Category: Main
- Method: Baking
- Cuisine: Seafood
Ingredients
- 2 pieces Mahi Mahi fillets (about 6 ounces each)
- 2 tablespoons olive oil
- 2 tablespoons fresh lemon juice
- 1 teaspoon garlic powder
- 1 teaspoon onion powder
- 1 teaspoon paprika
- Salt and pepper to taste
- Lemon slices and chopped fresh parsley for garnish
Instructions
- Preheat your oven to 400°F (200°C).
- Pat the mahi mahi fillets dry with paper towels.
- In a small bowl, mix olive oil, lemon juice, garlic powder, onion powder, paprika, salt, and pepper.
- Brush or spoon half of the mixture over each fillet until evenly coated.
- Place the seasoned fillets on a lined baking sheet.
- Bake for 20-25 minutes until the fish flakes easily with a fork.
- Let rest for a few minutes before serving. Garnish with lemon slices and parsley.
Nutrition
- Serving Size: 1 fillet (170g)
- Calories: 250
- Sugar: 0g
- Sodium: 100mg
- Fat: 12g
- Saturated Fat: 1g
- Unsaturated Fat: 11g
- Trans Fat: 0g
- Carbohydrates: 3g
- Fiber: 0g
- Protein: 37g
- Cholesterol: 90mg