Perfect Grilled Chicken Breast
There’s something truly magical about the experience of grilling chicken breast, isn’t there? It goes beyond just cooking; it’s a celebration of flavor, a dance of textures, and a shared moment that brings family and friends together. As the grill heats up and the tantalizing aroma of marinated chicken fills the air, it feels like time slows down, allowing us to savor not just the food but the memories we create around it. The Perfect Grilled Chicken Breast is more than just a meal—it’s a joy that unfolds with each bite, revealing layers of flavor and tenderness that are simply unforgettable. I promise you, once you master this recipe, you’ll find yourself returning to it again and again, each time perfecting your technique while enjoying its delicious simplicity.
The beauty of this dish lies in its versatility; it can be served at a backyard barbecue or as part of an elegant weeknight dinner. The marinade combines olive oil, garlic, lemon juice, and a touch of sweetness to create a symphony of flavors that seeps deep into the chicken. This process not only enhances taste but also ensures that each piece remains juicy and succulent. Trust me when I say that there’s nothing quite like sinking your teeth into perfectly grilled chicken breast—it’s an experience that evokes comfort and satisfaction every time. So grab your apron and let’s dive into this culinary adventure together!
Perfect Grilled Chicken Breast: A Symphony of Flavor on Your Grill
Let’s embark on this delightful journey to creating the Perfect Grilled Chicken Breast! This recipe will become a staple in your home cooking repertoire, promising juicy, flavorful chicken every single time.
Ingredients:
Before we get cooking, let’s gather all our ingredients! Each one plays a vital role in crafting that perfect dish we’re after.
- 2 pounds boneless, skinless chicken breast (about 6 breasts). Choosing high-quality chicken is crucial for achieving the best results in this recipe. Look for fresh, plump breasts with no added hormones or antibiotics if possible. The absence of skin allows for maximum marinade absorption while keeping the meat leaner and healthier. When you pound them to an even thickness—about half an inch—you ensure they cook evenly on the grill; this step is non-negotiable if you want to avoid dry spots!
- 3 tablespoons olive oil. This liquid gold is essential not just for flavor but also for moisture. Olive oil helps to keep the chicken tender while adding richness to our marinade. Opt for extra virgin olive oil for its robust taste and health benefits; it truly elevates the dish! If you’re out of olive oil or prefer something milder, avocado oil can be a fantastic substitute.
- 3 cloves garlic (minced). Garlic is like magic in cooking—it brings depth and complexity to any dish. Freshly minced garlic will infuse our marinade with its pungent aroma and flavor; trust me when I say it transforms ordinary grilled chicken into something extraordinary! For those who might have garlic powder on hand instead, use about one teaspoon as an alternative—though nothing beats fresh when you can use it.
- 1 tablespoon lemon juice. This bright acidity cuts through the richness of the olive oil and compliments the natural flavors of the chicken beautifully. Freshly squeezed lemon juice is ideal here; those bottled versions simply can’t compete with the vibrant zing that fresh citrus offers! If you’re feeling adventurous, try substituting lime juice for a different twist.
- 2 teaspoons Italian seasoning. A blend of dried herbs such as oregano, basil, thyme, and rosemary brings warmth and familiarity—think cozy family dinners or summer picnics! This seasoning adds an aromatic layer without overpowering our main ingredient: the chicken itself.
- 1 teaspoon sugar. While it may seem odd to add sugar to savory dishes, it plays an important role in balancing flavors by enhancing sweetness and caramelization during grilling. This subtle hint adds depth without making your dish taste sweet—trust me on this!
- ½ teaspoon garlic powder. While we’ve already included fresh garlic in our marinade, garlic powder provides another layer of flavor that rounds out our seasoning profile beautifully. It’s also great if you’re looking for an even distribution throughout your marinade.
- 1 ½ teaspoons salt. Salt is often dubbed “the secret ingredient” because it draws out moisture from proteins while enhancing their inherent flavors. Be sure not to skip this step—it’s essential for ensuring your chicken is well-seasoned throughout!
- Ground black pepper (to taste). A simple yet effective way to add warmth without overwhelming other flavors—a sprinkle (or two) will elevate your grilled chicken beautifully!
Equipment You’ll Need:
Now that we have everything ready, let’s talk about some essential tools for this culinary adventure! Having the right equipment makes all the difference between good food and great food.
- Meat mallet or rolling pin: These handy tools are indispensable when it comes to achieving uniform thickness in your chicken breasts. Pounding them gently helps break down muscle fibers so they remain tender during cooking—a step you won’t want to skip if you love juicy grilled meat!
- Large Ziploc bag (4–6 quart): A spacious bag works wonders for marinating! It allows all those flavors to envelop each piece of chicken thoroughly without needing multiple containers—plus it’s easy cleanup afterward!
- Grill: Whether you’re using gas or charcoal doesn’t matter much—the key here is preheating it properly so we achieve those beautiful grill marks while sealing in juices! An outdoor grill creates smoky nuances that’ll make your taste buds rejoice.
- Meat thermometer: To ensure perfectly cooked chicken every time (we’re aiming for 165°F), having an instant-read thermometer on hand is crucial! Avoid guessing games when grilling; trust me—you’ll thank yourself later.
With our ingredients gathered and equipment ready at hand, we can dive into preparing our Perfect Grilled Chicken Breast together! Each step will bring us closer to unlocking incredible flavor through patience and care—so let’s get started!
Step 1: Tenderizing Perfection
Begin by placing your boneless skinless chicken breasts inside that large Ziploc bag we mentioned earlier. Before sealing it up completely, leave one end open—you’ll want access as we tenderize these beauties! Using either a meat mallet or rolling pin (whichever you have handy), gently pound each breast until they reach about half an inch thickness—this technique ensures even cooking throughout while preventing dryness from overcooking thinner parts. Don’t rush through this process; take your time getting them uniform—that’s how you’ll achieve perfection on each bite!
Step 2: Marinating Magic
Now comes one of my favorite parts—the marinade! In a small bowl or measuring jug (whatever’s easiest), combine the remaining ingredients: olive oil, minced garlic cloves, lemon juice, Italian seasoning blend, sugar, garlic powder—and don’t forget that all-important salt! Mix everything until combined; then pour over your prepared chicken in its Ziploc cocoon before sealing securely (always do a quick hole check!). Give it a nice massage through the bag; feel free to channel any energy into this step—it helps distribute all those lovely flavors evenly across every piece. Once massaged lovingly into place—refrigerate for at least four hours or up to twelve hours if you’ve got time; I promise you won’t regret letting those flavors meld together overnight.
Step 3: The Grill Awaits
When it’s finally time to fire up that grill (and yes—this part gets exciting!), take your marinated chicken out from its chilled resting place twenty minutes beforehand so they come closer towards room temperature before hitting those hot grates—it truly helps them cook evenly throughout! Preheat your grill over high heat until nice and sizzling hot before lightly oiling grates with either spray or brush method…just enough so nothing sticks during cooking—but don’t go overboard here! Place each piece directly onto heated surfaces carefully—and cover using lid immediately afterward—to trap heat inside nicely while locking in juices too!
Step 4: Searing Success
Start timing now: grill those delightful breasts for approximately two-to-four minutes per side depending on thickness until juices run clear—a sign they’re done—but don’t forget about using that trusty thermometer here too—we’re aiming for internal temperatures reaching 165°F before declaring victory over undercooked poultry fears! Once reached perfection levels? Remove from heat promptly—and allow resting five minutes prior serving—to ensure everything stays succulent inside while redistributing moisture back within post-cooking magic!
I can’t wait for you to experience how wonderful this Perfect Grilled Chicken Breast turns out—I know you’re going love every flavorful bite just as much as I do! Stay tuned—we’ve still got more steps ahead filled with excitement waiting just around corner…
The Journey to the Perfect Grilled Chicken Breast
Step 5: Let’s Marinate for Flavor Explosion
After you’ve tenderized your chicken to that perfect half-inch thickness—this is absolutely crucial for ensuring even cooking and optimal tenderness—you’ll want to dive into the marinating phase. Take a moment to appreciate the beauty of those flattened chicken breasts, as they’re about to absorb a symphony of flavors! In a small bowl or measuring jug, whisk together the olive oil, minced garlic, lemon juice, Italian seasoning, sugar, garlic powder, salt, and black pepper. The olive oil acts as a flavor carrier; it helps the spices cling to the chicken while simultaneously keeping it moist during grilling. The acidity in the lemon juice not only brightens up the flavors but also plays an important role in tenderizing the meat—a true game-changer!
Once your marinade is beautifully combined, pour it over the chicken in your Ziploc bag. Yes, I know what you might be thinking: “Is this really necessary?” Trust me on this one! Ensuring that every inch of that chicken is coated with your homemade marinade is non-negotiable for achieving that deeply satisfying flavor profile. Seal the bag tightly—double-check for any holes (we don’t want any leaks ruining our flavorful journey!)—and then give it a gentle massage. Imagine you’re giving your chicken a warm hug; this step helps distribute the marinade evenly and infuses every bite with deliciousness. Now comes the hard part: refrigerate that bag for at least 4 hours or up to 12 hours if you can wait. This patience will pay off in dividends when you take your first bite of that grilled masterpiece.
Step 6: Prepping Your Grill Like a Pro
As your chicken bathes in its flavorful marinade, it’s time to shift gears and prepare your grill for action. About 20 minutes before you’re ready to grill, take that marinated chicken out of the refrigerator and let it rest at room temperature. I know it’s tempting to throw cold chicken straight onto a hot grill, but allowing it to sit out for these few minutes helps ensure even cooking—you’ll avoid that dreaded dry outer layer with an undercooked center! Meanwhile, fire up your grill and set it to high heat. If you’re using a charcoal grill, light those coals until they’re glowing red with ash; if gas is more your style, ignite those burners and let them preheat.
While your grill reaches sizzling temperatures—aiming for around 450°F—don’t forget about those grates! Lightly oiling them is paramount; this simple act creates a non-stick surface that will help achieve those beautiful sear marks without tearing apart your precious chicken. You can use a paper towel dipped in oil held with tongs or a grill brush for this task. Remember: we want gorgeous grill lines and juicy chicken, so don’t skip this vital step! Keep an eye on the temperature; if it’s too hot, you may end up with charred outsides and raw insides—nobody wants that!
Step 7: The Grilling Symphony Begins
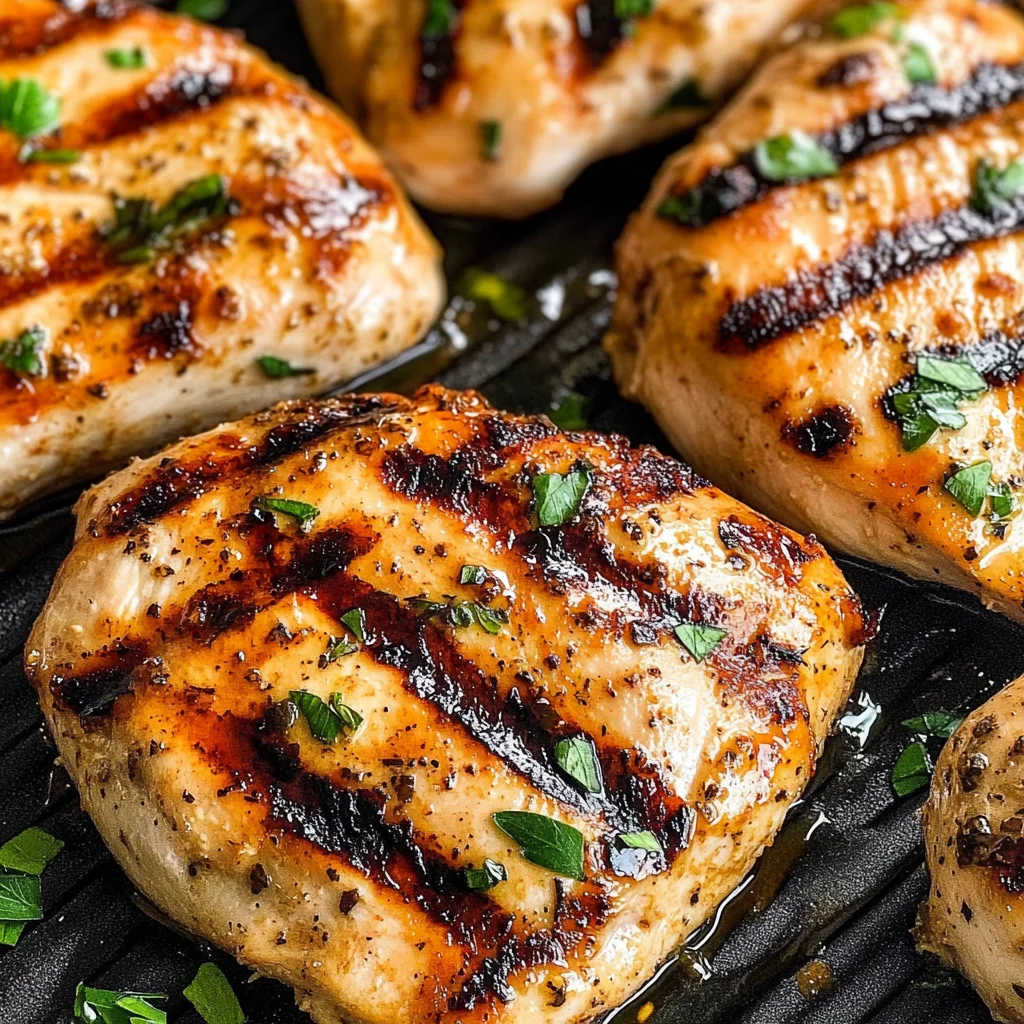
Now comes the moment we’ve all been waiting for: grilling time! With your grill hot and ready like an eager orchestra preparing for performance night, carefully place each piece of marinated chicken breast directly onto those oiled grates. It’s essential not to overcrowd them; giving each breast enough space allows heat circulation and ensures they cook evenly without steaming each other. Close the lid gently—this traps heat like an oven—and let them dance on high heat for about 2-4 minutes before flipping them over.
You might wonder why we’re starting with such high heat—well, here’s where science meets culinary magic! That initial sear locks in juices while creating a delightful golden crust on the outside; it’s this contrast of textures—the crispiness of the exterior against the tender juiciness inside—that makes grilled chicken so utterly intoxicating. As you flip each breast after about 2-4 minutes (feel free to check their progress by lifting one slightly), keep an eye on their color; they should be developing beautiful brown grill marks by now—a sign that flavor is building beautifully! Continue grilling until juices run clear and an internal thermometer reads 165°F—a non-negotiable point for food safety!
Step 8: Patience is Key – Rest Before Serving
Ahh…the moment has arrived when these glorious pieces of grilled perfection are ready to come off the heat! However tempting it might be to dig right in—I urge you to resist! Allowing your grilled chicken breasts to rest for about 5 minutes before serving is crucial for achieving juicy results. This step allows time for the juices within each piece of meat to redistribute evenly throughout—the last thing we want is all those flavorful juices spilling out onto our cutting board when we slice into them!
During this resting period, cover your grilled beauties loosely with aluminum foil—it keeps them warm while retaining moisture without steaming them further (we want to keep that glorious crust intact!). After five minutes have passed—trust me on this—you’ll find yourself rewarded with succulent bites filled with flavor beyond what you could imagine. Each piece will be perfectly juicy and bursting with all those beautiful marinades we’ve worked so hard on together!
Final Touches
Step 9: Serve Up Your Masterpiece
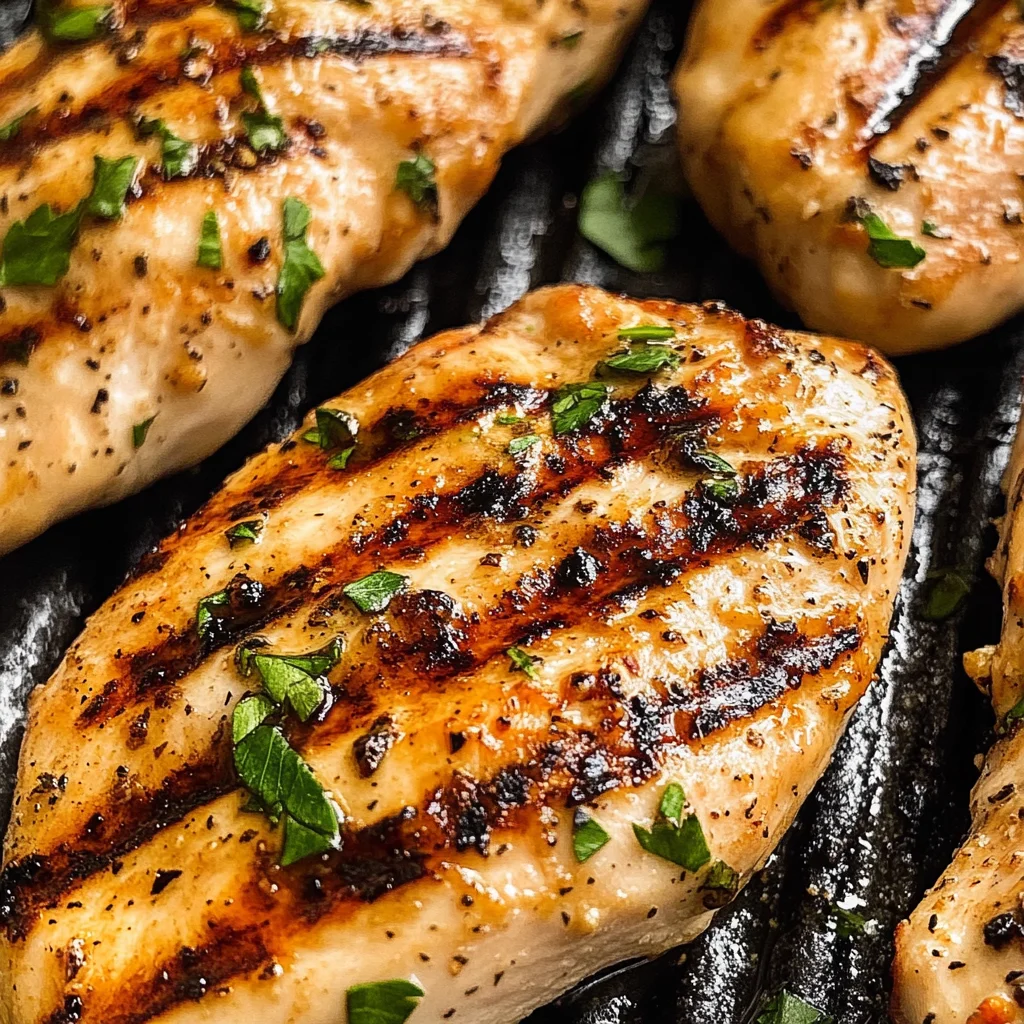
Finally, my dear friends—it’s time for presentation! Once rested and ready to go, place these perfectly grilled chicken breasts on a serving platter or individual plates. I recommend garnishing with freshly chopped herbs like parsley or basil—they add such vibrant color while enhancing flavors too! Squeeze extra lemon over top if desired; there’s something magical about that citrus kiss alongside our savory creation.
And there you have it—the Perfect Grilled Chicken Breast! It’s truly extraordinary how something so simple can yield such profound satisfaction at mealtime. Whether you’re hosting friends for dinner or enjoying a casual family meal outdoors as summer breezes through your backyard—it never fails to impress and delight! So gather around together, savor every bite, share stories over dinner—and most importantly…enjoy every moment spent creating delicious memories around food.
I hope you feel as excited as I do about making this dish—it holds a special place in my heart—and I promise once you master these steps; you’ll never think of grilled chicken quite the same way again! Happy grilling!
Storage and Enjoyment Tips for Your Perfect Grilled Chicken Breast
Now that you’ve created your culinary masterpiece, it’s time to revel in the joy of savoring your perfect grilled chicken breast! Whether you’re hosting a gathering or enjoying a cozy dinner at home, this dish is sure to impress with its juicy tenderness and vibrant flavors. But what happens if you have leftovers? No need to fret, my friend! There are delightful ways to store and enjoy this flavorful creation long after the grill has cooled down.
Storing Leftover Perfect Grilled Chicken Breast
To keep your leftover perfect grilled chicken breast as luscious as when it was freshly cooked, I recommend using airtight containers or resealable bags. This helps lock in the moisture and flavor while preventing any unwanted air from drying out your delicious meal. If stored properly in the refrigerator, it should last about 3-4 days—just enough time for you to relish those tasty bites throughout the week! And here’s a little pro tip: if you’re worried about dryness, consider placing a slice of bread in the container; it absorbs excess moisture while keeping the chicken juicy. When reheating, simply warm it gently in the microwave or on a skillet over low heat to ensure it stays tender. Trust me, nothing beats diving into that mouthwatering goodness a few days later!
Freezing Perfect Grilled Chicken Breast for Later
If you find yourself with extra chicken—and let’s be honest, who doesn’t love having ready-to-eat meals on hand?—freezing is an excellent option! First, make sure to allow your perfect grilled chicken breast to cool completely before sealing it away in sturdy freezer bags or airtight containers. This way, it’ll maintain its texture and flavor. When frozen correctly, your chicken can last up to three months without losing its charm! When you’re ready to use it, simply thaw overnight in the refrigerator or use the defrost setting on your microwave. This convenience is absolutely paramount; just imagine pulling out perfectly grilled chicken from your freezer on a busy weeknight—it’s like having a little piece of summer grilling magic ready for you at any moment!
As you can see, both storing and freezing options offer fantastic ways to preserve your perfect grilled chicken breast, ensuring that every bite remains moist and flavorful no matter when you decide to enjoy it again.
Perfect Grilled Chicken Breast
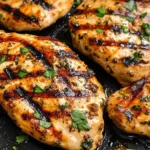
Experience the joy of grilling with this Perfect Grilled Chicken Breast recipe that promises juicy, flavorful results every time. This dish is not just a meal; it’s a celebration of flavor that brings family and friends together. The marinade features a delightful blend of olive oil, garlic, lemon juice, and Italian seasoning, ensuring that each bite is tender and aromatic. Whether served at a backyard barbecue or as part of a cozy weeknight dinner, this chicken breast will quickly become a staple in your cooking repertoire. Grab your apron and get ready to create unforgettable memories around the grill!
- Prep Time: 15 minutes
- Cook Time: 10 minutes
- Total Time: 25 minutes
- Yield: Serves approximately 6
- Category: Main
- Method: Grilling
- Cuisine: American
Ingredients
- 2 pounds boneless, skinless chicken breasts
- 3 tablespoons olive oil
- 3 cloves garlic (minced)
- 1 tablespoon lemon juice
- 2 teaspoons Italian seasoning
- 1 teaspoon sugar
- ½ teaspoon garlic powder
- 1 ½ teaspoons salt
- Ground black pepper (to taste)
Instructions
- Tenderize the chicken breasts to about half an inch thickness using a meat mallet or rolling pin.
- In a bowl, mix olive oil, minced garlic, lemon juice, Italian seasoning, sugar, garlic powder, salt, and black pepper.
- Place the chicken in a large Ziploc bag and pour the marinade over it. Seal the bag and massage gently to coat evenly. Refrigerate for at least 4 hours or up to 12 hours.
- Preheat your grill to high heat and lightly oil the grates.
- Grill chicken for about 2-4 minutes on each side until juices run clear and internal temperature reaches 165°F.
- Allow resting for 5 minutes before serving.
Nutrition
- Serving Size: Approximately 5 ounces (140g)
- Calories: 220
- Sugar: 1g
- Sodium: 450mg
- Fat: 9g
- Saturated Fat: 1g
- Unsaturated Fat: 8g
- Trans Fat: 0g
- Carbohydrates: 2g
- Fiber: 0g
- Protein: 34g
- Cholesterol: 120mg