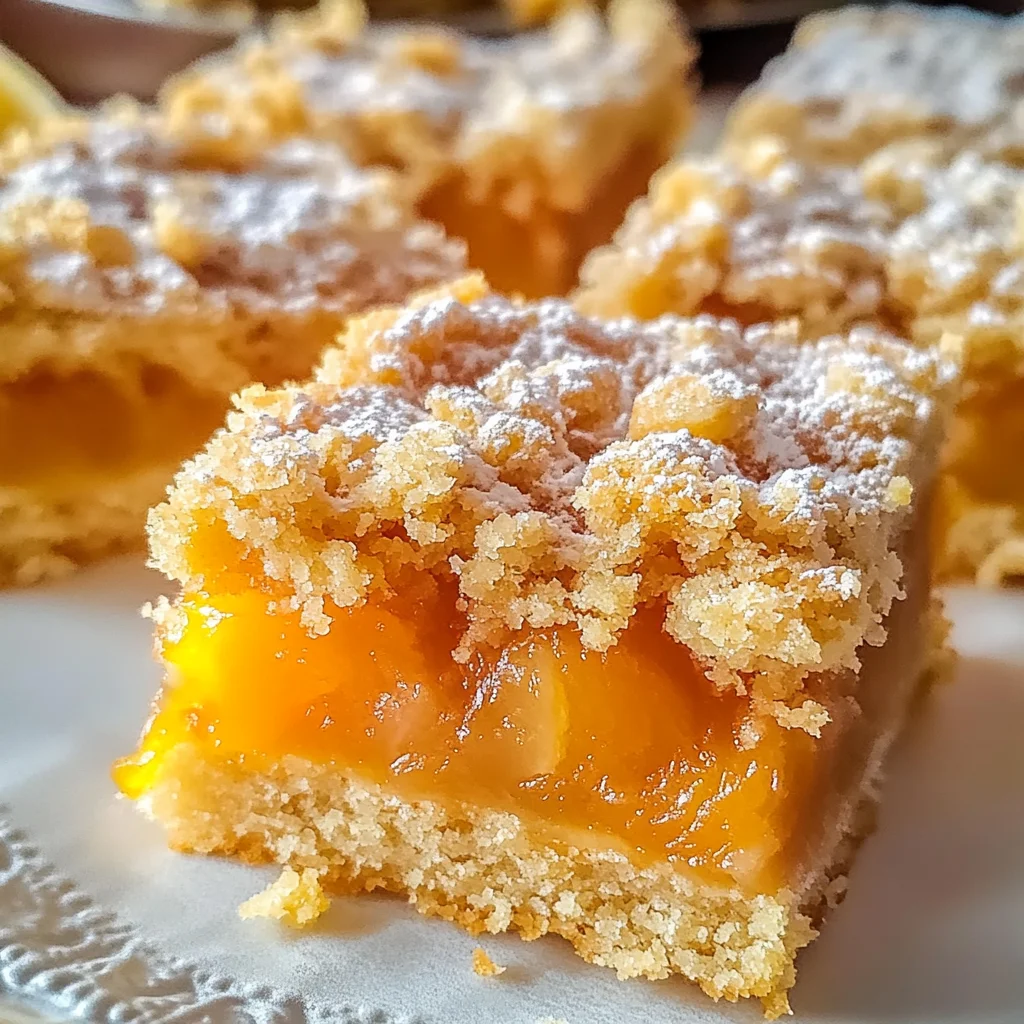
Apricot Shortbread Bars Recipe
There’s something profoundly satisfying about baking that transcends mere sustenance. It’s an experience that envelops you in warmth and nostalgia, evoking memories of shared moments with family and friends, the comforting aroma wafting through the house, and the delightful anticipation of tasting something you’ve lovingly crafted. This Apricot Shortbread Bars Recipe encapsulates all that and more! Each bite reveals a symphony of flavors, where the sweet tang of apricots meets the buttery richness of shortbread—a combination so divine it feels like a warm hug. As you embark on this culinary journey, I promise you’ll find not just a delicious treat but a celebration of flavors and textures.
Now, let’s talk about the heart of this recipe—the dried apricots. These little gems, when cooked down into a luscious filling, transform into something truly extraordinary. Their sweetness is enhanced by just the right amount of sugar and a splash of lemon juice, creating a balanced filling that pairs beautifully with the crumbly shortbread crust. The layers meld together in delightful harmony, making each bar an irresistible bite-sized treasure. You’ll be captivated not only by how easy they are to make but also by how quickly they disappear once shared with loved ones!
Apricot Shortbread Bars Recipe: Sweet Delights in Every Bite
Welcome to a delightful baking adventure with my Apricot Shortbread Bars Recipe! This treat is perfect for any occasion—whether it’s an afternoon tea or simply a sweet indulgence after dinner. Let’s dive into this simple yet unforgettable recipe that will surely become a cherished favorite in your home!
Ingredients:
As we gather our ingredients for these Apricot Shortbread Bars, think about how each element plays its part in crafting this beautiful dessert. Let’s explore what we need.
- 3 cups (360g) all-purpose flour. Flour is the backbone of our shortbread crust; it provides structure and stability to our bars. For this recipe, using all-purpose flour is ideal because it strikes the perfect balance between tenderness and sturdiness—allowing us to achieve that wonderfully crumbly texture while still holding together beautifully when baked. When measuring your flour, I recommend spooning it into your measuring cup rather than scooping directly from the bag to avoid packing it down too tightly; this will ensure your bars aren’t dense!
- 1 cup (200g) granulated sugar. Sugar isn’t just for sweetness; it plays an essential role in achieving that golden-brown color we adore in baked goods. In our Apricot Shortbread Bars, sugar works its magic by caramelizing slightly during baking, adding depth to both flavor and texture. If you’re feeling adventurous or health-conscious, consider using coconut sugar or a natural alternative—just keep in mind that adjustments might need to be made based on sweetness levels.
- 1 teaspoon baking powder. This leavening agent is crucial! It helps create those tender layers in our crust by introducing air into the dough as it bakes. The result? A lightness that contrasts beautifully with the chewy apricot filling. Always check your baking powder’s expiration date before using—it should be fresh for optimal results.
- 1/2 teaspoon salt. Salt enhances flavors—it’s like a secret ingredient that brings everything together beautifully without being overpowering. In desserts like these bars, salt balances out sweetness and accentuates the natural flavors of apricots. Trust me; don’t skip this step!
- 1 1/2 cups (340g or 3 sticks) unsalted butter, cold and cut into small cubes. Butter is essential for creating that rich flavor and tender texture we crave in shortbreads! Cold butter helps create flakes within our crust as it melts during baking—this wonderful layering effect contributes to its signature crumbly texture. Look for high-quality unsalted butter; it allows you better control over seasoning your dish.
- 1 large egg, lightly beaten. The egg acts as a binding agent here—it holds our crust together while adding moisture for tenderness as well. Beating it lightly incorporates air which can contribute to an airy texture when mixed into our shortbread dough.
- 1 teaspoon vanilla extract. Vanilla is truly magical! It adds warmth and complexity to our bars’ flavor profile without stealing the spotlight from the apricots themselves. When choosing vanilla extract, opt for pure vanilla rather than imitation; you’ll notice a significant difference in taste.
- 2 cups (about 350-400g) dried apricots, roughly chopped. Dried apricots bring not only sweetness but also their lovely chewy texture; they form the heart of our filling! When selecting dried apricots, look for those without added sugars or preservatives—the purer they are, the more vibrant their flavor will be once cooked down.
- 1 1/2 cups water. Water hydrates our dried fruit as they cook down into a luscious filling; it’s essential for achieving that silky-smooth consistency we desire! Don’t worry about measuring precisely—this step is forgiving.
- 1/2 cup (100g) granulated sugar (adjust to taste depending on apricot sweetness). Since dried fruits can vary significantly in sweetness based on ripeness at harvest time or drying methods used, having some flexibility with additional sugar allows you to tailor your filling perfectly according to your palate.
- 2 tablespoons fresh lemon juice. Fresh citrus juice brightens up any dish! Here, lemon juice adds acidity that cuts through the sweetness of both the apricots and sugar—a delightful contrast that makes every bite refreshing instead of cloyingly sweet.
- 1/4 teaspoon almond extract (optional but highly recommended for depth of flavor). Almond extract introduces subtle nutty undertones which pair excellently with apricots—it’s like adding another layer of complexity without overpowering their natural taste!
- Pinch of salt again ties everything together nicely by elevating flavors throughout both components: crust AND filling!
Equipment You’ll Need:
Having the right tools can make all the difference in your baking experience! While these items aren’t ingredients per se, they are essential partners on your journey toward creating these delightful Apricot Shortbread Bars.
- 9×13 inch baking pan – This size is perfect for ensuring even cooking while allowing ample space for spreading out both crust and filling without overcrowding them! If you have one with straight edges versus sloped sides—great choice! It makes cutting cleaner later on.
- Parchment paper – An invaluable tool for easy removal post-baking; lining your pan prevents sticking so you can lift out entire batches effortlessly once cooled down properly.
- Mixing bowls (various sizes) – A set ranging from small (for eggs & extracts) up through large (for combining dry ingredients) ensures efficiency throughout each step while minimizing mess!
- Whisk or fork – Essential tools needed during mixing stages—they’ll help aerate mixtures effectively while blending elements seamlessly together until smooth!
- Pastry blender or food processor – Either option works wonders when cutting cold butter into flour mixture efficiently—creating those inviting flaky layers we cherish within baked goods!
Now that we’ve gathered our ingredients and tools let’s dive into preparing these scrumptious Apricot Shortbread Bars!
Step 1: Crafting Your Divine Apricot Filling
Begin by placing your chopped dried apricots into a medium saucepan along with water and sugar—a simple yet impactful combination destined for greatness! Turn on your heat to medium-high until everything begins simmering gently; stirring occasionally ensures nothing sticks or burns at this critical stage as transformation unfolds before your eyes—a vibrant medley bubbling away harmoniously! Once simmering has commenced successfully reduce heat down low—you want slow cooking now so flavors meld beautifully over approximately fifteen minutes’ time frame until those lovely fruit pieces soften dramatically while liquid evaporates substantially too… Stirring occasionally remains imperative here—it prevents sticking altogether while lovingly coaxing out every ounce of essence locked inside those tiny golden morsels!
Once cooked thoroughly through—perhaps they resemble jam-like consistency now? Remove from heat entirely; then add fresh lemon juice alongside optional almond extract followed by pinch salt—and stir well until combined completely! Allow cooling slightly before transferring mixture either straight back pot itself if using immersion blender tool OR switching gears entirely towards food processor approach instead: Pulse gently until desired texture achieved whether chunky remains preferred—or smoother finish beckons instead… Set aside while moving forward towards crust preparation phase ahead—we’re building layers upon layers full flavor goodness here!
Step 2: Preparing Your Buttery Crust
As we transition toward crafting our delectable buttery shortbread base next up preheat oven at three hundred seventy-five degrees Fahrenheit (190 degrees Celsius)—that way when time comes around later everything already heated up optimally awaits finishing touches applied shortly thereafter too! While waiting grab greased/floured nine-by-thirteen inch pan ready alongside parchment paper lining method employed earlier ensures flawless extraction later on post-bake process too—it makes life easier trust me here folks… Now let’s grab large mixing bowl containing flour/sugar/baking powder/salt beforehand whisked together thoroughly till blended well across board yielding consistent texture expected throughout dough formed later ahead…
Next step involves adding cold cubed butter directly into dry mixture—using pastry blender technique here means cutting butter precisely into smaller chunks amongst flour blend until coarse crumbs appear gradually forming up nicely around pea-sized bits remaining intact—that’s fine folks don’t fret just yet… Should you prefer speedier option? Switch gears towards trusty food processor instead: pulse intermittently maintaining vigilance against over-processing since we want those delightful flakiness included still present afterwards… Afterward prepare separate small bowl where egg gets lightly beaten alongside vanilla extract; pour combined wet mixture directly onto flour-butter crumb mix before incorporating gently via fork/hands just enough bringing dough together satisfactorily without overmixing occurring—as crumbly state should remain intact ideally holding shape upon pressing lightly…
Step 3: Assembling Your Layers
Reserve about one-and-a-half cups worth shortbread dough mixture meant solely topping off luscious apricot filling laid below—that’s key folks don’t forget… Now firmly press remaining portion evenly across prepared bottom layer within nine-by-thirteen inch pan previously lined ensuring consistency maintained throughout surface created prior allowing evenness achieved all-around easily too… Using hands/measuring cup bottoms really helps flatten things nicely down there underneath ensuring firm groundwork established adequately allows future toppings adhere properly atop sauce layer soon added next…
Gently spread cooled-down fruity goodness onto pressed-out shortbread base leaving slight border around edges (~quarter inch perhaps)—display patience here since letting some air circulate aids final product outcome significantly towards glorious results anticipated later down line trust me please…
Step 4: Topping Off with Crumbles
Now take reserved crumbly top portion set aside earlier crumbling evenly across freshly spread-out apricot goodness below till generously coated everywhere possible atop surface seen clearly thus far—no need rushing anything folks let passion guide instead enjoying every moment spent creating these delectable beauties infusing love along way surely… Bake away blissfully inside preheated oven watching closely around thirty-to-thirty-five-minute mark elapsed soon enough noticing edges turning golden brown appearance indicating readiness achieved successfully too—filling bubbling slightly provides further assurance everything coming together harmoniously indeed…
With careful attention remove pan once done placing upon wire rack awaiting cooling period afterwards absolutely crucial part folks remember patience plays pivotal role here preventing premature cutting ruining delicate nature existing inside glorious bar awaiting perfection achieved fully prior digging right away after cooling off completely first couple hours minimum necessary…
Stay tuned as we wrap up final steps including slicing techniques yielding neat squares ready serve guests family alike eager indulge joyfully celebrating scrumptious dessert shared among loved ones soon arriving awaiting delightfully warm gatherings ahead…
Step 5: The Crucial Cooling Process
Once your heavenly Apricot Shortbread Bars emerge from the oven, you’ll want to resist the temptation to dig in right away. Trust me on this; patience is key! Transfer the baking pan to a wire rack and let it cool completely for at least two to three hours at room temperature. I know, waiting can feel like an eternity when your kitchen is filled with those intoxicating aromas of buttery shortbread and sweet apricot filling. But believe me, this step is absolutely paramount for achieving that perfect texture. If you cut into the bars too early, you’ll find they crumble under pressure, and you won’t get those beautiful squares that are a joy to serve.
While your bars cool, allow the filling to set properly. This process not only makes slicing easier but also enhances the overall flavor as the ingredients meld together beautifully. If you’re in a hurry (and who isn’t sometimes?), you can pop them into the refrigerator after they’ve cooled for about an hour at room temperature. Just remember that letting them sit undisturbed allows the flavors to develop further, creating a truly extraordinary dessert experience. So take a deep breath, enjoy the aroma wafting through your kitchen, and let time work its magic.
Step 6: Cutting Into Perfection
After what feels like an eternity but is actually just a couple of hours, it’s finally time to cut those bars! If you’ve lined your pan with parchment paper, rejoice! You can simply lift them out using the edges of the paper—this makes for easy handling and keeps your bars intact. Place them onto a sturdy cutting board that can handle some gentle pressure. Now comes the fun part: using a sharp knife, slice into squares or rectangles as desired.
A little tip for achieving clean cuts: consider chilling those bars in the refrigerator for about 15-30 minutes before cutting. The colder dough will firm up nicely and make slicing much easier without crumbling apart. Wipe your knife clean between cuts; this helps maintain those beautiful edges and prevents any sticky apricot filling from clinging onto your knife blade. As you cut through these delightful layers—crust on top and bottom with luscious apricot filling in between—you’ll be treated to that satisfying crunch followed by a soft chew that’s simply divine.
Step 7: Presentation Matters
Now that you’ve skillfully sliced your Apricot Shortbread Bars into perfect pieces, let’s talk about presentation because we know how much first impressions matter! Arrange these beauties on a lovely platter or even in individual cupcake liners if you’re feeling fancy—it adds an elegant touch that’s sure to impress your guests or family members. Drizzling with some warm apricot glaze or sprinkling powdered sugar over them can elevate their visual appeal even further, making them look as incredible as they taste.
But don’t stop there! Consider pairing these bars with a dollop of fresh whipped cream or a scoop of dairy-free ice cream for an indulgent dessert experience that will have everyone raving about your culinary skills. This final touch not only amplifies flavors but also adds another layer of texture that complements the soft crumb of the shortbread and tangy apricot filling beautifully.
Step 8: Storing Your Sweet Creations
If by some stroke of luck there are leftovers (which is rare given how delicious they are), storing them properly ensures they stay fresh and delightful for days to come! Once cooled completely and cut into bars, place them in an airtight container lined with parchment paper between layers to prevent sticking—this is critical! Store them at room temperature for up to three days or keep them in the fridge if you want them to last longer; they’ll remain deliciously moist thanks to that rich butter content.
But here’s my little secret: you can freeze these gems too! Just wrap each bar tightly in plastic wrap, then place them in a freezer-safe bag or container. They’ll keep well for up to three months—perfect for unexpected guests or moments when you simply need a sweet treat on hand! When you’re ready to indulge again, let them thaw overnight in the fridge or at room temperature for about an hour before enjoying their delightful flavors once more.
Conclusion:
As we wrap up this delightful culinary journey together through my cherished Apricot Shortbread Bars Recipe, I hope you feel as inspired as I do! From mixing together that dreamy shortbread base to watching the apricots transform into a luscious filling, every step is infused with joy and passion. What makes this recipe truly special are those harmonious flavors—the buttery richness of the crust complemented by the naturally sweet-tart notes of apricots—and let’s not forget that lovely hint of lemon juice that brightens everything up! Each bite brings together contrasting textures: crisp edges giving way to soft filling—a truly extraordinary experience!
This recipe isn’t just about taste; it’s an inviting experience in itself. The joy of making these bars can turn any ordinary day into something special—perfect for those cozy afternoons with family or lively gatherings with friends where everyone shares laughter and treats alike. Just imagine pulling these golden bars from your oven, filling your home with warmth and sweetness—the sheer happiness on everyone’s faces when they take their first bite is priceless!
When thinking about how best to serve these delights, picture savoring one alongside a steaming cup of tea or coffee—the warmth perfectly balancing the chewy apricot filling while the buttery shortbread crumbles enchantingly melt in your mouth. For an afternoon pick-me-up, pair one with a dollop of whipped coconut cream or serve them as part of an elegant dessert spread at your next gathering; they will certainly steal the show! And if you’re feeling adventurous, why not consider drizzling some melted dark chocolate over these bars? That touch adds another level of indulgence that’s simply irresistible!
Feeling adventurous? This Apricot Shortbread Bars Recipe is wonderfully adaptable! You could swap out dried apricots for other fruits like peaches or cherries—each variation brings its own unique charm while still capturing that delightful essence we adore so much! Or perhaps try adding some chopped nuts for added crunch and flavor depth! I invite you wholeheartedly to dive into this recipe adventure—you’ll not only create something delicious but also weave beautiful memories along the way. So roll up those sleeves and get baking; I can’t wait to hear about all your marvelous creations!
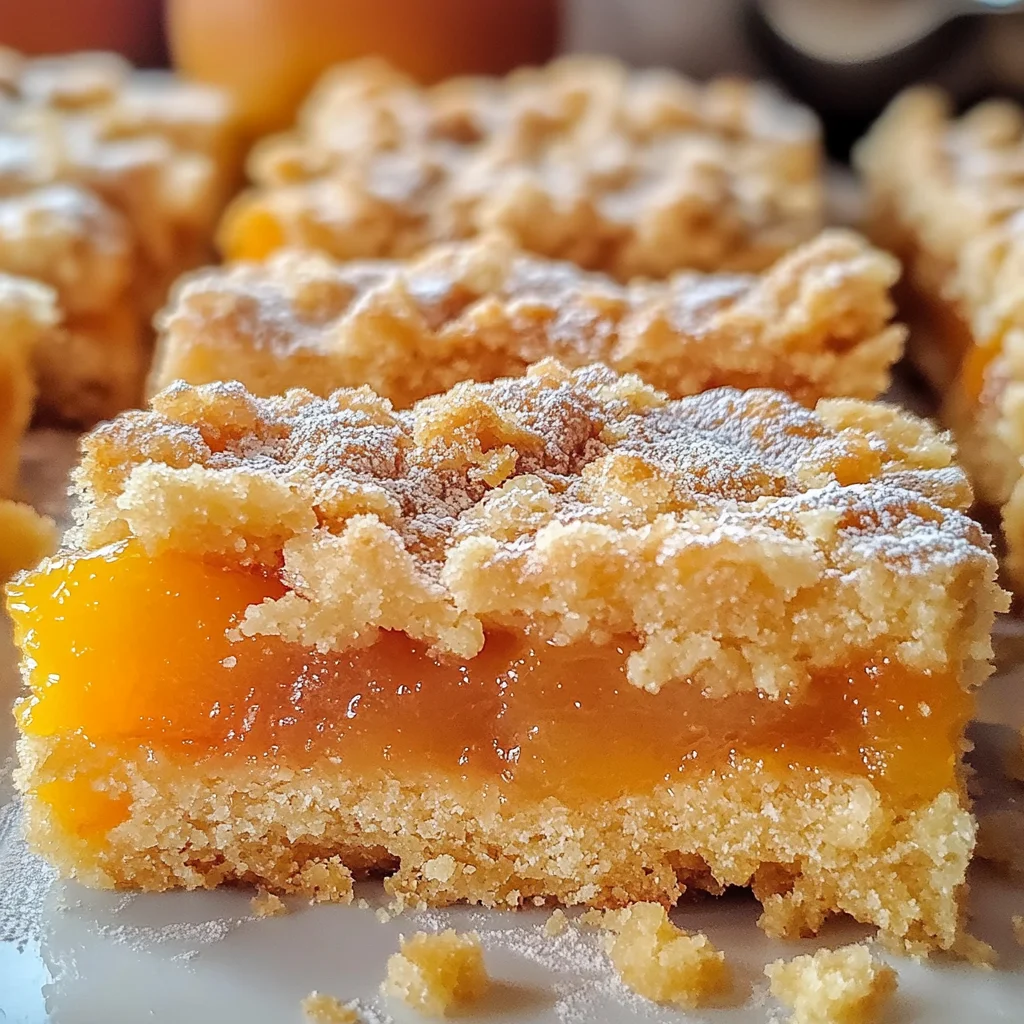
Apricot Shortbread Bars

Indulge in the delightful experience of baking with our Apricot Shortbread Bars Recipe. This charming treat effortlessly combines the sweet tang of dried apricots with a buttery, crumbly shortbread crust, creating a dessert that’s both comforting and satisfying. Perfect for afternoon tea or as a sweet ending to any meal, these bars are not only easy to make but are sure to disappear quickly when shared with loved ones. Each bite is a luscious reminder of home-baked goodness, inviting warmth, and nostalgic flavors. So roll up your sleeves and embark on this simple yet rewarding journey in your kitchen!
- Prep Time: 20 minutes
- Cook Time: 35 minutes
- Total Time: 55 minutes
- Yield: Approximately 24 servings 1x
- Category: Dessert
- Method: Baking
- Cuisine: American
Ingredients
- 3 cups all-purpose flour
- 1 cup granulated sugar
- 1 teaspoon baking powder
- 1/2 teaspoon salt
- 1 1/2 cups unsalted butter, cold and cubed
- 1 large egg, lightly beaten
- 1 teaspoon vanilla extract
- 2 cups dried apricots, roughly chopped
- 1 1/2 cups water
- 1/2 cup granulated sugar (for filling)
- 2 tablespoons fresh lemon juice
Instructions
- Preheat your oven to 375°F (190°C). Grease a 9×13 inch baking pan and line it with parchment paper.
- In a mixing bowl, whisk together flour, sugar, baking powder, and salt.
- Cut in the cold butter until the mixture resembles coarse crumbs. Mix in the egg and vanilla until just combined.
- Press about two-thirds of the dough into the bottom of the prepared pan.
- In a saucepan over medium heat, combine chopped apricots, water, and sugar. Cook until softened (about 15 minutes), then stir in lemon juice.
- Spread the apricot filling over the crust and crumble the remaining dough on top.
- Bake for 30-35 minutes or until golden brown. Cool completely before slicing.
Nutrition
- Serving Size: 1 bar (60g)
- Calories: 210
- Sugar: 12g
- Sodium: 45mg
- Fat: 12g
- Saturated Fat: 7g
- Unsaturated Fat: 4g
- Trans Fat: 0g
- Carbohydrates: 24g
- Fiber: 1g
- Protein: 2g
- Cholesterol: 30mg