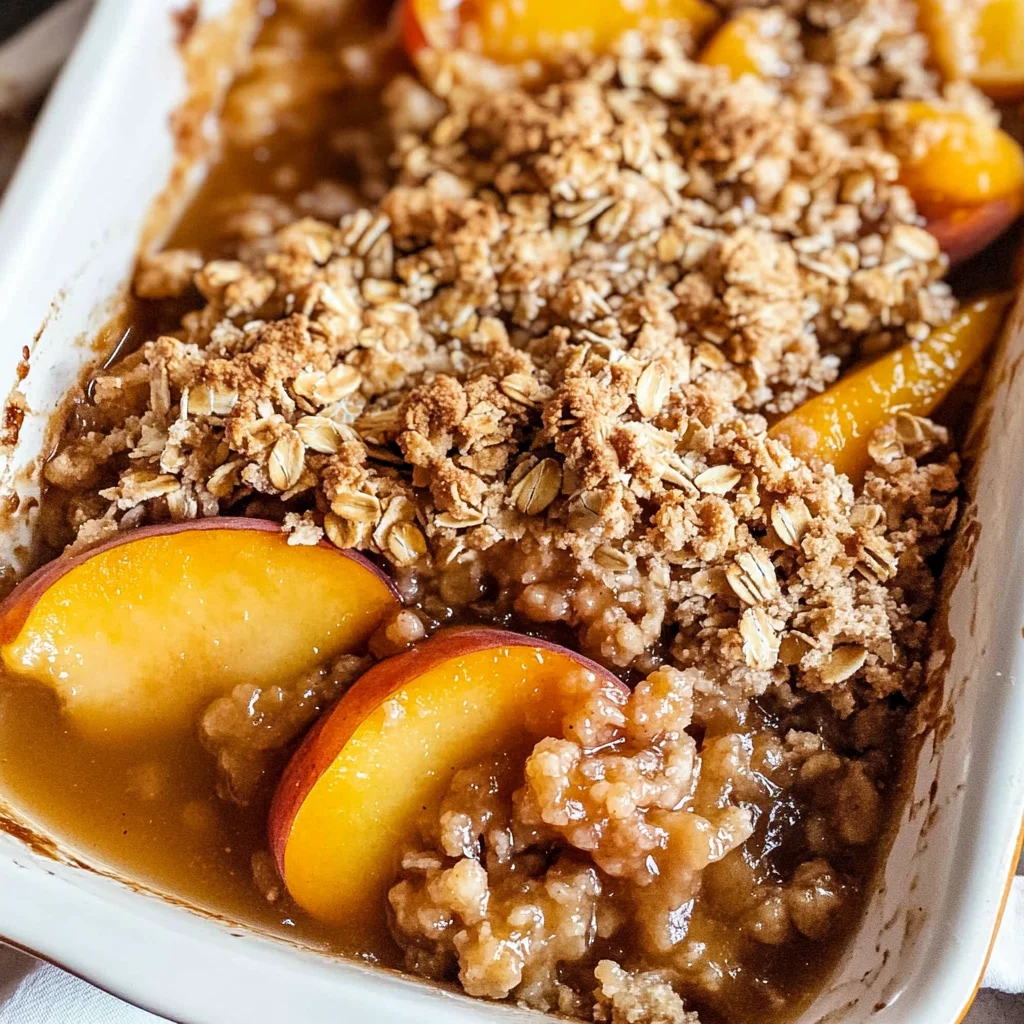
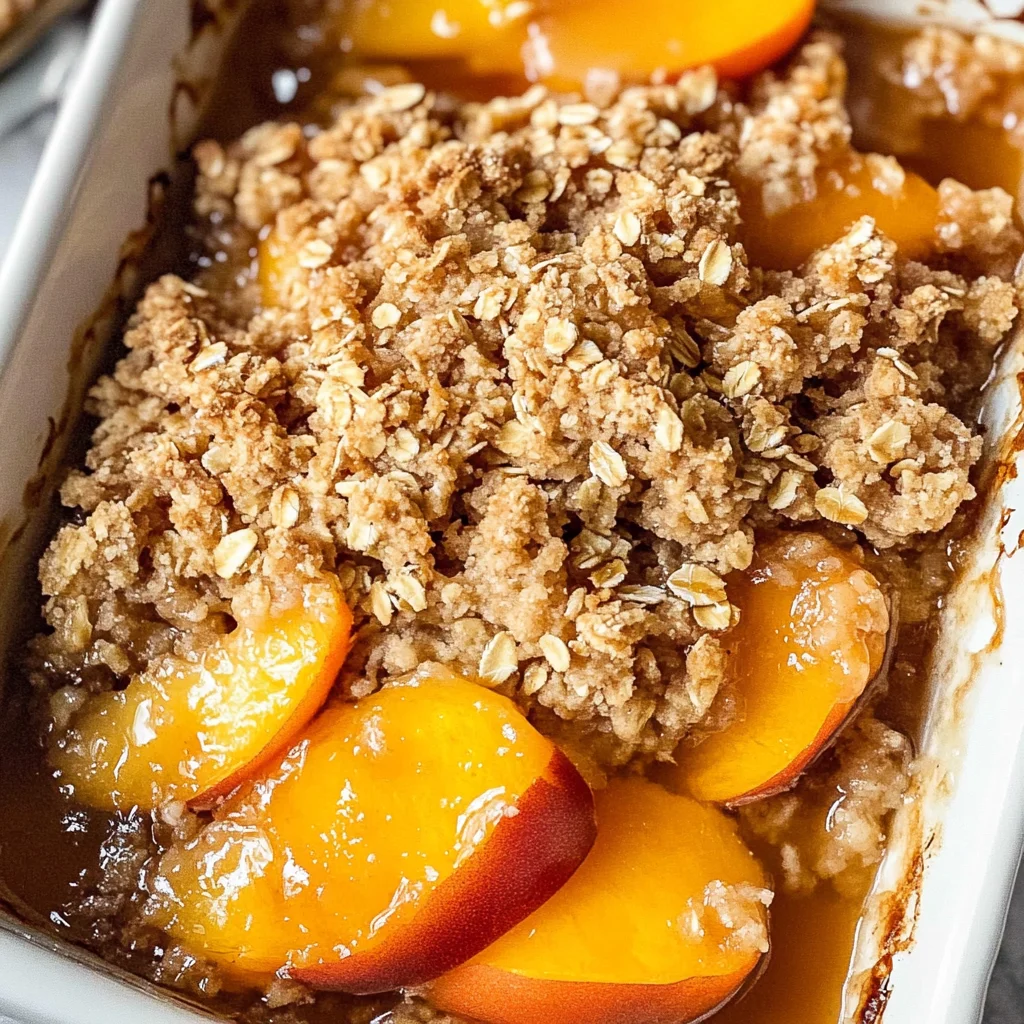
Peach Crisp with Canned Peaches
There’s something profoundly comforting about a warm dessert that fills your home with the sweet, intoxicating aroma of baked peaches and cinnamon. This Peach Crisp with Canned Peaches is not just a recipe; it’s an invitation to gather around the table, share stories, and create cherished memories. Imagine pulling this golden-brown delight from the oven, the bubbling peaches peeking through the crispy oat topping, inviting you in with its syrupy sweetness and that familiar, nostalgic scent. Each spoonful is a symphony of flavors and textures—juicy, tender peaches nestled under a crunchy layer of oats kissed with cinnamon. It’s a perfect harmony that’s both simple and extraordinary.
I’ve always been captivated by how something so uncomplicated can bring such joy. This Peach Crisp is a classic American dessert, reminiscent of summer picnics and family gatherings where laughter echoes around the table. Whether you’re sharing it with friends on a warm evening or enjoying it solo with your favorite cozy blanket, each bite evokes warmth and satisfaction. The beauty of using canned peaches is that you can enjoy this delightful treat any time of year—no need to wait for peach season! Trust me when I say this dessert will quickly become one of your go-to recipes.
Peach Crisp with Canned Peaches: A Comforting Delight
Let me take you on this delicious journey to create a dessert that is as easy as it is rewarding. With just seven ingredients, you’ll whip up something truly special that makes your taste buds dance in delight. So roll up your sleeves, grab your apron, and let’s dive into making this beautiful Peach Crisp together!
Ingredients:
As we embark on this culinary adventure, it’s essential to understand each ingredient’s role in crafting our irresistible Peach Crisp with Canned Peaches. Every element contributes to creating that perfect balance of sweetness and texture.
- 58 ounces canned peaches (sliced and drained). These juicy gems are truly the star of our show! When choosing canned peaches, look for those packed in juice rather than syrup for a more natural sweetness without added sugar. The key here is to drain them well; excess liquid could make our crisp soggy instead of delightfully crunchy. Not only do these peaches provide convenience, but they also deliver rich flavor all year round—no waiting for summer!
- ¾ cup brown sugar (packed). This ingredient is absolutely paramount for achieving that deep caramel flavor that pairs beautifully with the peaches’ natural sweetness. The molasses content in brown sugar adds complexity and richness that white sugar simply cannot replicate. Make sure to pack it tightly in your measuring cup; this ensures we get every bit of flavor into our crisp!
- ¾ cup all-purpose flour. Flour acts as the backbone of our topping, providing structure to our crisp while melding beautifully with the oats and butter. It helps bind everything together while allowing our topping to become wonderfully golden brown as it bakes. If you’re looking for alternatives due to dietary preferences or restrictions, feel free to experiment with gluten-free flour blends—they can work surprisingly well too!
- ⅔ cup quick oats. Oats are what give our peach crisp its delightful crunch! They soak up some of that luscious peach juice as they bake, creating a chewy texture that contrasts beautifully with the soft fruit beneath. Quick oats are ideal here because they cook faster and create a tender topping that’s not overly chewy—perfectly balanced against the juicy filling underneath.
- 1½ teaspoon ground cinnamon. Ahh, cinnamon—the spice that transports us instantly into comfort territory! Its warm notes enhance the sweetness of the peaches while adding depth to every bite of our crisp. I promise you, don’t skimp on this ingredient—it’s what elevates this recipe from good to utterly extraordinary.
- ½ teaspoon salt. You might be wondering why we need salt in a dessert? Salt is an essential player here; it enhances flavors dramatically and balances out sweetness beautifully! Just a pinch can make all the difference in brightening up those rich flavors without being overpowering.
- ½ cup unsalted butter (softened). Butter is what brings everything together! It adds richness, moisture, and flavor while helping achieve that lovely golden crust we’re aiming for on top of our crisp. Make sure it’s softened; this allows for easy incorporation into our dry ingredients without overworking them—a key step towards achieving tender results.
Equipment You’ll Need:
Having the right tools at your disposal makes cooking not only smoother but also more enjoyable! While they might not be ingredients, these essential partners will help you create something wonderful.
- 9×9-inch baking pan: This size pan is perfect for ensuring even cooking; it’s neither too big nor too small for our Peach Crisp with Canned Peaches recipe. If you’re working with different dimensions, just keep an eye on baking time since larger pans may require more time while smaller ones may finish quicker.
- Mixing bowls: You’ll want at least two mixing bowls—one for combining those dry ingredients like flour and oats before introducing butter—and another one for layering those luscious peaches at the bottom of your baking dish.
- Measuring cups: Accurate measurements are crucial here! Having both dry and liquid measuring cups will help ensure every ingredient is properly accounted for so that nothing goes awry during baking.
- Rubber spatula or wooden spoon: A sturdy spatula or spoon will help you mix your ingredients without risking damage to any non-stick surfaces you might be working with—not to mention they’re great for scraping down sides when needed!
Now that we have gathered our ingredients and equipment, let’s move on to preparing this delightful Peach Crisp with Canned Peaches!
Step 1: Preheat Your Oven & Prepare Your Baking Dish
First things first—preheating your oven to 350°F (175°C) sets the stage for baking magic! While that’s happening, lightly spray your 9×9-inch baking pan with non-stick cooking spray; this step ensures easy removal once baking is complete—nobody wants their delicious creation stuck to the bottom! Once you’ve drained those beautiful canned peaches (this step cannot be overlooked), pour them into an even layer across the bottom of your prepared pan—it’s like laying down a gorgeous foundation before building something incredible atop!
Step 2: Mix Up That Crunchy Topping
In a medium bowl (the second one you prepared earlier), combine brown sugar, flour, oats, cinnamon, and salt until fully incorporated—that sweet aroma wafting up already hints at what’s ahead! Gently stirring these together allows their flavors to mingle beautifully before adding softened butter—this part is crucial as well because we want just enough contact between ingredients without overmixing into mushy territory! Use either your fingers or a pastry cutter if available; work until everything looks crumbly yet cohesive—it should resemble wet sand or small pebbles scattered throughout.
Step 3: Layer & Bake
With love infused in every morsel created thus far, carefully pour your crumbly mixture over those sweet peach slices sitting patiently below—the sight alone should ignite excitement within you! Now gently spread it out evenly across—don’t rush this step because uniform coverage means evenly baked goodness throughout once you pull it from the oven later on! Now slide it into your preheated oven where patience becomes key; allow it around 25 minutes until golden-brown perfection emerges before you—a visual cue signaling success!
Step 4: Serve & Enjoy!
Once baked perfectly golden-brown atop those bubbling juices underneath—that’s when true magic happens! Remove from oven cautiously (it’ll be hot!) Let cool slightly before serving warm—trust me when I say nothing beats enjoying fresh-baked desserts right outta their home while still warm from being nestled within comforting heat moments earlier—and enjoy every bite knowing you’ve created something truly special today!
Final Touches: Serving Up Joy
Step 9: The Finishing Touch
Now comes my favorite moment—the moment you get to serve up this stunning Peach Crisp with Canned Peaches! But before diving in headfirst (though I wouldn’t blame you!), consider adding a scoop of vanilla ice cream or some whipped coconut cream on top if you’re feeling indulgent—it’s like draping a luxurious cloak over an already beautiful outfit! Trust me; that cold creaminess against warm fruity goodness will elevate each bite into an ethereal realm of dessert bliss.
As you ladle out generous portions into bowls, let those juices flow freely—they’re liquid gold! Encourage everyone around you to indulge slowly; after all, such treats deserve appreciation rather than hurried consumption. Take a moment to savor those flavors—the sweet warmth from baked peaches intertwined with crunchy oats dusted with cinnamon will create memories worth sharing again and again.
And there you have it—a Peach Crisp with Canned Peaches that’s not just food but an experience filled with love and nostalgia! I can guarantee you’ll be asked for seconds (and maybe even thirds). So go ahead—bake up this delightful dessert and enjoy every bite surrounded by loved ones; trust me—it’s absolutely worth it!
Storage and Enjoyment Tips for Your Peach Crisp with Canned Peaches
Now that your Peach Crisp with Canned Peaches is freshly baked and filling your kitchen with that utterly intoxicating aroma, it’s time to dig in! But what if you have leftovers? No worries! This delightful dessert can be enjoyed over the next few days, allowing you to relish its warm, sweet flavors long after it comes out of the oven. Let’s talk about how to properly store this gem so that it remains just as delicious as the moment it was served.
Storing Leftover Peach Crisp with Canned Peaches
To keep your leftover peach crisp at its best, transfer it into an airtight container and store it in the refrigerator. This simple step is absolutely paramount for maintaining the quality of your dessert; otherwise, you risk it drying out or becoming soggy from excess moisture. In the fridge, your peach crisp will stay fresh for about 3 to 4 days. If you’re worried about it losing its delightful texture, I have a fantastic pro tip: place a slice of bread inside the container! The bread will absorb any excess moisture while keeping your crisp perfectly luscious. When you’re ready to enjoy another serving, simply reheat it in the oven for about 10 minutes at 350°F until warmed through. Trust me on this—there’s nothing quite like that first bite of warm peach goodness combined with that crunchy topping!
Freezing Peach Crisp with Canned Peaches for Later
If you want to enjoy this scrumptious dessert even longer, consider freezing a portion! Freezing peach crisp is incredibly easy: just let it cool completely before transferring it to a freezer-safe container or wrapping it tightly in aluminum foil. This way, you can keep your peach crisp frozen for up to three months without sacrificing flavor or texture. When you’re ready to indulge in this sweet treat again, simply thaw it in the refrigerator overnight and then reheat in the oven as mentioned earlier. The convenience of having a homemade dessert at your fingertips is simply wonderful—it feels like having a little piece of summer waiting for you whenever you crave something sweet!
Peach Crisp with Canned Peaches

Indulge in the comforting delight of Peach Crisp with Canned Peaches, a warm dessert that wraps you in nostalgia with every bite. This easy-to-make recipe combines tender, juicy peaches and a crunchy oat topping infused with cinnamon for a satisfying experience that’s perfect year-round. Whether enjoyed solo or shared with loved ones, this peach crisp is an invitation to gather around the table and create cherished memories. The best part? You can whip it up any time of the year using canned peaches, making it a go-to recipe for all occasions. Let’s dive into this delightful treat that promises joy in every spoonful.
- Prep Time: 15 minutes
- Cook Time: 25 minutes
- Total Time: 40 minutes
- Yield: Serves approximately 8 people 1x
- Category: Dessert
- Method: Baking
- Cuisine: American
Ingredients
- 58 ounces canned peaches (sliced and drained)
- ¾ cup brown sugar (packed)
- ¾ cup all-purpose flour
- ⅔ cup quick oats
- 1½ teaspoon ground cinnamon
- ½ teaspoon salt
- ½ cup unsalted butter (softened)
Instructions
- Preheat your oven to 350°F (175°C) and lightly grease a 9×9-inch baking pan.
- Drain the canned peaches and layer them evenly in the prepared baking pan.
- In a medium bowl, mix together brown sugar, flour, oats, cinnamon, and salt until combined.
- Add softened butter to the dry ingredients and mix until crumbly.
- Evenly sprinkle the topping over the peaches.
- Bake for about 25 minutes or until golden brown and bubbly.
- Allow cooling slightly before serving warm.
Nutrition
- Serving Size: 1/8 of the recipe (approximately 120g)
- Calories: 210
- Sugar: 16g
- Sodium: 150mg
- Fat: 8g
- Saturated Fat: 5g
- Unsaturated Fat: 3g
- Trans Fat: 0g
- Carbohydrates: 34g
- Fiber: 2g
- Protein: 2g
- Cholesterol: 15mg