Hawaiian Shrimp
There’s something utterly enchanting about cooking, isn’t there? It’s not just about nourishing our bodies; it’s a beautiful ritual that connects us to our roots, our loved ones, and even the places we dream of visiting. When I think about this Hawaiian Shrimp recipe, I’m transported to a sun-drenched beach with golden sands and azure waves lapping at my feet. The air is thick with the intoxicating aroma of garlic and butter, mingling effortlessly with the salty sea breeze. Each bite of this quick, garlicky shrimp dish bursts with flavor and takes me on a mini-vacation right in my kitchen. It’s a culinary experience that brings joy and warmth to any dinner table, evoking memories of tropical sunsets and laughter shared over delicious food.
As we dive into this recipe together, I want you to remember: cooking should always be an adventure! This Hawaiian Shrimp is not just a meal; it’s a celebration of flavors that come alive in just 20 minutes. Perfectly seasoned shrimp sautéed in rich butter and fragrant garlic creates a symphony of tastes that’s both satisfying and utterly indulgent. Whether you’re hosting friends for dinner or simply treating yourself after a long day, this dish promises to deliver smiles all around. So gather your ingredients, roll up those sleeves, and let’s create something extraordinary—one bite at a time!
Hawaiian Shrimp: A Taste of Paradise in Every Bite
Welcome to your new favorite quick dinner! This Hawaiian Shrimp recipe combines juicy shrimp with a luxurious garlicky butter sauce that will whisk you away to tropical shores. With just a handful of ingredients and minimal prep time, you’ll have an exquisite dish that’s perfect for any occasion.
Ingredients:
Let’s embark on this culinary journey together! Each ingredient plays its part in crafting the vibrant flavors you’ll savor in every morsel.
- 2 tsp paprika. This spice is not just for color; it adds a warm earthiness and subtle sweetness that beautifully complements the shrimp. When choosing paprika, look for the vibrant red hue indicating freshness—this is crucial for maximizing flavor. If you’d like to switch things up, smoked paprika can offer an intriguing twist with its rich depth.
- 1 tsp sea salt. Sea salt is different from table salt because it has larger crystals and often comes from evaporated seawater, imparting unique minerals into your dish. It enhances the natural sweetness of the shrimp while balancing out the richness of the butter sauce. Feel free to adjust based on your preference—just remember that this little gem is essential for bringing out all those delicious flavors!
- 1 tsp black pepper. Freshly ground black pepper adds heat without overpowering other flavors—it’s like the secret handshake among ingredients! By using whole peppercorns and grinding them yourself, you’re unlocking oils that elevate every bite into something truly special. Trust me on this one; it’s worth taking that extra step.
- 2 tablespoons flour. This might seem like an odd addition for shrimp, but coating them lightly helps develop a crispy texture while they cook. It also aids in thickening any sauce created during cooking, resulting in an irresistibly luscious finish that clings beautifully to each piece of shrimp.
- 12 oz. shrimp (cleaned and deveined). Freshness is key when it comes to seafood! Look for shrimp with a slight sheen—this indicates they are fresh and not frozen too long ago. The size matters too; medium or large shrimp work best here since they’ll cook quickly yet remain juicy inside—a delightful contrast against that crispy exterior.
- 1/2 stick unsalted butter. Butter adds richness and depth to our dish—it transforms everything into liquid gold! Opting for unsalted allows us complete control over seasoning as we go along; you’ll find it absolutely paramount in achieving that perfect balance in flavor.
- 7 garlic cloves (minced). Garlic is truly the heart of this dish—the aroma alone can make anyone swoon! Mince your garlic finely so it releases its oils fully while cooking; when it turns translucent and aromatic, you’ll know you’re onto something special! Don’t rush this step; letting garlic brown slightly deepens its flavor into something downright intoxicating.
- 2 tablespoons olive oil. This versatile oil works wonders here by elevating the buttery notes while providing a healthy fat component that’s beneficial too! Its high smoke point means we can crank up the heat without fear—perfect for achieving those gorgeous sear marks on our beloved shrimp.
- Fresh chopped parsley (optional for garnish). While purely aesthetic at first glance, fresh parsley brightens each bite with its herbaceous notes! Plus, who doesn’t love a pop of green on their plate? It adds an element of freshness that ties everything back together beautifully.
Equipment You’ll Need:
Having the right tools makes all the difference when preparing your Hawaiian Shrimp! These essential partners ensure your cooking experience flows smoothly and results in mouthwatering success.
- Large resealable bag – This handy little tool is perfect for mixing dry ingredients evenly while coating your shrimp effortlessly without making a mess—who wouldn’t want to keep their kitchen tidy?
- 12-inch cast iron skillet – A versatile piece that retains heat exceptionally well! Using cast iron provides an excellent sear on your shrimp while helping to build layers of flavor from those tasty browned bits left behind after cooking—a sure way to enhance your shrimp’s overall taste effortlessly!
- Sharp knife – A quality knife ensures precision when mincing garlic or chopping parsley quickly—trust me; you want sharp blades working for you rather than against you!
- Cutting board – Choose one with enough space so you can chop away without feeling cramped! A sturdy cutting board protects both your countertops and knife edges while making prep work feel effortless.
Now that you’re equipped with both knowledge about ingredients & tools let’s dive straight into preparing our delectable Hawaiian Shrimp!
Step 1: Prepare Your Flavor Base
Begin by placing paprika, sea salt, black pepper, and flour into your large resealable bag—this simple act sets the stage for incredible flavor development later on! Give it a good shake until everything is well combined—a vivid reminder of how easy it can be to layer flavors when we take care at every step! Now add those cleaned & deveined shrimp directly into the bag before sealing tightly—you’ll want each piece coated evenly so it gets that lovely crispiness we’re aiming for once cooked. Set aside while we move on—you’ll notice how quickly this process unfolds!
Step 2: Sauté That Garlic
In your trusty cast iron skillet over medium heat, add half a stick of unsalted butter—watch as it melts down into glorious liquid gold before introducing minced garlic into the mix! As soon as those aromatic cloves hit hot butter (and oh boy do they ever), stir gently so they don’t brown too fast; we’re looking for translucence rather than darkness here! After 2–3 minutes or until fragrant—the moment when love fills the air—you’ll know it’s time to remove them from heat entirely so they don’t burn… Because burnt garlic? Well—that’s simply heartbreaking!
Step 3: Cook Your Shrimp
With garlic set aside safely awaiting reintroduction later on—we’ll now pour some olive oil into our same skillet at medium-high heat until shimmering but not smoking (you’ll see tiny bubbles forming). Carefully place each piece coated from earlier directly onto this heated surface without overcrowding them; letting them breathe means better browning results overall—trust me on this one! Allow approximately 2–3 minutes per side until they turn pinkish-orange around edges; keep an eye out since these beauties cook faster than expected!
Step 4: Combine Flavors
Once all shrimp are cooked through (you’ll recognize their plumpness!), bring back those lovingly sautéed garlic pieces right atop these succulent morsels within skillet itself—a final flourish before plating up perfection awaits us ahead! Gently stir everything together until combined thoroughly while allowing residual heat from both ingredients melds together beautifully—it creates an utterly intoxicating aroma wafting through kitchen air that’ll surely have mouths watering nearby… Sprinkle chopped parsley across top if desired!
And there you have it—the epitome of tropical bliss achieved right within mere moments spent laboring at home! You’ve created something profoundly satisfying: Hawaiian Shrimp served directly onto plates exuding warmth reminiscent of sandy shores kissed by sunbeams… Enjoy every bite knowing how simple yet extraordinary cooking can truly be when approached with love & passion!
Cooking Your Juicy Hawaiian Shrimp: A Flavorful Adventure
Step 5: Searing the Shrimp to Perfection
Now, let’s get to the heart of this recipe—the shrimp! In a large 12-inch cast iron skillet, heat up your olive oil until it shimmers and starts to smoke just slightly. This is where the magic happens; the high heat allows for a perfect sear that seals in those juicy flavors while creating a delightful crust. Once the oil is hot enough, gently add your coated shrimp in a single layer. I can’t stress enough how important it is not to overcrowd the skillet; if you crowd them together, you’ll end up steaming instead of searing, which we definitely don’t want!
Cook the shrimp for about 2 to 3 minutes on each side. As they cook, keep an eye out for that beautiful transformation from translucent to a vibrant pink; it’s like watching a sunset unfold as they turn golden brown and develop that charming caramelization. This step is crucial because it enhances the flavor profile through the Maillard reaction—essentially, it’s science meeting culinary art! Trust me on this one; don’t rush it! If you try to flip them too soon, you risk tearing the delicate flesh. Instead, give them time to form that gorgeous crust before turning them over.
Step 6: Infusing Garlic Bliss
Once your shrimp are beautifully seared and ready to shine, it’s time to bring back that aromatic garlic we sautéed earlier. Now, pour the cooked garlic back into the skillet over the shrimp. The moment you do this, you’ll be greeted by an intoxicating aroma that wafts through your kitchen—a true testament to how simple ingredients can create extraordinary flavors. The warmth from the shrimp will reheat the garlic quickly and allow those flavors to meld together beautifully.
At this stage, gently stir everything together in the skillet; you want every succulent bite of shrimp coated in that garlicky goodness. This mixing also ensures that none of your lovely garlic gets left behind at the bottom of the pan. What makes this dish so special is precisely this amalgamation of flavors—the buttery richness combined with fragrant garlic creates a symphony on your palate that transports you straight to a Hawaiian beach. Don’t forget to sprinkle some freshly chopped parsley over your dish; not only does it add a pop of color, but it also brings a fresh brightness that balances all those rich flavors perfectly.
Step 7: The Importance of Resting
As tempting as it may be to dive right into your luscious Hawaiian shrimp, I encourage you to let them rest for just a minute or two in their garlicky bath before serving. Allowing food to rest isn’t just about letting it cool down; it’s about letting all those tantalizing juices redistribute throughout each succulent piece of shrimp. When food rests after cooking, especially proteins like shrimp, it becomes more tender and flavorful—it’s truly one of those non-negotiable steps in cooking!
During this brief interlude, take a moment to set your table and prepare any sides you might want—maybe some fluffy rice or a refreshing salad? If you’ve chosen rice as your accompaniment, now’s also an excellent time to fluff it up with some coconut milk or lime zest for an extra tropical twist! By giving your dish this little moment of patience and care, you’re ensuring every bite will deliver maximum satisfaction.
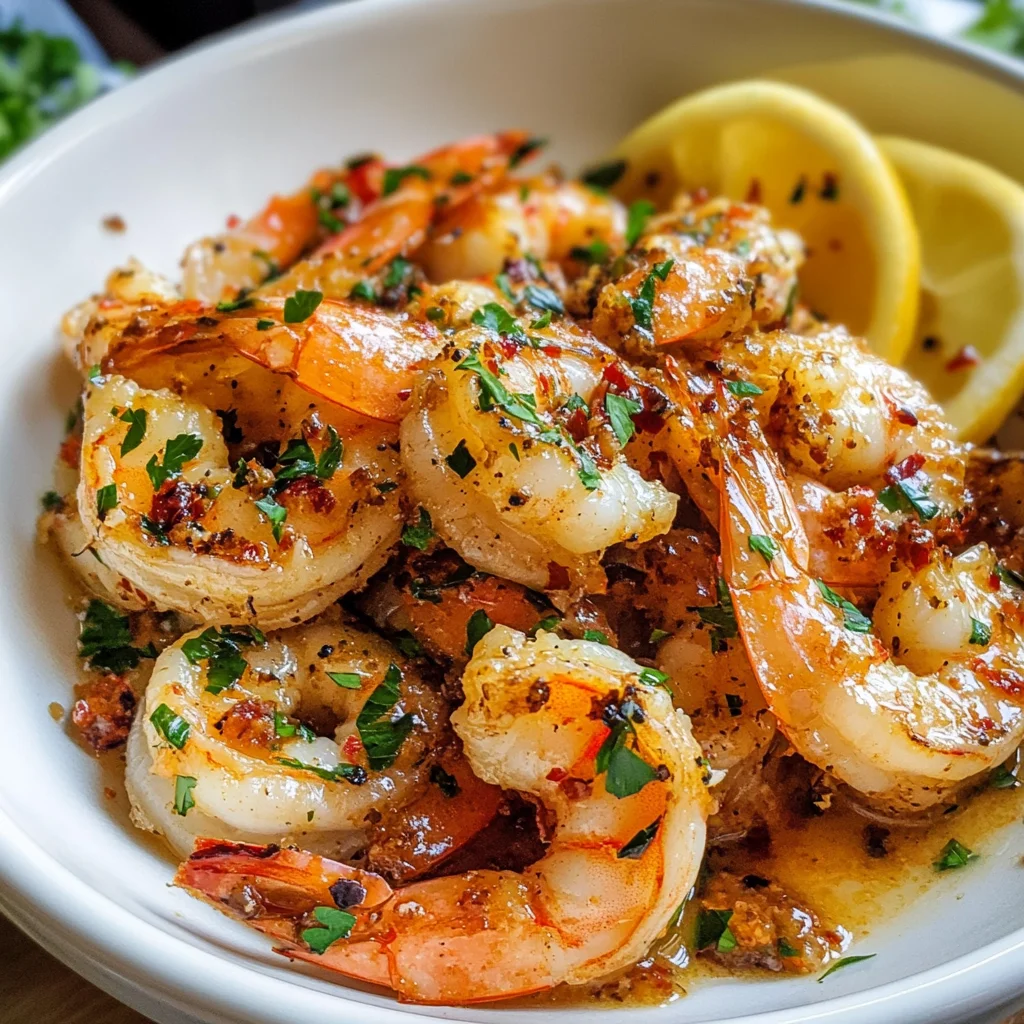
Step 8: Plating Your Tropical Delight
Finally, we reach our joyful conclusion: plating! Oh my goodness—this is where we elevate our Hawaiian shrimp from mere food into an experience! Using tongs or a slotted spoon (to let excess sauce drip off), carefully arrange your beautifully cooked shrimp onto each plate. Drizzle any remaining garlicky butter sauce from the skillet over each portion because why would we ever waste such liquid gold?
Take care when plating; arrange them artfully so they stand out with their golden hues against whatever colorful sides you’ve chosen—perhaps bright green steamed broccoli or vibrant orange slices of mango? It’s all about creating not just a meal but an unforgettable visual feast that beckons everyone at the table. And there’s nothing quite like serving something homemade and delicious that evokes warmth and love in every bite. So gather around with friends or family and relish in this tropical delight together!
Celebrating Your Creation
Now that you’ve mastered this quick Hawaiian shrimp recipe in garlicky butter sauce—juicy, flavorful morsels ready in just 20 minutes—you’re set for an extraordinary dinner experience! Each bite bursts with flavor and transports you straight to sun-kissed shores. I promise you; once you serve this dish, everyone will be asking for seconds—and possibly even thirds!
Don’t forget that cooking is all about sharing moments filled with laughter and joy around the table. Enjoy every step of this culinary journey! Whether it’s casual weeknight dinners or special gatherings with loved ones, these Hawaiian shrimp are destined to become a cherished staple in your kitchen repertoire. So go ahead—whip up this delightful dish again and again because I assure you—it never gets old!
Storage and Enjoyment Tips for Your Hawaiian Shrimp
Now that you’ve whipped up this tantalizing dish of Hawaiian shrimp, it’s time to dig in and enjoy! The moment you take that first bite, the garlicky butter sauce will envelop your taste buds in a warm embrace, transporting you to a sun-soaked beach with every mouthful. However, if you find yourself with any leftovers (which I doubt because they’re just so delicious), don’t worry—I’ve got you covered on how to keep them fresh for another day.
Storing Leftover Hawaiian Shrimp
To store your Hawaiian shrimp properly, transfer any leftovers into an airtight container. This is crucial for maintaining their delightful flavors and textures. You can keep them in the refrigerator for about 2-3 days, but trust me when I say that they may not last that long! To ensure the shrimp remain juicy and tender after refrigeration, consider placing a slice of bread in the container; it helps absorb excess moisture while keeping the shrimp from drying out. When you reheat them, I recommend using a skillet over medium heat to gently warm them through—this way, you preserve that gorgeous buttery sauce without overcooking the shrimp. Just imagine taking a forkful of those succulent morsels again; it’s like reliving the tropical bliss all over!
Freezing Hawaiian Shrimp for Later
If you want to make your cooking life even easier, freezing your Hawaiian shrimp is a fantastic option! To do this, place the cooled shrimp in a freezer-safe bag or container, removing as much air as possible before sealing it tight. When done correctly, they can be stored in the freezer for up to three months. Why freeze? Because having these flavorful gems ready at your fingertips means you can whip up an exotic meal anytime! Just pull out what you need and let them thaw overnight in the fridge or use a quick water bath for faster defrosting. This convenience factor is absolutely paramount when you’re craving something tropical without the wait!
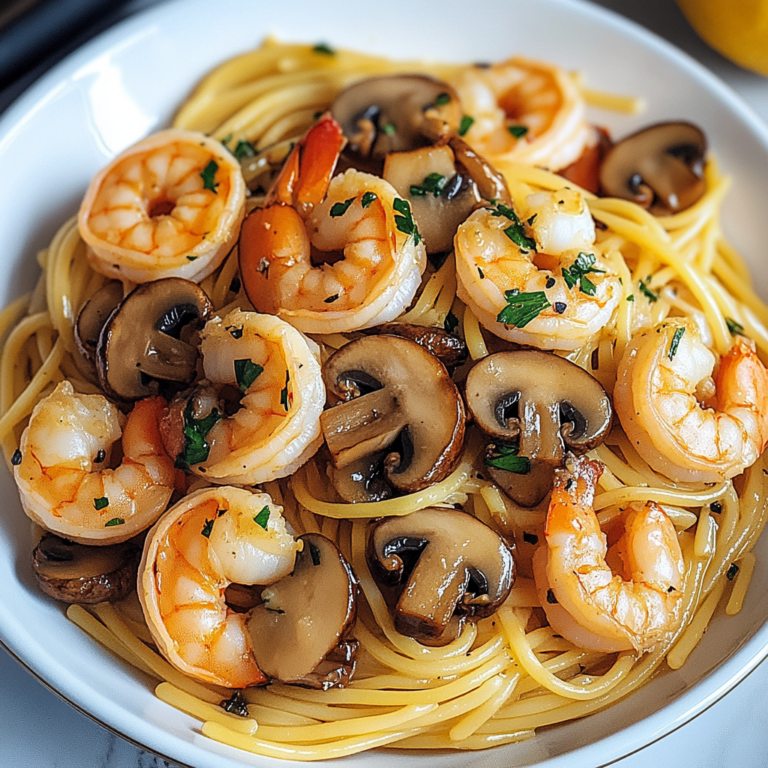
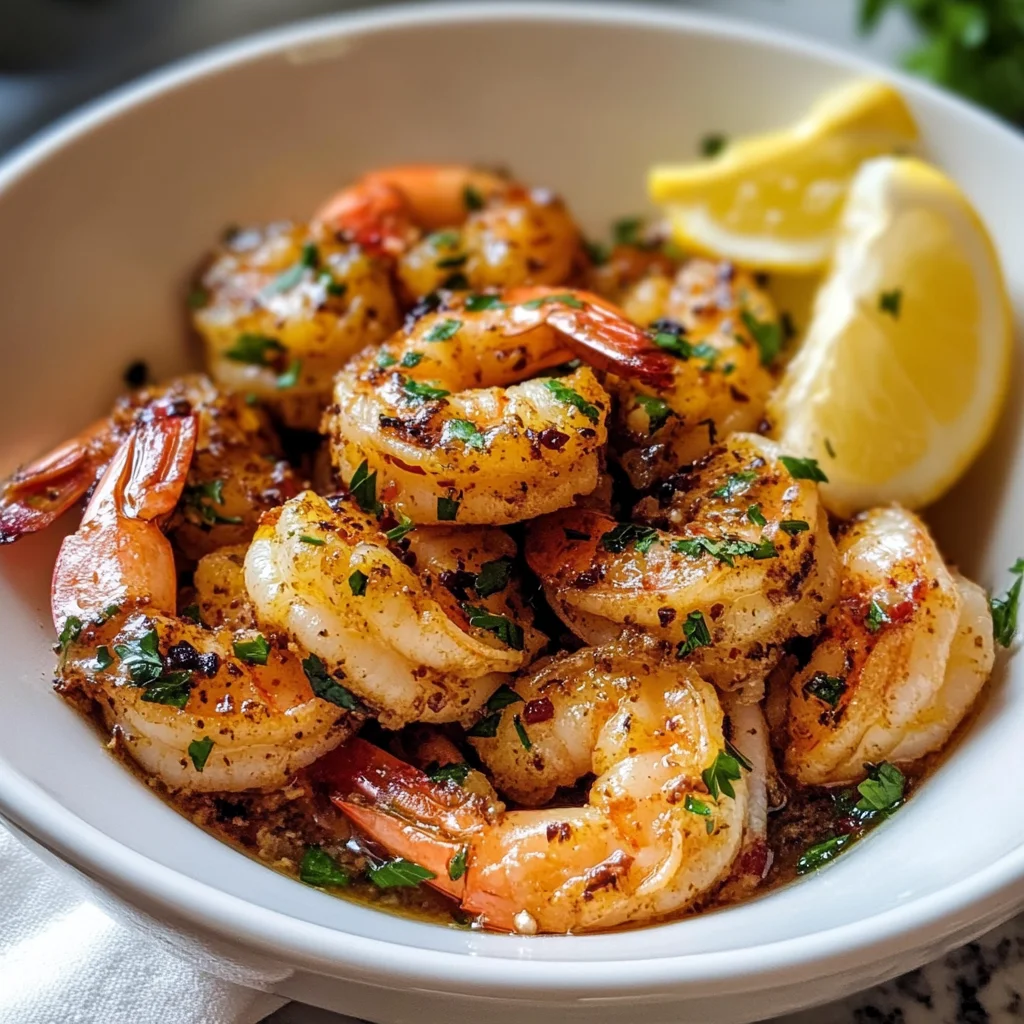
Hawaiian Shrimp
Hawaiian Shrimp is a vibrant, tropical dish that brings the flavors of the islands straight to your dinner table in just 20 minutes. This quick and easy recipe features juicy shrimp sautéed in a rich, garlicky butter sauce that’s infused with warm spices like paprika and seasoned to perfection with sea salt and black pepper. Each bite bursts with flavor, transporting you to sun-kissed beaches with every morsel. Perfect for weeknight dinners or special occasions, this dish is sure to impress your family and friends while creating lasting memories around the table.
- Prep Time: 10 minutes
- Cook Time: 10 minutes
- Total Time: 20 minutes
- Yield: Serves 4
- Category: Main
- Method: Sautéing
- Cuisine: Tropical
Ingredients
- 2 tsp paprika
- 1 tsp sea salt
- 1 tsp black pepper
- 2 tablespoons flour
- 12 oz shrimp (cleaned and deveined)
- 1/2 stick unsalted butter
- 7 garlic cloves (minced)
- 2 tablespoons olive oil
- Fresh chopped parsley (optional for garnish)
Instructions
- In a large resealable bag, combine paprika, sea salt, black pepper, and flour. Shake until well mixed.
- Add cleaned shrimp to the bag, seal tightly, and shake again until evenly coated.
- In a cast iron skillet over medium heat, melt butter and sauté minced garlic until fragrant (about 2–3 minutes).
- Increase heat to medium-high and add olive oil until shimmering. Cook shrimp in a single layer for about 2–3 minutes on each side until pink and golden brown.
- Return sautéed garlic to the skillet, gently stir to combine all ingredients. Garnish with fresh parsley if desired.
- Allow shrimp to rest briefly before serving.
Nutrition
- Serving Size: 3 oz shrimp with sauce
- Calories: 270
- Sugar: 0 g
- Sodium: 510 mg
- Fat: 16 g
- Saturated Fat: 7 g
- Unsaturated Fat: 9 g
- Trans Fat: 0 g
- Carbohydrates: 8 g
- Fiber: 0 g
- Protein: 22 g
- Cholesterol: 190 mg