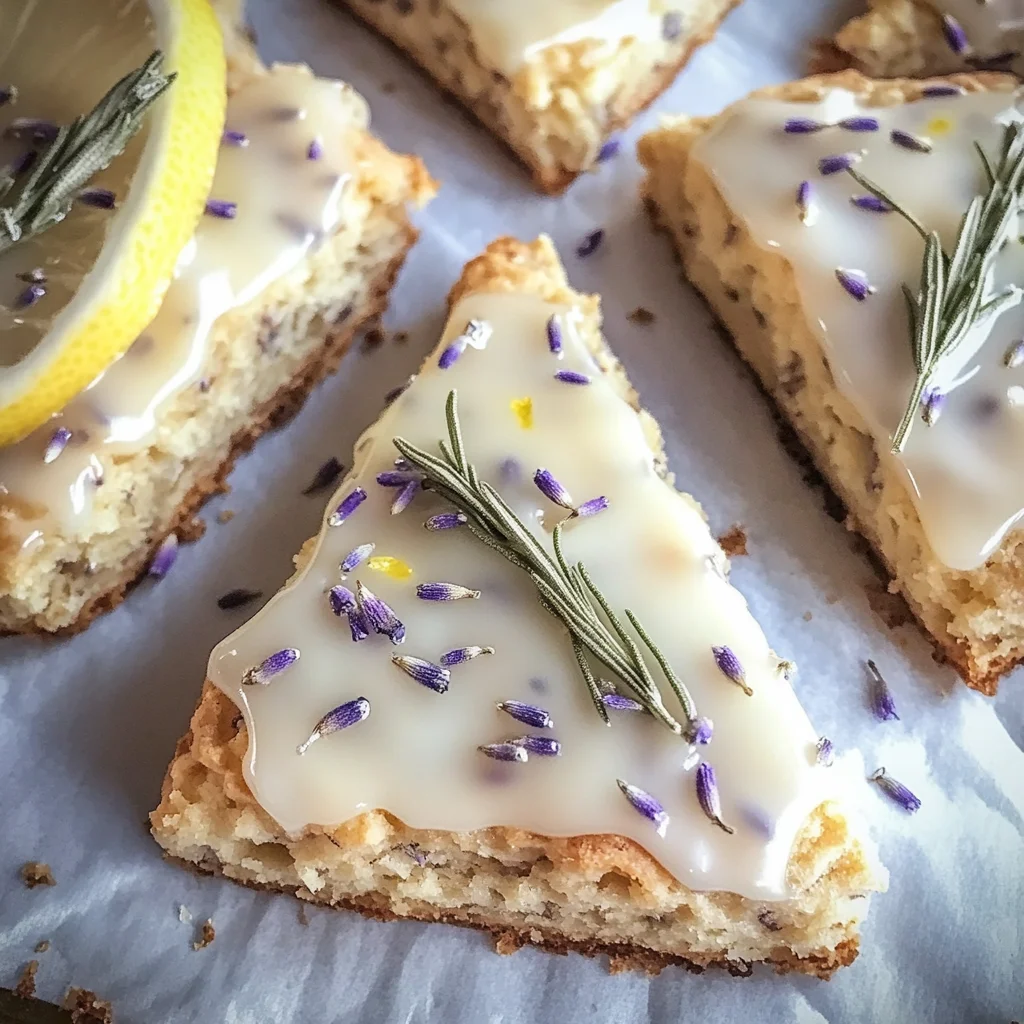
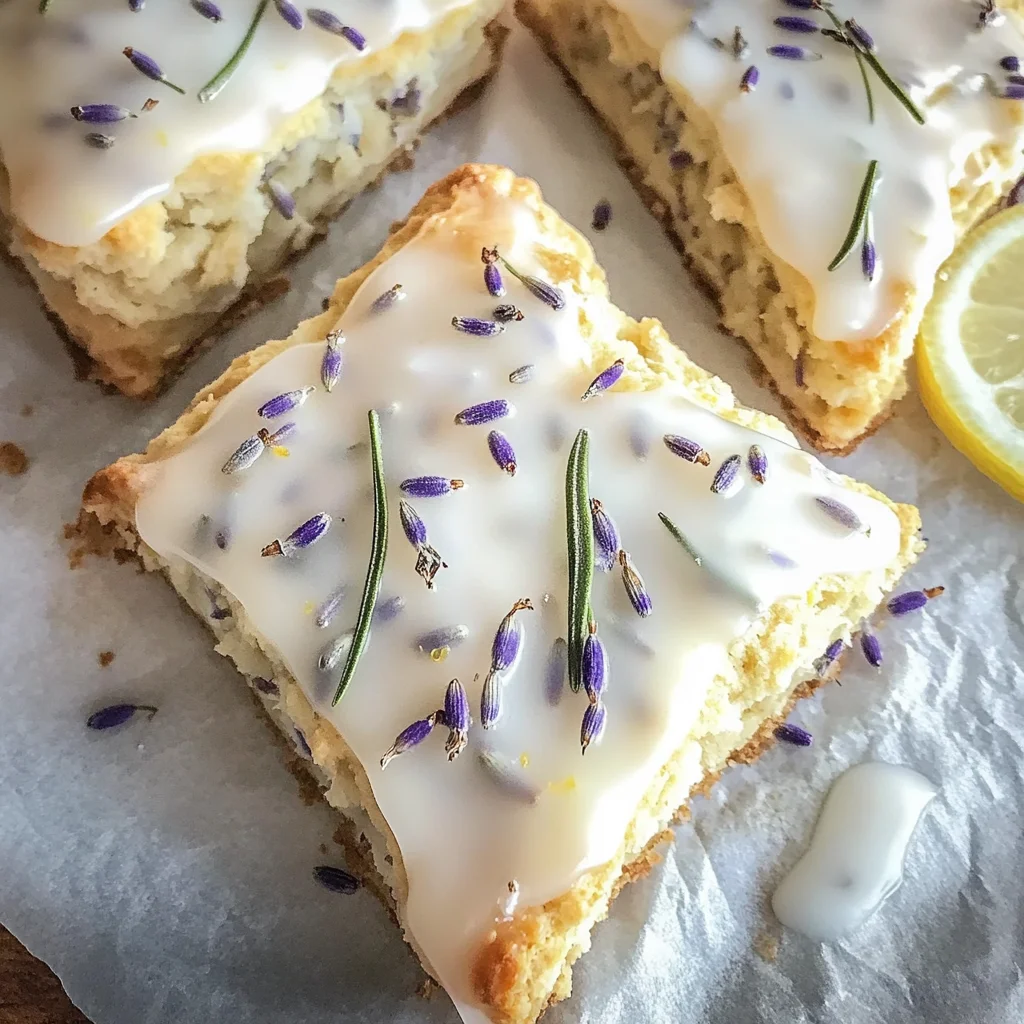
Lavender & Rosemary Scones with Lemon Glaze for Brunch Bliss
There’s something profoundly satisfying about the act of baking, isn’t there? It’s more than just mixing flour and sugar; it’s a symphony of flavors and aromas that dance together, intertwining to create something truly special. As I embarked on this journey of creating Lavender & Rosemary Scones with Lemon Glaze for Brunch Bliss, I was reminded of spring mornings where the air is infused with the delicate fragrance of blooming lavender and fresh herbs. This recipe transcends mere sustenance; it captures a slice of joy and warmth that can only come from sharing food made with love. Imagine pulling these scones from the oven, their golden tops glistening – can you smell that? The floral notes of lavender mingling with the earthy hint of rosemary create a delightful experience that sets the perfect tone for any gathering.
The beauty of these scones lies not only in their taste but also in their versatility. Whether you’re hosting a brunch with friends or simply indulging in a quiet moment alone with your favorite tea, these treats are sure to elevate the occasion. What makes them truly extraordinary is the lemon glaze that drizzles over the warm scones, adding a zesty brightness that complements the subtle floral and herbaceous flavors beautifully. And let me tell you, when that sweet-tart glaze meets the delicate texture of the scone, it’s nothing short of magic. Trust me; once you make these Lavender & Rosemary Scones with Lemon Glaze for Brunch Bliss, they will become a cherished staple in your kitchen.
Lavender & Rosemary Scones with Lemon Glaze for Brunch Bliss: A Floral Escape
Baking these scones is like taking a mini-vacation to a sun-drenched garden. Each ingredient plays its part in crafting a delightful treat that captivates not just your taste buds but your heart as well. So gather your ingredients, and let’s dive into this culinary adventure together!
Ingredients:
As we embark on this flavorful journey, let’s take a moment to appreciate each ingredient and what it brings to our Lavender & Rosemary Scones with Lemon Glaze for Brunch Bliss.
- 2 cups All-Purpose Flour: This is your foundational ingredient, providing structure and stability to our scones. When measuring flour, I recommend spooning it into your measuring cup rather than scooping directly from the bag – this keeps it light and airy, which is crucial for achieving that tender crumb we all desire. If you’re feeling adventurous, you could even substitute half of it for whole wheat flour for added nuttiness!
- 1/2 cup Butter (cold, cubed): The use of cold butter is absolutely paramount here! When incorporated into our dry ingredients through cutting or rubbing in, it creates little pockets of fat that will melt during baking, resulting in flaky layers – just what we want in scones! Look for high-quality unsalted butter; I often opt for European-style butters because they provide richer flavor due to their higher fat content.
- 1 large Egg: Eggs act as binders in our dough while also contributing moisture and richness. When choosing your egg, look for ones that are organic or free-range if possible; they tend to have deeper yolks and richer flavor which enhances our scones.
- 1 tablespoon Dried Lavender (culinary-grade): Here’s where things get aromatic! Culinary lavender adds an intoxicating floral note that pairs beautifully with savory elements like rosemary. Always make sure you’re using culinary-grade lavender – this ensures safety and flavor integrity. If you’re unsure about working with lavender, start small as its essence can be quite strong!
- Zest from 1 Lemon: Zest is like capturing sunshine in a bottle – it’s where all those aromatic oils reside! Adding lemon zest brightens up our scone batter while enhancing the floral notes of lavender. Trust me on this one; skipping zest would mean missing out on layers of flavor complexity.
- 1 tablespoon Rosemary (fresh or dried): Whether fresh or dried, rosemary brings an earthy warmth to our scones that’s truly comforting. Fresh rosemary has more vibrant flavor; however, if dried is what you have on hand, just reduce the amount slightly since dried herbs are more concentrated.
- 1/4 cup Sugar (granulated): This little boost not only adds sweetness but also aids in browning our scones when baked – creating that lovely golden crust we all adore! You can adjust this based on how sweet you prefer your breakfast treats.
- 1 tablespoon Baking Powder: This crucial leavening agent gives our scones their lift! Without it, we’d end up with dense little rocks instead of fluffy delights. Be sure to check expiration dates because old baking powder loses potency.
- 1/2 cup Heavy Cream (or milk): Cream adds richness to our dough while providing moisture needed for proper mixing and texture development. If you’re looking for lower fat options or dairy-free alternatives, full-fat coconut milk works wonders too!
- 1/2 teaspoon Salt: Don’t forget salt! It enhances flavor overall and balances sweetness perfectly – it’s non-negotiable in baking.
- 1 cup Powdered Sugar (finely ground): This sugar will be used later to create our luscious lemon glaze which brings everything together beautifully while adding an exquisite sheen.
- 2 tablespoons Lemon Juice: Just like zesting earlier, freshly squeezed lemon juice provides acidity which balances sweetness in our glaze while also offering brightness to every bite!
Equipment You’ll Need:
Now that we’ve gathered all these wonderful ingredients, let’s talk tools! Having the right equipment makes all the difference between a good bake and an exceptional one. These tools are essential partners in crafting something truly special:
- Mixing Bowls: A set of sturdy mixing bowls will be your best friends during this process! Opt for glass or stainless steel bowls as they can withstand both hot and cold temperatures effectively without retaining odors or stains.
- Pastry Cutter or Fork: This tool is perfect for cutting cold butter into flour without melting it away too quickly – preserving those lovely flaky layers we’re after!
- Baking Sheet lined with Parchment Paper: To ensure easy removal and perfect browning without sticking – parchment paper is non-negotiable when baking anything delicate like scones!
- Measuring Cups & Spoons: Accurate measurements are crucial here – invest in good quality measuring cups (both dry and liquid) as well as spoons for precision!
- Whisk: A simple whisk helps combine dry ingredients effortlessly while also incorporating air into batters or glazes which creates lighter textures!
With all our tools ready at hand along with those beautiful fresh ingredients waiting patiently on your counter… let’s dive into making these magnificent scones!
Step 1: Prepare Your Dough
Start by preheating your oven to 400°F (200°C) while gathering all your ingredients together because organization makes everything easier! In a large mixing bowl, combine 2 cups all-purpose flour along with ¼ cup sugar and 1 tablespoon baking powder. Using either a whisk or fork gently stir them together until well-mixed—this step helps distribute leavening evenly throughout ensuring consistent rise across all scone pieces later on! Now comes one of my favorite parts—cutting in butter! Take those cold cubes (½ cup) straight from the fridge—this temperature is important—and use your pastry cutter or fork to mix them into the dry mixture until it resembles coarse crumbs. Don’t rush through this step; take time as blending thoroughly allows tiny pockets between flour particles essential for creating flakiness when baked!
Step 2: Add Flavorful Elements
Once you’ve achieved that lovely crumbly texture resembling sand-like granules—it’s time to introduce flavor! Gently fold in 1 tablespoon dried lavender alongside 1 tablespoon rosemary (fresh or dried), ensuring every bit gets coated evenly—this step infuses aromatic elements throughout so no bite goes unflavored! Next up comes adding wet ingredients starting first by cracking open 1 large egg into another bowl before whisking lightly—this process combines yolk proteins ensuring even distribution when added next along with creamy goodness from ½ cup heavy cream (or milk). Carefully pour both mixtures into dry ones using spatula movements—gently fold until just combined avoiding overmixing otherwise risk toughening dough which no one wants here!
Step 3: Shape Those Scones
Now comes shaping those delightful morsels into something recognizable—grab some flour dusted onto clean countertop surface then turn out dough onto it gently kneading just enough times (3–5) until smooth—not too much though; remember gentle touch achieves lightness here! Divide dough ball into two equal halves then flatten each down slightly creating disc shapes roughly around ¾ inches thick before cutting them either wedges/pieces or circles using cookie cutter… oh how fun does this sound already?! Place shaped pieces onto lined baking sheet leaving space between each one allowing room needed whilst expanding during bake time ahead…
Step 4: Bake Until Golden Perfection
We’re almost there—the aroma wafting through kitchen should start building excitement now! Slide those beauties into preheated oven letting them bake around 18 minutes until tops turn golden brown—you’ll know they’re done once edges look crisped up nicely yet centers remain tender soft underneath… What happens if they stay longer? Well unfortunately burnt bottoms could occur ruining entire batch—a tragedy not worth risking so keep an eye out closely watching carefully towards end timer countdown…
With patience rewarded soon enough you’ll see glorious results ready cooling down slightly before drizzling luscious lemon glaze atop finished masterpieces—stay tuned as we prepare ourselves next unveiling delightful transformation bringing us closer enjoying every bite tasting happiness found within each crumb together soon enough…
Step 5: Bringing the Dough Together
Now that we’ve mixed our dry ingredients and infused them with the heady aromas of lavender and rosemary, it’s time to bring everything together into a beautiful dough. Start by creating a little well in the center of your flour mixture; this is where we’ll introduce our wet ingredients. Crack in your large egg, which acts as a binding agent, helping to give our scones that lovely, tender crumb we’re all aiming for. Next, pour in your cold heavy cream or milk—this adds moisture and richness to the scones. As you gently stir everything together with a spatula or wooden spoon, you’ll start to see the magic happen; the flour will absorb the liquids, and soon enough, it’ll transform into a shaggy dough that holds together but still has some texture.
It’s crucial at this stage not to overmix your dough; trust me on this! Overworking can lead to tough scones instead of the light and flaky ones we desire. Aim for just enough mixing until there are no dry bits left—it’s perfectly fine if your dough looks a bit rustic with some lumps and bumps. This roughness is what makes each scone unique! Once you’ve achieved that delightful shaggy consistency, gather the dough into a ball with your hands. You might notice it feels slightly sticky—that’s normal! It’s a sign that we’re on the right track to creating something profoundly satisfying.
Step 6: Shaping Your Scones
Now comes the fun part—shaping our scones! Lightly flour a clean surface (remember, we want just enough flour to keep things from sticking), then turn out your dough onto it. With gentle hands, pat it down into a circle about one inch thick. Don’t rush this step; take your time as you shape it because how you handle the dough plays a significant role in how flaky and tender they will be once baked. You want to maintain those air pockets within the dough so they can puff beautifully in the oven.
Using a sharp knife or a bench scraper (which I absolutely adore for this task), cut your round into 12 equal wedges—just like slicing up a pizza! You can also use round cutters if you’re feeling fancy, but I personally love the rustic charm of wedges. As you place each piece onto your prepared baking sheet lined with parchment paper (this helps prevent sticking), give them some space to breathe; they’ll expand while baking and need room to grow. Admire their soon-to-be irresistible form—it’s almost like they’re just waiting for their moment to shine!
Step 7: Chilling for Flakiness
At this point, let’s talk about chilling our shaped scones—a step often overlooked but absolutely paramount for achieving perfect texture. By placing them in the refrigerator for about 15-20 minutes before baking, we allow the butter in the dough to firm up again after being softened during mixing. Why chill? When cold butter hits that hot oven, it creates steam as it melts, leading to those glorious layers we crave in our scones! Think of this step as giving them time to relax before they hit the heat—much like us after a long day.
While they chill, consider preheating your oven to 400°F (200°C). The higher temperature is essential because it ensures that those cold scones will rise quickly when exposed to heat, creating an enticing golden-brown crust on top while keeping that fluffy interior moist and airy. This is where patience pays off—trust me when I say that skipping this step could result in denser scones that miss out on all that delightful flakiness we’re after!
Step 8: Baking Your Perfect Lavender & Rosemary Scones
With your chilled scones now ready for action, pop them into your preheated oven and let them bake for about 18-20 minutes. As they begin their transformation in the oven, keep an eye on them; you’ll notice them puffing up beautifully! The aroma wafting from your kitchen will be utterly intoxicating—lavender paired with rosemary creates an enchanting scent that fills every corner of your home and wraps around you like a warm hug.
You’ll know they’re done when they turn a lovely golden color on top and give off that irresistible smell of freshly baked goods. A quick visual cue is also helpful: gently touch one of the tops; if it springs back lightly without leaving an indentation, you’re good to go! If they look too pale or feel soft in the middle when pressed gently, give them another minute or two but watch closely—overbaking can lead us down unfortunate paths toward dryness! Once baked perfectly golden brown, remove them from the oven and allow them to cool slightly on a wire rack—you don’t want these beauties getting soggy on the bottom!
Conclusion:
As we reach the end of our delightful journey through this recipe, I hope you’ve felt my excitement bubbling over as we crafted these enchanting Lavender & Rosemary Scones with Lemon Glaze together! There’s something profoundly satisfying about combining flavors that evoke springtime bliss—the floral notes of lavender mingling with earthy rosemary and zesty lemon create an unforgettable experience that dances on your palate like sunshine after rain. This isn’t just another baked good; it’s truly extraordinary and perfect for brightening up any gathering.
I cannot stress enough why this recipe is an absolute must-try! It’s not merely about indulging in delectable flavors; it’s about sharing moments filled with laughter and warmth as loved ones gather around the table. These scones are versatile enough to shine during brunches, afternoon teas, or even cozy get-togethers where heartfelt conversations flow as freely as the tea. Imagine pulling these golden delights from the oven—the soft steam rising gently as they cool down while your home fills with their enchanting aroma—it’s pure magic!
Serving suggestions? Oh dear friend, imagine savoring one alongside a steaming cup of herbal tea or perhaps pairing it with fresh berries drizzled lightly in honey—a match made in heaven! For an afternoon pick-me-up, try slathering one with creamy vegan butter or coconut yogurt; it adds another layer of richness that complements those delicate flavors beautifully. And if you’re feeling indulgent? A dollop of lemon curd atop gives each bite an exquisite burst of citrusy delight that will transport you straight into dessert bliss.
Feeling adventurous? This recipe is wonderfully adaptable! You could swap out rosemary for fresh thyme or even add some finely chopped nuts like almonds for added crunch and depth—don’t hesitate to experiment! Or try infusing different glazes; perhaps orange instead of lemon? The sky’s the limit here! I invite you all to embark on this culinary adventure; try out these scones yourself and share your experiences with me—I would love nothing more than connecting over our shared love of food!
Lavender & Rosemary Scones with Lemon Glaze for Brunch Bliss
Indulge in the delightful experience of baking with these Lavender & Rosemary Scones with Lemon Glaze for Brunch Bliss. Combining aromatic floral notes with the earthy essence of rosemary and a zesty lemon glaze, these scones are perfect for elevating any brunch gathering or enjoying a quiet moment with a cup of tea. The recipe captures the joys of springtime and is straightforward enough for bakers of all skill levels. With flaky layers and an enchanting aroma wafting through your kitchen, these treats are destined to become a cherished staple in your home.
- Prep Time: 20 minutes
- Cook Time: 20 minutes
- Total Time: 40 minutes
- Yield: About 12 scones 1x
- Category: Breakfast
- Method: Baking
- Cuisine: American
Ingredients
- 2 cups all-purpose flour
- 1/2 cup cold butter (cubed)
- 1 large egg
- 1 tablespoon dried culinary lavender
- Zest from 1 lemon
- 1 tablespoon rosemary (fresh or dried)
- 1/4 cup granulated sugar
- 1 tablespoon baking powder
- 1/2 cup heavy cream (or milk)
- 1/2 teaspoon salt
- 1 cup powdered sugar (for glaze)
- 2 tablespoons lemon juice
Instructions
- Preheat oven to 400°F (200°C). In a large bowl, mix flour, sugar, baking powder, and salt.
- Cut in cold butter until mixture resembles coarse crumbs.
- Fold in lavender, rosemary, and lemon zest.
- In another bowl, whisk the egg with heavy cream. Pour into dry ingredients and mix until just combined.
- Turn dough onto a floured surface and gently knead a few times. Pat into a circle about one inch thick.
- Cut into wedges or circles and place on a parchment-lined baking sheet.
- Chill dough for 15 minutes before baking for optimal flakiness.
- Bake for 18–20 minutes until golden brown.
- For the glaze, whisk powdered sugar with lemon juice until smooth; drizzle over cooled scones.
Nutrition
- Serving Size: 1 serving
- Calories: 220
- Sugar: 9g
- Sodium: 180mg
- Fat: 10g
- Saturated Fat: 6g
- Unsaturated Fat: 3g
- Trans Fat: 0g
- Carbohydrates: 30g
- Fiber: 1g
- Protein: 3g
- Cholesterol: 25mg