Brown Butter and Honey Pistachio Cookie Bars Recipe
The Magic of Brown Butter and Honey Pistachio Cookie Bars
There’s something undeniably enchanting about the combination of brown butter, honey, and pistachios. As I often tell my friends, this is more than just a recipe; it’s a heartfelt experience that brings warmth to your kitchen and joy to your taste buds. When the rich, nutty aroma of brown butter fills the air, it evokes cherished memories of family gatherings where laughter mingles with the scent of freshly baked treats. Each bite of these Brown Butter and Honey Pistachio Cookie Bars is like a warm embrace, perfectly balancing sweet and savory notes that dance together in harmony, creating a truly extraordinary moment for anyone lucky enough to indulge.
What makes this recipe special is not only its delightful flavors but also the way it bridges tradition and innovation. The deep, caramelized notes from the brown butter elevate these cookie bars to a level that feels both nostalgic and fresh. Imagine gathering your loved ones around a table, sharing stories as you pass around these delicious bars—each one a little piece of happiness that weaves connections between the past and present. Trust me when I say that once you try making these bars, they’ll become a treasured staple in your kitchen repertoire.
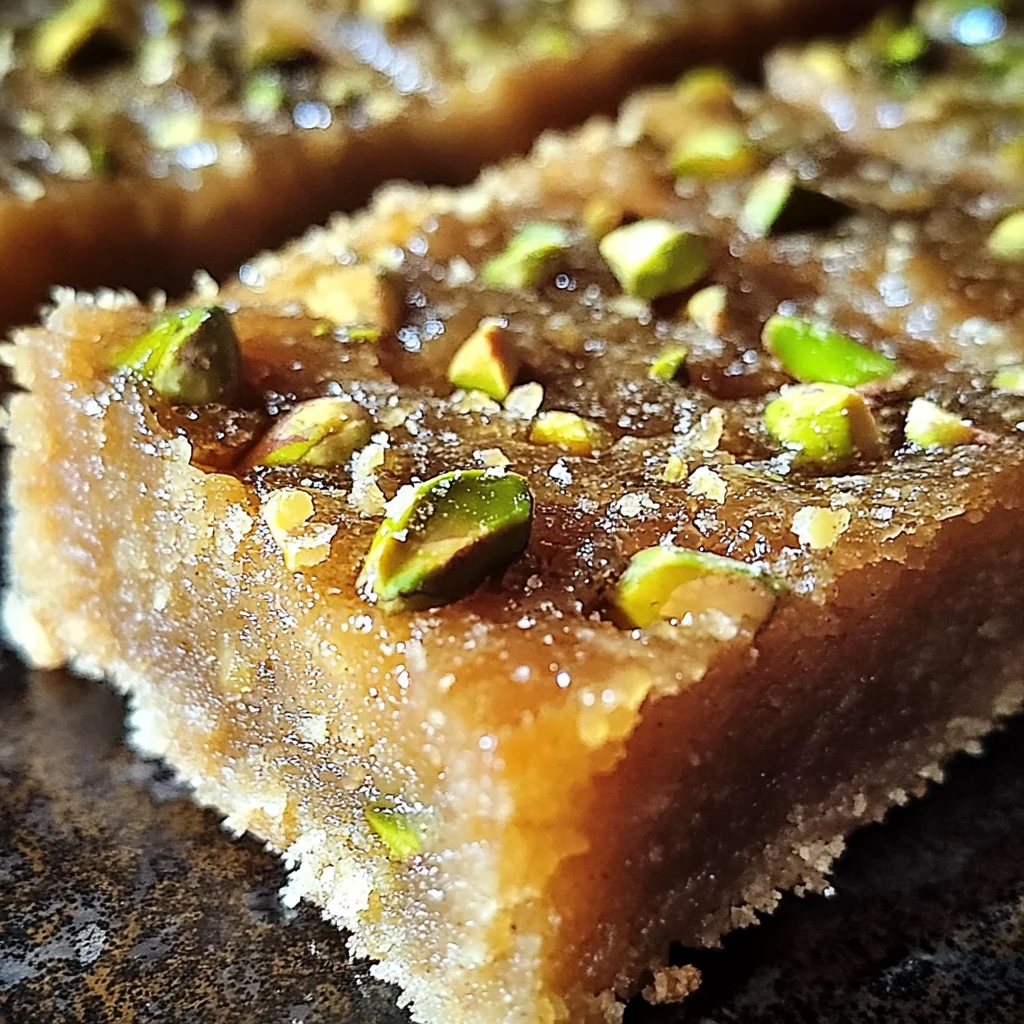
Brown Butter and Honey Pistachio Cookie Bars Recipe: Chewy Delights with Nutty Goodness
I am beyond excited to share this simple yet heavenly recipe with you! These cookie bars are chewy, flavorful, and absolutely irresistible. The process may seem intricate at first glance, but I promise you it’s manageable—and oh-so-rewarding. Let’s embark on this culinary journey together!
Ingredients:
As we gather our ingredients for this delightful adventure, it’s essential to understand what each component brings to our Brown Butter and Honey Pistachio Cookie Bars Recipe. Each ingredient has a role to play in achieving that perfect balance of flavors and textures.
- 1 cup (2 sticks or 226g) unsalted butter: This is crucial for creaming properly and creating that light, airy texture we’re aiming for in our Brown Butter and Honey Pistachio Cookie Bars Recipe. When melted over medium heat, this butter transforms into liquid gold as it develops those aromatic nutty flavors during browning. Always choose high-quality butter; European-style varieties tend to have higher fat content which enhances richness.
- 2 ½ cups (about 310g) all-purpose flour: Flour acts as the backbone of our cookie bars, providing structure while allowing for that chewy texture we crave. It’s important to spoon and level your flour rather than scooping directly from the bag; this prevents packing too much flour into your measuring cup, which could lead to dry bars. If you’re looking for alternatives due to dietary preferences or restrictions, you could consider using a blend of gluten-free flours designed for baking.
- 1 teaspoon baking soda: This leavening agent is vital for giving our cookie bars their lift. It reacts with the acids in our other ingredients (like honey) to create carbon dioxide bubbles that help achieve that delightful chewy texture. Always ensure your baking soda is fresh; an expired package won’t give us the rise we desire.
- ¾ teaspoon salt: Salt enhances every flavor in our recipe; it’s like magic! It balances sweetness from the sugars and honey while intensifying those rich notes from brown butter. If you’re using salted pistachios later on, consider reducing this amount to ½ teaspoon so we don’t overpower the delicate balance of flavors.
- ¾ cup (165g) light brown sugar: Packed with moisture and flavor, light brown sugar contributes not just sweetness but also that coveted chewiness in our cookie bars. It contains molasses which adds depth; when paired with honey later on, we get an incredible symphony of sweet notes!
- ½ cup (100g) granulated sugar: This sugar provides sweetness while helping achieve a beautiful golden crust on top of our cookie bars. A mix of both granulated and brown sugar ensures we have both texture and flavor—a non-negotiable aspect for any successful dessert!
- ½ cup (170g) honey: Honey lends an enchanting floral sweetness while also adding moisture to our dough—making these cookie bars irresistibly chewy! Whether you opt for clover or wildflower honey will influence the final flavor profile slightly; both are excellent choices that add their unique touch.
- 2 large eggs: Room temperature eggs are essential here because they blend better into our batter than cold eggs straight from the fridge do. They provide structure while contributing moisture needed for those moist centers we adore!
- 2 teaspoons pure vanilla extract: Vanilla extract adds warmth and depth to our cookie bars—it’s absolutely paramount in rounding out all those rich flavors at play! Opting for pure vanilla over imitation will yield significantly better results; trust me on this one!
- 1 ½ cups (about 210g) shelled pistachios, roughly chopped (reserve ¼ cup for topping): These nuts are not only crunchy but also add vibrancy through their color contrast with golden hues from browning butter and sugars! Their nutty essence shines through beautifully when mixed into the dough while their reserved chopped pieces sprinkled on top offer delightful visual appeal.
- Flaky sea salt: While optional, sprinkling flaky sea salt over your cookie bars before baking elevates everything from good to extraordinary! That subtle salty crunch against sweet bites creates an alluring contrast that keeps everyone coming back for more—trust me when I say it’s worth it!
Equipment You’ll Need:
Having the right tools at hand can make all the difference in creating something wonderful in your kitchen! While they may not be ingredients, these essential partners will help ensure success in every step along the way.
- 9×13 inch baking pan – This size is perfect for baking our cookie bars evenly without them being too thick or thin. It allows ample space for spreading out dough while ensuring even cooking throughout—an absolute must-have!
- Parchment paper – Lining your pan with parchment paper not only prevents sticking but also makes lifting out those beautiful cookie bars so much easier once cooled! Leaving an overhang creates handles which allow you to lift them out effortlessly without compromising shape.
- Electric mixer or sturdy whisk – Whether using handheld or stand mixers equipped with paddle attachments ensures thorough blending without overmixing—this mechanical assistance allows us control over incorporating ingredients smoothly!
- Rubber spatula or wooden spoon – These trusty tools come into play during folding phases where gentle mixing preserves texture while preventing excess gluten development—keeping things chewy rather than cakey!
Each piece of equipment works tirelessly alongside you as you create these delectable treats—you’re going to want them all by your side as we dive into preparing these incredible Brown Butter and Honey Pistachio Cookie Bars!
Step 1: Melting the Butter
Let’s kick off this delicious adventure by melting our unsalted butter over medium heat in a saucepan. As it begins its transformation from solid sticks into creamy liquid gold, you’ll notice it starts foaming up—a sign that water content is evaporating away. Keep a watchful eye now because once we’ve melted all that wonderful butter completely down, we enter an exciting stage known as “browning.” Swirl the pan occasionally during this process so heat distributes evenly without burning any spots; you’ll notice sizzling sounds will mellow out as clarity returns.
This metamorphosis takes about 5-8 minutes after melting begins—don’t rush! Patience pays off here because watching closely helps us catch those tiny golden specks forming at the bottom—the milk solids caramelizing beautifully into nutty goodness! Once you see them turning amber-colored? That’s your cue—it’s time to take it off heat immediately before things turn bitter!
Step 2: Cooling Down Our Liquid Gold
After pouring all those glorious browned bits into a large heatproof bowl—remember not leaving any behind—they still need some time before entering dough territory! Allow this luscious concoction cool at room temperature for about 15-20 minutes until it’s cool enough to touch but remains liquid—not solidified like butter would be if left too long unattended! Alternatively? You could speed things up by putting it briefly in the refrigerator—but stir occasionally just so nothing sets up too quickly—which would hinder proper integration later on.
Cooling might seem tedious initially but trust me—it serves two purposes here: first ensuring safety around hot liquids during next steps…and secondly allowing flavors continue developing further within those toasted milk solids immersed among buttery richness—it’s worth every minute spent waiting patiently!
Step 3: Preparing Our Baking Pan
While waiting on cooling down moments? Let’s prep our baking pan! Greasing generously with some extra unsalted butter prevents sticky disasters later down road—we all know how frustrating it can be when beloved treats cling stubbornly onto surfaces instead of lifting cleanly out upon finishing baking process! After greasing? Grab yourself parchment paper lining—leaving slight overhangs along two opposite sides creates helpful handles making removal easier once baked through completely—no one wants messy cuts today!
Lightly grease parchment paper itself too—this ensures nothing gets stuck there either—and now? We’re ready set up nicely before moving forward towards mixing up all those incredible ingredients together shortly after finishing here…
Step 4: Mixing All Ingredients Together
Now comes one of my favorite parts—the joyfully chaotic mixing stage where everything comes together harmoniously! Using either electric mixer fitted with paddle attachment or simply employing good ol’ fashioned whisk technique works wonders here—just remember not rush through blending stages if possible since slower speeds allow flavors meld nicely instead potential toughening gluten development happening otherwise!
Start beating mixture at medium speed until well combined—it should appear smooth while slightly lightened shade emerges within first few minutes spent whisking away happily together…now let’s add room temperature eggs one by one afterward beating well after each addition until fully incorporated—not forgetting scraping down sides regularly ensuring no dry streaks remain hidden underneath layers waiting patiently hopeful getting mixed too soon enough…
This step becomes crucial since skipping could lead unfortunate dryness later along textural journey ahead—we definitely want chewy beauties awaiting us shortly thereafter so let’s stay focused right now!
Stay tuned as we continue crafting these mouthwatering Brown Butter and Honey Pistachio Cookie Bars together—I promise it’ll be worth every minute spent inside warm inviting kitchens where dreams transform deliciousness awaits eagerly poised upon plates just begging shared amongst loved ones everywhere!
Step 5: Let’s Cool Down the Liquid Gold
Once you’ve poured that luscious brown butter into your heatproof bowl, it’s time to let it cool down. This step is crucial because warm butter can cook the eggs too quickly when you mix them in later, leading to an uneven texture in your cookie bars. So, let your beautiful concoction rest at room temperature for about 15 to 20 minutes. If you’re feeling a bit impatient (I totally get it!), you can pop it in the refrigerator for about 10 minutes—just make sure to stir it occasionally to prevent it from solidifying on the sides. You want that brown butter to be cool enough to touch but still liquid; we’re aiming for a silky consistency here. Trust me on this one! The cooling not only ensures that our eggs stay at the right temperature but also enhances the flavors, allowing those nutty notes to deepen even further.
Step 6: Greasing and Lining Your Pan with Love
While your brown butter cools, let’s prepare our baking pan! Grab a 9×13 inch baking dish and add a little extra unsalted butter to grease its interior. This step is more than just a formality; it creates a non-stick environment for our cookie bars, ensuring they release beautifully once baked. After greasing, line the pan with parchment paper, leaving overhangs on two opposite sides—this “sling” method will absolutely change your life! It allows you to lift the entire slab out of the pan effortlessly after cooling, making cutting so much easier and neater. Lightly grease the parchment as well; this helps prevent any sticking and ensures all those tasty edges come out perfectly crisp and golden. The anticipation builds as we set up this foundational aspect of our recipe!
Step 7: Whipping Up the Sweet Harmony
Now comes one of my favorite parts: mixing everything together! Using either an electric mixer or a sturdy whisk (if you’re feeling adventurous!), combine your cooled brown butter with light brown sugar and granulated sugar in a large mixing bowl. Beat this mixture on medium speed for about 2-3 minutes until it’s well-blended and has lightened slightly in color. This is where we’re developing that beautiful texture—creaming together these sugars with the fat from the butter introduces air into our batter, which contributes to that delightful chewiness we’re all craving. Don’t rush this step; taking your time here will create a symphony of flavors later on! Once combined and looking smooth, we’ll add our room temperature eggs one at a time. Be sure to beat well after each addition until fully incorporated; each egg adds moisture and richness while helping bind everything together.
Step 8: Embracing Vanilla’s Warm Embrace
After you’ve added both eggs and seen them meld into your sugary mixture like magic, it’s time for another layer of flavor: pure vanilla extract! Add in those two teaspoons of vanilla—the aroma alone is intoxicating—and mix until just combined. Here’s where we need to be careful not to overmix; stirring too vigorously can develop gluten from the flour prematurely, which could lead us down the path of tough cookie bars instead of delightfully chewy ones. So gently fold in that dry mixture until you no longer see streaks of flour; we want everything evenly distributed without losing that tender texture we adore so much.
Next Major Phase – Creating Your Cookie Bar Masterpiece
With our batter coming together beautifully, we’re now ready for one of the most exciting parts—adding those stunning pistachios!
Step 9: Folding In Nature’s Green Gems
Take your shelled pistachios (reserving that precious quarter cup for later) and gently fold them into your cookie dough using a rubber spatula or wooden spoon. This step is where we really start to see our Brown Butter and Honey Pistachio Cookie Bars Recipe come alive! The vibrant green of the pistachios contrasts beautifully against the golden batter, promising pops of flavor with every bite. Make sure they are evenly distributed throughout without overmixing—remember, we want those lovely chewy bites rather than dense cookie bars! By incorporating these nuts at this stage, their crunchy texture will bring wonderful contrast against that soft base once baked.
Step 10: Pressing Down for Perfection
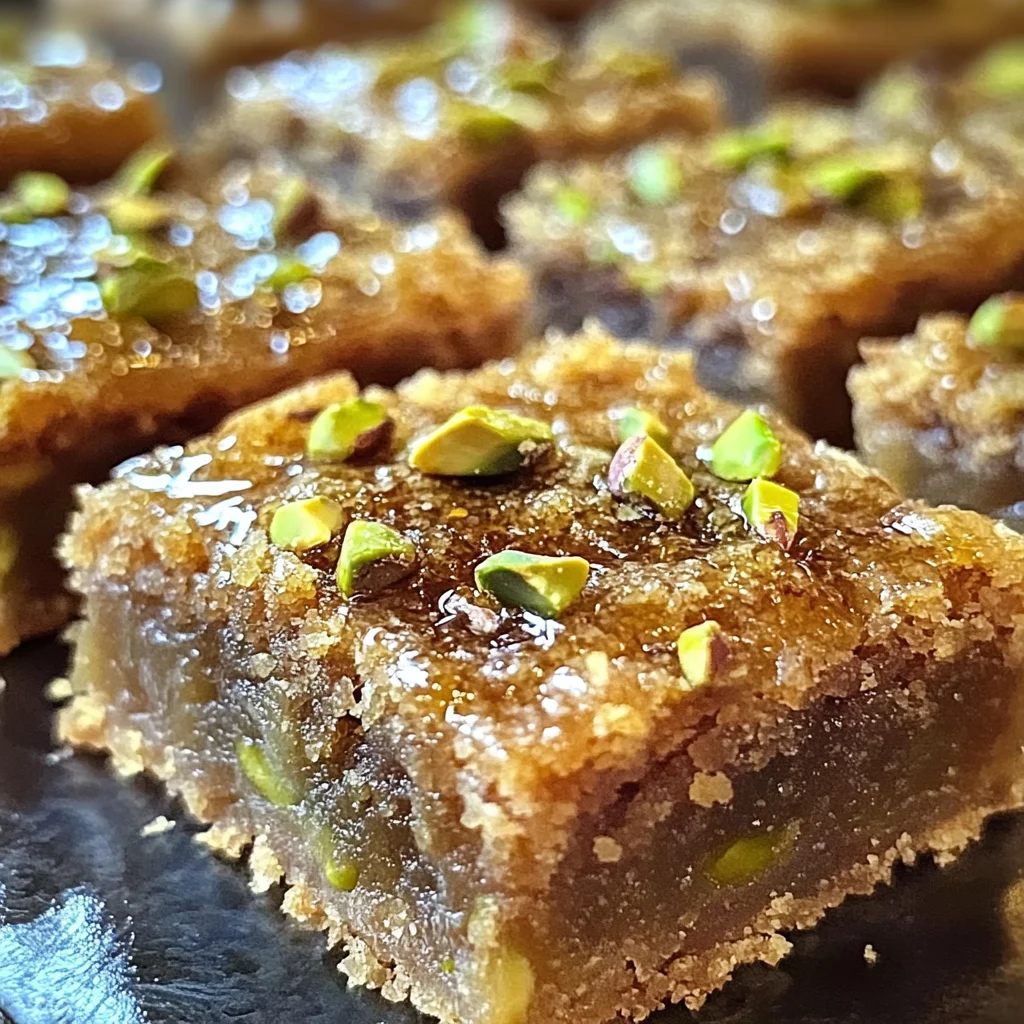
Once your pistachios are folded in perfectly (and trust me—you’ll know when it feels right), it’s time to press this delightful dough into your prepared baking pan! Using either the back of a spoon or your lightly greased fingertips, spread the dough evenly across the bottom of the pan. It’s essential to ensure that it reaches all corners and achieves an even surface, as this guarantees uniform baking throughout—nobody wants undercooked centers or burnt edges! Aim for a level finish; don’t worry if it’s not perfect because those slight imperfections add character—and who doesn’t love a little rustic charm? If you’re feeling fancy (and I know you are!), sprinkle that reserved quarter cup of chopped pistachios over the top before moving on.
Step 11: A Touch of Sea Salt Magic
Now here comes my secret weapon—a sprinkle of flaky sea salt over the top before baking! This non-negotiable step elevates these cookie bars from delicious to utterly extraordinary by enhancing all those sweet flavors while balancing them out beautifully with just a hint of saltiness. The contrast between sweet honeyed goodness and savory sea salt creates an unforgettable flavor experience that’s simply delightful! You’ll want just enough so each bite feels balanced but not overly salty; trust me when I say this simple finishing touch makes all the difference.
Step 12: Baking Your Perfect Brown Butter and Honey Pistachio Cookie Bars Recipe
Now it’s finally time for these beauties to hit the oven! Preheat yours to 350°F (175°C) if you haven’t already—it should feel like Christmas morning with all that anticipation filling your kitchen right now! Slide your pan into the oven and set a timer for about 25-30 minutes—but keep an eye on these lovelies during their bake-off! You’ll know they’re ready when the edges look set and golden brown while maintaining a slightly underbaked center—think soft but not wet or jiggly when prodded gently. A toothpick inserted into the center should come out with just a few moist crumbs clinging onto it rather than liquid batter; this is key for achieving those chewy textures.
I encourage you not to rush through this baking phase—patience truly pays off here as those cookies transform beautifully under heat. Baking times might vary slightly depending on how reliable or quirky your oven tends to be, so start checking around that 23-minute mark if you’re looking for chewier bars—the goal here is perfection!
Once baked, let them cool completely in their pan before attempting any cutting—that’s right folks—this usually takes at least 2-3 hours (or longer). I know waiting can feel like torture but allow me to assure you that patience is paramount here; cooling helps them set properly and ensures clean cuts as well as that coveted chewy texture we’re striving for!
Stay tuned because soon we’ll dive into slicing up these decadent treats—I promise it’ll be worth every moment spent waiting!
Storage and Enjoyment Tips for Your Brown Butter and Honey Pistachio Cookie Bars Recipe
Ah, the moment you’ve been waiting for has finally arrived! Your kitchen is filled with the warm, nutty aroma of freshly baked Brown Butter and Honey Pistachio Cookie Bars. The golden edges beckon you to take a bite, and I promise you, they’re every bit as delicious as they look. But before you dive right in, let’s talk about how to properly store these delightful treats so that they stay just as scrumptious for days to come.
Storing Leftover Brown Butter and Honey Pistachio Cookie Bars Recipe
To keep your cookie bars at their best, you’ll want to store them in an airtight container. I recommend using a glass or plastic container with a tight-fitting lid that keeps out air and moisture—both enemies of freshness. If you’re dealing with leftovers (and trust me, that’s a big if!), these bars will remain delectable for about 5-7 days at room temperature. For those who are concerned about maintaining that chewy texture, consider placing a slice of bread in the container with your bars; this little trick helps absorb moisture without sacrificing the delightful chewiness we all crave. After a few days, you might find that the flavors have deepened beautifully—imagine the honey becoming even more pronounced against the rich backdrop of brown butter! When the urge strikes, simply enjoy them as is or pop one in the microwave for about 10 seconds. This quick zap warms them up just enough to revive that gooey goodness.
Freezing Brown Butter and Honey Pistachio Cookie Bars Recipe for Later
If you find yourself overwhelmed by leftover cookie bars (or if you’re simply planning ahead), freezing them is an excellent option! To freeze your bars properly, first make sure they’ve cooled completely. Cut them into individual pieces, then wrap each piece tightly in plastic wrap or aluminum foil. Place wrapped bars in a freezer-safe bag or container, removing as much air as possible before sealing. When properly stored this way, they can last up to three months in the freezer without losing any of their charm. The beauty of freezing is that it allows you to enjoy these treats whenever the craving strikes—just pull one (or two) from the freezer and let it thaw at room temperature for about 30 minutes or zap it in the microwave for a few seconds until warmed through. It’s like having a little piece of joy waiting for you whenever you need it!
Brown Butter and Honey Pistachio Cookie Bars
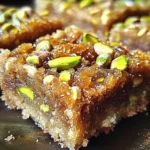
Indulge in the delightful experience of our Brown Butter and Honey Pistachio Cookie Bars Recipe. With rich, nutty brown butter and a sweet touch of honey, these cookie bars offer a perfect balance of flavors and textures. Each bite is a chewy delight, enhanced by the crunch of pistachios, making them an irresistible treat for any occasion. They are simple to prepare and sure to impress friends and family alike. Enjoy them as an afternoon pick-me-up or serve them at your next gathering—either way, they’re destined to become a favorite!
- Prep Time: 15 minutes
- Cook Time: 30 minutes
- Total Time: 45 minutes
- Yield: About 16 servings 1x
- Category: Dessert
- Method: Baking
- Cuisine: American
Ingredients
- 1 cup (2 sticks or 226g) unsalted butter
- 2 ½ cups (about 310g) all-purpose flour
- 1 teaspoon baking soda
- ¾ teaspoon salt
- ¾ cup (165g) light brown sugar
- ½ cup (100g) granulated sugar
- ½ cup (170g) honey
- 2 large eggs
- 2 teaspoons pure vanilla extract
- 1 ½ cups (about 210g) shelled pistachios, roughly chopped (reserve ¼ cup for topping)
- Flaky sea salt
Instructions
- Preheat your oven to 350°F (175°C) and grease a 9×13 inch baking pan with unsalted butter. Line with parchment paper for easy removal.
- Melt the unsalted butter in a saucepan over medium heat until browned, then allow it to cool slightly.
- In a bowl, mix together the brown butter, light brown sugar, and granulated sugar until smooth.
- Add the eggs one at a time, mixing well after each addition. Stir in the vanilla extract.
- In another bowl, whisk together flour, baking soda, and salt; gradually fold into the wet ingredients until just combined.
- Gently fold in chopped pistachios.
- Spread the dough evenly into the prepared pan and sprinkle with flaky sea salt.
- Bake for 25-30 minutes or until golden brown around the edges but slightly underbaked in the center.
- Let cool completely before cutting into bars.
Nutrition
- Serving Size: 1 bar (50g)
- Calories: 210
- Sugar: 12g
- Sodium: 95mg
- Fat: 10g
- Saturated Fat: 6g
- Unsaturated Fat: 4g
- Trans Fat: 0g
- Carbohydrates: 29g
- Fiber: 1g
- Protein: 3g
- Cholesterol: 37mg