Cowboy Corn Dip
There’s something truly magical about gathering around a table with friends and family, sharing laughter, stories, and delicious bites that bring comfort and joy. Today, I want to share with you a recipe that embodies all of those feelings—Cowboy Corn Dip. This dip is more than just an appetizer; it’s a celebration of flavors and textures that come together in perfect harmony. Picture this: creamy cheeses mingling with sweet corn, hearty black beans, and a touch of heat from jalapeños, all topped off with the crunch of fresh green onions. It’s like a warm embrace on a platter, inviting everyone to dig in and enjoy.
Every time I make this Cowboy Corn Dip, it feels like an echo of summers spent outdoors, grilling with friends or cozy gatherings on cooler evenings where the air is filled with warmth and laughter. The way the ingredients meld together creates a symphony of flavors that dances across your palate. Trust me when I say that this dip is not just delicious; it’s utterly intoxicating! It has the power to turn any ordinary day into something special, making it perfect for game nights, potlucks, or simply enjoying at home while watching your favorite show. So grab your favorite tortilla chips or some crunchy veggies because we’re about to embark on this delightful culinary journey together!
Cowboy Corn Dip: A Flavorful Fiesta in Every Bite
Let me tell you, there’s nothing quite like the exuberance you feel when serving up this Cowboy Corn Dip at your next gathering. It’s easy to prepare yet impressively flavorful—just what we need for those moments when we want to dazzle our guests without spending hours in the kitchen. The beauty of this dip lies not only in its rich ingredients but also in its versatility. You can customize it based on your preferences or what you have on hand! Whether you’re hosting a casual get-together or a lively celebration, this dip will be the star of your appetizer spread.
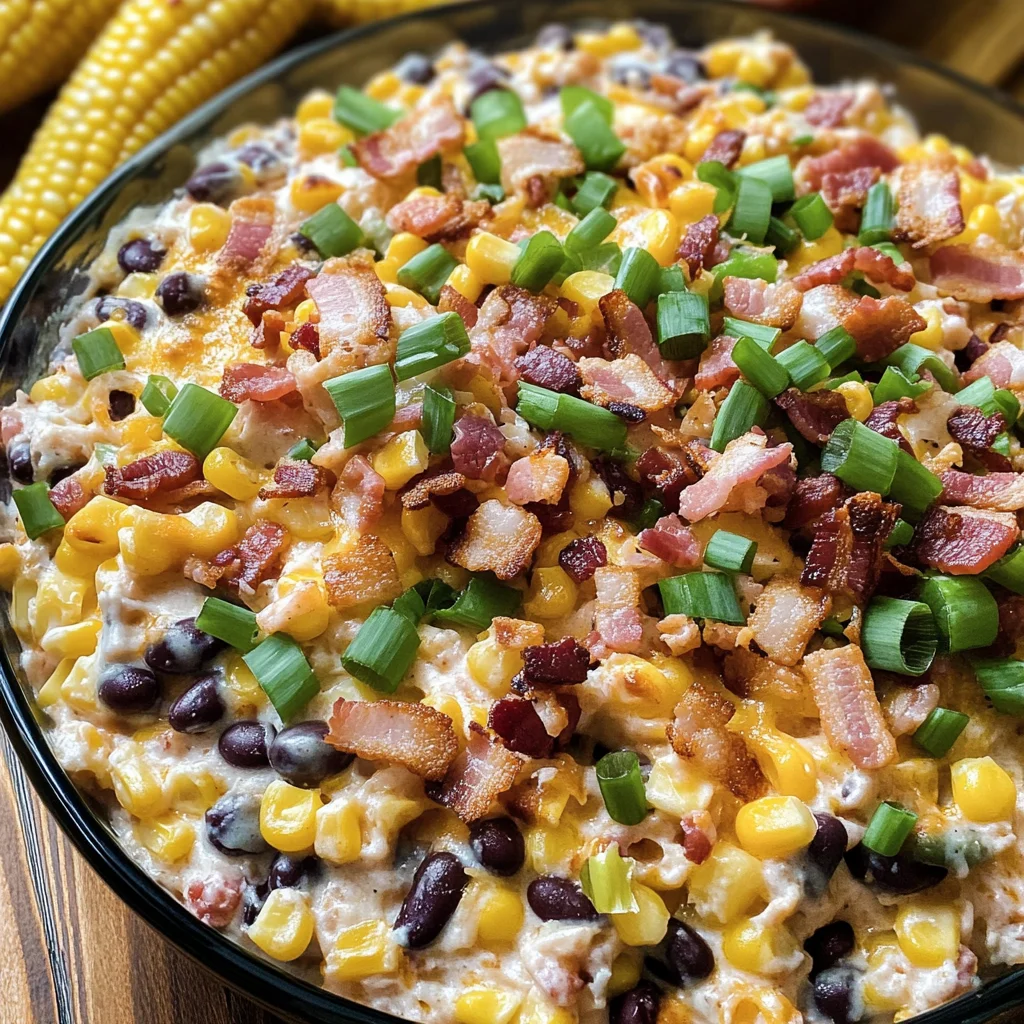
Ingredients:
As we gather our ingredients for this Cowboy Corn Dip adventure, just know that each component plays a vital role in creating that irresistible flavor profile we all crave. Here’s what you’ll need:
- 2 cans (15.25 ounces each) whole kernel corn, drained. The sweet kernels bring a delightful burst of freshness to our dip and provide beautiful color contrast against the creamy backdrop. When choosing canned corn, look for brands that use non-GMO corn and have no added sugars or preservatives—this ensures you’re getting pure sweetness without unwanted additives.
- 1 can (15 ounces) black beans, rinsed and drained. Black beans add not only creaminess but also protein and fiber to our dip, making it more filling and nutritious. Rinsing them well is essential as it removes excess sodium from the canning process while enhancing their natural earthiness in flavor.
- ½ cup (116 g) mayonnaise. This ingredient is crucial for achieving that creamy richness we desire in dips! Mayonnaise acts as an emulsifier here; it binds everything together while contributing a luscious mouthfeel that elevates every bite.
- 4 ounces cream cheese, softened. Softened cream cheese blends seamlessly into our mixture without clumps—ensuring every scoop is smooth and indulgent. When purchasing cream cheese, opt for full-fat varieties as they yield the best results; low-fat versions often lack the depth of flavor we’re aiming for.
- 1 cup (113 g) mild cheddar cheese, shredded. Cheddar brings sharpness without overwhelming heat; its gooeyness when melted creates that coveted stretchy texture we adore in dips! Ensure you’re buying block cheese rather than pre-shredded options since they contain anti-caking agents that affect melting.
- 1 cup (113 g) mozzarella cheese, shredded. Mozzarella adds another layer of creaminess while enhancing stretchiness! Like cheddar, go for block mozzarella here—it will melt beautifully into our dip without becoming rubbery.
- ½ cup (50 g) parmesan cheese, grated. Parmesan introduces umami notes along with a slight nuttiness that elevates our dip’s overall flavor profile. Freshly grated parmesan is ideal here; its potency cannot be matched by pre-grated varieties!
- 1 large jalapeño, seeded and finely diced. For those who enjoy a bit of heat! Jalapeños offer vibrant flavor without overpowering the other ingredients if used judiciously—you’ll appreciate their subtle kick once incorporated into our dip.
- 8 slices thick-cut bacon, cooked and crumbled. This ingredient adds crunch alongside smoky goodness—it’s what makes cowboy cuisine so beloved! If you prefer not to use bacon or want a vegetarian option instead, consider substituting with crispy chickpeas or even smoked paprika for depth.
- 1 medium red onion (finely diced), about ½ cup. Red onion provides crispness along with sweetness when sautéed lightly—perfect for balancing out other robust flavors present in our dip!
- ½ teaspoon kosher salt & ¼ teaspoon black pepper. These seasonings are non-negotiable—they enhance every element within our dish ensuring nothing falls flat! Adjust these amounts based on personal preference or dietary needs.
- Green onion (chopped for garnish). While not essential to flavor itself—their vibrant green hue offers freshness atop our finished product—a visual treat that beckons everyone closer!
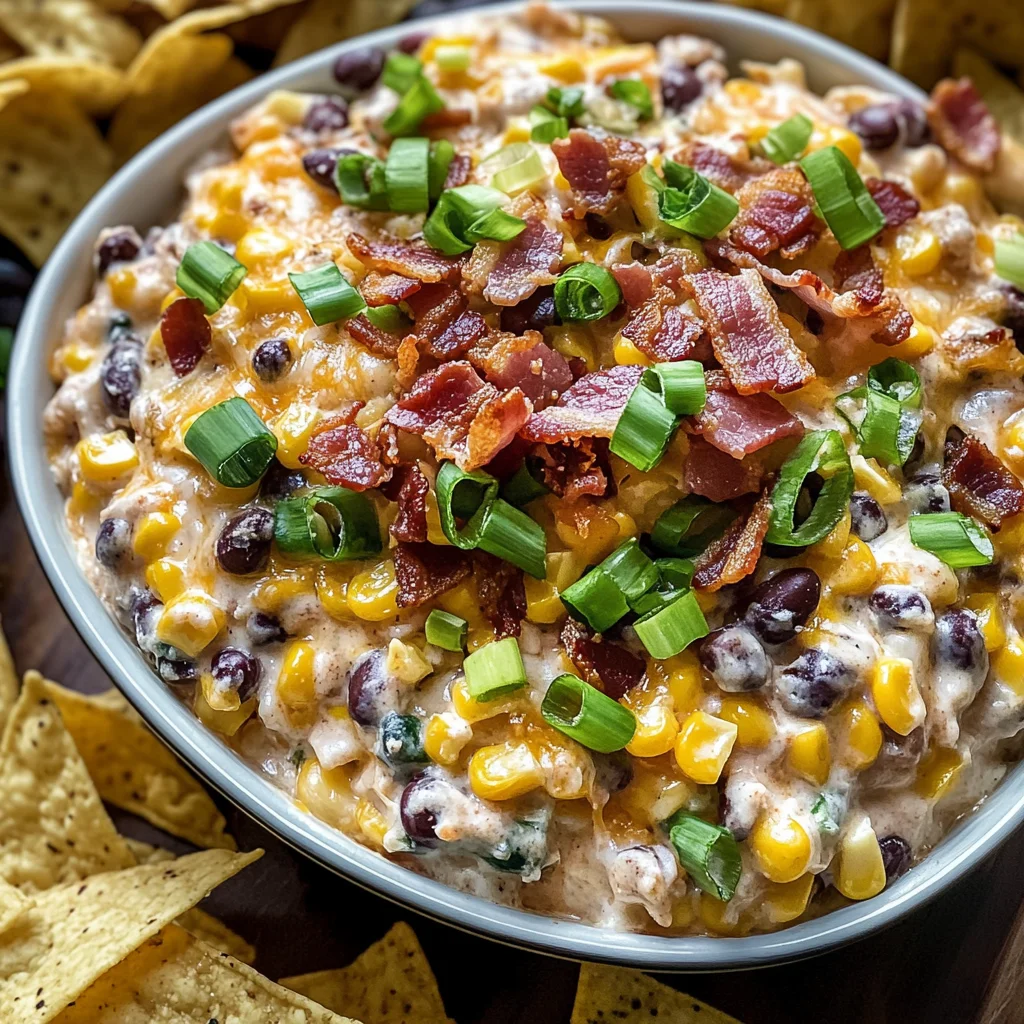
Equipment You’ll Need:
Before diving into preparation mode let’s gather some essential tools together because having the right equipment makes everything smoother—and trust me; you’ll feel like a pro chef when you’ve got everything lined up perfectly! Here are some key pieces you’ll need:
- Large mixing bowl: This will be your primary workspace where all those wonderful ingredients come together harmoniously! A sturdy bowl allows plenty of room for mixing without spilling over.
- Spatula or wooden spoon: Perfect companions for folding delicate mixtures like ours gently while ensuring proper incorporation without deflating any air pockets—especially important after adding cream cheese!
- Can opener: Essential for opening those cans swiftly so there are no hold-ups during prep time—you want this process flowing smoothly so you can enjoy yourself!
- Knife & Cutting Board: Sharp knives make quick work slicing through vegetables while boards provide stability during chopping tasks—safety first!
With these tools by your side—and each ingredient ready to go—we’re set to create something truly extraordinary together!
Preparing the Cowboy Corn Dip
Step 1: Gather Your Ingredients
Take a moment to lay out each ingredient before diving into preparation; trust me—it makes everything feel less chaotic! Start by draining the canned corn thoroughly since excess liquid can make your dip watery—a big no-no if we’re aiming for rich creaminess! Rinsing black beans under cold water helps remove extra sodium while enhancing their natural flavors too—don’t skip this step either!
Step 2: Combine Base Ingredients
In your large mixing bowl now comes the fun part: adding those luscious creamy elements—mayonnaise and softened cream cheese—to create an irresistible base layer! Using your spatula or wooden spoon mix until they’re beautifully combined; note how they transform from separate entities into one velvety mixture before adding any dry components like cheddar and mozzarella cheeses next!
Step 3: Fold In Remaining Ingredients
Once you’ve achieved that smooth result it’s time to fold in remaining goodies such as corn mixture alongside black beans followed by jalapeños plus diced red onions—each addition enhancing texture complexity whilst contributing unique tastes too! Stir gently but thoroughly avoiding aggressive motions which might break down fragile items like peppers who’ve worked hard keeping their shape intact throughout cooking processes ahead!
Step 4: Season To Perfection
Now let’s add seasoning magic by sprinkling kosher salt along with freshly cracked black pepper over entire batch—we want every bite bursting full-flavored bliss after all! Mix until evenly distributed then take note: tasting at this stage gives insight whether adjustments need made before finalizing masterpiece creation later on down line…so don’t hesitate experimenting until it feels “just right!”
I can’t wait for you to experience how these steps come together seamlessly turning simple ingredients into something magnificent—a true cowboy-inspired feast awaits ahead once served alongside crispy tortilla chips or vibrant veggie sticks too…get ready my friend because everyone will be reaching out seconds before long!
Cowboy Corn Dip: The Heart of Your Next Gathering
As we dive into the next steps of creating this utterly intoxicating Cowboy Corn Dip, I want you to really feel the joy and warmth that comes from preparing something meant to bring people together. This dip isn’t just food; it’s an experience—a true celebration of flavor and comfort that transforms ordinary moments into unforgettable memories. So, let’s roll up our sleeves and get our hands a little messy, shall we?
Step 5: Mixing Everything Together – A Flavorful Union
In a large mixing bowl, you’ll begin the process that truly brings this Cowboy Corn Dip to life. Start by adding the drained corn and rinsed black beans—these two ingredients are like the dynamic duo in a buddy cop movie; they complement each other perfectly while also bringing their own unique character to the table. The sweetness of the corn pairs beautifully with the earthy richness of the black beans, creating a base that’s both satisfying and hearty.
Next, let’s introduce the creamy elements: mayonnaise and softened cream cheese. This combination not only adds a luscious texture but also aids in binding all these vibrant ingredients together into a cohesive dip. As you mix, don’t rush this step; take your time to ensure every morsel is coated in that rich goodness. You should see everything blending beautifully into what looks like a decadent, creamy mixture—this is crucial for achieving that perfect mouthfeel later on. To finish off this beautiful amalgamation, sprinkle in the cheddar, mozzarella, and parmesan cheeses, allowing them to melt slightly into the warm mixture as you stir. The result? A symphony of flavors just waiting to dance on your taste buds!
Step 6: Spicing It Up – A Kick of Heat
Now it’s time for some excitement! Grab that finely diced jalapeño and add it to your bowl. Trust me on this one; don’t skip out on those jalapeños—a little heat is what makes this dip so special! They bring a lovely contrast against the creamy backdrop you’ve created and will wake up your palate in ways you didn’t know were possible. If you’re cautious about heat levels (I totally understand), feel free to start with just half of that jalapeño and taste as you go; after all, cooking is about personal preference as much as it is about techniques.
As you fold in this fiery addition along with the red onion—which adds not just flavor but also crunch—you’ll notice how vibrant and colorful your mixture becomes. This step is absolutely paramount because it ensures every bite will be flavorful and exciting. And don’t forget to sprinkle in that kosher salt and black pepper—these seasonings are essential for elevating all those fantastic flavors within your dip.
Step 7: The Importance of Resting – Letting Flavors Marry
Once everything is well combined—oh my goodness, doesn’t it already look divine?—it’s time for one very important step: resting. Yes, I know we’re all tempted to dive right in with our tortilla chips at this point, but I promise you: patience will reward you here! Cover your bowl with plastic wrap or transfer your dip into an airtight container if you prefer, then pop it into the refrigerator for at least two hours (or even overnight if you’re feeling generous!).
Why chill? Well, during this time, all those beautiful flavors have a chance to meld together harmoniously. Think of it like letting a fine wine breathe; each ingredient gets to know its neighbors better, resulting in a truly extraordinary taste experience when served cold. You might notice how certain flavors become more pronounced while others mellow out—not unlike catching up with an old friend over coffee! Just be sure not to skip or shorten this chilling period if you can help it; trust me—it makes all the difference between good dip and great dip!
Step 8: Serving It Up Right – Presentation Matters!
Now comes one of my favorite parts: serving! Remove your delightful Cowboy Corn Dip from the fridge—the anticipation has been building—and prepare yourself for some serious compliments when everyone takes their first bite! Before serving, give it one last gentle stir; sometimes there can be a little separation after chilling due to the cream cheese solidifying slightly. A quick mix will restore its creamy consistency without compromising any flavor.
For presentation, I love to sprinkle some freshly chopped green onions on top—this brightens up not just the appearance but also adds another layer of fresh flavor that contrasts beautifully with the richness of the cheese blend below. Serve this marvelous concoction alongside an array of crispy tortilla chips or colorful fresh vegetables—the crunchiness contrasts so well with the smoothness of the dip! Remember, people eat with their eyes first; making it visually appealing elevates your dish from appetizer status to star attraction at any gathering!
Final Touches – Elevating Your Experience
Step 9: The Grand Finale – Enjoy Every Bite!
As you gather around with friends or family (or maybe even just treat yourself!), take a moment to relish what you’ve created—a delightful Cowboy Corn Dip that’s not just delicious but also embodies warmth, laughter, and connection. When serving, encourage everyone to dig in while it’s still chilled—the interplay between cool dip and crispy chip creates an utterly satisfying experience as flavors burst forth in every bite.
And remember: cooking isn’t merely about following instructions—it’s about infusing love into everything you create! Whether it’s game day or a cozy movie night at home, I promise you’ll find joy not only in eating this Cowboy Corn Dip but also in sharing it with those who matter most. Now grab those chips and prepare for an explosion of flavors—this dip is sure to be a hit! Enjoy every single bite!
Storage and Enjoyment Tips for Your Cowboy Corn Dip
Now that you’ve whipped up a batch of this utterly intoxicating Cowboy Corn Dip, you might be wondering how to savor every last bit. Trust me, whether you’re hosting a lively gathering or just enjoying a cozy night in, this dip is a crowd-pleaser that brings joy in every bite. But what happens if you find yourself with some leftovers? Fear not! Storing your Cowboy Corn Dip is quite simple and ensures you can relish its delightful flavors even after the party ends.
Storing Leftover Cowboy Corn Dip
To keep your Cowboy Corn Dip fresh and delicious, transfer it into an airtight container—this is absolutely paramount for preserving its creamy texture and vibrant flavors. You can pop it in the refrigerator where it will stay good for about 3 to 5 days, although I promise you, it might not last that long if you have friends like mine who can’t resist coming back for more! If you’re worried about keeping the dip from drying out, consider placing a piece of parchment paper directly on top of the dip before sealing the container; this little trick works wonders! When you dig into the leftovers, you’ll find that the flavors have had time to meld together even more profoundly, creating an experience that’s just as satisfying as when it was first made. If you’re feeling adventurous, you could even gently reheat it in the oven or microwave—just make sure to do so slowly to maintain that delicious creaminess!
Freezing Cowboy Corn Dip for Later
If you want to take your meal prep game to the next level, freezing your Cowboy Corn Dip is a fantastic option! Just scoop the dip into a freezer-safe container or a resealable bag, making sure to remove as much air as possible before sealing. This way, your dip will stay fresh for up to 2 months in the freezer! When you’re ready to enjoy it again, simply move it to the refrigerator overnight to thaw. I love how convenient this makes my life—imagine pulling out a frozen stash of this rich and flavorful dip on a whim! It’s brilliant because not only does it save time during busy weeks but also ensures that those comforting flavors are just a quick heat away. That convenience factor really makes meal planning feel effortless and oh-so-rewarding.
With these storage tips in hand, you can enjoy your Cowboy Corn Dip long after making it—because let’s be honest: nobody wants their delicious hard work to go to waste!
Cowboy Corn Dip

Cowboy Corn Dip is the ultimate crowd-pleaser, bringing together a vibrant mix of creamy cheeses, sweet corn, hearty black beans, and a hint of jalapeño heat. This easy-to-make dip is perfect for any gathering, whether it’s game night, a casual party, or simply enjoying with loved ones at home. With its rich flavors and comforting texture, each scoop feels like a warm embrace. Serve it alongside crispy tortilla chips or fresh veggies for a delightful experience that will have everyone coming back for more!
- Prep Time: 15 minutes
- Cook Time: None
- Total Time: 0 hours
- Yield: Approximately 12 servings 1x
- Category: Appetizer
- Method: Mixing
- Cuisine: American
Ingredients
- 2 cans whole kernel corn (15.25 ounces each)
- 1 can black beans (15 ounces)
- ½ cup mayonnaise
- 4 ounces cream cheese (softened)
- 1 cup mild cheddar cheese (shredded)
- 1 cup mozzarella cheese (shredded)
- ½ cup Parmesan cheese (grated)
- 1 large jalapeño (seeded and diced)
- 1 medium red onion (finely diced)
- Salt and pepper to taste
- Chopped green onions for garnish
Instructions
- Drain the canned corn and rinse the black beans thoroughly.
- In a large mixing bowl, combine the mayonnaise and softened cream cheese until smooth.
- Fold in the shredded cheddar, mozzarella, and grated Parmesan cheese.
- Add the drained corn, rinsed black beans, diced jalapeño, diced red onion, salt, and pepper to the mixture.
- Mix gently until all ingredients are evenly combined.
- Cover and refrigerate for at least two hours to allow flavors to meld.
- Garnish with chopped green onions before serving with tortilla chips or fresh veggies.
Nutrition
- Serving Size: 2 tablespoons (30g)
- Calories: 120
- Sugar: 2g
- Sodium: 200mg
- Fat: 9g
- Saturated Fat: 3g
- Unsaturated Fat: 5g
- Trans Fat: 0g
- Carbohydrates: 8g
- Fiber: 3g
- Protein: 4g
- Cholesterol: 10mg