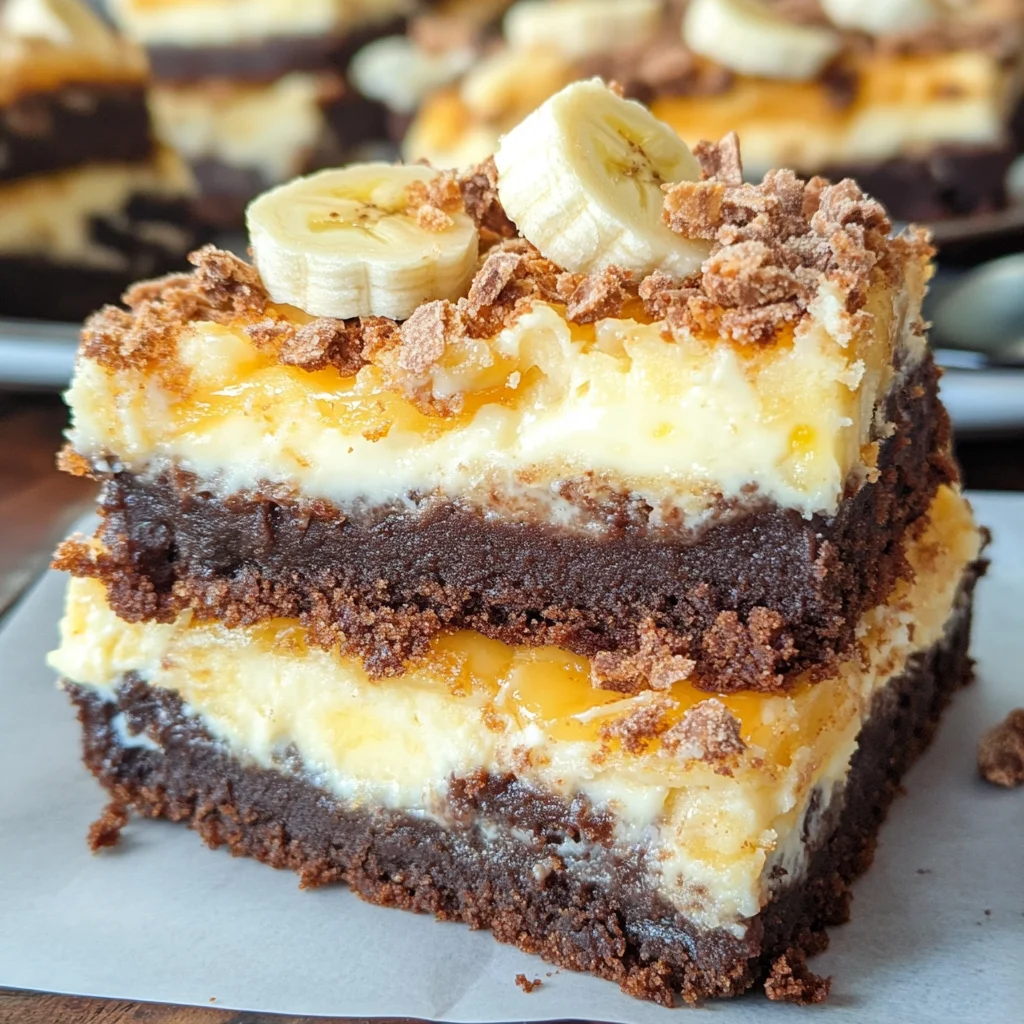
Banana Pudding Brownies
Ah, my dear friend! Let me take you on a delightful journey into the world of desserts with a little creation that I hold very close to my heart: Banana Pudding Brownies. This isn’t just another recipe; it’s an experience that intertwines nostalgia and innovation, a sweet symphony where fudgy chocolate brownies meet the creamy embrace of banana pudding. As I reminisce about childhood gatherings filled with laughter and this irresistible treat gracing the dessert table, I can almost hear the joyful gasps of delight from friends and family as they indulge in this decadent dessert. The layers of rich chocolate combined with the luscious banana pudding create a dance of flavors that’s nothing short of magical.
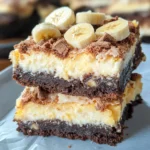
Imagine sinking your fork into these brownies, the initial bite revealing a chewy, chocolate-laden base, followed by a silky smooth layer of banana pudding that feels like a warm hug. The addition of fresh bananas and crunchy vanilla wafers not only enhances the texture but also adds an element of surprise with every mouthful. This is what makes these Banana Pudding Brownies truly extraordinary; they capture the essence of comfort food while elevating it with playful modernity. I promise you, once you taste them, they will become your go-to dessert for any occasion—from casual weeknight treats to festive gatherings.
Banana Pudding Brownies: A Decadent Symphony of Chocolate and Banana
Welcome to my kitchen, where we’re about to embark on a delightful adventure crafting these Banana Pudding Brownies together! This recipe is not just about baking; it’s about creating memories and sharing joy through food. So grab your apron and let’s dive into this deliciousness that combines two beloved desserts into one unforgettable experience.
Ingredients:
As we gather our ingredients for this sumptuous dessert, take a moment to appreciate how each component plays its own vital role in crafting these indulgent Banana Pudding Brownies. Every ingredient has been chosen not just for flavor but for texture, richness, and overall harmony in this beautiful creation.
- 1 cup light brown sugar, packed. This sugar brings a depth of flavor that’s absolutely paramount in our brownies. Its molasses content contributes not only sweetness but also moisture, resulting in fudgy goodness that melts in your mouth. When choosing brown sugar, opt for one that’s freshly packed—this ensures it retains its moisture and flavor intensity. If you’re ever caught without brown sugar, you can substitute it with white granulated sugar mixed with a bit of molasses to mimic that lovely caramel undertone.
- 1/4 cup white granulated sugar. While the brown sugar offers richness, white granulated sugar helps create that perfect balance by contributing to the structure of our brownies. It aids in achieving that delightful crust on top while keeping the inside soft and chewy. Remember, precision matters here; too much sugar can lead to overly sweet brownies that overshadow the subtle banana notes we want to shine through.
- 1/2 cup (1 stick) unsalted butter, melted. Butter is where all the magic begins! This step is crucial because melted butter blends seamlessly into our batter, imparting richness and moisture without making the brownies greasy. Make sure your butter isn’t too hot when adding it to prevent cooking the eggs prematurely—just warm enough to melt but cool enough to keep everything balanced.
- 2 tsp pure vanilla extract. Vanilla is like the secret ingredient whispering sweet nothings throughout our dessert! It enhances all those delicious flavors while adding its own aromatic quality. Always choose pure vanilla extract over imitation for a more authentic and vibrant flavor profile; it truly makes all the difference in elevating your baking game.
- 2 large eggs. Eggs play an essential role here; they provide structure while also contributing moisture and richness to our brownies. When mixing them in, look for them to be fully incorporated—this ensures an even distribution throughout our batter which leads us closer to brownie perfection!
- 3/4 cup all-purpose flour. Flour is our backbone—it gives our brownies their structure while allowing them to rise beautifully during baking. When measuring flour, be sure to spoon it into your measuring cup instead of scooping directly from the bag; this prevents packing too much flour which could lead to dry brownies.
- 1/4 cup unsweetened cocoa powder. Cocoa powder is what transforms ordinary brownies into chocolaty decadence! Look for high-quality cocoa powder as it will have a profound impact on flavor; Dutch-processed cocoa can add a smoother taste while natural cocoa provides more acidity—either works beautifully here depending on your preference.
- 1/2 tsp salt. Don’t overlook salt—it’s an essential player in balancing sweetness and enhancing all those wonderful flavors hiding within our ingredients! A pinch goes a long way in brightening up every bite you take.
- 1 cup semi-sweet chocolate chips. Chocolate chips are like little pockets of joy within every bite! They add texture and additional bursts of chocolatey goodness that complements the brownie base perfectly—be generous here because who doesn’t love extra chocolate?
- 1 8oz block cream cheese, room temperature. Cream cheese will give us that luxurious banana pudding topping we crave—it creates a silky mouthfeel that’s utterly intoxicating against the rich brownie base below it! Make sure it’s at room temperature so it blends seamlessly without lumps; there’s nothing worse than unexpected chunks ruining your creamy dreams!
- 1 3.4oz box instant banana pudding. Instant banana pudding is where we get that iconic flavor directly infused into our dessert! It thickens beautifully when combined with milk and adds sweetness without overwhelming—the key ingredient behind making this treat sing!
- 1/3 cup dairy milk of any kind. Milk plays an important role by helping blend everything together smoothly while also ensuring our pudding layer achieves just the right consistency—creamy but not runny!
- 1 small banana, peeled and chopped small. Fresh bananas add both flavor and texture; they bring brightness alongside their natural sweetness while providing those lovely chewy bites amidst creamy layers—absolutely divine!
- 1 to 1 1/2 cups vanilla wafers, broken into pieces. These crunchy gems bring not only texture but also nostalgia; who doesn’t love classic vanilla wafers? Their crispiness contrasts beautifully against soft layers above them—a delightful crunch that rounds out every heavenly mouthful!
Equipment You’ll Need:
Now that we’ve gathered our ingredients full of promise and potential, let’s talk about some essential tools you’ll need as partners in creating these marvelous Banana Pudding Brownies! Having the right equipment can make your baking experience smoother and more enjoyable—trust me on this!
- 9×13 inch baking pan – This size is perfect for baking up a batch large enough to share (or not!). A glass or metal pan works wonderfully; just remember if using glass bakeware reduce oven temperature slightly as it retains heat differently than metal pans do.
- Parchment paper – Lining your pan with parchment paper is non-negotiable if you want easy removal post-baking! Not only does it prevent sticking but also allows for easier cleanup—a true win-win situation!
- Mixing bowls (both large & medium) – You’ll need bowls at various sizes for creaming ingredients together as well as mixing dry components separately before combining everything harmoniously together.
- Hand or stand mixer – While you could mix by hand (and build those arm muscles!), using an electric mixer saves time—and helps achieve that fluffy texture we’re after more easily!
- Rubber spatula or wooden spoon – These are indispensable tools when folding ingredients together gently without deflating air bubbles—we want maximum fluffiness after all!
With everything prepped correctly—including tools at hand—we’re ready now delve deeper into preparing these luscious Banana Pudding Brownies step-by-step!
Step 1: Prepping Our Canvas
First things first: preheat your oven to 350°F (175°C). It’s essential we set this foundational stage right so when we’re ready to bake these beauties emerge cooked evenly throughout! Next up? Grab your trusty 9×13 inch baking pan lined with parchment paper—a trick I highly recommend because it’ll make removing those luscious brownies later so much easier! Aim for letting some parchment overhang along edges so you can easily lift out once cooled—trust me on this step; you’ll thank yourself later when cutting slices becomes effortless rather than sticky business!
Step 2: Creaming Together
In either large mixing bowl or using your handy-dandy stand mixer fitted with paddle attachment (if available), start creaming together both sugars along with melted butter until light-colored & fluffy—a process known as aeration which incorporates air bubbles resulting in tenderness within baked good once cooked through! This should take roughly 2–3 minutes at medium speed so don’t rush it—taking time here ensures optimal results down line! Once creamed nicely together add vanilla extract next followed closely behind by room temperature eggs one at time mixing until fully incorporated before moving onto dry ingredients stage.
Step 3: Mixing Dry Ingredients
In separate medium-sized bowl combine all-purpose flour alongside unsweetened cocoa powder plus salt using whisk until blended nicely—this simple yet vital step helps ensure even distribution preventing clumps from forming during final mix stage later on! Now comes fun part: gently fold these dry components into wet mixture gradually incorporating third portion at time until just combined—you want batter looking smooth without overmixing which could lead tough texture upon baking later on…so be gentle here folks!
Step 4: Adding Chocolate Chips
Finally—we can bring forth those glorious semi-sweet chocolate chips folded lovingly right into rich batter mixture before transferring entire concoction carefully spread across prepared pan evenly ensuring all corners filled so nobody misses out during serving time later—because everyone deserves equal deliciousness after all right? Bake uncovered center rack around 30–40 minutes watching closely towards end where outer edges begin turning golden brown while center sets firm yet slightly jiggly—that’s okay don’t fear as it’ll continue cooking post-removal from heat source allowing perfect fudginess achieved eventually once cooled down completely before slicing squares up generously sized servings ready enjoy indulging blissfully afterwards…
Stay tuned as we’ll continue through assembling layers next bringing everything together beautifully soon enough…
Step 5: Crafting the Creamy Banana Pudding Layer
Now that your brownie base is beautifully baked and resting, it’s time to create the utterly intoxicating cream cheese banana pudding layer that will elevate these Banana Pudding Brownies to a new level of decadence. Start by placing your room-temperature cream cheese into a clean mixing bowl—this step is absolutely crucial because room-temperature cream cheese blends seamlessly into a smooth and luscious mixture, while cold cream cheese can leave you with unsightly lumps that could ruin the texture of your filling. Using either a hand mixer or stand mixer, beat the cream cheese until it reaches a velvety-smooth consistency. This process usually takes about 2-3 minutes; you want to be sure it’s fluffy and airy, not just blended.
Next, open your box of instant banana pudding and add it to the softened cream cheese along with 1/3 cup of dairy milk. Mix this combination until it’s fully combined—trust me on this step! The banana pudding not only adds incredible flavor but also brings an amazing creaminess that contrasts beautifully with the fudgy brownie layer beneath it. I always find myself pausing at this moment, inhaling that delightful aroma of ripe bananas and sweet cream—it’s like pure nostalgia in a bowl! Gently fold in your freshly chopped banana pieces; they’ll add little bursts of happiness throughout each bite. You’ll know you’re ready when everything is perfectly blended and has that rich, creamy texture that promises to be utterly satisfying.
Step 6: Layering for Success
With both layers prepared—the fudgy brownie base and the luxurious pudding mixture—it’s time for the fun part: layering them together! First, grab your cooled brownie pan from earlier, which should now be firm yet tender to touch. Carefully spread the banana pudding mixture over the brownie layer using an offset spatula or the back of a spoon. Take your time with this step; don’t rush it! An even layer is vital because it ensures every bite offers that exquisite balance of flavors and textures we’re aiming for. As you spread, let your heart sing as you watch those vibrant yellow bananas peek through their creamy blanket.
Once you’ve smoothed out every inch of that delicious pudding layer, it’s time to introduce our crunchy counterpart—the vanilla wafers. Break them into pieces (not too small; we want some texture) and scatter them generously over the top of the pudding layer. This isn’t just for decoration; those crispy pieces will provide a delightful contrast against the soft pudding while absorbing some moisture during baking, creating a lovely chewy texture without losing their crunch entirely. As you sprinkle these little gems on top, envision how they’ll transform into a delightful topping once baked—that perfect finishing touch!
Step 7: Baking Your Perfect Banana Pudding Brownies
Now comes the moment when all your hard work pays off as these beauties head into the oven! Preheat your oven to 350°F if you haven’t already done so; this temperature is non-negotiable for achieving that perfect bake where both layers get their chance to shine without drying out too much or becoming overly gooey. Place your assembled pan onto the center rack—this ensures even heat distribution, which is essential for our layered dessert to bake uniformly.
Bake uncovered for about 30-40 minutes, but keep an eye on them toward the end! You’re looking for those outer edges of the pudding layer to turn golden brown while ensuring that middle remains slightly set but still jiggly—think of it like checking if a cheesecake is done. A slight jiggle means perfection! If you overbake, you risk losing that lush creaminess that makes these brownies so extraordinary. Every oven varies slightly in heat distribution, so know your oven well and trust yourself when deciding if they need another minute or two. I promise you; this patience will reward you tenfold!
Step 8: Cooling Down for Flavor Harmony
Once you’ve baked these beauties to golden perfection, resist the overwhelming urge to dive right in! Allowing them to cool completely is crucial—not just for cutting purposes but also because cooling helps marry all those beautiful flavors together into something profoundly satisfying. I know waiting can feel agonizing when all you want is to sink your teeth into those layers of chocolatey goodness topped with creamy banana love.
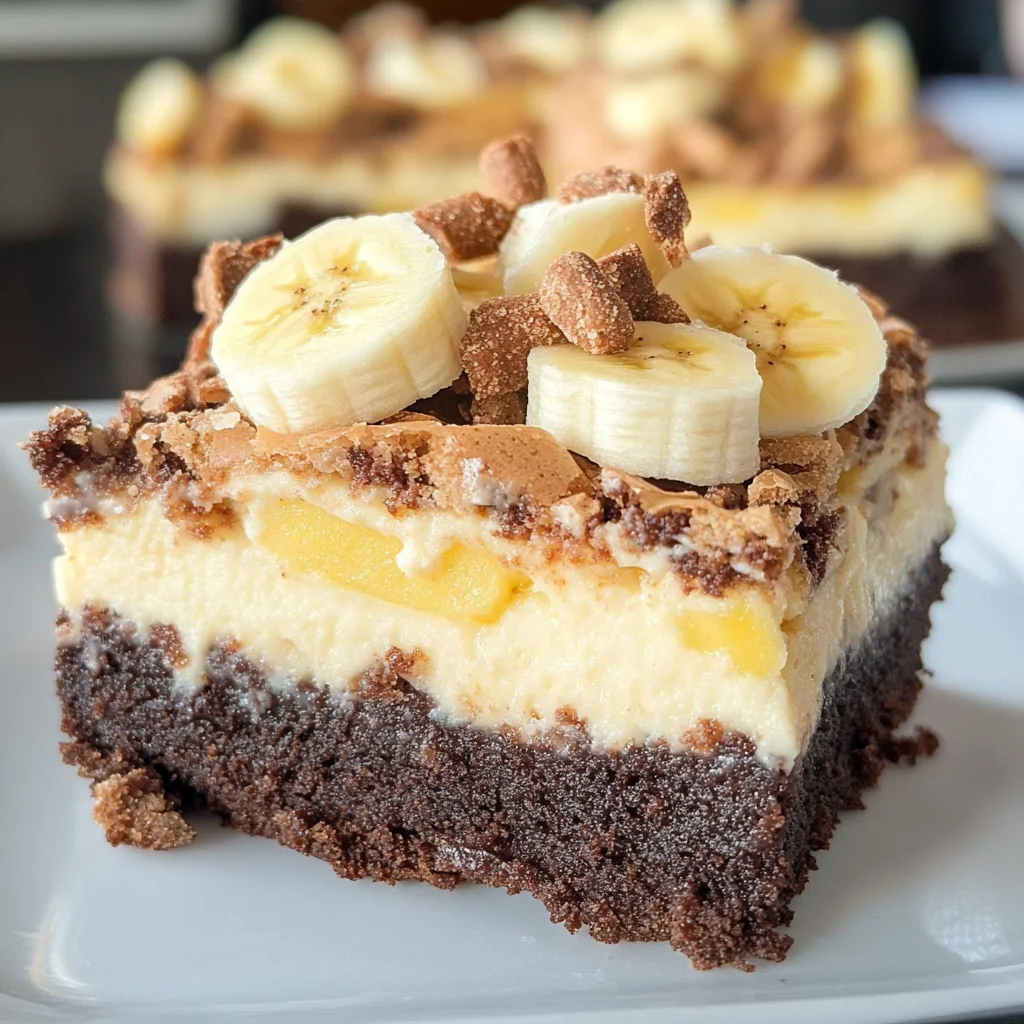
Let them sit at room temperature for about an hour before transferring them to the refrigerator. This chilling phase gives time for all those elements within each decadent square to settle—it’s where magic happens! Ideally, let them chill in the fridge for at least four hours or overnight if you’re feeling particularly patient (though I understand how challenging that can be!). Just imagine how heavenly they will taste after soaking up all those flavors overnight! When finally ready to serve, cut them into generous squares, allowing each piece to reveal its stunning layers—trust me; it’s going to be worth every minute spent waiting!
Final Touches: Serving Your Banana Pudding Brownies
As you prepare to present these Banana Pudding Brownies at your next gathering or simply as a treat for yourself (because who says we can’t indulge?), consider adding an extra flourish—perhaps a dollop of whipped coconut cream or a sprinkle of crushed vanilla wafers on top before serving? It elevates their appearance even further while adding an extra textural delight that’s simply irresistible.
When you’re ready to serve them up—or sneak one for yourself—remember how special this treat truly is. Each bite delivers not just flavor but also memories and love wrapped inside layers of nostalgia—a dessert crafted with care from my kitchen straight to yours. Whether enjoyed at family gatherings or cozy nights in with friends, these brownies hold promise—a promise of joy and satisfaction with every shared moment around them. So go ahead; dig in! Enjoy this delectable creation and watch everyone come back asking for seconds—because who could possibly resist?
Storage and Enjoyment Tips for Your Banana Pudding Brownies
Now that your kitchen is filled with the intoxicating aroma of baked goodness and you’ve savored those first heavenly bites, it’s time to talk about how to cherish these delights a little longer! Trust me, you’ll want to hang on to every last crumb of these Banana Pudding Brownies. The delightful layers of rich chocolate brownies, creamy banana pudding, and crunchy vanilla wafers create an experience that’s simply irresistible. But life happens, and if there are any leftovers (though I doubt it!), here’s how to keep them fresh and delicious for as long as possible.
Storing Leftover Banana Pudding Brownies
To preserve the scrumptiousness of your Banana Pudding Brownies, store them in an airtight container at room temperature for up to a day or so. If you want to enjoy them longer—because who wouldn’t?—the refrigerator is your best friend! They can last about 3-5 days chilled, but here’s a pro tip: place a slice of bread in the container with the brownies. This little trick will help maintain their moisture while keeping those glorious vanilla wafers from getting too soft too quickly. When stored properly, these brownies develop an even deeper flavor profile over time as they meld together; the creamy banana pudding becomes richer, and the whole dessert transforms into a profound symphony of flavors. And when you’re ready for a treat, serve them cold straight from the fridge or allow them to come to room temperature for that perfect texture that will melt in your mouth.
Freezing Banana Pudding Brownies for Later
If you’re looking ahead or simply want to prepare in advance (what a genius move!), freezing these beauties is a fantastic option. To freeze your Banana Pudding Brownies like a pro, cut them into squares first and then wrap each piece tightly in plastic wrap before placing them in a freezer-safe container or bag. This way, you can grab just what you need without defrosting the entire batch! They’ll stay deliciously preserved in the freezer for up to three months. When you’re ready to indulge again, simply take out however many squares you desire and let them thaw overnight in the refrigerator. The convenience factor here is absolutely paramount—imagine coming home after a long day and having these delightful treats waiting for you! You can even pop them into the microwave for about 10 seconds if you crave that warm brownie experience again.
These storage tips will ensure your Banana Pudding Brownies remain an indulgent delight whenever you choose to enjoy them!
Banana Pudding Brownies
Indulge in the delightful fusion of fudgy chocolate brownies and creamy banana pudding with these Banana Pudding Brownies. This recipe brings together two classic desserts into a single decadent treat that’s perfect for any occasion. Imagine sinking your fork into a rich brownie base, only to be met with layers of smooth banana pudding and crunchy vanilla wafers. Each bite is a harmony of flavors and textures, evoking nostalgia while offering a modern twist. Whether it’s a family gathering or a cozy night in, these brownies promise to impress everyone at the table.
- Prep Time: 20 minutes
- Cook Time: 35 minutes
- Total Time: 55 minutes
- Yield: Approximately 12 servings 1x
- Category: Dessert
- Method: Baking
- Cuisine: American
Ingredients
- 1 cup light brown sugar
- 1/4 cup white granulated sugar
- 1/2 cup unsalted butter, melted
- 2 large eggs
- 3/4 cup all-purpose flour
- 1/4 cup unsweetened cocoa powder
- 1 cup semi-sweet chocolate chips
- 8 oz cream cheese, room temperature
- 3.4 oz box instant banana pudding
- 1/3 cup dairy milk
- 1 small banana, chopped
- 1 to 1.5 cups broken vanilla wafers
Instructions
- Preheat oven to 350°F (175°C) and line a 9×13 inch baking pan with parchment paper.
- In a large bowl, mix brown sugar, white sugar, and melted butter until fluffy. Add eggs one at a time and vanilla extract; mix until combined.
- Gradually add flour, cocoa powder, and salt; fold in chocolate chips.
- Spread the brownie batter evenly in the prepared pan and bake for 30–40 minutes until edges are golden.
- For the pudding layer, beat cream cheese until smooth; mix in instant banana pudding and milk until combined. Fold in chopped bananas.
- Spread the pudding mixture over cooled brownies and top with broken vanilla wafers.
- Refrigerate for at least four hours or overnight before serving.
Nutrition
- Serving Size: 1 square (75g)
- Calories: 295
- Sugar: 25g
- Sodium: 150mg
- Fat: 15g
- Saturated Fat: 7g
- Unsaturated Fat: 8g
- Trans Fat: 0g
- Carbohydrates: 36g
- Fiber: 2g
- Protein: 4g
- Cholesterol: 35mg