Clafoutis
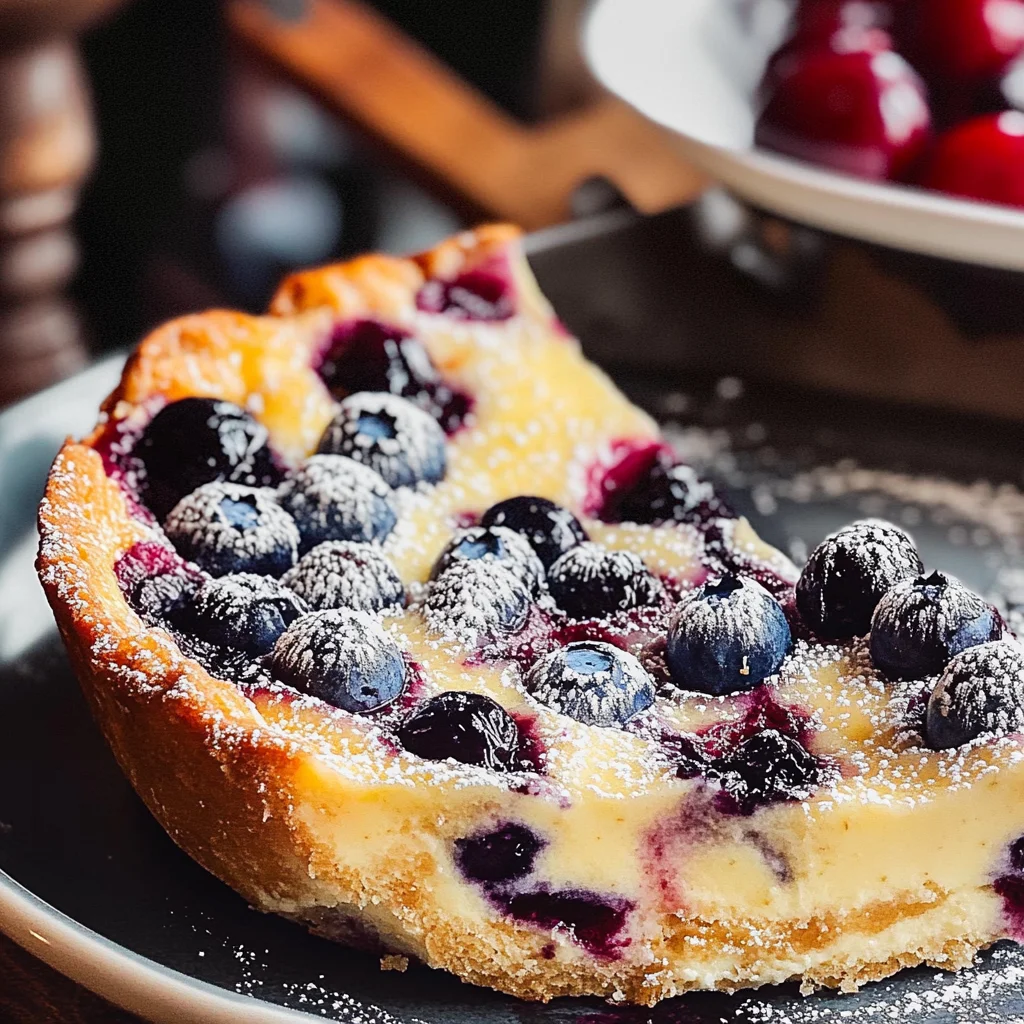
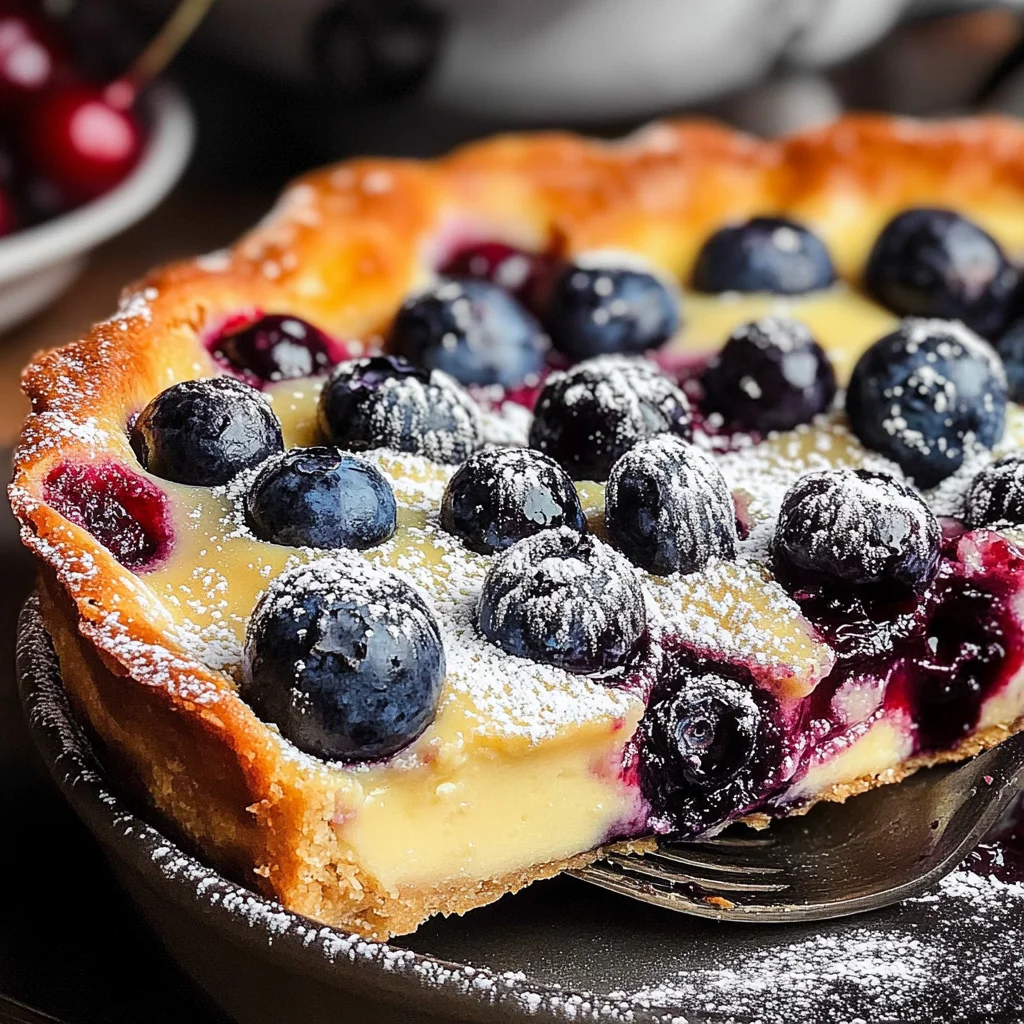
There’s something truly magical about the aroma of a freshly baked clafoutis wafting through the house. It’s not just a dessert; it’s an experience that pulls at the strings of nostalgia, reminding us of sun-drenched picnics and leisurely brunches with loved ones. When I think about what makes this clafoutis so special, it’s the way the creamy custard-like batter envelops tender, juicy cherries and blueberries, creating a symphony of flavors that dance on your palate. Each bite is like a warm hug, comforting and familiar, yet astonishingly elegant. The focus keyphrase, Clafoutis, captures this essence perfectly—an exquisite French dessert that feels both decadent and simple.
This recipe has woven itself into the fabric of my family gatherings. I remember the first time I made it for my friends; their delighted expressions were worth every minute spent in the kitchen. Clafoutis is deeply rooted in French tradition but allows for creativity with seasonal fruits. While this version features succulent cherries and luscious blueberries, feel free to experiment with whatever fruits you have on hand—peaches, plums, or even raspberries are delightful alternatives! What truly makes this dish shine is its versatility and how it brings people together around the table. It’s perfect for lazy Sunday mornings or festive occasions alike; every occasion deserves a touch of sweetness.
Clafoutis: A Sweet Embrace in Every Bite
Let me take you on this culinary journey where we’ll create a beautiful clafoutis together! It’s one of those recipes that feels special yet comes together so effortlessly that you’ll find yourself making it again and again. Trust me when I say that each step adds layers of flavor and texture that culminate in something truly extraordinary.
Ingredients:
As we embark on this delightful adventure to make clafoutis, let’s gather our ingredients with care and intention. Each component plays a vital role in crafting this heavenly dessert.
- 1 cup cherries (pitted): Fresh cherries are essential here—they bring a burst of sweetness and juiciness that defines the clafoutis experience. When selecting your cherries, look for those that are plump with glossy skins—this indicates freshness and ripeness. If cherries aren’t in season or you’re feeling adventurous, consider substituting them with more blueberries or other berries to suit your taste!
- 1 cup blueberries (or more cherries): Blueberries add a delightful tartness to balance the sweetness of the cherries while contributing vibrant color to our dish. The best blueberries should be firm and deep blue with a slight bloom on their surface—a natural protective coating indicating they’re fresh and full of flavor.
- 4 large eggs (room temperature): Eggs are crucial for creating that custardy texture we adore in clafoutis. Using room temperature eggs allows them to incorporate more easily into the batter, ensuring a smooth consistency without any lumps. If you’ve forgotten to take them out ahead of time, simply place them in warm water for about 10 minutes before using!
- 1/2 cup + 1 tablespoon superfine sugar (divided): Superfine sugar dissolves seamlessly into our batter, creating that luscious custard-like texture while also adding sweetness without grittiness. If you can’t find superfine sugar at your local store, you can easily pulse regular granulated sugar in a blender for a few seconds until it’s finer—just be sure not to turn it into powder!
- 1 1/2 cups flour: All-purpose flour provides structure to our clafoutis while allowing it to rise beautifully as it bakes. Make sure to sift your flour before measuring; this aerates it and prevents any lumps from forming in your batter.
- 1/3 cup + 3 tablespoons butter (melted and divided): Butter is where we get rich flavor and moistness from! Melted butter ensures even distribution throughout the batter while imparting its creamy goodness into every bite. For optimal results, use unsalted butter as it gives you full control over your dish’s saltiness.
- 1 1/4 cups milk: Milk transforms our batter into a velvety mixture reminiscent of custard or pudding once baked. Whole milk is my go-to here because its higher fat content yields an indulgent texture—you could swap it out for almond or oat milk if you’re looking for non-dairy options without compromising too much on flavor.
- 1 teaspoon vanilla: Vanilla extract elevates our clafoutis by adding warmth and complexity—a non-negotiable ingredient if you ask me! Make sure you’re using pure vanilla extract rather than imitation; trust me, the difference is profound!
- 1 tablespoon powdered sugar: This final touch adds elegance—sprinkling powdered sugar over your baked clafoutis transforms it from delicious to visually stunning! It’s like giving your dessert a delicate dusting of snow.
Equipment You’ll Need:
Now that we’ve gathered our ingredients, let’s talk about some essential tools you’ll need to create your masterpiece! Having these items on hand will make the entire process smoother—and let’s face it, cooking should always be enjoyable!
- Large mixing bowl: A sturdy mixing bowl is essential for combining our ingredients thoroughly without any mess spilling over—opt for glass or stainless steel as they hold heat well if you’re working with melted butter.
- Whisk: A good whisk allows us to blend our ingredients smoothly without lumps effectively—it helps create air pockets as we incorporate air into our batter for a lighter finish.
- Measuring cups & spoons: Precise measurements are vital in baking! Invest in quality measuring cups and spoons so you can achieve accuracy every time—you’ll thank yourself later when all your recipes turn out beautifully!
- Baking dish: A large baking dish is ideal for spreading our fruit evenly while allowing enough space for the custard mixture to rise—choose one that’s at least 9×13 inches or equivalent size so everything bakes evenly.
- Spatula: A silicone spatula comes in handy for scraping down sides during mixing as well as when pouring your batter into the baking dish—it ensures no precious mixture goes wasted!
Now that we’re all set up with ingredients and equipment let’s dive right into preparing this delightful clafoutis!
Step 1: Preheat Your Oven & Prepare Your Dish
First things first—preheating your oven is absolutely paramount! Set it to 180°C (350°F) so it’s nice and hot when we’re ready to bake our clafoutis later. While that’s happening, generously grease a large baking dish using three tablespoons of melted butter; this step prevents sticking and helps achieve those lovely golden edges we all crave! Once greased, spread out your luscious pitted cherries and blueberries across the bottom evenly—they’ll soak up flavors from the batter while baking!
Step 2: Whisk Together Eggs & Sugar
In your large mixing bowl now warmed by those preheating oven vibes, crack open four room-temperature eggs into the bowl along with half a cup of superfine sugar. Using your whisk, beat these together until they’re lightened in color—a lovely pale yellow hue—and frothy! This process introduces air into your mixture which plays an essential role in achieving that airy texture we desire in our final product; don’t skip this step because it’s crucial for fluffiness!
Step 3: Combine Flour & Melted Butter
Next up is adding flour—we want to gradually incorporate one-and-a-half cups into our egg-sugar mixture while continuing to whisk gently so we don’t create lumps! Afterward, pour in one-third cup of melted butter along with one-and-a-quarter cups of milk followed by one teaspoon of pure vanilla extract; continue whisking until everything melds harmoniously together into a smooth batter without any visible flour pockets remaining.
Step 4: Pour Over Fruit & Bake
Now comes my favorite part—carefully pour this beautiful golden batter over those gorgeous berries nestled snugly beneath! It’s breathtaking how they seem to float atop like jewels waiting to be discovered within each slice post-bake—the anticipation builds as you place it carefully onto your oven rack. Bake for approximately thirty-five to forty minutes until puffed up around edges while remaining slightly soft at center—it should jiggle just ever-so-slightly when moved gently but not sloshy which indicates an underbaked state!
Once it’s done baking—and oh my goodness does it smell divine—remove your masterpiece from oven blissfully proud knowing you’ve created something truly special today…
Stay tuned as we sprinkle on that final touch before serving because trust me; there’s nothing quite like sharing slices topped off delicately with powdered sugar alongside warm hugs from family gathered around enjoying every bite together!
Step 5: Pouring the Custard Over the Fruit
Now that your batter is beautifully mixed, it’s time to bring it all together in a way that makes your heart sing. Gently pour the luscious custard over the bed of cherries and blueberries that you so lovingly arranged in your baking dish. This step is not just about combining ingredients; it’s about creating a harmonious blend where the fruits nestle into a soft embrace of custard. As you do this, you’ll notice how the batter glides effortlessly over the fruits, almost like a warm hug enveloping them. Trust me on this—this moment is crucial because it allows those sweet, juicy bursts of flavor from the berries to infuse into the custard as they bake, making every bite an utterly intoxicating experience.
As you pour, make sure to cover all the fruits evenly. This ensures that no berry gets left behind and every spoonful contains that perfect balance of creamy custard and fruity goodness. The science behind this is fascinating—when baked, the batter sets around the fruit, creating a delightful contrast in texture. You’ll want to ensure that there are no air pockets trapped beneath the batter because those can lead to uneven cooking. So take your time, pour slowly, and feel free to give your baking dish a gentle shake to help settle everything into place.
Step 6: Baking with Love
Now comes one of my favorite parts—baking your clafoutis! Slide your prepared baking dish into the preheated oven set at 180°C (350°F). As soon as you close the oven door, you’ll be greeted with a wave of warmth and anticipation! Let it bake for 35-40 minutes, but don’t just set a timer and walk away. This is where patience becomes important; I promise you, watching it rise and transform is part of the magic! During this time, you’ll see it puff up like a golden cloud while filling your kitchen with an aroma that will have everyone wandering in for a sniff.
Keep an eye on it as it bakes; towards the end of cooking time, check for doneness by inserting a skewer into its center. If it comes out clean or with just a few moist crumbs clinging to it, then it’s ready! What you’re looking for is that beautiful golden-brown hue on top—a visual cue that tells you your clafoutis has developed its signature crusty exterior while remaining soft and creamy inside. Don’t rush this step! The transformation from batter to clafoutis is where all those wonderful flavors meld together and create something truly extraordinary.
Step 7: The Sweet Finishing Touch
Once your clafoutis has completed its time in the oven and has achieved that glorious golden color, it’s time for an important finishing touch: sprinkling with sugar. Carefully remove your masterpiece from the oven (don’t forget to use those oven mitts—I’ve learned this lesson more than once!). While it’s still warm but not too hot to touch, take that remaining tablespoon of superfine sugar along with some powdered sugar and sprinkle them generously over the surface. This isn’t just for decoration; it’s about enhancing flavors and adding a touch of sweetness that contrasts beautifully with the tartness of the berries.
You might wonder why we do this after baking instead of before. The answer lies in creating texture! As the sugars melt slightly into the warm clafoutis, they form a delicate crust atop our dessert that adds another layer of complexity to each bite. It’s absolutely paramount for achieving that divine balance between sweet and tangy—a hallmark of any great dessert! Allowing it to rest briefly after removing from the oven lets those flavors settle even more—so resist diving right in! Just take a moment to appreciate what you’ve created before serving.
Step 8: Serving Your Clafoutis Delight
Now comes perhaps one of my favorite moments—the joy of serving up slices of your freshly baked clafoutis! Allow it to cool at room temperature for about 10-15 minutes before cutting; this gives everything time to firm up slightly so you can achieve beautiful slices without making too much mess. When you’re ready, grab a sharp knife and cut through that custardy goodness—you’ll want each piece to be perfectly portioned so everyone gets their fair share of both fruit and custard.
But here’s where you’ll want to be mindful: if it’s too hot when you cut into it, you may find yourself with some mushy edges rather than those lovely clean lines we all admire in good desserts. Also consider serving it warm or at room temperature—it’s delicious both ways! A dollop of whipped cream or perhaps a scoop of vanilla ice cream on top elevates this dessert even further; however, it’s equally delightful served plain so don’t feel pressured if you’re keeping things simple.
And there you have it—a stunning clafoutis that’s bursting with flavor! Each slice offers up a symphony of textures—from creamy custard intermingling with juicy fruit—that will surely impress anyone lucky enough to share this moment with you. I can’t wait for you to make this recipe yourself; I promise you’ll be captivated by its charm just like my family has been for years!
Storage and Enjoyment Tips for Your Clafoutis
Now that your clafoutis is golden brown and radiating warmth, it’s time to enjoy this delightful dish! The aroma wafting from your oven is not just an invitation; it’s a celebration of the sweet union between cherries and blueberries nestled in that custard-like batter. But what if you have a little left over? Don’t fret! I’ve got you covered with some fantastic tips on how to store this delicious treat so you can relish it even after the first serving.
Storing Leftover Clafoutis
To keep your clafoutis tasting as divine as it did fresh out of the oven, you’ll want to transfer any leftovers to an airtight container. This is crucial because it helps maintain that luscious texture while preventing the dish from absorbing any unwanted odors in your fridge. Properly stored, your clafoutis will stay good for about 3-4 days. If you’re looking to keep it even longer, consider placing a slice of bread in the container with the clafoutis—this little trick absorbs excess moisture, ensuring your dessert doesn’t become soggy. When you’re ready for another taste, simply reheat individual portions in the microwave or pop it back into a warm oven for a few minutes. Trust me, each bite will still be utterly intoxicating, reviving those harmonious flavors that make this dish truly special.
Freezing Clafoutis for Later
If you find yourself with more clafoutis than you can handle (which honestly never happens in my house), freezing it is an excellent option! To do this right, make sure it has completely cooled down before slicing into individual portions and wrapping them tightly in plastic wrap or aluminum foil. Then place those wrapped pieces into a freezer-safe container or bag—this will help prevent freezer burn. Your clafoutis will keep beautifully frozen for up to 2 months! When you’re ready to indulge again, simply thaw overnight in the fridge and reheat gently in the oven or microwave. The convenience of having this delightful dessert ready at your fingertips makes meal planning so much sweeter!
Clafoutis

Clafoutis is a charming French dessert that beautifully marries the sweetness of seasonal fruits with a creamy custard-like batter. This delightful dish is not just a treat for the taste buds; it evokes warm memories of sunlit brunches and family gatherings. Picture juicy cherries and blueberries nestled within a fluffy, golden exterior, creating an experience that is both comforting and elegant. Ideal for any occasion, from leisurely Sunday mornings to festive celebrations, this clafoutis recipe invites creativity—feel free to swap in your favorite fruits or even add a touch of chocolate for an extra hint of indulgence. With its effortless preparation and impressive presentation, this dessert is sure to become a beloved staple in your kitchen.
- Prep Time: 15 minutes
- Cook Time: 40 minutes
- Total Time: 55 minutes
- Yield: Serves approximately 8
- Category: Dessert
- Method: Baking
- Cuisine: French
Ingredients
- 1 cup pitted cherries
- 1 cup blueberries
- 4 large eggs
- 1/2 cup + 1 tablespoon superfine sugar (divided)
- 1 1/2 cups all-purpose flour
- 1/3 cup + 3 tablespoons melted butter (divided)
- 1 1/4 cups milk
- 1 teaspoon vanilla extract
- 1 tablespoon powdered sugar (for dusting)
Instructions
- Preheat your oven to 180°C (350°F) and grease a large baking dish with melted butter.
- Spread the pitted cherries and blueberries evenly across the bottom of the prepared dish.
- In a large mixing bowl, whisk together the eggs and half a cup of superfine sugar until light and frothy.
- Gradually add the flour, melted butter, milk, and vanilla extract, whisking until smooth.
- Pour the batter over the fruit in the baking dish.
- Bake for 35-40 minutes or until puffed up and golden brown on top.
- Let it cool slightly before dusting with powdered sugar.
Nutrition
- Serving Size: 1 slice (100g)
- Calories: 290
- Sugar: 18g
- Sodium: 150mg
- Fat: 14g
- Saturated Fat: 8g
- Unsaturated Fat: 6g
- Trans Fat: 0g
- Carbohydrates: 35g
- Fiber: 2g
- Protein: 6g
- Cholesterol: 110mg