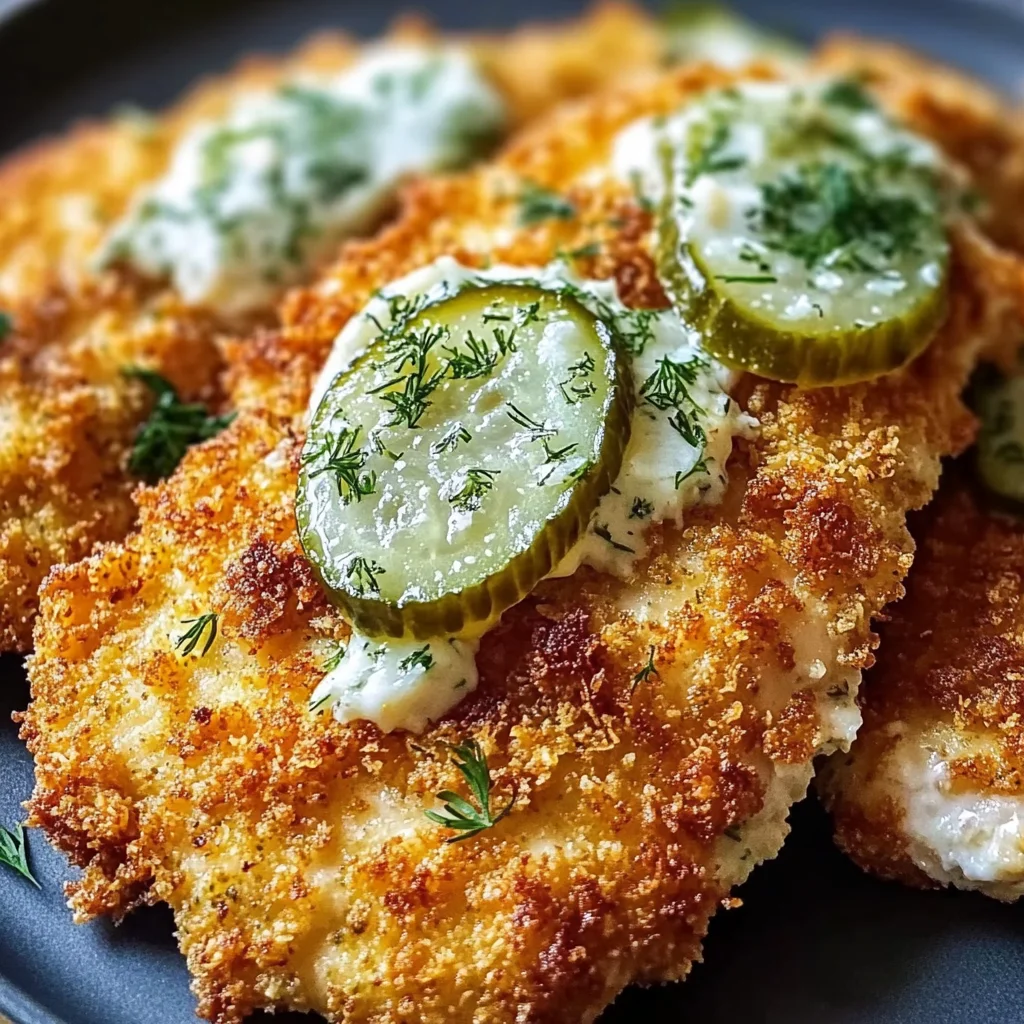
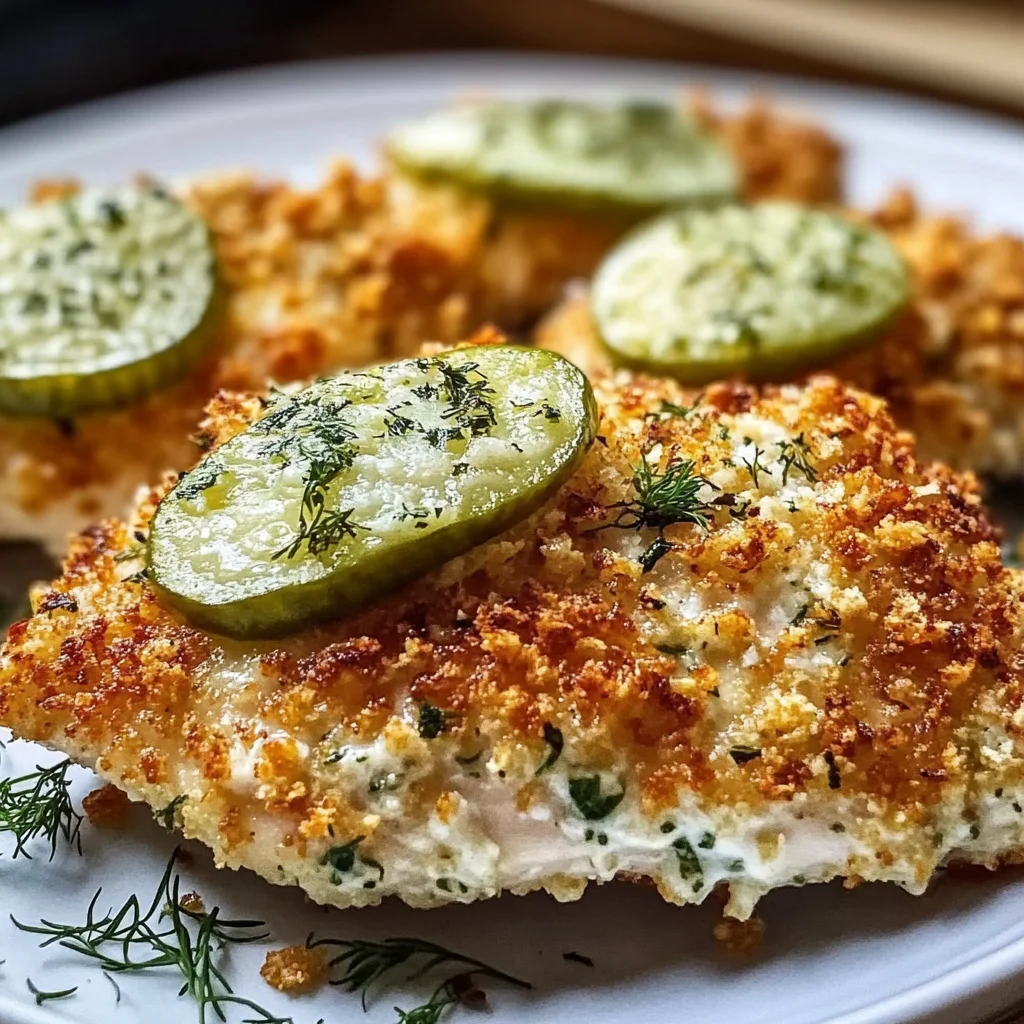
Crispy Dill Pickle Parmesan Chicken
There’s something utterly magical about the way food can bring us together, don’t you think? It’s more than just a meal—it’s an experience that wraps us in warmth and nostalgia, reminding us of family gatherings, laughter-filled kitchens, and the joy of sharing something delicious with those we love. I have always been captivated by how certain dishes have the power to evoke such strong emotions. The Crispy Dill Pickle Parmesan Chicken is one of those recipes that transcends mere sustenance. It’s not just chicken; it’s an explosion of flavors and textures that dance together in perfect harmony. Imagine biting into a crunchy, golden crust that gives way to tender, juicy chicken infused with the tangy essence of dill pickle juice. This dish is a revelation—a delightful surprise that will leave you and your loved ones raving long after the last bite.
Now, why pickles? Well, let me tell you: there’s something incredibly nostalgic about dill pickles for many of us. They remind us of summer barbecues, picnics by the lake, and family road trips where snacking on pickles was simply non-negotiable! Marinating chicken in pickle juice isn’t just a trendy twist; it’s an age-old technique that enhances juiciness and flavor while tenderizing the meat beautifully. This marriage of comforting flavors and innovative cooking methods is what makes this recipe so special. Whether you’re preparing it for a cozy weeknight dinner or serving it proudly at your next gathering, this Crispy Dill Pickle Parmesan Chicken is sure to steal the show—and perhaps even your heart.
Crispy Dill Pickle Parmesan Chicken: A Crunchy Delight That Will Wow Your Taste Buds
Let me take you on a flavorful journey through this delightful recipe! Each step brings you closer to creating a dish that sings with flavor and crunch. As we embark on this culinary adventure together, get ready to embrace your inner chef because I promise you, once you make this crispy wonder, you’ll want to whip it up again and again.
Ingredients:
As we gather our ingredients, let’s take a moment to appreciate each one’s role in crafting this masterpiece. Every single element plays a vital part in achieving that perfect balance of flavors and textures.
- 4 boneless, skinless chicken breasts. This lean protein is what keeps our dish light yet satisfying. I always recommend looking for chicken breasts that are plump and fresh—aim for organic or free-range if available for better flavor and texture. When cooking with chicken breasts, it’s essential to ensure they stay moist during cooking; hence the marinade is crucial here!
- 1 cup dill pickle juice (from a jar of pickles). Now here lies the magic! This liquid gold not only infuses the chicken with its signature tang but also acts as a natural tenderizer due to its acidity. The longer you marinate (up to 2 hours), the more pronounced that delightful pickle flavor becomes! If you’re feeling adventurous or want to customize your flavor profile, try adding some garlic or spices into your brine.
- 1 cup seasoned breadcrumbs. These little crumbs pack a punch when it comes to texture! Seasoned breadcrumbs enhance our crispy coating with herbs and spices already added—making our job easier while ensuring maximum flavor impact. You could even make your own from stale bread mixed with Italian seasoning if you’re feeling extra crafty!
- 1/2 cup grated Parmesan cheese. Ahh, cheese—the comforting touch we all need! Parmesan adds depth and richness while contributing to that irresistible golden crust we all crave when frying chicken. Opt for freshly grated or shredded cheese for superior meltability; it will cling beautifully to our coating mixture.
- 1/2 cup all-purpose flour. This ingredient acts as our first layer of protection—creating a barrier between moisture in the chicken and crispy coating outside it. Flour has a unique ability to create structure when fried; be sure to season it well with garlic powder, onion powder, paprika, salt & pepper before coating.
- 2 large eggs, whisked. Eggs serve as an adhesive in our three-stage breading process—they help everything stick together beautifully while adding richness as they cook into golden perfection! Be sure they’re whisked well until frothy; this airiness helps them coat evenly.
- 1 tsp garlic powder & 1 tsp onion powder. These aromatic powders are non-negotiables when it comes to flavoring our flour mixture! They contribute warmth and depth without overwhelming other flavors—that subtle background note makes all the difference!
- 1/2 tsp paprika. Adding just enough smokiness without overpowering everything else; it introduces another dimension without being too spicy or bold—perfectly balancing out those tangy notes from pickles.
- Salt and pepper, to taste—always essential for elevating flavors! Remember these two staples are foundational in any savory dish; don’t shy away from seasoning generously while keeping balance in mind.
- Cooking oil, for frying—choose something neutral like vegetable or canola oil which has a high smoke point making it ideal for frying without burning easily! The oil temperature is key here; too low means soggy results whereas too high could lead to burnt exteriors before cooking through!
Equipment You’ll Need:
Having the right tools makes all the difference when creating culinary magic in your kitchen! While these items may not be ingredients themselves, they are essential partners in bringing this Crispy Dill Pickle Parmesan Chicken to life.
- Large skillet – A sturdy skillet ensures even heat distribution while frying; choose one that’s deep enough so splattering oil doesn’t become an issue! Cast iron pans work wonders here as they retain heat exceptionally well but any heavy-bottomed pan will do!
- Shallow dishes – You’ll need three shallow dishes for dredging: one for seasoned flour mix (essential for coating), another for whisked eggs (the binder), and the last one containing breadcrumbs mixed with Parmesan (the crowning glory!). Shallow dishes allow easy access as opposed to deeper bowls making dredging simpler!
- Meat thermometer – This tool is non-negotiable if you want perfectly cooked chicken every time without guessing game involved! An instant-read thermometer will give peace mind knowing internal temperature hits 165°F ensuring safety while remaining juicy inside!
- Wire rack – Placing fried chicken on wire racks allows excess oil drips away while maintaining crispness! Avoid putting directly onto paper towels which can cause steam buildup leading sogginess instead!
With these ingredients gathered and equipment prepped, we’re ready to dive into crafting this mouthwatering Crispy Dill Pickle Parmesan Chicken! Let’s get those taste buds tingling as we move forward into preparation…
Step 1: Marinating Magic
Begin by placing your beautiful boneless skinless chicken breasts into either a shallow dish or zip-top bag—whichever suits your fancy but ensure they’re fully covered with fragrant dill pickle juice. The magic happens here as we allow these tender morsels soak up all that zesty goodness for at least thirty minutes but preferably up to two hours if time allows—this patience pays off tenfold down the line when biting into juicy bites bursting with flavor! Trust me on this step; skipping it would mean losing out on profound juiciness which makes this dish extraordinary!
Step 2: Setting Up Your Dredging Station
While waiting patiently during marination period (I know it’s hard!), set up three shallow dishes side by side—the first filled with seasoned flour mixture combining garlic powder, onion powder along with paprika plus salt & pepper; second holds whisked eggs ready act as glue binding everything together nicely; finally third contains breadcrumb-Parmesan blend awaiting crispy transformation ahead! Having everything organized beforehand ensures smooth sailing during assembly process later on—it minimizes mess while maximizing efficiency—a little prep goes long way trust me!
Step 3: Dredging Perfection
Once marinated time arrives remove each piece from brine pat dry gently using paper towels before proceeding through dredging station sequentially starting flour followed by egg then breadcrumb mix—each step building layers upon layers creating ultimate crunch factor desired outcome everyone loves so much about fried foods! Take care pressing breadcrumbs firmly onto surface ensuring thorough coverage crucial aspect yielding uniformity across each cutlet—we want no naked spots here folks—it’s all about consistent texture throughout so pay close attention while doing so!
Step 4: Frying Until Golden Brown
Now comes perhaps most exciting part—the frying process itself where dreams come true manifesting visually fragrant aroma wafting through kitchen filling hearts with anticipation making mouths water uncontrollably! Heat approximately half inch cooking oil over medium-high flame within large skillet until shimmering but not smoking—this indicates optimal temperature reached ready receive coated cutlets without fear burning prematurely before cooking through properly inside! Carefully place prepared chicken pieces spaced apart avoiding overcrowding allowing even browning occur—you’ll notice them sizzle immediately which is music ears indicating success unfolding right before eyes await delicious transformation ahead…
Stay tuned as we continue exploring further steps bringing together this delectable Crispy Dill Pickle Parmesan Chicken…
Step 5: Mastering the Art of Dredging
Now that our chicken has soaked up all that delightful dill pickle juice, it’s time to coat these beauties with an irresistible crust! Grab your three shallow dishes and get ready to set up a dredging station. In the first dish, combine the all-purpose flour with garlic powder, onion powder, paprika, and a generous pinch of salt and pepper. This blend is not just about flavor; flour creates a dry surface that allows the egg to stick better—a crucial step for achieving that perfect crust. Trust me on this: if you skip this step or rush through it, you may end up with a sad, uneven coating.
Once your spice-laden flour is prepped, whisk your eggs in the second dish until they’re smooth and creamy—this will serve as the magical glue holding everything together. In your third dish, mix the seasoned breadcrumbs with the Parmesan cheese to create a crunchy topping that is absolutely paramount in giving your chicken that golden, mouthwatering finish. I can almost hear my friends raving about this combination already! Now take each chicken breast out of its brine bath and pat it dry with paper towels; this helps remove excess moisture, ensuring a crispier exterior once fried. Dredge each piece in the seasoned flour first—make sure it’s evenly coated—and then dip it into the egg wash, letting any excess drip off before pressing it firmly into the breadcrumb-Parmesan mixture. Don’t be shy here; really press down to ensure that crust adheres beautifully. You want every inch covered because that crispy layer is where all the magic happens!
Step 6: Heating Up for Crunchy Goodness
With our chicken beautifully coated, let’s talk frying! Heat about half an inch of cooking oil in a large skillet over medium-high heat. The ideal temperature for frying is key; if it’s too hot, you’ll burn the breadcrumbs before the chicken cooks through—resulting in a disappointment no one wants at their dinner table! To test if your oil is ready without using a thermometer (though I highly recommend having one!), drop in a small pinch of breadcrumbs; if they sizzle immediately but don’t burn, you’re golden! As you carefully place each piece of chicken into the hot oil—remember not to overcrowd the pan—we’re aiming for that perfect balance between sizzling excitement and even cooking.
Fry each piece for about 5 to 7 minutes per side. You’ll know it’s time to flip when you see those beautiful golden brown edges peeking up at you—and trust me, they’ll be calling your name! Keep an eye on them; if you notice excessive smoking or burning on one side while they’re cooking, don’t hesitate to lower your heat slightly. Once both sides are perfectly crispy and golden brown—around 165°F internal temperature—remove them from the skillet and transfer them onto a wire rack set over a baking sheet to drain any excess oil. This step is crucial because if you leave them resting in the pan or on paper towels, they can become soggy instead of maintaining their glorious crunch.
Step 7: Resting — A Vital Moment of Patience
While it may be tempting to dive right into enjoying this Crispy Dill Pickle Parmesan Chicken straight from the fryer (I feel ya!), I urge you to show some patience here. Letting your fried chicken rest for about five minutes before serving is essential for achieving that juicy interior we all crave. During this resting time, juices redistribute throughout the meat rather than spilling out when you cut into it—a phenomenon known as carryover cooking. This means every bite will be as explosively flavorful as possible!
If you’re feeling particularly fancy (and I know you are), now’s also a great moment to whip up a simple dipping sauce or garnish while waiting. A drizzle of ranch dressing or perhaps a quick homemade dill sauce would complement those pickle flavors beautifully and elevate your dining experience even further!
Step 8: The Final Touch – Plating Perfection
Now comes what I like to call the grand reveal—plating our gorgeous creation! Transfer those perfectly rested pieces of Crispy Dill Pickle Parmesan Chicken onto a platter or individual plates for serving. You might think about garnishing them with fresh herbs or lemon wedges for an extra pop of color and freshness—a simple touch that not only looks delightful but also brings out those dill notes even more beautifully.
If you’re feeling adventurous (and why wouldn’t you?), consider pairing this dish with some crispy roasted potatoes or perhaps even a light salad dressed simply with olive oil and vinegar; these sides will wonderfully complement our star attraction while balancing out its richness. As you gather around the table with loved ones—the aroma wafting through the air—get ready for some serious compliments coming your way!
Next Major Phase – Enjoying Your Culinary Masterpiece
As we reach this delicious conclusion together, remember to savor every moment—not just of eating but also of sharing this meal with friends and family who will surely cherish every bite as much as you do. Cooking isn’t just about sustenance; it’s about creating memories around food that nourishes both body and soul.
So there you have it—the wonderful journey leading us to Crispy Dill Pickle Parmesan Chicken perfection! I promise you this recipe will become an instant favorite in your household—just as it has in mine. Enjoy every single crunchy morsel, and don’t forget to share how yours turned out—I love hearing from fellow kitchen adventurers! 🍽️✨
Storage and Enjoyment Tips for Your Crispy Dill Pickle Parmesan Chicken
Now that your kitchen is filled with the enticing aroma of crispy, golden perfection, it’s time to dig in and enjoy every delectable bite of this Crispy Dill Pickle Parmesan Chicken! But wait—what if you have leftovers? Don’t fret; I’ve got you covered with some fantastic storage tips that will keep your chicken just as irresistible as when it first came out of the pan. After all, there’s nothing quite like the joy of savoring a home-cooked meal, even days later.
Storing Leftover Crispy Dill Pickle Parmesan Chicken
To preserve the magic of your crispy chicken, I recommend transferring any leftovers to an airtight container. This is crucial to keep the moisture in and prevent your chicken from drying out. You can store it in the refrigerator for up to three days. If you’re worried about maintaining that delightful crunch, here’s a little tip: place a slice of bread in the container with the chicken—this helps absorb excess moisture while keeping your chicken succulent and flavorful. When you’re ready to enjoy those leftovers, simply reheat them in an oven preheated to 350°F for about 10-15 minutes. This method revives that glorious crispiness while ensuring the inside remains tender and juicy. Trust me; you’ll be reliving those wonderfully satisfying bites with every mouthful!
Freezing for Later
If you want to keep your crispy creation even longer, freezing is an excellent option! To properly freeze your Crispy Dill Pickle Parmesan Chicken, let it cool completely before placing it in a single layer on a baking sheet lined with parchment paper. Once frozen solid (about two hours), transfer the pieces into a freezer-safe bag or container, removing as much air as possible to prevent freezer burn. This method allows you to keep your delightful dish for up to three months! When you’re ready to indulge again, simply thaw it in the fridge overnight and then reheat using either an oven or air fryer until heated through. The convenience of having such a delicious meal on hand is absolutely fantastic—not only does it save time during busy weeks, but it also ensures you always have something scrumptious at your fingertips!
Crispy Dill Pickle Parmesan Chicken

Crispy Dill Pickle Parmesan Chicken is a delightful dish that brings together the tangy flavor of dill pickles and the satisfying crunch of a perfectly fried coating. This recipe not only elevates ordinary chicken breasts but also creates a meal filled with nostalgia and joy. Marinated in zesty pickle juice, each bite promises to be juicy and flavorful, while the golden, crispy crust adds an irresistible texture. Perfect for weeknight dinners or gatherings with friends and family, this chicken dish is sure to impress everyone at your table. Get ready for an explosion of flavors that will leave you wanting more!
- Prep Time: 10 minutes
- Cook Time: 15 minutes
- Total Time: 25 minutes
- Yield: Serves 4
- Category: Dinner
- Method: Frying
- Cuisine: American
Ingredients
- 4 boneless, skinless chicken breasts
- 1 cup dill pickle juice
- 1 cup seasoned breadcrumbs
- 1/2 cup grated Parmesan cheese
- 1/2 cup all-purpose flour
- 2 large eggs, whisked
- 1 tsp garlic powder
- 1 tsp onion powder
- 1/2 tsp paprika
- Salt and pepper, to taste
- Cooking oil (vegetable or canola) for frying
Instructions
- Marinate chicken breasts in dill pickle juice for at least 30 minutes (up to 2 hours).
- Set up a dredging station with three shallow dishes: one with seasoned flour (add garlic powder, onion powder, paprika, salt & pepper), one with whisked eggs, and one with breadcrumbs mixed with Parmesan.
- Pat chicken dry after marination. Dredge each piece in flour, dip into egg wash, then coat thoroughly in breadcrumb mixture.
- Heat oil in a large skillet over medium-high heat. Fry coated chicken for about 5-7 minutes on each side until golden brown and cooked through (internal temperature should reach 165°F).
- Remove from skillet and let rest on a wire rack for five minutes before serving.
Nutrition
- Serving Size: 1 chicken breast - approximately 170g
- Calories: 400
- Sugar: 1g
- Sodium: 850mg
- Fat: 20g
- Saturated Fat: 5g
- Unsaturated Fat: 15g
- Trans Fat: 0g
- Carbohydrates: 30g
- Fiber: 2g
- Protein: 35g
- Cholesterol: 130mg