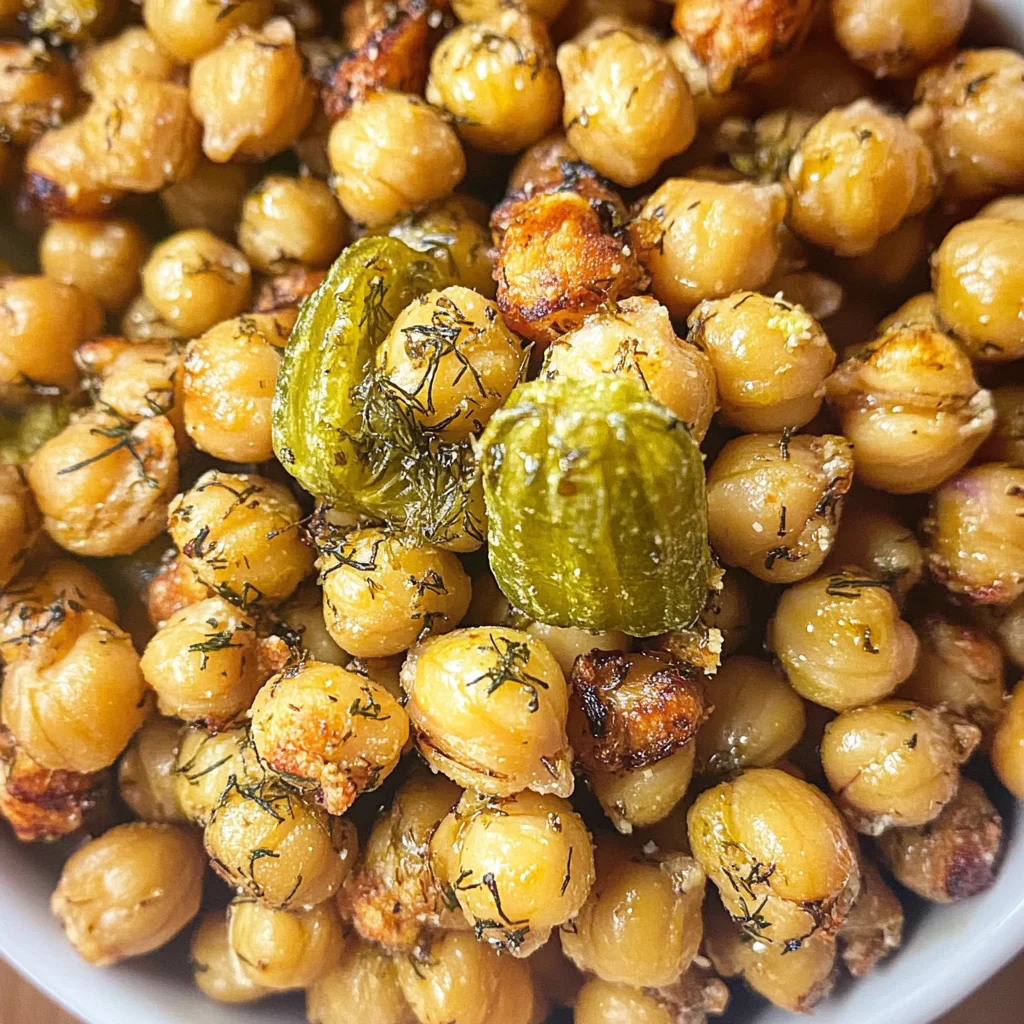
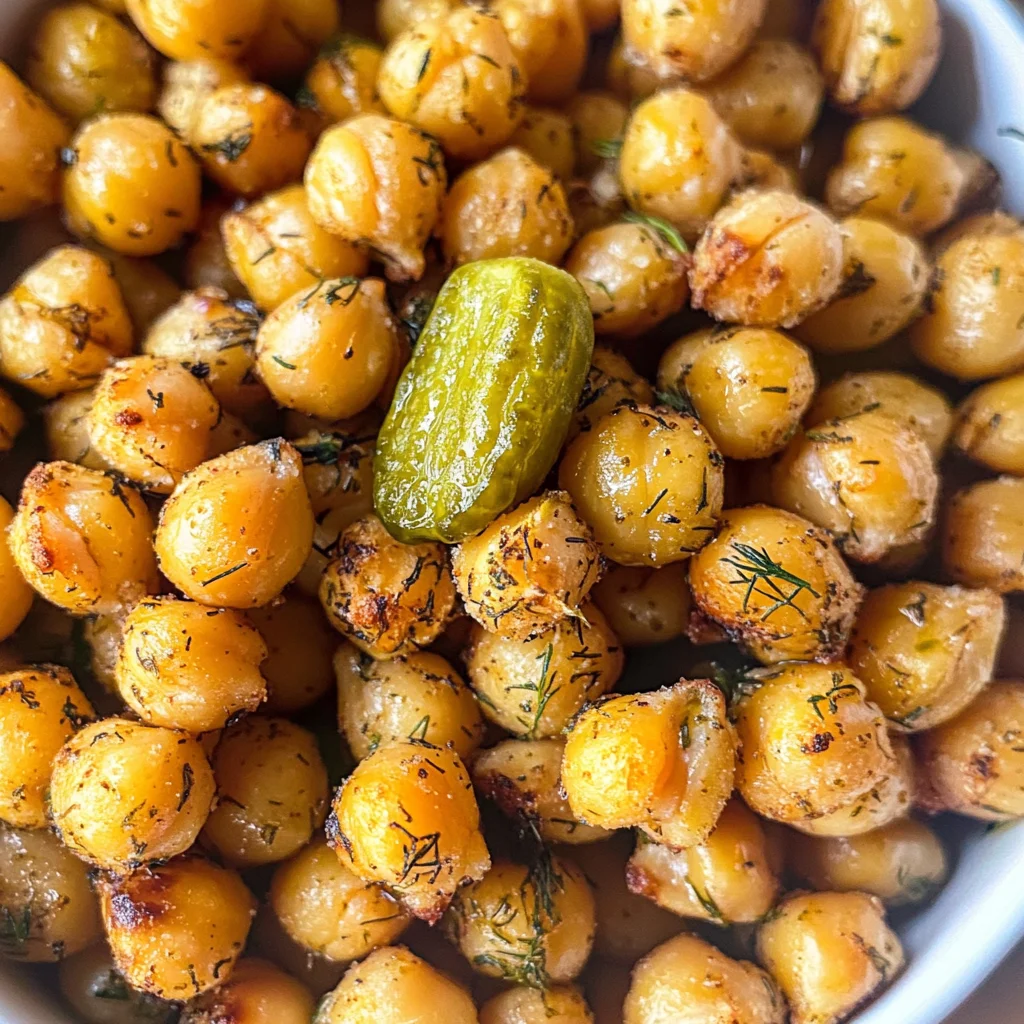
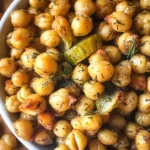
Dill Pickle Roasted Chickpeas
There’s something profoundly satisfying about creating a dish that perfectly encapsulates both comfort and flavor. When I first stumbled upon the idea of Dill Pickle Roasted Chickpeas, my heart skipped a beat—just imagine the warm, earthy crunch of roasted chickpeas married with the bright, tangy essence of dill pickles! This recipe is more than just a delightful snack; it’s an experience that bridges nostalgia and innovation. The way these little legumes transform in the oven is nothing short of magical. They go from humble beans to crunchy morsels that pack a punch of flavor, making them the ideal companion for game day festivities or cozy evenings at home. Trust me when I say, once you try these Dill Pickle Roasted Chickpeas, you’ll find yourself reaching for them time and again.
What makes this recipe truly special is its simplicity and versatility. You don’t have to be a seasoned chef to pull it off; all you need is a few pantry staples and a dash of enthusiasm! And while they are perfect for snacking on during your favorite sports events or movie nights, they also serve as a fantastic appetizer when entertaining friends. The vibrant flavors and textures are sure to spark conversation and joy around your table. So, let’s dive into this culinary adventure together—I promise you won’t regret it!
Dill Pickle Roasted Chickpeas: A Crunchy Snack with Zing
Welcome to the world of Dill Pickle Roasted Chickpeas! These crispy bites are not just any ordinary snack; they’re an explosion of flavors that will have your taste buds dancing with delight. Whether you’re preparing for a gathering or simply craving something savory and satisfying, this recipe truly brings joy to every occasion.
Ingredients:
As we embark on this culinary journey together, let’s take a moment to appreciate each ingredient that plays a vital role in crafting our Dill Pickle Roasted Chickpeas. Each component brings something unique to the table, ensuring that we achieve that perfect balance of taste and texture.
- 30 ounces garbanzo beans (chickpeas) (two 15-ounce cans): These little gems are the star of our show! Chickpeas are not only packed with protein but also provide a wonderful base that becomes irresistibly crunchy when roasted. When choosing canned chickpeas, look for those without added preservatives or excessive sodium; rinsing them well before use will help wash away any excess saltiness. If you’re feeling adventurous, you can also try using dried chickpeas—just soak them overnight and cook until tender before following the rest of the recipe.
- 2 Tablespoons pickle brine (juice from a pickle jar): This tangy liquid brings life to our chickpeas—a splash of pickle brine elevates their flavor profile with its zesty kick! It’s like magic in a jar! Make sure to choose your favorite pickles for this; whether they’re dill or bread-and-butter style, each variety will impart its unique character into the dish. Don’t hesitate to experiment—you might discover your new favorite twist!
- 1 Tablespoon olive oil: This liquid gold is crucial in our roasting process as it aids in achieving that coveted crispiness while providing richness to every bite. Olive oil not only enhances flavor but also helps in binding other seasonings onto our chickpeas. For an extra layer of depth, consider using extra virgin olive oil—it has a more robust flavor profile compared to regular olive oil.
- 1/2 teaspoon salt: Salt is essential; it enhances all flavors within our dish while balancing out the acidity from the pickle brine. The key here is moderation—too little salt can leave your snack bland, but too much can overpower those delightful pickle notes we’re aiming for.
- 1 teaspoon dried dill weed: Dill weed adds an aromatic freshness that echoes the essence of pickles throughout our roasted chickpeas. Its herbaceous quality complements both the brine and chickpeas beautifully. If you can find fresh dill at your local market, by all means—use it! Just keep in mind you’ll want to use about three times as much since fresh herbs are less concentrated than dried ones.
Equipment You’ll Need:
Having the right tools on hand can transform any cooking endeavor into an enjoyable experience rather than a stressful chore! Each piece of equipment listed here acts as an essential partner in creating our delicious Dill Pickle Roasted Chickpeas.
- Oven: Your trusty oven is where all the magic happens! Preheating it properly ensures even roasting—this step cannot be skipped if you want those chickpeas to become perfectly crispy rather than soggy.
- Baking sheet: A good-quality baking sheet provides ample space for your chickpeas without overcrowding them, which could lead to steaming instead of roasting. If you have one lined with silicone or parchment paper, even better—it helps with easy cleanup!
- Silicone baking mat or cooking spray: Using these tools prevents sticking while allowing for optimal browning on your chickpeas—nobody wants their hard work stuck to the pan!
- Towels or paper towels: These will come in handy for drying off those freshly rinsed chickpeas before tossing them with seasoning; moisture is not our friend when it comes to achieving that glorious crunch!
Now that we’ve gathered all our ingredients and tools, let’s dive into preparing this sensational snack!
Step 1: Preheat Your Oven Like a Pro
To kick things off right, preheat your oven to 350°F (175°C). Why do we take this step? Well, starting with a hot oven creates an immediate environment conducive to roasting—the goal here is crispy perfection. While it heats up, take this time to prepare your chickpeas by draining and rinsing them thoroughly under cold water; this not only removes excess sodium but also helps enhance their natural flavors.
Step 2: Drying Off Those Chickpeas
Once drained, place your chickpeas between two clean towels or layers of paper towels and gently pat them dry—you want to remove as much moisture as possible without crushing them! This step might seem trivial but trust me; it’s absolutely paramount for achieving that delightful crunch we desire later on during roasting. If you’re feeling experimental and want some extra texture contrast, press firmly enough to peel some skins off; leaving most skins intact will still yield great results.
Step 3: Tossing It All Together
With dried chickpeas in hand, it’s time to toss them together with pickle brine, olive oil, and salt in a large mixing bowl until they’re evenly coated—every single one deserves love here! The combination of salty brine mingling with rich olive oil creates harmony among flavors while ensuring thorough seasoning distribution across each chickpea surface area.
Step 4: Spreading Out On Your Baking Sheet
Next up is spreading those seasoned beauties out onto your prepared baking sheet lined with either silicone or parchment paper—it’s important not to overcrowd them! Give each chickpea room so they roast evenly instead of steaming together like old friends who haven’t seen each other in ages! Now slide that tray into your preheated oven and let those lovely legumes work their magic for about 35-40 minutes until they begin taking on golden hues.
Stay tuned as we continue transforming these simple ingredients into something utterly intoxicating—a snack you’ll be proud to share (or keep all for yourself)!
Step 5: Bake Until Golden and Crunchy
Now that you’ve tossed your chickpeas in that delightful mixture of pickle brine, olive oil, and salt, it’s time to spread them out on a baking sheet. I recommend using a silicone baking mat for the best results, as it helps to ensure even cooking and prevents sticking. If you don’t have one, don’t worry—just lightly spray some aluminum foil with cooking spray to create a non-stick surface. This step is crucial because proper spacing allows the hot air to circulate around each chickpea, which is what transforms them from soft little legumes into crunchy bites of joy.
Preheat your oven to 350°F (175°C). Once it reaches temperature, slide in your baking sheet and let the magic begin! The roasting process typically takes about 35 to 40 minutes. Keep an eye on them; you’re looking for a beautiful golden-brown color that signifies they are beginning to dry out and crisp up. The aroma wafting through your kitchen will be utterly intoxicating—this is the moment when your anticipation builds! Remember, patience is key here; if you rush this step by increasing the temperature, you risk burning the outside while leaving the insides soggy. So take a deep breath and allow these beauties to develop their flavor.
Step 6: The Post-Bake Crunch Ritual
Once those golden morsels emerge from the oven, resist the temptation to dig in immediately! Instead, turn off your oven but leave the chickpeas inside. This extra drying phase is absolutely paramount for achieving that coveted crunchiness. By letting them sit in the residual heat of the oven for an additional 30-40 minutes—checking every 10-15 minutes—you allow moisture to escape fully without overcooking them. Trust me on this; it’s during this waiting period that they truly transform into a snack that’s profoundly satisfying.
As they rest, make sure to keep an eye on their progress. You want them to feel firm and dry when you finally do take them out. If they feel soft or chewy at this point, just give them a little more time in that warm oven oasis. This transformation not only enhances texture but also intensifies their flavor profile, creating that perfect symphony of crispy goodness that will have everyone begging for more!
Step 7: Seasoning with Love
After your chickpeas have reached their peak crunchiness, it’s time for one final flourish—the seasoning! Transfer those roasted wonders into a lovely bowl where they can bask in their glory. Now comes the fun part: adding dried dill weed. You’ll want to sprinkle about one teaspoon over your crunchy chickpeas; however, if you’re like me and absolutely adore dill (it’s such an aromatic herb with its bright and slightly tangy notes), feel free to add a touch more!
The key here is ensuring that every precious chickpea gets coated evenly with that fragrant dill. If they’ve dried out nicely during roasting, then you might find the herbs cling beautifully without any additional liquid; however, sometimes just a dribble of olive oil or another splash of pickle brine can help adhere those flavors if needed. This step not only amps up their flavor but also gives them an elegant finishing touch—each bite will be bursting with dill-infused joy!
Step 8: Cooling Down for Maximum Crunch
At this juncture, after all your hard work crafting these Dill Pickle Roasted Chickpeas, it’s vital to let them cool completely before storing or serving. Place them outside of any container or bag; this is critical because any trapped heat can lead to condensation forming inside—resulting in softening rather than maintaining that delightful crunch we all crave. Allowing them to cool down naturally lets air circulate around them and solidifies their crispy nature.
While they cool on the counter (which should take about 10-15 minutes), take a moment to appreciate how far you’ve come—what started as humble chickpeas has transformed into an extraordinary snack perfect for game day or casual gatherings! This cooling period also grants you time to reflect on how these roasted delights can be customized further; perhaps consider experimenting with other spices like smoked paprika or garlic powder next time? The world is your oyster when it comes to flavor combinations!
The Final Touch: Enjoying Your Creation
Finally! After all those steps filled with anticipation and care, it’s time for you—and possibly some eager friends—to enjoy these addictive Dill Pickle Roasted Chickpeas! Serve them in a decorative bowl where everyone can admire their gorgeous color and irresistible crunch before diving in. I promise you’ll find yourself delightfully snacking away as if they’re popcorn at the movies—all while knowing you’re indulging in something healthy yet utterly delicious.
These fabulous little nuggets are perfect as an appetizer when entertaining guests or simply enjoyed as a mid-afternoon snack while lounging on your couch watching your favorite show (no judgment here!). And remember—if by some miracle there are leftovers (a rarity in my house!), store them in an airtight container once they’ve cooled entirely so they maintain that fabulous crunch for days ahead.
So go ahead—make this recipe yours today! I can’t wait for you to experience just how truly extraordinary Dill Pickle Roasted Chickpeas can be; I’m convinced they’ll become a cherished staple in your home just as they have mine!
Storage and Enjoyment Tips for Your Dill Pickle Roasted Chickpeas
Ah, the moment has come! Your kitchen is filled with the delightful aroma of crispy chickpeas, tantalizingly seasoned with that zesty dill pickle flavor. As you prepare to dive into this scrumptious creation, let’s chat about how to store these little gems to keep them fresh and flavorful for your next snack attack or game day gathering. I promise you; the joy of having these Dill Pickle Roasted Chickpeas at your fingertips is just a few storage tips away!
Storing Leftover Dill Pickle Roasted Chickpeas
To ensure your leftover Dill Pickle Roasted Chickpeas remain as delectable as they are straight from the oven, choose an airtight container made from glass or BPA-free plastic. This will keep moisture at bay and protect their crispiness. I typically store mine in a cool pantry or cupboard away from direct sunlight, where they can happily last up to a week—if they last that long! Now here’s my little pro tip: if you want an extra layer of protection against sogginess, toss in a small slice of bread into the container. It absorbs excess humidity while allowing your crunchy treats to maintain their satisfying texture. Trust me; you’ll be amazed at how well it works! After a few days, the flavors only deepen, creating a taste experience that’s even more profound than when freshly baked. When you’re ready to indulge again, feel free to enjoy them straight from the container or give them a quick 5-minute toast in the oven to refresh their crunchiness.
Freezing Dill Pickle Roasted Chickpeas for Later
If you find yourself with an abundance of these irresistible snacks—or simply want to prepare ahead—freezing is an excellent option! To freeze your Dill Pickle Roasted Chickpeas properly, allow them to cool completely and then spread them out on a baking sheet lined with parchment paper in a single layer. This prevents them from clumping together into one solid mass. Once they’re frozen firm (usually after about two hours), transfer them into a freezer-safe bag or container, squeezing out as much air as possible before sealing. They’ll stay fresh in your freezer for up to three months! When you’re ready to enjoy them again, there’s no need for thawing—just toss them directly into an oven preheated at 350°F for about 10-15 minutes until they regain their crunch. This method is not only convenient but also allows you to savor this delightful snack whenever the craving strikes!
With these storage strategies in hand, you’ll always have a stash of these utterly intoxicating chickpeas ready for munching or entertaining guests.
Dill Pickle Roasted Chickpeas
Enjoy crunchy and flavorful Dill Pickle Roasted Chickpeas as a healthy snack or appetizer that’s perfect for any occasion. Try this easy recipe today!
- Prep Time: 10 minutes
- Cook Time: 40 minutes
- Total Time: 50 minutes
- Yield: Approximately 4 servings 1x
- Category: Snack
- Method: Baking
- Cuisine: American
Ingredients
- 30 ounces garbanzo beans (chickpeas)
- 2 tablespoons pickle brine
- 1 tablespoon olive oil
- 1/2 teaspoon salt
- 1 teaspoon dried dill weed
Instructions
- Preheat your oven to 350°F (175°C). Drain and rinse the chickpeas under cold water.
- Pat the chickpeas dry using paper towels to remove excess moisture.
- In a large bowl, combine chickpeas with pickle brine, olive oil, and salt. Toss until evenly coated.
- Spread the seasoned chickpeas on a baking sheet lined with parchment paper in a single layer.
- Roast in preheated oven for 35-40 minutes until golden brown and crispy.
- For extra crunch, turn off the oven after baking and leave the chickpeas inside for an additional 30-40 minutes.
- Sprinkle with dried dill weed before serving.
Nutrition
- Serving Size: 1 serving
- Calories: 130
- Sugar: 0g
- Sodium: 185mg
- Fat: 3g
- Saturated Fat: 0.5g
- Unsaturated Fat: 2.5g
- Trans Fat: 0g
- Carbohydrates: 20g
- Fiber: 6g
- Protein: 6g
- Cholesterol: 0mg