Fried Mushrooms Recipe
As I sit here reminiscing about the countless evenings spent in the kitchen with loved ones, I can’t help but smile at the memories created over simple yet utterly delicious dishes. The Fried Mushrooms Recipe that I’m about to share is not just a collection of ingredients and steps; it’s an experience steeped in warmth and laughter, a melody of textures and flavors that connects us all. Imagine biting into perfectly crispy mushrooms, their earthy flavor harmonizing beautifully with the seasoned crunch that envelops them. The aroma wafts through your home like a comforting hug, inviting everyone to gather around, eager to taste what’s cooking. I promise you, these fried mushrooms will transport you to a place of culinary bliss, where every bite feels like a celebration of togetherness.
Why do we love these fried mushrooms so much? It’s not just the crunch or the umami flavors that make them irresistible; it’s the way they can transform any gathering into a festive occasion. Whether served as an appetizer before dinner or as a delightful side dish next to your favorite meal, these little bites are versatile and crowd-pleasing. The beauty of this recipe lies in its simplicity, allowing you to customize the breading thickness based on your preference, which means you can have them just how you like them—crispy and golden or light and delicate. This flexibility makes it not only easy to whip up but also deeply satisfying as you craft something special for those you care about. Now, let’s embark on this exciting culinary journey together!
Fried Mushrooms Recipe: A Crunchy Delight for Any Occasion
This Fried Mushrooms Recipe is perfect for those who crave something savory and satisfying. With its straightforward method and ability to impress your family and friends, you’ll find yourself making these more often than you think!

Ingredients:
Embarking on this culinary adventure requires just a handful of ingredients that combine seamlessly to create something extraordinary. Let’s dive into each one!
- 8 ounces sliced mushrooms (cleaned): The star of our show! When selecting mushrooms, fresh is always best; look for firm caps that are free from blemishes and sliminess. Varieties such as cremini or button mushrooms work beautifully here, offering different depths of flavor while maintaining that perfect texture when fried. Their natural moisture helps keep them juicy inside while the outside crisps up beautifully during frying—a truly magical transformation.
- 1 cup flour: Ah, flour—the backbone of our breading! It acts as the canvas upon which we build flavor and texture. All-purpose flour works wonderfully here, creating a light yet sturdy coating that holds onto the seasoning perfectly. If you’re feeling adventurous or gluten-sensitive, consider using alternatives like almond flour or chickpea flour for a unique twist that still delivers on crunch.
- 2 Tablespoon seasoned salt: This ingredient is absolutely paramount! Seasoned salt elevates our dish by infusing it with layers of flavor that complement the earthiness of our mushrooms exquisitely. The blend typically contains salt along with spices such as garlic powder or paprika—each contributing its own background note that enhances every bite. Don’t skimp on this; it’s what transforms ordinary fried mushrooms into an unforgettable indulgence!
- Vegetable or canola oil: We need enough oil to create an inch or more in our frying pan if pan-frying—this ensures even cooking and a beautiful golden crust all around! Both vegetable oil and canola oil have high smoke points which make them ideal for frying without burning too quickly. If you’re feeling adventurous, oils like peanut oil can add a delightful nutty flavor—but ensure no allergies are present among your guests.
- 2 eggs (optional): While eggs help create a thicker batter that’s wonderfully crunchy and rich when fried, they can be excluded if you’re aiming for a lighter breading. If opting to use them, whisking them until frothy adds airiness to our coating—ensuring each mushroom is enveloped in an even layer that’s both crisp and tender inside.
Equipment You’ll Need:
Before we dive into frying those delightful morsels, let’s gather some essential tools! Having the right equipment makes all the difference in ensuring your cooking experience is smooth and enjoyable.
- Deep skillet or frying pan: A good-quality skillet allows for even heat distribution which is crucial when frying. You want your oil hot enough to create those delicious sizzles when the mushrooms hit the pan without burning anything too quickly! If using a deep fryer, it provides precise temperature control which can lead to perfectly cooked results every time.
- Tongs: These handy tools are non-negotiable when it comes to turning your mushrooms without splashing hot oil everywhere! They allow you to maneuver each piece gently while ensuring they cook evenly on all sides—trust me; you’ll appreciate this step when you’re trying to maintain that beautiful golden color.
- Mixing bowls: For combining your flour and seasoned salt as well as whisking your eggs (if using), having dedicated mixing bowls keeps everything organized while making clean-up easier afterward!
Preparing the Fried Mushrooms Recipe
Step 1: Heating Up Your Oil
To start this mouthwatering journey, we first need to heat our oil properly—this step is crucial for achieving that satisfying crunch we’re after! If you’re pan-frying, place your skillet over medium heat and pour in enough vegetable or canola oil until it reaches about an inch deep; you’ll know it’s ready when tiny bubbles form around the edges after sprinkling in some flour for testing. If using a deep fryer, set it to approximately 375°F—this ensures even cooking while avoiding greasy results! Don’t rush this step; giving your oil ample time to reach temperature ensures beautifully crispy outcomes.
Step 2: Preparing Your Breading Station
While your oil heats up nicely, let’s prepare our breading station by combining flour with seasoned salt in a large bowl or zip-top bag—this method allows for easy coating later on! Whisk together until well blended; remember—the seasoning is what gives life to our dish! Once combined thoroughly, set aside for now because we’ll soon use this magical mixture.
Step 3: Coating Your Mushrooms
Now comes one of my favorite parts—the coating process! If you’ve decided to include eggs for added richness and crunchiness in your batter, whisk them in another bowl until frothy before dipping each mushroom slice into this mixture followed by rolling them generously in your seasoned flour blend. This layering creates a protective shield around each slice ensuring they’re bursting with flavor once fried! If you’re going for thinner breading—you could skip right ahead from dipping directly into flour instead—don’t worry… either way will lead you down a path of deliciousness!
Step 4: Frying Those Little Gems
Finally—let’s fry! Carefully drop each coated mushroom into your hot oil using tongs (remember safety first!), being cautious not to overcrowd the pan as this could lower the temperature too drastically resulting in soggy bottoms instead of crispy perfection! Allow them roughly two minutes per side until golden brown—that heavenly scent will fill your kitchen enticing everyone around! Keep an eye out—they cook quickly so don’t wander far! Once done frying remove them onto paper towels briefly allowing excess oil to drain away before serving immediately while still warm… believe me; they’ll disappear faster than you can say “fried mushrooms!”
And there you have it—a simple yet profoundly satisfying Fried Mushrooms Recipe that’s bound to become one of your go-to favorites! Each bite offers a symphony of flavors combined with crispy textures that’ll have everyone coming back for seconds (or thirds)! Enjoy every moment spent creating these delights; trust me—it’s worth every minute spent in front of the stove!
The Perfect Crunch: Breading and Frying Your Mushrooms
Step 5: Coat Those Beautiful Mushrooms
Now that your oil is glistening and ready, it’s time to bring those lovely sliced mushrooms into the spotlight! If you’re opting for the egg-based breading, whisk the eggs in a separate bowl until they are smooth and a bit frothy—this aeration will help create a delightful texture on your mushrooms. Take each mushroom slice, dip it lovingly into the egg mixture, letting any excess drip off. This step is crucial because the egg acts as an adhesive, ensuring that the flour coating sticks beautifully during frying. Then, gently place them into your seasoned flour mixture. Toss them around in there like they’re at a dance party! You want every inch of those mushrooms to be coated in this flavorful embrace. If you prefer a lighter touch with no egg, simply toss the mushrooms directly into the seasoned flour—trust me, they will still turn out deliciously crispy.
As you coat each mushroom, take a moment to appreciate how the flour clings to their surfaces; this will create an incredible crunch when fried. Make sure there are no clumps of flour stuck together; otherwise, you might end up with some unappetizing bits later on. Give them a gentle shake or tap to remove any excess flour before moving on to frying. Remember, this is all about building layers of flavor and texture; patience here will yield a profoundly satisfying crunch that’s truly extraordinary!
Step 6: Frying with Love
With your mushrooms now perfectly coated, it’s time for the moment of truth—the frying! Carefully lower the mushrooms into the hot oil in small batches; overloading the pan can drop the temperature too much and lead to soggy results—a fate we absolutely want to avoid. You should hear that delightful sizzle as they hit the oil; it’s music to any cook’s ears! Keep an eye on them as they fry for about 2-3 minutes per side, giving them an occasional gentle stir to ensure even cooking. This technique is known as shallow frying if you’re using a pan and deep frying if you’re fully submerging them; both methods have their charm but require careful monitoring.
Why is maintaining that heat so vital? Well, when oil cools down too much, it can cause your mushrooms to absorb more oil rather than creating that crisp outer layer we all crave. You want each piece to bubble away happily in its little pool of golden liquid gold! Look for that gorgeous golden-brown color as your cue that they are perfectly cooked—trust me when I say they will not only look beautiful but taste utterly intoxicating!
Step 7: The Resting Game
Once those mushrooms are beautifully browned and crisped to perfection—ohh la la—it’s tempting to dive right in, but hold onto your horses for just a moment longer! This step is non-negotiable: transferring your fried mushrooms onto a plate lined with paper towels allows them to drain off any excess oil. Think about it: you’ve put all this effort into creating something magnificent; why would you want to weigh it down with greasiness? Letting them rest for about 2-3 minutes also helps keep that delightful crunch intact! During this time, their flavors meld together beautifully as well.
While they’re resting, take a moment to inhale the aroma wafting through your kitchen; it’s intoxicatingly savory and oh-so-satisfying. I promise you that just looking at these beauties will make your heart flutter! Use this time wisely; consider whipping up a dipping sauce or prepping some fresh herbs for garnishing—your fried mushrooms deserve nothing less than an elegant presentation!
Step 8: The Finishing Touches
Now comes one of my favorite parts—the grand reveal! As you plate those crispy little treasures, consider garnishing them with freshly chopped parsley or chives for an elegant touch and burst of freshness that complements their richness beautifully. Tossing in some lemon zest can add an extra zing that’ll elevate each bite from delicious to downright divine! Don’t forget about serving sauces—perhaps a homemade garlic aioli or a tangy vegan ranch dressing could be just what these mushrooms need for dipping bliss.
When serving these fried delights at gatherings or casual weeknight dinners, watch how quickly they disappear—they’re not just food; they’re pure joy encapsulated in each bite! Trust me on this: once you share these with friends or family, they’ll be begging for this Fried Mushrooms Recipe again and again. Their crunchy exterior paired with tender mushroom goodness inside creates such a captivating contrast that it’s impossible not to fall in love with every mouthful!
Conclusion:
What an incredible journey we’ve taken together through this Fried Mushrooms Recipe! From choosing the freshest mushrooms to crafting that perfect crispy coating, every step has been infused with love and anticipation. The combination of textures—the tender yet earthy mushroom paired with that beautifully crunchy exterior—is truly extraordinary and elevates this dish beyond mere snacking; it becomes an experience worth sharing.
This recipe isn’t just about taste; it’s about creating joy in the kitchen and making memories along the way. Imagine gathering your loved ones around as you pull those golden morsels from the heat—everyone buzzing with excitement as they dive into their first bites. It’s perfect for game nights, casual get-togethers, or even just because it’s Tuesday! The sheer pleasure of cooking these delights is matched only by the joy they bring when shared.
Pairing possibilities are endless: imagine savoring one with a zesty dipping sauce like tangy ranch or creamy garlic aioli that heightens each bite’s flavors. For an afternoon pick-me-up, serve them alongside a fresh salad bursting with crunchy vegetables drizzled in balsamic dressing; what a refreshing contrast! Or perhaps indulge yourself in a cozy movie night where these crispy gems are complemented by homemade popcorn and your favorite film—it sounds heavenly, doesn’t it?
Feeling adventurous? This recipe is wonderfully adaptable! Try swapping out traditional flour for gluten-free alternatives if that suits your needs or experiment with different seasonings—think smoky paprika or aromatic herbs—to elevate those flavors even further. You could even add some grated vegan cheese into your breading mix for an extra layer of deliciousness! I invite you to take this recipe and make it your own; share your variations with me—I’d love to hear how you’ve put your own spin on it!
Fried Mushrooms Recipe

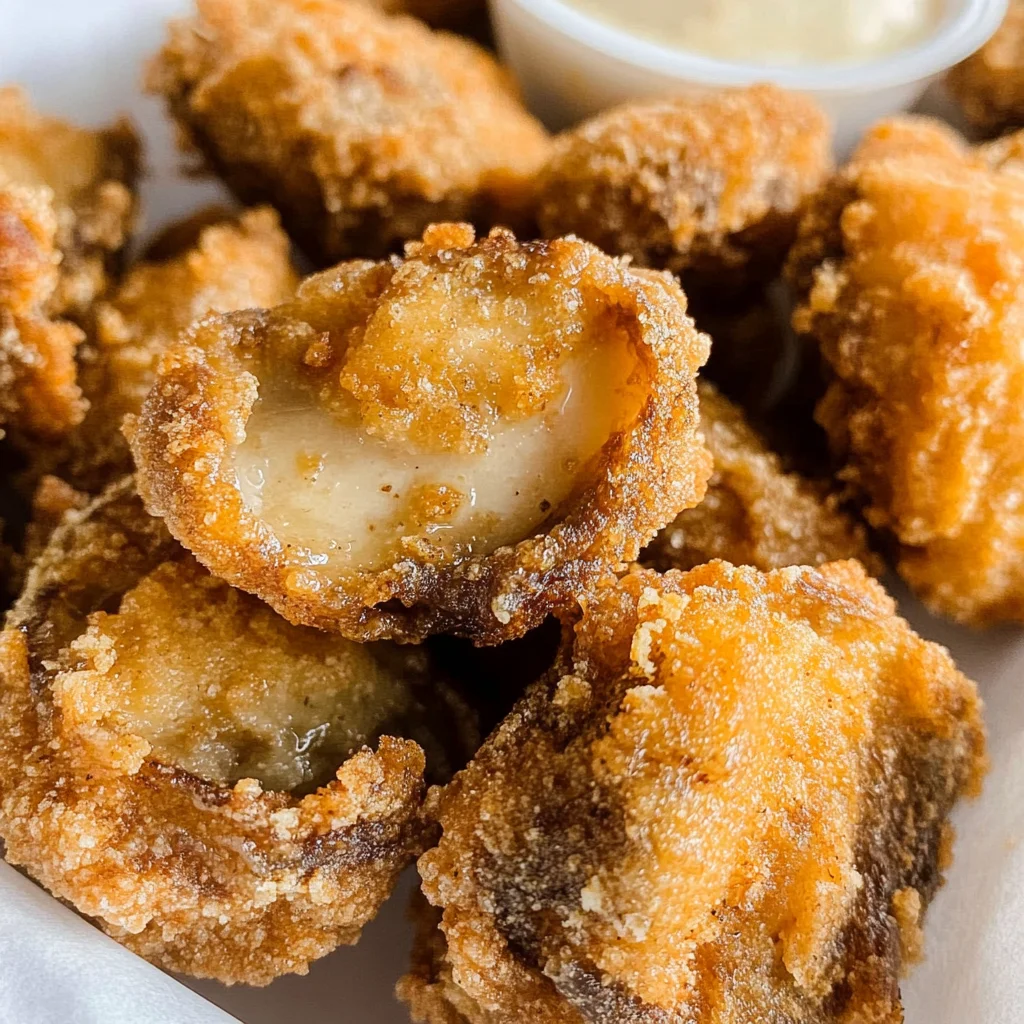
Indulge in the joy of cooking with this Fried Mushrooms Recipe, a delightful treat that transforms simple ingredients into a crunchy sensation. Perfectly crispy on the outside while tender on the inside, these savory mushroom bites are great for any occasion—whether as an appetizer, side dish, or snack. With a customizable breading and an inviting aroma, they are sure to bring everyone together around the table. Pair them with your favorite dipping sauce for an unforgettable culinary experience. Get ready to impress your family and friends with this easy-to-follow recipe that guarantees satisfaction in every bite!
- Prep Time: 15 minutes
- Cook Time: 10 minutes
- Total Time: 25 minutes
- Yield: 4 servings 1x
- Category: Appetizer
- Method: Frying
- Cuisine: American
Ingredients
- 8 ounces sliced fresh mushrooms (cremini or button)
- 1 cup all-purpose flour (or gluten-free alternative)
- 2 tablespoons seasoned salt
- Vegetable or canola oil (for frying)
- 2 eggs (optional)
Instructions
- Heat oil in a deep skillet or frying pan over medium heat until shimmering (about 375°F for deep frying).
- In a large bowl, combine flour and seasoned salt.
- If using eggs, whisk them in a separate bowl until frothy. Dip each mushroom slice into the egg mixture (if using), then coat thoroughly in the seasoned flour.
- Carefully place coated mushrooms into the hot oil in small batches. Fry for about 2-3 minutes per side until golden brown.
- Remove mushrooms and drain on paper towels to absorb excess oil before serving.
Nutrition
- Serving Size: 2 pieces (approximately 80g)
- Calories: 160
- Sugar: 0g
- Sodium: 600mg
- Fat: 9g
- Saturated Fat: 1g
- Unsaturated Fat: 8g
- Trans Fat: 0g
- Carbohydrates: 16g
- Fiber: 1g
- Protein: 4g
- Cholesterol: 40mg