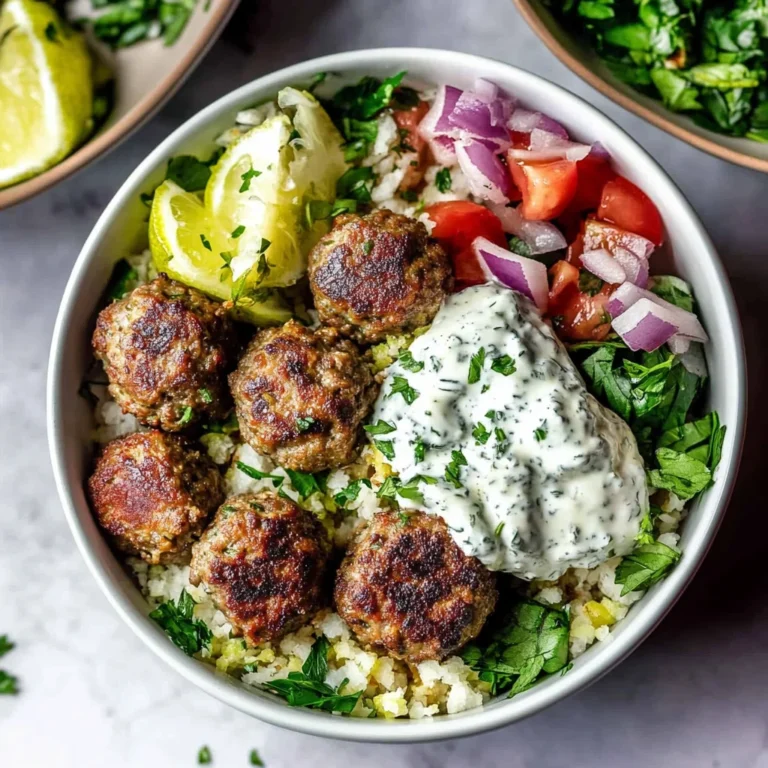
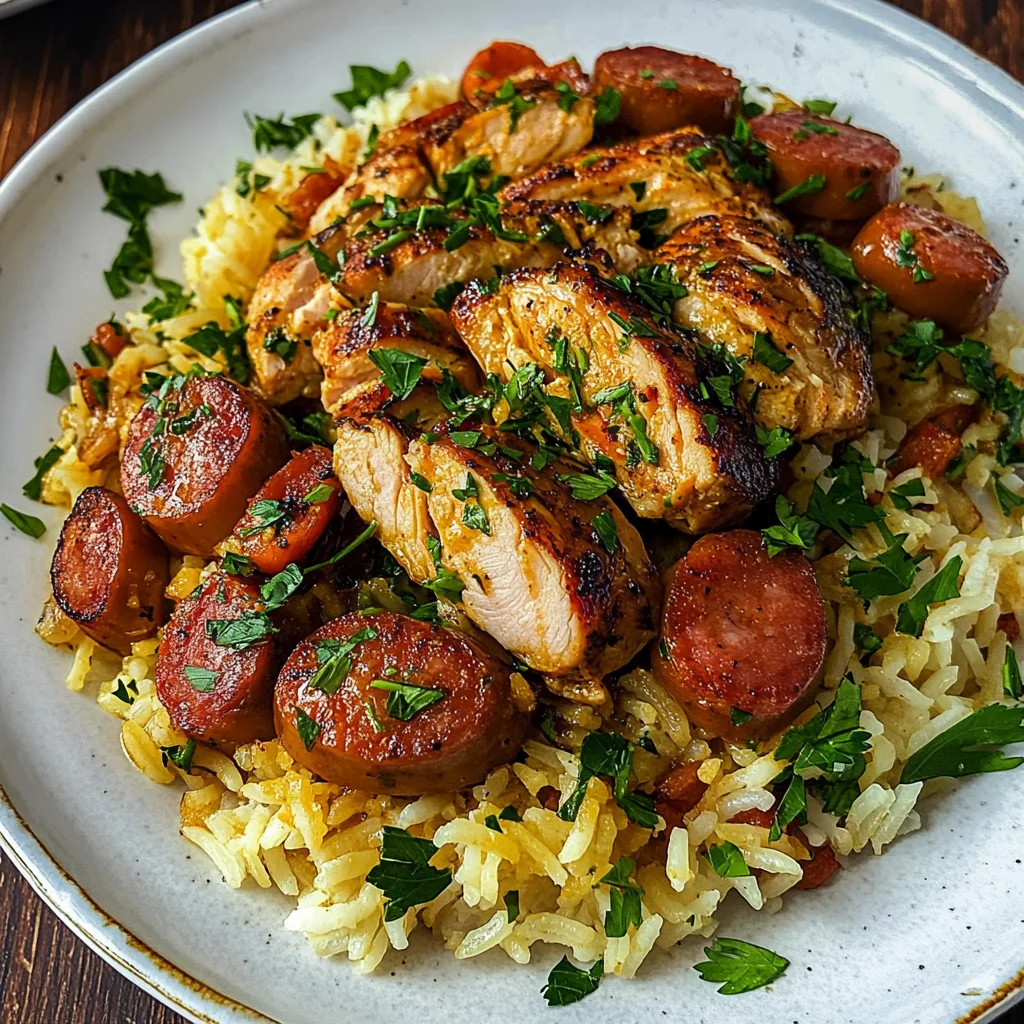
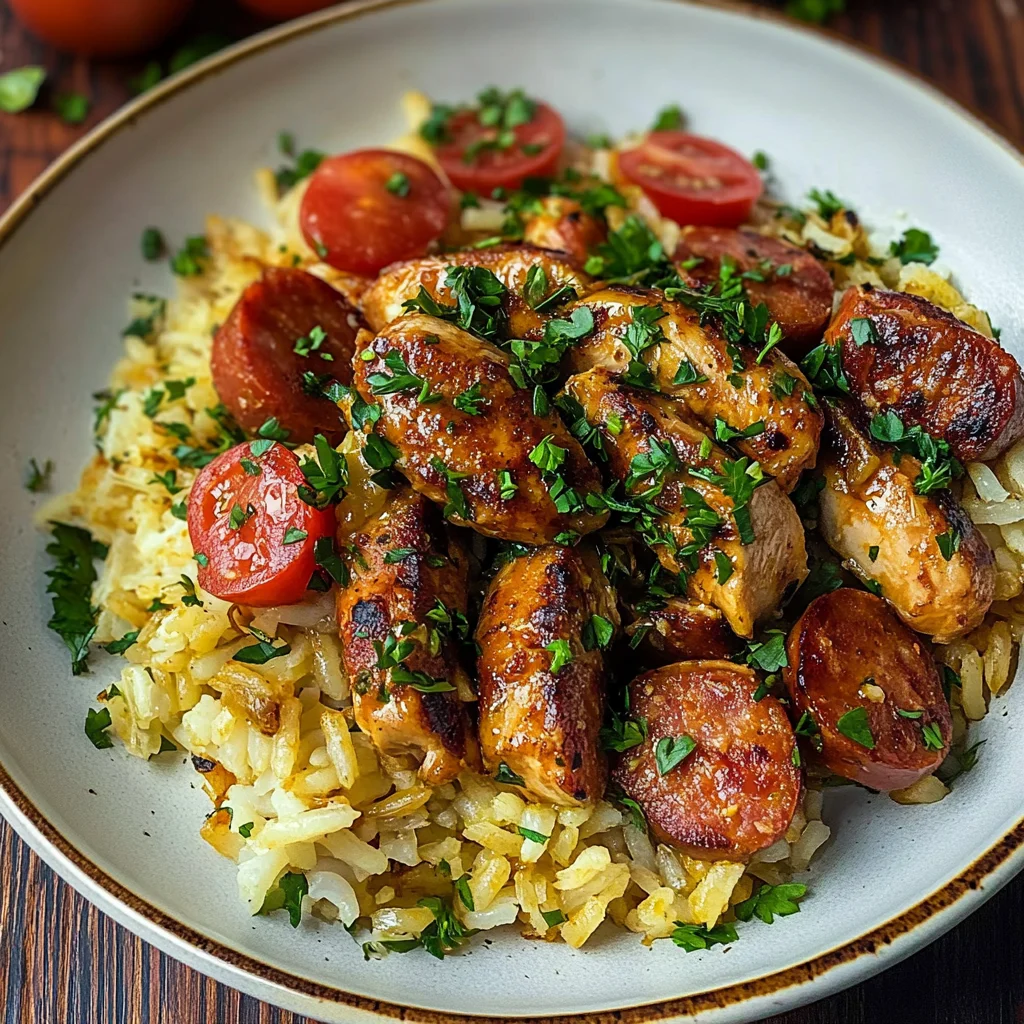
Galinhada
There’s something truly magical about gathering around a table filled with food that has been lovingly prepared, and Galinhada embodies that spirit perfectly. This traditional Brazilian dish of chicken and rice is more than just a meal; it’s an experience that brings people together. Imagine the tender pieces of chicken nestled within a fragrant bed of rice, each grain infused with the vibrant colors and flavors of turmeric and fresh herbs. The enticing aroma wafts through your home, creating a warm hug for your senses, and promises comfort in every bite. As you savor this dish, you’re not just tasting food; you’re indulging in a rich tapestry of culture and tradition that speaks to the very heart of communal eating.
What makes Galinhada so special to me is its ability to transform simple ingredients into something utterly extraordinary. Growing up, I remember my family gathering for special occasions around a large pot of this dish, laughter echoing through the air as we shared stories and memories. It’s a recipe that bridges generations, where each cook adds their own unique twist while honoring the foundational elements that make it so beloved. Trust me when I say that once you master this recipe, it will become a cherished staple in your kitchen, perfect for gatherings or simply cozy nights at home.
Galinhada: A Heartwarming Brazilian Delight
Today, I’m excited to guide you through preparing this soulful dish! With its easy one-pot cooking method and rich flavor profile, it’s perfect for feeding a crowd or simply enjoying leftovers throughout the week. So grab your apron and let’s embark on this culinary journey together!
Ingredients:
As we dive into creating this delightful Galinhada, let’s take a moment to appreciate each ingredient that plays an essential role in crafting its deliciousness. Every component contributes not only flavor but also texture and color, transforming our simple meal into a vibrant feast.
- 1 onion (peeled). Onion serves as the aromatic backbone of our dish, releasing its natural sweetness as it cooks down. It forms the base upon which the other flavors build, creating depth in every bite. When selecting onions, look for firm bulbs with dry skin; they should feel heavy for their size and have no blemishes or soft spots.
- 3 garlic cloves (peeled). Garlic brings an unmistakable warmth and earthiness that elevates the entire dish. Its pungent aroma wafts through your kitchen as it caramelizes, adding another layer of complexity to our Galinhada. Fresh garlic is always best; choose cloves that are plump and unbruised for maximum flavor.
- ½ cup fresh parsley. Fresh parsley not only brightens up our dish visually but also adds a refreshing contrast to the richness of the chicken and rice. Its vibrant green color speaks volumes about freshness! When purchasing parsley, opt for crisp leaves without any yellowing – they should smell fragrant and earthy.
- 1 tablespoon ground turmeric. This golden spice is what gives Galinhada its characteristic hue – think sunshine captured in powder form! Turmeric also imparts subtle earthy notes and is packed with health benefits to boot! Always check your spice jars for freshness; they should be aromatic when you open them.
- 1 tablespoon apple cider vinegar. A splash of acidity from apple cider vinegar helps balance out the richness of the chicken while enhancing all those lovely flavors simmering together. It acts as an unexpected yet welcome counterpoint to the other ingredients – trust me on this one; it’s absolutely crucial!
- ½ cup olive oil. Olive oil is our cooking fat here; its smooth texture helps sauté aromatics beautifully while contributing healthy fats to our dish. Choose extra virgin olive oil for its robust flavor; it’ll add richness that complements each ingredient harmoniously.
- Salt and freshly ground pepper (to taste). These seasonings are non-negotiable! Salt enhances all flavors present in our dish while freshly ground pepper adds warmth without overpowering other elements. Seasoning should be adjusted throughout cooking—taste along the way!
- 1 ½ pounds skinless, boneless chicken thighs (cut into 1-inch pieces). Chicken thighs are my go-to here because they stay juicy during cooking thanks to their higher fat content compared to breasts—resulting in tender bites full of flavor! Look for thighs with minimal fat caps; they should feel moist but not slimy.
- 1 teaspoon olive oil (for browning chicken). A drizzle will help achieve that beautiful golden crust on our chicken pieces when searing them at high heat—this step seals in moisture while developing layers of flavor!
- 2 calabresa sausages (approximately 4 ounces each), sliced (substituting kielbasa or chicken sausage). These flavorful sausages introduce depth with their smoky notes but can be replaced based on preference or dietary needs! Regardless of choice—slice them thinly so they cook evenly alongside everything else.
- 1 onion (chopped) (for sautéing). We’re using another onion here because layering flavors is key! This chopped onion will soften beautifully as we sauté it alongside carrots—creating a sweet base filled with savory goodness!
- 1 large carrot (finely diced). The carrot adds sweetness as well as beautiful color contrast against darker tones from meat & spices—a visual delight on your plate! Opt for firm carrots without blemishes; these will contribute crunchiness even after cooking down.
- ½ cup white grape juice. This unexpected ingredient brings natural sweetness balanced by acidity—akin to using wine—but suitable for everyone! It’ll help deglaze any caramelized bits stuck at bottom after browning meats which intensifies overall taste!
- 2 ½ cups chicken broth. Broth is essential here—it infuses every grain of rice with savory flavor while providing moisture needed throughout cooking process—as well ensuring nothing sticks at bottom during simmering phase! Homemade broth works wonders if available; otherwise store-bought low-sodium options suffice too!
- 1 cup white long-grain rice (rinsed). Rinsing removes excess starch from grains preventing clumping—ensuring fluffy results once cooked! Long-grain varieties like basmati or jasmine work best due their light texture allowing them absorb flavors wonderfully without becoming mushy over time!
- 2 bay leaves. These aromatic leaves impart subtle herbal notes during simmering process enhancing overall character without overwhelming palates—it’s like wrapping everything up tightly whilst giving off pleasant scents along way!
- 2 Roma tomatoes (chopped). Adding fresh tomatoes brings brightness plus acidity—perfectly balancing heavier components already present within dish itself—while also offering visual appeal amongst contrasting colors inside pot itself!
- Salt and freshly ground pepper (to taste) again ensures all aspects remain harmonious together culminating delightful result once finished cooking properly! Adjust accordingly based preferences/tastes!
- ¼ cup chopped parsley serves as finishing touch providing both freshness visually topping off final presentation plus hint herbaceousness enhancing overall enjoyment biting into warm bowlful goodness ahead!.
Equipment You’ll Need:
Before we get started on this wonderful journey towards creating Galinhada, let’s gather some essential tools that will make our experience smooth sailing! Having the right equipment is key because it can elevate your cooking game while ensuring everything comes together beautifully.
- Large pot or Dutch oven – This sturdy vessel is where all magic happens! Its heavy base allows for even heat distribution during cooking processes such as browning meats & simmering rice eliminating hot spots often found in thinner pans leading potential burning issues instead resulting perfectly cooked meal every single time!
- Wooden spoon or spatula – An essential partner when stirring ingredients ensures nothing gets left behind at bottom preventing sticking/burning plus allowing easy mixing among various components seamlessly blending together achieving ultimate harmony throughout entire dish itself inspiring confident approach cooking wise too!
- Sharp knife & cutting board – Precision matters while prepping veggies/meat beforehand making sure cuts remain uniform facilitating even cooking times plus enhancing presentation skills post-cooking too—so aim invest good quality blades keeping them sharp regularly sharpening whenever necessary maintaining efficiency throughout culinary adventures ahead!
Step 1: Aromatic Foundations
To kick off our Galinhada journey, begin by finely chopping one peeled onion along with three garlic cloves—the fragrant duo that lays down the foundation of flavors in our pot! Heat your large pot over medium heat before adding half a cup of olive oil—a generous amount—but don’t worry about excess fat here because it’ll impart richness later on too! Once hot enough (look for shimmering surface), toss those onions in first allowing them to sweat until translucent—about five minutes should do—before introducing minced garlic next which requires only brief sautéing until fragrant—around thirty seconds max since burnt garlic can turn bitter really quickly ruining whole batch sadly if neglected carelessly!
Step 2: Building Flavor Layers
Now comes time add diced carrots followed shortly afterwards sliced calabresa sausage into pan along side browned vegetables already sizzling away merrily below surface pushing everything deeper within pot layering even further enriching profile immensely ensuring multiple textures flourish variety throughout final results too—all combined contributing symphony flavors dancing across palate reminding us why we love food so dearly whether celebrating festive occasions everyday moments alike alike especially now during chilly months ahead cozy nights spent indoors wrapped snuggy blankets comforting bowls steaming hot right laps warming hearts souls alike would agree wholeheartedly indeed!
Step 3: Browning Chicken
Once those vegetables have softened beautifully—allow another eight minutes maximum here—we want ensure sausage crisps edges slightly golden enhance smokiness further still craving depth fully realized next step involves working magic brown bits forming bottom now revealing secrets held captive patiently waiting release finally incorporating bite-sized pieces skinless boneless chicken thighs gently stirring around adding sprinkle salt pepper ensure evenly seasoned throughout—you’ll notice remarkable transformation happening before eyes vibrant colors emerge enticing aromas swirling captivating senses exhilarating anticipation grows stronger momentarily pausing reflect gratitude appreciating efforts thus far rewarding journey lies ahead ultimately culminating joyous satisfaction eating hearty meals created lovingly from scratch enjoyed shared friends family alike reminds us stories told meals made resonate deeply profoundly meaningful ways beyond mere sustenance alone surely captures essence living fully embracing simplicity beauty surrounding us always present mindful experience nourishing body soul both simultaneously!!
Step 4: Infusing Flavors
Once chicken has taken on gorgeous golden hue approximately ten minutes later—we’re ready introduce next round players joining party namely chopped Roma tomatoes bay leaves white grape juice pouring generously over top noticing how liquid hugs everything tightly locking moisture inside ensuring perfectly cooked rice later absorbing all lingering goodness floating around bubbling away merrily beneath surface slowly simmering away gentle whispers promising delights await eagerly anticipating first bites feeling warmth envelop surroundings magically transforming atmosphere pulling everyone closer table setting inviting conversations laughter filling air bringing smiles faces connecting people sharing joy food creates undeniable bond cherished memories forged lasting impressions heartwarming moments last lifetime unfolding before eyes sharing love through crafted dishes made thoughtfully together instilling appreciation traditions passed down generations perpetuating cycle continues onward forevermore…
I hope you’re feeling excited about diving into this delicious recipe for Galinhada! Join me next time as we wrap up with steps focusing on finishing touches garnishing serving suggestions bringing entire experience full circle showcasing masterpiece created lovingly kitchen today!!
Step 5: Sautéing the Aromatics to Perfection
Now that we have our chicken marinated and ready, it’s time to ignite our culinary adventure by bringing together the aromatic foundations of our Galinhada. Heat a large, heavy-bottomed pot over medium heat and drizzle in a teaspoon of olive oil—just enough to coat the bottom. Add in your sliced calabresa sausages (or kielbasa if you’re opting for that delightful substitution) and let them sizzle away. This step is absolutely paramount because it allows the fat from the sausages to render out, infusing the oil with flavor that will ultimately elevate every bite of your dish. As those sausages begin to brown beautifully, you’ll notice their edges crisping up, releasing a mouthwatering aroma that fills your kitchen with warmth and comfort.
Once the sausages are perfectly golden, toss in chopped onion and finely diced carrot. Sauté these together until the onions become translucent and soft—about 5-7 minutes. You want to stir occasionally, allowing all those flavors to mingle harmoniously in the pot. This is where patience pays off; by sautéing these aromatics slowly, you’re drawing out their natural sweetness, creating a flavor base that will be profoundly satisfying in your finished dish. Trust me on this step—it’s not just about cooking; it’s about building layers of flavor that will make each spoonful utterly intoxicating.
Step 6: Introducing the Chicken and Building Depth
Once those aromatics are dancing together like old friends at a reunion, it’s time to introduce our marinated chicken! Carefully transfer the chicken pieces into the pot and give everything a gentle stir. Allow this to cook for about 10 minutes—this step is crucial because searing the chicken creates those lovely browned bits at the bottom of your pot, known as fond. These little nuggets of flavor are non-negotiable when it comes to creating depth in your Galinhada. As you watch the chicken transform from raw to golden brown, relish in that comforting sound—it’s like music in your ears!
After about 10 minutes of stirring occasionally (and enjoying that enticing aroma wafting through your home), add in your white grape juice along with 2½ cups of chicken broth. I know what you might be thinking: “Why grape juice?” Well, my friend, this sweet addition balances beautifully with savory elements while enhancing richness without overpowering other flavors. Stir everything together gently, scraping up any fond from the bottom—this is where real goodness lies! Now it’s time for our bay leaves to join this delicious mix; they’ll infuse their herbal notes into every grain of rice and piece of chicken while simmering away.
Step 7: The Magic of Simmering
Now comes one of my favorite parts—the simmering! Once all ingredients are combined effortlessly in your pot, bring everything to a gentle boil; then reduce the heat to low so you can cover it with a lid and let it work its magic for about 30 minutes. Don’t rush this step! Simmering allows flavors to meld together beautifully—the starches from the rice release into the broth while absorbing all those incredible seasonings. It’s almost magical how simple ingredients can transform into something so comforting and hearty.
While it’s simmering away, take a moment to prepare yourself for what’s next: rinsing your white long-grain rice until the water runs clear is essential before adding it into this fantastical mixture. Rinsing removes excess starch which can make our dish gummy instead of fluffy—nobody wants clumpy rice! After about half an hour, you’ll notice delightful bubbles rising through the lid; lift it just slightly and take a quick peek. The smell should be simply divine at this point—the combination of tender chicken melding with fragrant broth is sure to make your mouth water!
Step 8: The Grand Finale – Adding Rice
It’s finally time for our rinsed long-grain rice to join this flavorful party! Gently fold in one cup of rice along with those two chopped Roma tomatoes—oh, how they’ll brighten up both color-wise and taste-wise! Ensure everything is distributed evenly throughout so every bite offers a perfect symphony of flavors. A sprinkle of salt and freshly ground pepper here is absolutely key; seasoning at different stages helps build complexity throughout each layer.
Now cover that glorious pot again and allow it all to simmer on low heat for another 20-25 minutes until most liquid has been absorbed and rice becomes tender but not mushy—it should still have some bite left! Keep an eye on things during this time; if it looks too dry or starts sticking at all (we don’t want any scorched bits!), feel free to add a splash more broth or water as necessary. You’re looking for fluffy grains that have soaked up all those beautiful juices while staying distinct—that’s when you know you’ve hit perfection!
Final Touches – Bringing It All Together
Step 9: The Finishing Touch – Garnishing Your Galinhada
As we near completion, let’s focus on those final touches that will elevate your Galinhada from simply delicious to truly extraordinary! Once you’ve determined that both chicken and rice are cooked perfectly—tender yet firm—you’ll want to remove those bay leaves before serving (they’ve done their job). Now sprinkle generously with fresh parsley; not only does it add vibrant color but also introduces an aromatic freshness that cuts through richness beautifully.
You might be tempted (and I wouldn’t blame you!) just to dive right in at this point—but allow yourself a moment of patience as we let everything rest uncovered for about five minutes before serving. This resting period allows residual steam to finish cooking any last bits while redistributing moisture throughout your dish—resulting in even greater tenderness when you dig in!
Serve this heartwarming dish family-style right from its pot or plate individually if you’re feeling fancy; either way, don’t forget some extra chopped parsley on top for visual flair! And remember, I promise you there’s something deeply satisfying about sharing food prepared with love—a true celebration around any dining table awaits as everyone gathers around savoring each bite together.
This Galinhada recipe may seem simple at first glance but remember: it’s these uncomplicated dishes made with care that warm hearts and nurture souls. Enjoy every moment—and every spoonful—because nothing beats homemade comfort food like this!
Storage and Enjoyment Tips for Your Galinhada
Now that your Galinhada is bubbling away in its pot, filling your kitchen with an aroma that’s nothing short of intoxicating, it’s time to bask in the joy of sharing this dish with loved ones. The colors alone—the vibrant yellows from the turmeric, the earthy greens from the parsley, and the rich browns of the chicken—make this a feast for both the eyes and the palate. But let’s talk about what happens when you have leftovers, because trust me, this dish only gets better with time!
Storing Leftover Galinhada
To keep your leftover Galinhada tasting as delightful as it did on day one, I recommend using airtight glass containers. Glass not only helps preserve flavors but also allows you to easily see what deliciousness awaits inside. When stored correctly in the refrigerator, your Galinhada can last up to four days, making it a perfect meal prep option! If you’re looking to maintain that wonderfully moist texture, consider placing a slice of bread in the container before sealing—it may sound odd, but it works wonders in keeping things fresh! As for reheating, simply warm it gently on the stove or in the microwave until heated through; I promise you’ll still enjoy the symphony of flavors that made you fall in love with this dish in the first place.
Freezing Galinhada for Later
If you find yourself with more Galinhada than you can devour right away (which is often a delightful dilemma), freezing is an excellent solution! To do this properly, let your dish cool completely before transferring it to freezer-safe bags or containers. Squeeze out as much air as possible to prevent freezer burn—this little step is absolutely paramount! When stored properly, your Galinhada can keep well for up to three months. When you’re ready to indulge again, simply thaw it overnight in the fridge and reheat gently; you’ll be amazed at how those flavors meld even further during their time together in the freezer. This method not only saves you time but also ensures that even on busy days, a comforting meal is just a quick reheat away!
Galinhada

Galinhada is a heartwarming Brazilian chicken and rice dish that embodies the spirit of communal dining. With tender pieces of chicken simmered alongside aromatic spices and fluffy rice, this one-pot wonder promises comfort in every bite. Enhanced by vibrant turmeric, fresh herbs, and a splash of apple cider vinegar, it strikes a perfect balance between savory and slightly tangy flavors. Gathering around a pot of Galinhada not only nourishes the body but also creates lasting memories among family and friends, making it an ideal choice for gatherings or cozy weeknight dinners. Let’s dive into this delightful recipe that will surely become a staple in your kitchen.
- Prep Time: 20 minutes
- Cook Time: 60 minutes
- Total Time: 1 hour 20 minutes
- Yield: Serves approximately six people 1x
- Category: Main
- Method: One-pot cooking
- Cuisine: Brazilian
Ingredients
- 1 onion, peeled
- 3 garlic cloves, peeled
- ½ cup fresh parsley
- 1 tablespoon ground turmeric
- 1 tablespoon apple cider vinegar
- ½ cup olive oil
- Salt and freshly ground pepper (to taste)
- 1 ½ pounds skinless, boneless chicken thighs, cut into 1-inch pieces
- 2 kielbasa sausages, sliced
- 1 large carrot, finely diced
- ½ cup white grape juice
- 2 ½ cups chicken broth
- 1 cup white long-grain rice, rinsed
- 2 bay leaves
- 2 Roma tomatoes, chopped
Instructions
- Finely chop the onion and garlic. Heat olive oil in a large pot over medium heat. Sauté onion until translucent (about 5 minutes), then add garlic for another 30 seconds.
- Stir in diced carrot and sliced sausages; cook until softened (about 8 minutes).
- Add the chicken thighs to the pot, seasoning with salt and pepper. Cook until browned (about 10 minutes).
- Pour in white grape juice and chicken broth; stir in bay leaves and chopped tomatoes.
- Bring to a gentle boil, reduce heat to low, cover, and simmer for about 30 minutes.
- Fold in rinsed rice; cover and cook for an additional 20–25 minutes until liquid is absorbed.
- Remove bay leaves, garnish with parsley, let rest for five minutes before serving.
Nutrition
- Serving Size: Approximately 1 bowl (350g)
- Calories: 420
- Sugar: 3g
- Sodium: 580mg
- Fat: 24g
- Saturated Fat: 4g
- Unsaturated Fat: 18g
- Trans Fat: 0g
- Carbohydrates: 34g
- Fiber: 3g
- Protein: 27g
- Cholesterol: 85mg