Homemade Subway Raspberry Cookies
Craving those soft, sweet cookies from Subway but don’t want to make the trip? Ah, I totally get it! There’s something extraordinarily comforting about a freshly baked cookie that envelops you with warmth and nostalgia. The moment you break open one of those delightful raspberry cookies, you’re greeted by an intoxicating aroma that’s hard to resist. The sweet-tartness of the raspberries mingling with the creamy white chocolate creates a symphony of flavors that dances on your palate, making each bite feel like a warm hug. And believe me when I say, making these Homemade Subway Raspberry Cookies in your own kitchen transforms them from mere snacks into a cherished experience—a bridge between tradition and innovation that leaves you with memories as sweet as the cookies themselves.
Now, what makes these cookies so special? It’s not just about satisfying a craving; it’s about crafting something that brings joy and comfort to those you love. Picture this: You’ve had a long day, and as you pull these cookies out of the oven, you’re met with the warm embrace of vanilla and butter wafting through your home. Sharing them with friends or family feels like sharing a piece of your heart. These cookies are perfect for any occasion—be it a cozy night in or a festive gathering. They have this magical quality that transcends age and occasion; everyone from kids to grandparents will be reaching for seconds (and maybe even thirds). So grab your apron, preheat that oven, and let’s dive into creating these scrumptious delights together!
Homemade Subway Raspberry Cookies: Your New Favorite Treat
Welcome to the world of baking magic! Today, we’re embarking on a delightful journey to create our very own version of those beloved Subway Raspberry Cookies. Trust me; once you’ve tasted these homemade beauties, you may never want store-bought again. They’re soft, chewy, and bursting with flavor—just like you remember! Let’s explore how to bring this delectable recipe to life.
Ingredients:
As we begin our culinary adventure together, let’s gather our ingredients. Each one plays an essential role in crafting those soft and luscious Homemade Subway Raspberry Cookies that will leave everyone asking for more.
- 2 cups plain flour. This flour is our backbone—it provides structure and stability to our cookies while allowing them to rise just enough without becoming too dense. When measuring flour, be sure to spoon it into your measuring cup and level it off rather than scooping directly from the bag; this ensures accuracy and prevents denseness in your final product.
- 2 teaspoons corn flour. This ingredient is often overlooked but is absolutely paramount for achieving that soft texture reminiscent of bakery-style cookies. Corn flour adds tenderness by preventing gluten formation when mixed with our all-purpose flour—it’s like providing a gentle hug for each cookie!
- 1/2 teaspoon salt. Salt might seem simple, yet it plays an extraordinary role in enhancing flavors throughout the cookie dough. It balances sweetness and elevates every ingredient’s natural taste profile—don’t skip this step! A pinch of salt is what separates good cookies from truly exceptional ones.
- 1 teaspoon baking soda. This leavening agent is crucial as it helps our cookies rise beautifully during baking while keeping them light and airy inside—think about that perfect chewiness! Baking soda also reacts with acidic components in the brown sugar or raspberries, contributing to browning and flavor development.
- 3/4 cup unsalted butter, softened at room temperature. Butter is where much of the magic happens; it provides richness and depth of flavor while also contributing to that lovely melt-in-your-mouth texture we’re aiming for in our Homemade Subway Raspberry Cookies. Make sure it’s softened properly—if it’s too cold or melted, you’ll miss out on achieving that ideal creaminess.
- 2/3 cup granulated sugar. This sugar not only sweetens our dough but also aids in creating that slight crispness on the edges while keeping the center chewy—perfection! Granulated sugar caramelizes during baking, giving your cookies beautiful golden edges.
- 1/2 cup brown sugar. The deep molasses flavor found in brown sugar enhances both moisture and chewiness in our cookies; it adds complexity while working harmoniously with the white chocolate chunks and raspberries for an utterly intoxicating combination.
- 2 teaspoons vanilla essence. Vanilla extract is non-negotiable here—it infuses warmth into every bite! Opt for pure vanilla when possible; synthetic options lack the depth needed for these cookies’ flavor profile.
- 1 large egg & 1 egg yolk. Eggs contribute necessary moisture along with binding power which holds everything together beautifully while creating lift during baking—leading us toward those perfectly structured cookies! Using an additional yolk adds extra fat for even richer results; trust me on this!
- 3/4 cup white chocolate chunks. These little morsels are like pockets of sweetness sprinkled throughout each cookie—melting slightly during baking to form gooey bites among tangy raspberry bursts. If you’re feeling adventurous, consider using high-quality chocolate bars chopped into chunks instead!
- 1/2 cup freeze-dried raspberries. Ahh…these gems are what elevate our cookies from ordinary to extraordinary! Freeze-dried raspberries pack intense flavor without adding unwanted moisture; they create delightful little bursts of tartness in every bite that contrast beautifully against the sweetness of white chocolate.
- 4 ounces softened cream cheese. Cream cheese adds richness and contributes to that soft texture we desire—it creates more moistness than any other fat could alone! Ensure it’s genuinely softened so it blends seamlessly into your dough without lumps.
- 1/4 cup icing sugar & 1/2 teaspoon vanilla essence (for frosting) if desired (but optional). A dusting of icing sugar enhances presentation while providing an elegant touch if you’re looking to impress guests or loved ones – though rest assured they’ll be delightful even without!
Equipment You’ll Need:
Before we dive into mixing up our cookie dough, let’s ensure we have all the right tools at hand—that way, nothing stands between us and deliciousness! While they may not be ingredients per se, having quality equipment makes all the difference in achieving success.
- Mixing bowls (large) – You’ll want enough space for all your ingredients as well as room for mixing without any spills or messes happening around you—this makes clean-up easy breezy too!
- Electric mixer (stand or hand-held) – Creaming butter with sugars can be quite labor-intensive by hand; using an electric mixer saves time while ensuring everything blends smoothly together into fluffy perfection.
- Measuring cups & spoons – Precise measurements are key ingredients when baking; accurate ratios lead directly towards consistent results each time—you’ll thank yourself later!
- Baking sheets lined with parchment paper – This prevents sticking while promoting even browning throughout baking—the last thing we want is beautiful creations ruined by sticking!
With all our ingredients gathered and equipment ready to go, let’s jump into preparing these dreamy Homemade Subway Raspberry Cookies together!
Step 1: Creaming Butter & Sugars Together
The first step sets everything up beautifully—let’s start by creaming together our softened unsalted butter along with granulated sugar and brown sugar until light and fluffy—this process known as creaming incorporates air into your mixture which eventually contributes significantly toward texture during baking (so don’t rush this step!). You’re looking for a pale yellow color change along with volume increase here; ideally aim for about 3–5 minutes on medium speed until smooth consistency forms without lumps remaining visible—trust me on this part!
Step 2: Adding Eggs & Vanilla Essence
Next up comes adding both egg plus yolk alongside two teaspoons vanilla essence—and here’s where things get even more exciting because you’ll notice how different everything looks once combined properly! Beat them gently until fully incorporated before scraping down sides of bowl if necessary (this ensures no bits escape attention!). At this point those heavenly aromas should start wafting through your kitchen like music playing softly inviting us closer…
Step 3: Combining Dry Ingredients
Now let’s tackle those dry ingredients carefully measured earlier: whisk together plain flour along with corn flour, salt & baking soda separately before gradually incorporating them into wet mixture prepared previously—you don’t want anyone getting overwhelmed here so go slow! Mixing too aggressively can develop gluten leading towards tougher-than-desired results—not ideal at all! Instead use spatula gently folding until no streaks remain visible—this part allows flavors meld beautifully but avoids overdoing things so leave behind any thoughts about rushing onward!
Step 4: White Chocolate & Raspberries Join In
Once you’ve achieved smooth consistency here comes adding white chocolate chunks alongside freeze-dried raspberries—they’re what truly make these cookie creations sing out loud bursting forth colors/flavors galore reminding us why we started this whole adventure today! Fold gently yet thoroughly ensuring distribution throughout dough happens evenly—we want everyone indulging happily across their bites after all…
Stay tuned as we continue crafting delightful batches ahead—I promise you won’t regret taking time enjoying each step along way toward mastering this recipe just right…
Continue Your Journey to Homemade Subway Raspberry Cookies
Step 5: Creaming the Butters and Sugars to Perfection
Now that we have our dry ingredients all mixed together, it’s time to move on to one of my favorite steps: creaming the butter and sugars. This is an absolutely crucial technique in baking that helps create a light, airy texture in your cookies. Start by placing your softened unsalted butter into a large mixing bowl. The butter should be at room temperature—think of it like a soft cloud you can easily press with your fingers. Next, add both the granulated sugar and brown sugar. The granulated sugar provides sweetness while the brown sugar brings moisture and a lovely caramel flavor that will make your cookies utterly intoxicating.
Using an electric mixer (or a sturdy wooden spoon if you’re feeling adventurous!), beat the mixture on medium speed until it becomes light and fluffy, which usually takes about 2-3 minutes. You’ll know you’re there when it looks pale in color and has almost doubled in volume—this is where the magic happens! Air gets trapped in the butter, giving your cookies that wonderful lift when they bake. Trust me on this: don’t rush this step! It’s tempting to move forward quickly, but taking the time to cream properly will yield beautifully soft cookies instead of dense little pucks.
Step 6: Introducing Eggs and Vanilla – Building Layers of Flavor
Once your butter and sugars are perfectly creamed, it’s time to introduce the eggs and vanilla essence into our delightful mixture. Crack one large egg into your bowl along with an additional egg yolk—this combination adds richness and depth that makes each bite feel like a warm hug. You might wonder why we use an extra yolk; well, yolks are packed with fat, which is absolutely paramount for achieving that chewy texture we all crave in a cookie!
Add two teaspoons of vanilla essence as well; this aromatically uplifting ingredient not only enhances flavors but also infuses our cookies with that familiar warmth that evokes memories of baking with loved ones. Beat everything together on low speed until just combined; overmixing here would risk deflating all that lovely air we worked so hard to incorporate earlier. When finished, you should see a smooth mixture that glistens invitingly—don’t be tempted to skip tasting a tiny spoonful! It’s like liquid gold.
Step 7: Marrying Dry and Wet Ingredients – A Perfect Harmony
Now comes the moment where all elements come together in perfect harmony! Gradually add your dry ingredient mix into the wet ingredients—this ensures everything combines evenly without any lumps or streaks. I recommend doing this in two or three batches, gently folding with a spatula instead of mixing vigorously. This not only prevents overworking the dough but also maintains those precious air pockets we created earlier.
As you fold, keep an eye out for any stray bits of flour hanging around; you want to incorporate everything until just combined—no need for perfection here! Afterward, it’s time to add those heavenly white chocolate chunks (which melt beautifully during baking) and freeze-dried raspberries—a truly extraordinary addition that brings bursts of tartness into every bite. Gently fold these treasures into your batter until they are evenly distributed while savoring their vibrant colors—it’s like adding jewels to our cookie dough!
Step 8: Chilling – The Transformative Time-Out
This next step may require some patience, but I promise you—it’s worth every second! Once your dough is thoroughly mixed, cover it with plastic wrap or transfer it into an airtight container before placing it in the refrigerator for at least 30 minutes (or up to overnight). Why chill? Well, chilling allows the fats in our dough to solidify slightly again after being warmed up during mixing; this results in cookies that spread less during baking while maintaining their beautiful shape.
Moreover, letting them rest enhances flavor development through a process known as hydration—where flour absorbs moisture from other ingredients—and allows gluten strands to relax for softer cookies once baked. I recommend using this time wisely; maybe tidy up your kitchen or prepare some coffee for yourself because soon enough you’ll be rewarded with warm, fragrant cookies wafting through your home!
And there you have it! Your very own batch of Homemade Subway Raspberry Cookies that’s sure not only to satisfy cravings but also create unforgettable moments shared around tables filled with laughter and joy. Don’t forget—I encourage you always to share these delicious creations because food made with love is meant for sharing! Enjoy every delectable bite!
Storage and Enjoyment Tips for Your Homemade Subway Raspberry Cookies
Now that your kitchen is filled with the intoxicating aroma of freshly baked cookies, it’s time to dive into the delicious world of Homemade Subway Raspberry Cookies! But wait, let’s talk about how to keep this heavenly creation at its best for as long as possible because trust me, you’ll want to savor every last crumb. These cookies are not only a delight straight from the oven; they also have a way of bringing joy in the days that follow, so let’s make sure they stay fresh and fabulous!
Storing Leftover Homemade Subway Raspberry Cookies
To ensure your Homemade Subway Raspberry Cookies maintain their delightful softness and flavor, store them in an airtight container at room temperature. A glass or plastic container with a tight seal works wonders. You can also line the bottom with parchment paper for extra protection against any potential moisture. These cookies will keep their charm for up to a week, though I promise they might not last that long! For an added touch, place a slice of bread in the container; this little trick helps retain moisture, keeping those cookies beautifully soft and chewy. After storage, you’ll find that the balance of sweet white chocolate and tangy raspberry flavors still sings harmoniously together, creating an utterly satisfying treat. When you’re ready to enjoy them again, simply pop them in the microwave for about 10-15 seconds—just enough to revive their warmth and gooeyness without turning them into a puddle.
Freezing Your Cookies for Later
If you’re like me and can sometimes find yourself overwhelmed by the sheer joy of baking too many cookies (is there really such a thing?), freezing your Homemade Subway Raspberry Cookies is an excellent option! To freeze them properly, allow the cookies to cool completely first. Then, arrange them on a baking sheet lined with parchment paper in a single layer and freeze until solid—this prevents them from sticking together later on. Once frozen, transfer those beauties into a freezer-safe bag or container, separating layers with parchment paper if needed. They can be stored in your freezer for up to three months! When you’re ready for a sweet treat again, simply take out as many as you desire and let them thaw at room temperature or reheat in the oven briefly. The convenience of having these little gems on hand makes life sweeter!
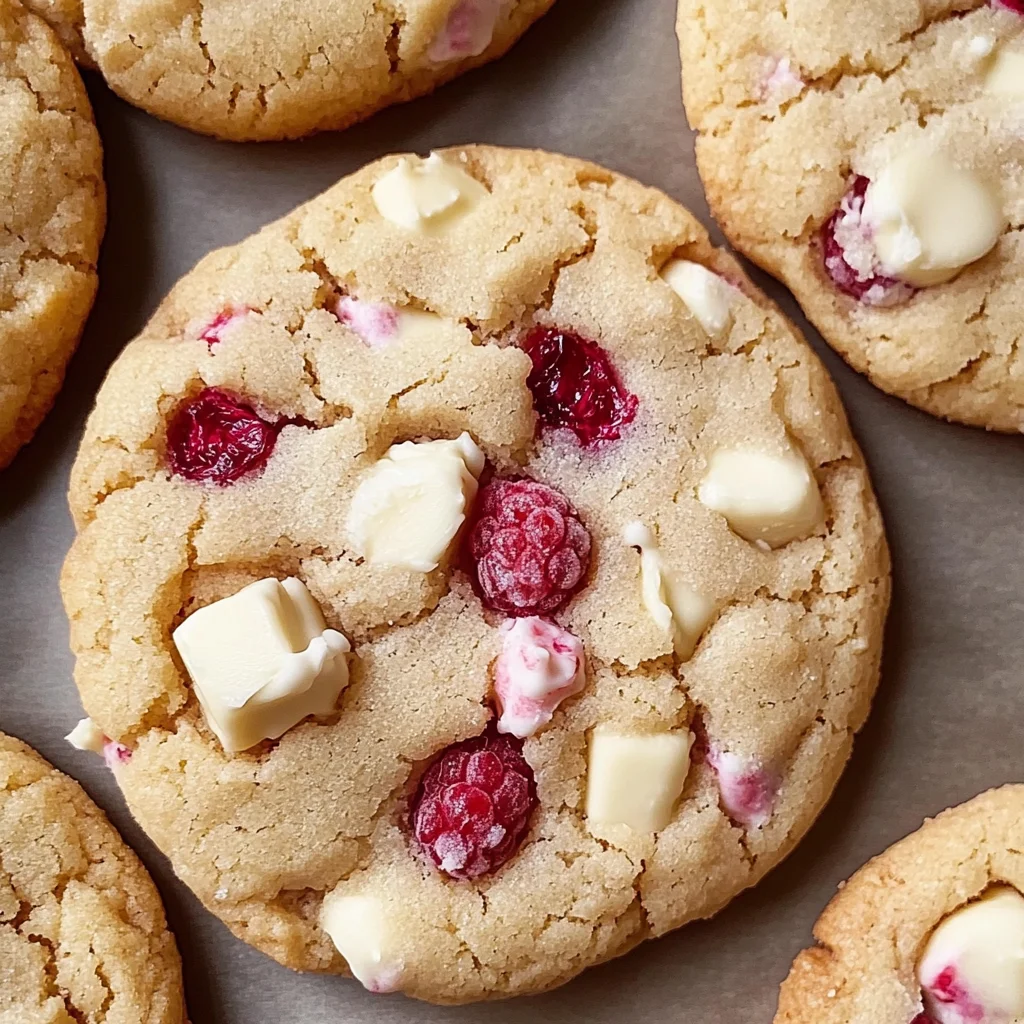
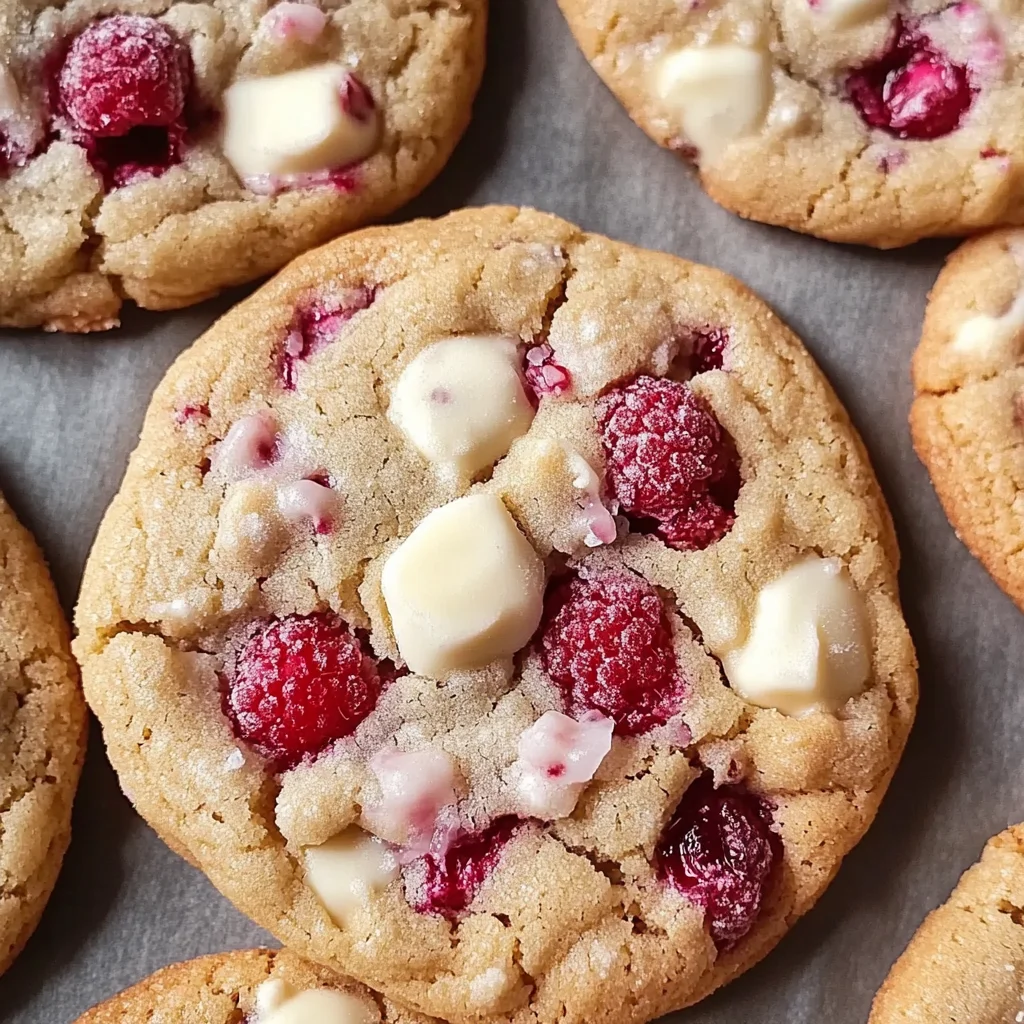
Homemade Subway Raspberry Cookies
Indulge in the delightful experience of baking with these Homemade Subway Raspberry Cookies—your ultimate treat for any occasion! These soft and chewy cookies are a perfect blend of sweet-tart raspberries and creamy white chocolate, creating a mouthwatering flavor that will transport you back to those nostalgic bakery days. With each bite, you’ll enjoy the balanced sweetness and refreshing tartness that makes them truly irresistible. Whether you’re sharing them with family or savoring them during a cozy night in, these cookies promise to bring joy and warmth to your kitchen. Embrace the magic of baking and elevate your dessert game with this easy-to-follow recipe!
- Prep Time: 15 minutes
- Cook Time: 12 minutes
- Total Time: 27 minutes
- Yield: Approximately 24 cookies 1x
- Category: Dessert
- Method: Baking
- Cuisine: American
Ingredients
- 2 cups plain flour
- 2 teaspoons corn flour
- 1/2 teaspoon salt
- 1 teaspoon baking soda
- 3/4 cup unsalted butter, softened
- 2/3 cup granulated sugar
- 1/2 cup brown sugar
- 2 teaspoons vanilla essence
- 1 large egg
- 1 egg yolk
- 3/4 cup white chocolate chunks
- 1/2 cup freeze-dried raspberries
- Optional: cream cheese frosting
Instructions
- Preheat your oven to 350°F (175°C) and line baking sheets with parchment paper.
- In a large mixing bowl, cream together softened butter, granulated sugar, and brown sugar until light and fluffy.
- Add the egg, egg yolk, and vanilla essence; beat until combined.
- In another bowl, whisk together flour, corn flour, salt, and baking soda. Gradually add this mixture to the wet ingredients while folding gently until just combined.
- Fold in white chocolate chunks and freeze-dried raspberries until evenly distributed.
- Scoop dough onto prepared baking sheets, leaving space between each cookie.
- Bake for 10-12 minutes or until edges are golden but centers remain soft. Allow to cool on the pan for 5 minutes before transferring to wire racks.
Nutrition
- Serving Size: 1 cookie
- Calories: 180
- Sugar: 12g
- Sodium: 85mg
- Fat: 8g
- Saturated Fat: 5g
- Unsaturated Fat: 3g
- Trans Fat: 0g
- Carbohydrates: 24g
- Fiber: 1g
- Protein: 2g
- Cholesterol: 25mg