Homemade Sweet Chili Sauce
There’s something magical about crafting your own sauces, don’t you think? The moment you combine simple ingredients and transform them into a symphony of flavors is nothing short of a revelation. Homemade Sweet Chili Sauce is one such creation that captures the essence of comfort and creativity in a bottle. The aroma of toasted garlic mingling with the sharpness of vinegar and the sweetness of sugar transports you straight to the heart of Thai cuisine. I promise you, making this sauce isn’t just about combining ingredients—it’s about creating a culinary experience that brings warmth to your heart and joy to your taste buds.
When I first discovered sweet chili sauce, it felt like unlocking a treasure chest of flavor possibilities. This sauce is not too spicy, making it incredibly versatile for dipping or drizzling over your favorite dishes. Whether it’s crispy spring rolls, grilled vegetables, or even drizzled over a fresh salad, each drop is like liquid gold that adds depth and excitement. And the best part? You can easily make it at home! It’s an opportunity to personalize every aspect, adjusting sweetness or heat to suit your palate. So gather your ingredients as we embark on this delightful culinary journey together—trust me; you’ll want this recipe in your arsenal!
Homemade Sweet Chili Sauce: A Flavorful Adventure Awaits
Let’s dive right into this delightful recipe for Homemade Sweet Chili Sauce! It’s easy to whip up and will elevate any meal with its sweet, tangy kick. With just a handful of ingredients, you’ll have a condiment that rivals anything you can find in stores but with the added bonus of knowing exactly what goes into it. So grab your apron, and let’s get to work!
Ingredients:
Before we jump into the cooking process, let’s explore each ingredient that makes this delicious sauce sing. Each one plays a vital role in achieving that perfect balance of sweet and savory.
- 1/2 cup rice vinegar (or white grape juice vinegar): This tangy element is essential to our sauce—it provides the acidic backbone that balances out the sweetness from the sugar. Rice vinegar has a mild flavor that won’t overpower other components but instead enhances them beautifully. If you’re looking for a sweeter alternative without sacrificing acidity, white grape juice vinegar works wonders as well! Just ensure whatever vinegar you choose is genuine—quality matters here for that authentic taste.
- 1/2 cup water: While water might seem mundane at first glance, it plays an important role in diluting the vinegar’s potency while allowing all flavors to meld together harmoniously. This gentle touch ensures our sauce isn’t overly sharp and creates a smooth consistency that’s perfect for dipping.
- 1 cup white sugar: Ah, sweet sugar—the star player in this recipe! It provides that signature sweetness for which sweet chili sauce is beloved. Sugar also helps to caramelize slightly during cooking, adding depth and richness to our final product. Using granulated white sugar allows for precise control over sweetness; however, if you’re looking for alternatives due to dietary preferences, feel free to experiment with coconut sugar or agave syrup.
- 1 Tablespoon garlic (minced): Garlic is where magic truly happens in this recipe! Its aromatic qualities will infuse our sauce with warmth and complexity. When minced finely, garlic releases its oils more effectively during cooking, ensuring that every spoonful bursts with flavor. Don’t skimp on freshness here—freshly minced garlic elevates this dish from good to extraordinary!
- 1 Tablespoon light soy sauce (or coconut aminos for Gluten-Free version): This ingredient introduces a savory umami note that rounds out all the competing flavors beautifully. Light soy sauce offers saltiness without overwhelming the palate; however, if you’re looking for gluten-free options or avoiding soy altogether, coconut aminos are an excellent substitute without compromising on taste.
- 4 teaspoons red chili flakes (or red pepper flakes): Here’s where we add just the right amount of heat! Red chili flakes bring warmth but can be adjusted based on personal preference—feel free to add more if you’re seeking an extra kick! Toasting them beforehand enhances their flavor profile dramatically by releasing essential oils; trust me—it makes all the difference.
- 3 teaspoons corn starch: Corn starch acts as our thickening agent here; it transforms our mixture from thin liquid into a luscious sauce that’s clingy enough for dipping yet pourable enough for drizzling. Mixing it with water creates a slurry which works best because it prevents clumping when added directly into hot liquids.
- 2 Tablespoons water: This additional bit of water helps create that slurry we discussed earlier—it ensures smooth incorporation into our sauce without creating lumps or uneven texture.
Now that we’ve gathered our ingredients let’s take stock of what tools will help us along this flavorful journey!
Equipment You’ll Need:
Having the right tools at your fingertips can turn cooking from a chore into an enjoyable experience filled with anticipation and creativity. Each piece serves as an essential partner in crafting your homemade sweet chili sauce—and I can’t wait to share them with you!
- Medium saucepan: A sturdy medium saucepan is crucial for bringing all those beautiful flavors together over heat while providing ample space for bubbling away without boiling over. Look for one with thick bottom construction; this ensures even heating which helps prevent scorching—a non-negotiable when making sauces!
- Whisk: A trusty whisk will be invaluable when incorporating our cornstarch slurry smoothly into the mixture. Opting for a silicone whisk can also protect your saucepan’s surface while providing efficient mixing action—no lumps allowed here!
- Measuring cups & spoons: It goes without saying how important accurate measurements are in any kitchen endeavor! They provide consistency across batches so each time you make this delightful sauce tastes just as good as before.
Now armed with knowledge about our ingredients and tools let’s move forward! Ready? Let’s dive in step-by-step through preparing this mouthwatering Homemade Sweet Chili Sauce!
Step 1: Whisking Up a Slurry
To begin our flavorful adventure, we need to create our cornstarch slurry! Take three teaspoons of cornstarch and mix them thoroughly with two tablespoons of water in a small bowl until no lumps remain—this step may seem simple but trust me; it’s absolutely paramount! This process ensures smooth incorporation into our bubbling concoction later on without creating any unsightly lumps within our final masterpiece.
Step 2: Toasting Those Chili Flakes
Heat up your medium saucepan over medium heat—this step is where much flavor development occurs! Once hot enough, toss in four teaspoons of red chili flakes and allow them to toast gently for about three minutes until fragrant but not burnt; watch closely because burnt spices can ruin everything you’ve created so far! Toasting enhances their flavor profile by releasing essential oils locked inside those tiny flakes—a true game changer when it comes down to maximizing taste potential!
Step 3: Bringing It All Together
Now comes one of my favorite parts—it’s time to add all those incredible ingredients we’ve prepped so far! Carefully pour in half a cup each of rice vinegar and water along with one cup of white sugar followed by minced garlic and light soy sauce (or coconut aminos). Stir everything together gently but consistently—this ensures even distribution throughout while preventing boiling over during cooking (which would not only create quite the mess but may alter flavor concentrations). Increase heat slightly until mixture reaches boiling point then allow it bubble away vigorously while stirring occasionally for four minutes—watch closely during this stage as some caramelization may begin happening at edges which adds rich depth!
Step 4: Thickening Our Liquid Gold
Once those glorious four minutes have passed by delightfully intoxicating both sight & smell senses alike—it’s time now to lower heat down towards low setting before slowly introducing cornstarch slurry made earlier while whisking continuously until fully absorbed (it should thicken almost instantly!). Make sure not rush through this step either because giving proper attention will yield smoother consistency overall without any weird textures popping up unexpectedly later on down line when trying enjoy final product atop favorite dishes!
There you have it—the first steps into creating your very own homemade sweet chili sauce! Isn’t it exciting? The tantalizing aromas wafting through your kitchen already hint at how wonderful this concoction will taste once cooled down completely before storing away safely until needed again next time cravings strike again… Stay tuned as we continue exploring more delicious steps ahead on this culinary journey together!
Step 5: The Perfect Mix – Incorporating the Slurry
Now that your sauce is bubbling away like a festive party, it’s time to add a crucial element that will elevate your Homemade Sweet Chili Sauce to heights of velvety perfection. Grab that cornstarch slurry you prepared earlier—this little mixture is absolutely paramount for achieving the luxurious thickness we crave in a good sauce. By slowly adding the slurry, you’ll ensure that it incorporates seamlessly into the bubbling concoction, creating a beautiful, glossy finish that clings lovingly to whatever you decide to dip or drizzle it on.
As you pour in the slurry, make sure to whisk continuously. This isn’t just about mixing; it’s about coaxing the flavors and textures to marry in perfect harmony. You’ll notice that almost immediately, the sauce begins to thicken up—like magic! This thickening process happens because cornstarch molecules swell and expand when they hit the heat, creating a silky mouthfeel that transforms your sauce from a mere liquid into an utterly intoxicating elixir. Trust me on this: if you skip this step or rush it, your sauce could end up too thin and watery. So take your time here; those few extra moments are what make the difference between good and truly extraordinary.
Step 6: Cooling Down – The Importance of Patience
Once you’ve achieved that beautiful thick consistency, it’s time to remove your saucepan from the heat source. I know it can be tempting to dive right in and start slathering this delicious sauce on everything in sight, but patience is key here! Allowing the sauce to cool down is not just about letting it reach room temperature; it’s also about letting the flavors intensify and mature. As the sauce cools, those bright notes of garlic and tangy vinegar meld beautifully with the sweetness of sugar and warmth from the chili flakes, creating a symphony of flavors that will dance on your taste buds.
When cooling, keep an eye on how the texture changes—it will continue to thicken slightly as it cools, which is part of what makes it so delightful when served. This resting period allows any harsh edges or rawness from ingredients like garlic to mellow out beautifully. If you’re feeling particularly ambitious (and patient!), let it sit longer; even half an hour can make a world of difference in flavor development. Plus, once cooled, this sauce can be stored for weeks—if you can resist eating it all at once!
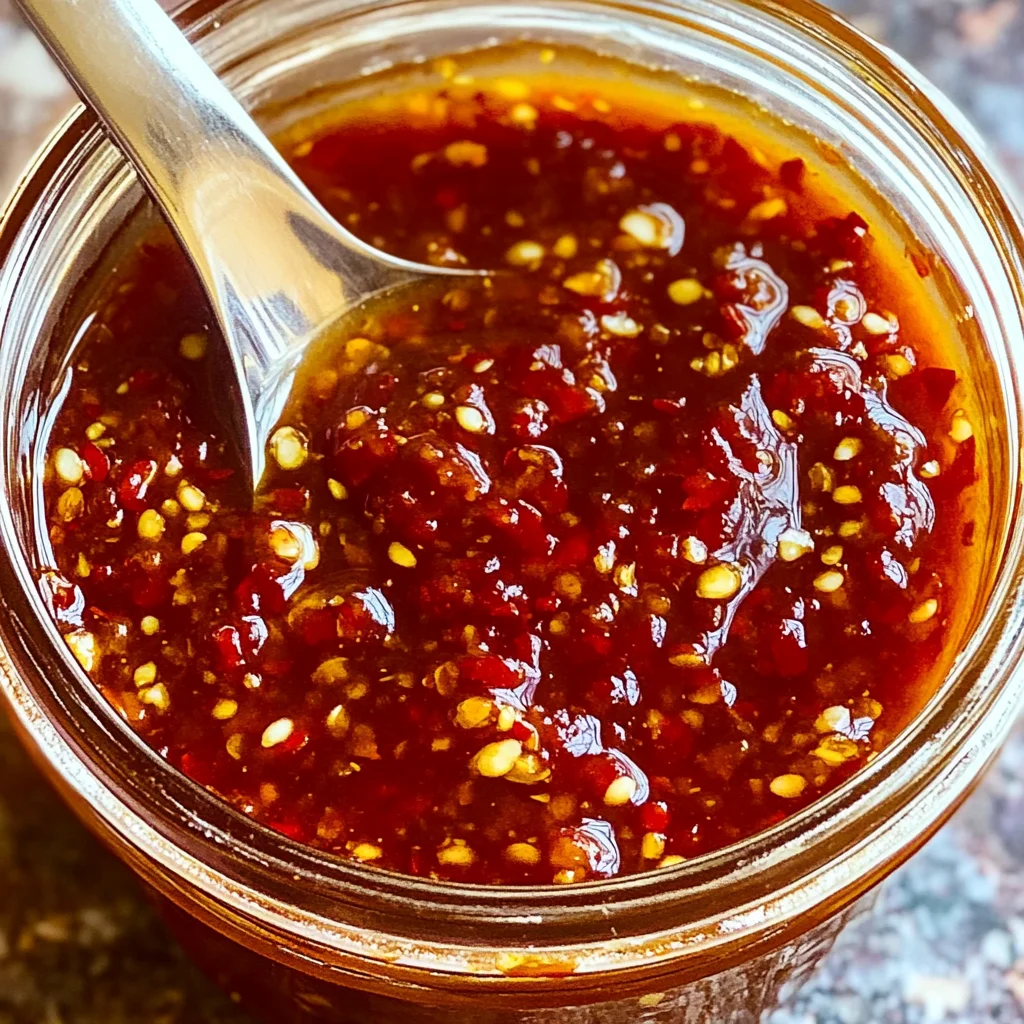
Step 7: Storing Your Liquid Gold
Now that your Homemade Sweet Chili Sauce has cooled down and transformed into something truly special, it’s time to think about storage. Choosing the right container is essential for keeping this liquid gold fresh and flavorful for as long as possible. I recommend using an airtight jar or bottle—something that seals in all those amazing aromas and prevents any unwanted air from sneaking in. Glass jars are fantastic options because they don’t absorb odors or flavors over time; plus, they look beautiful sitting on your kitchen shelf!
Before you pour your gorgeous creation into its new home, give it one last gentle stir with a spoon or spatula to ensure everything is well mixed together again after settling. Pour carefully into your container; you’ll want every last drop! As you seal it up tightly, imagine all the delicious meals ahead where this sweet chili sauce will feature prominently—dipping crispy spring rolls or drizzled over grilled veggies—the possibilities are endless! And remember: homemade sauces often taste even better after a day or two in the fridge as they continue developing their rich flavor profile.
Step 8: The Grand Finale – Usage Tips and Serving Suggestions
Now comes one of my favorite parts—the joy of sharing this delectable Homemade Sweet Chili Sauce with friends and family! But before you do, let’s talk about how best to use this condiment wonder. It’s incredibly versatile! Picture dipping crunchy vegetable tempura into its luscious depths—such a perfect balance of sweet heat with each bite! Or perhaps drizzling some on crispy tofu bites for a satisfying vegan treat? The world really is your oyster (or tofu!).
Don’t forget about using it as a marinade or glaze for chicken or fish too! Just remember: if you’re marinating proteins with this sauce, aim for at least 30 minutes before cooking so they can absorb all those wonderful flavors deeply. This isn’t just food preparation—it’s culinary magic happening right under your nose! And if you’re planning on hosting friends for dinner or game night? Set out a small bowl filled with this sweet chili delight alongside some fresh-cut vegetables or chips—it’ll be gone before you know it!
With these tips under your belt, I promise you’re going to have everyone raving about your homemade creation! So go ahead—get creative with how you use this sweet chili sauce because every dish deserves a touch of love from this easy-to-make condiment!
Conclusion:
As we wrap up this delightful journey through crafting homemade sweet chili sauce together, I can’t help but feel an overwhelming sense of joy! This recipe isn’t just about mixing ingredients; it’s about embracing flavors that come alive in every bite. With its perfect balance of sweetness and spice, this sauce transforms simple dishes into something truly extraordinary. The aromatic garlic mingles with tangy vinegar and sugar, creating a symphony of flavors that dances on your palate with every dip.
Now let me tell you why making this sauce is a must-try experience—you’ll find joy not only in its taste but also in the process itself. It’s incredibly accessible; anyone can whip up this magic with minimal ingredients and effort! Whether you’re prepping for a cozy night in with friends or adding flair to your next gathering, this sweet chili sauce shines bright on any table. Imagine pulling it from the fridge during an impromptu game night or serving it at a backyard barbecue—the compliments will roll in faster than you can say “homemade!”
And when it comes to pairing suggestions? Just imagine savoring some crispy spring rolls dipped into this luscious sauce or drizzling it over grilled veggies for an afternoon pick-me-up that’s utterly intoxicating. For those who crave indulgence, try slathering it over grilled chicken skewers or using it as a glaze on roasted eggplant—each bite bursting with flavor and warmth!
Feeling adventurous? You could easily customize this recipe by adjusting the heat level—add more red chili flakes if you’re looking for an exhilarating kick! Or perhaps infuse some fresh herbs like cilantro or mint for an aromatic twist that elevates every dish further. This recipe is wonderfully adaptable and encourages creativity; there are endless possibilities waiting for you in your kitchen! So grab those ingredients, get cooking, and don’t forget to share your experiences—I’d love to hear how your homemade sweet chili sauce turns out!
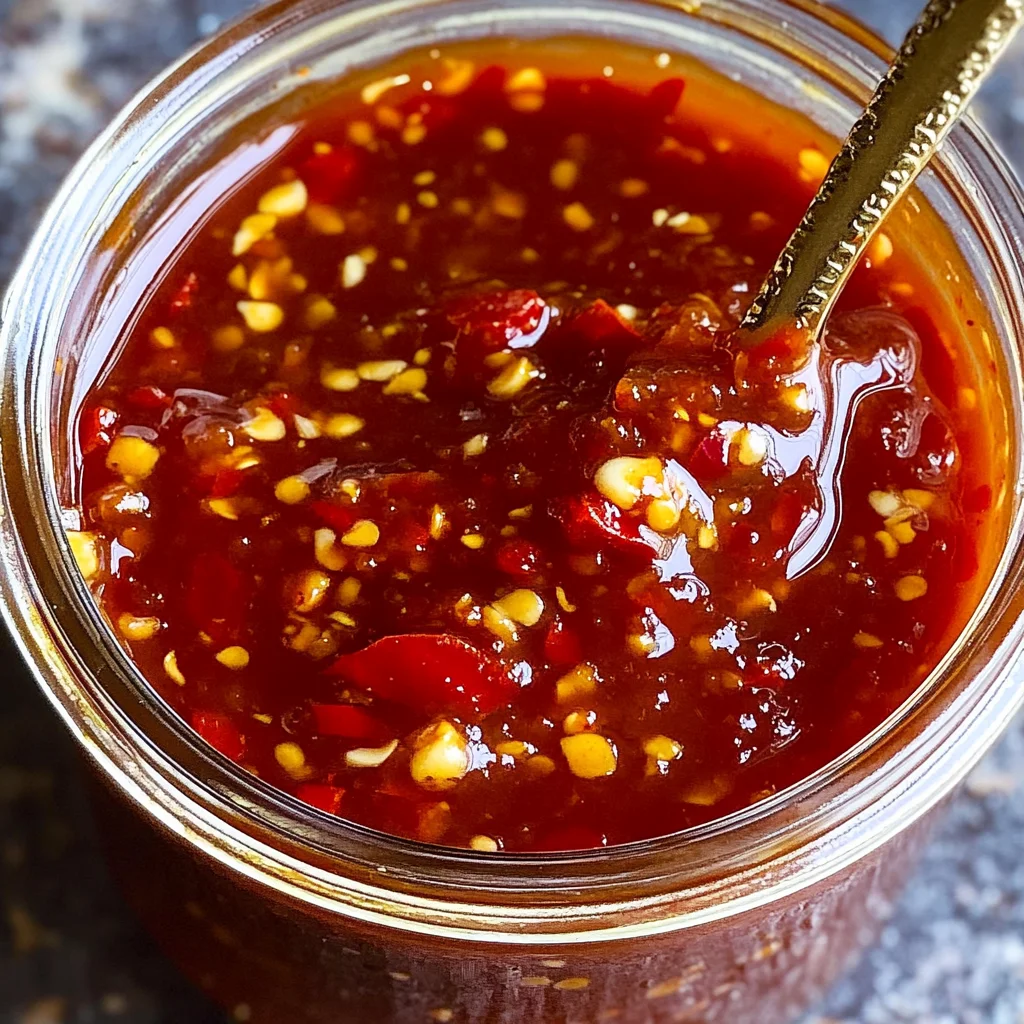
Homemade Sweet Chili Sauce
Homemade Sweet Chili Sauce is a delightful blend of sweet, tangy, and spicy flavors that can elevate any dish. This versatile condiment is perfect for dipping crispy spring rolls, drizzling over grilled vegetables, or adding a zing to salads. With simple ingredients like rice vinegar, sugar, and garlic, you can easily whip up this sauce in your own kitchen, allowing you to adjust the sweetness and heat to suit your taste.
- Prep Time: 10 minutes
- Cook Time: 10 minutes
- Total Time: 20 minutes
- Yield: About 12 servings 1x
- Category: Condiment
- Method: Sauce making
- Cuisine: Thai
Ingredients
- 1/2 cup rice vinegar (or white grape juice vinegar)
- 1/2 cup water
- 1 cup white sugar
- 1 tablespoon minced garlic
- 1 tablespoon light soy sauce (or coconut aminos)
- 4 teaspoons red chili flakes
- 3 teaspoons corn starch
- 2 tablespoons water (for slurry)
Instructions
- In a small bowl, mix the cornstarch with 2 tablespoons of water until smooth.
- Toast red chili flakes in a medium saucepan over medium heat for about 3 minutes until fragrant.
- Add rice vinegar, water, sugar, minced garlic, and soy sauce to the saucepan. Stir gently.
- Bring the mixture to a boil while stirring occasionally for about 4 minutes.
- Reduce heat and slowly add the cornstarch slurry while whisking continuously until thickened.
- Remove from heat and let cool before transferring to an airtight container.
Nutrition
- Serving Size: 1 tablespoon
- Calories: 50
- Sugar: 12g
- Sodium: 90mg
- Fat: 0g
- Saturated Fat: 0g
- Unsaturated Fat: 0g
- Trans Fat: 0g
- Carbohydrates: 13g
- Fiber: 0g
- Protein: <1g
- Cholesterol: 0mg