Peach and Blueberry Crisp
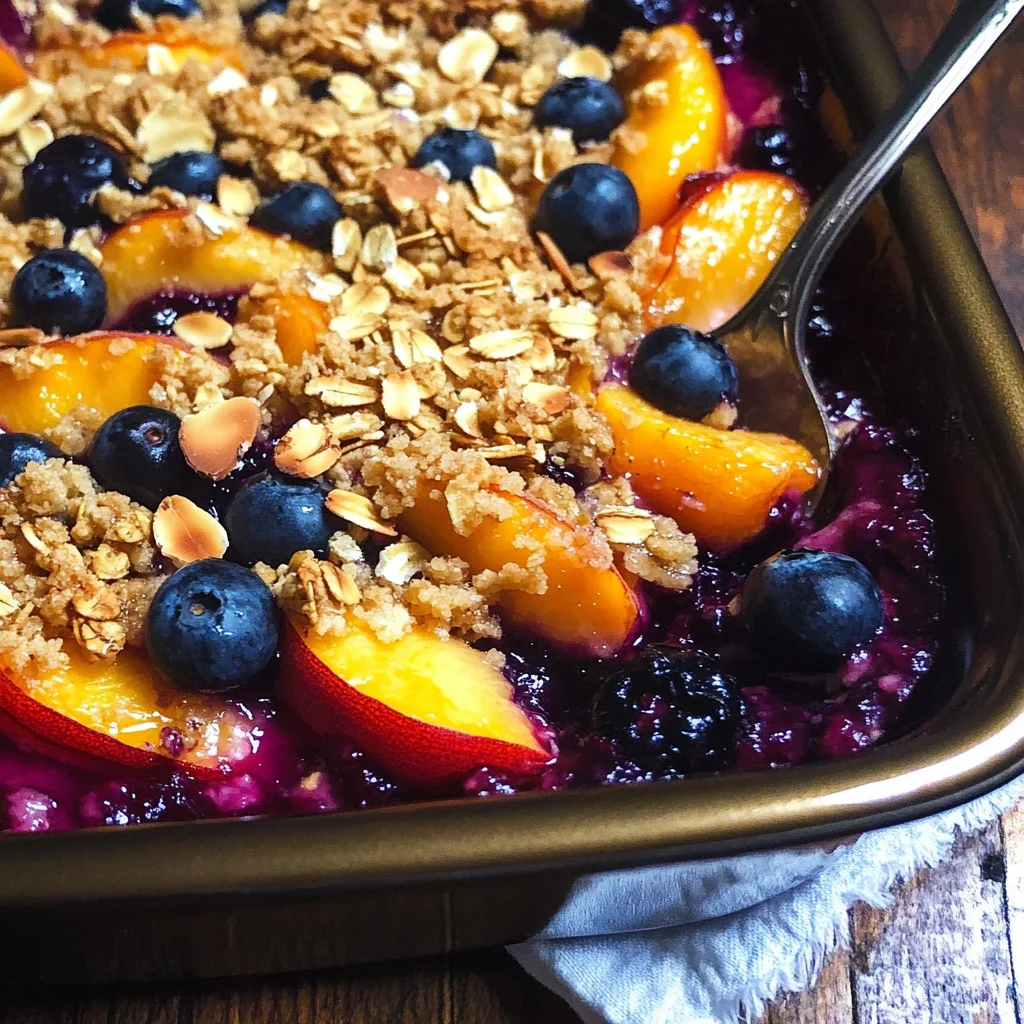
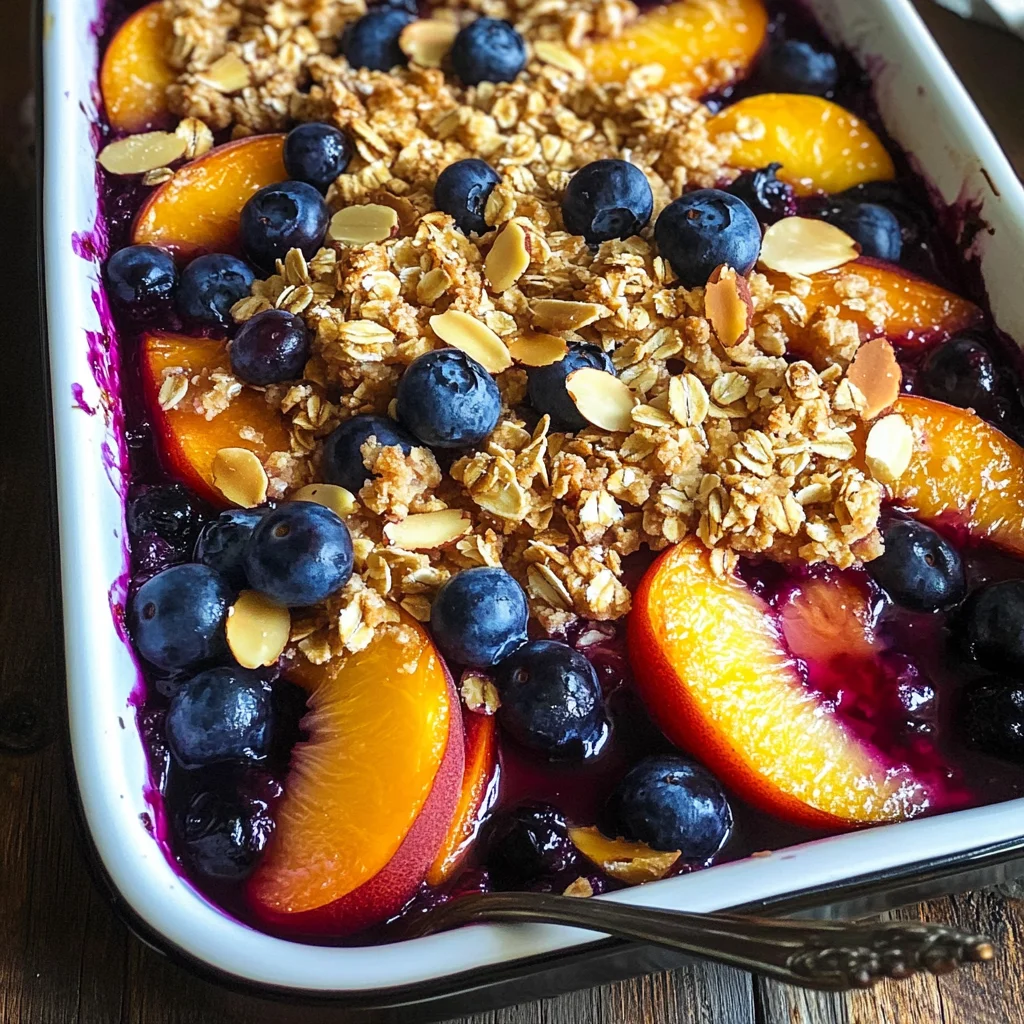
There’s something utterly magical about a fresh Peach and Blueberry Crisp that transcends mere dessert; it’s an invitation to gather around the table, share stories, and create lasting memories. The warm aroma of baked peaches mingling with the sweet tang of blueberries fills your kitchen, wrapping you in a comforting embrace as if summer itself has decided to linger just a little longer. Each spoonful is a delightful symphony of flavors and textures: the tender fruit beneath a golden, crunchy topping that sings of oats and almonds. Trust me, this is more than just food; it’s a celebration of everything that makes summer special. And what’s even better? This Peach and Blueberry Crisp is incredibly easy to whip up, allowing you to savor the sweetness of the season without spending hours in the kitchen.
As you embark on this culinary adventure, imagine yourself surrounded by loved ones, laughter echoing through the air as you serve up warm bowls of this crisp topped with a scoop of your favorite ice cream or perhaps a dollop of whipped coconut cream. I’ve always been captivated by how simple ingredients can come together to create something truly extraordinary, and this recipe captures that essence beautifully. The balance between the juicy fruit and the crunchy topping creates an experience that is profoundly satisfying. So grab your apron! Let’s dive into making this delightful Peach and Blueberry Crisp together.
Peach and Blueberry Crisp: A Summer Dream Come True
Calling all fruit lovers! This Peach and Blueberry Crisp is not just a dessert; it’s an ode to summer itself. With its vibrant colors and tantalizing flavors, it beckons you to enjoy those sun-drenched days when peaches are at their peak ripeness and blueberries burst with sweetness. This recipe marries the tartness of blueberries with the fragrant juiciness of peaches in perfect harmony—each bite transports you right to a sunny orchard. Plus, its simplicity means it’s approachable for cooks at any level, making it perfect for family gatherings or quiet evenings at home.
Ingredients:
As we get ready to explore this delightful recipe, let’s take a moment to appreciate each ingredient that plays its part in crafting this delectable Peach and Blueberry Crisp. Every element brings something unique to the table, so let’s dive deeper into what makes each one essential!
- 4 peaches (cored, unpeeled, sliced into wedges). Fresh peaches are absolutely paramount here—they’re what give our crisp its signature sweetness and juicy texture. When selecting peaches, go for those that are slightly soft to the touch but not mushy; they should have a lovely aroma too! Their skin adds flavor and color to our dish, so there’s no need to peel them—trust me on this! If fresh peaches aren’t available, frozen ones can be used as well; just make sure they’re thawed before adding them.
- 12 oz blueberries. These little gems are bursting with flavor! Their tartness complements the sweetness of the peaches beautifully while also providing vibrant color contrast against the warm tones of baked fruit. I recommend using fresh blueberries whenever possible since they have such a lovely pop when baked—frozen blueberries can work too but might release more moisture than desired.
- 4 tablespoons salted butter (melted). Butter is like liquid gold in baking; it helps create that rich flavor while also contributing moisture to keep our crisp from drying out during baking. Melted butter will combine seamlessly with our dry ingredients for that perfect crumbly topping we’re aiming for.
- 1/2 fresh lemon (squeezed). A splash of lemon juice adds brightness to our crisp—it balances out the sweetness while enhancing both fruits’ natural flavors. It’s remarkable how such a small amount can elevate your dish! Make sure to use fresh lemon juice rather than bottled for maximum freshness.
- 1/3 cup brown sugar. Brown sugar has that deep caramel flavor which pairs perfectly with both peaches and blueberries—it’s like giving your crisp an extra layer of complexity! It also helps retain moisture in our filling, creating luscious pockets of gooey goodness.
- 1 teaspoon vanilla extract. Pure vanilla extract adds warmth and depth—a non-negotiable ingredient in desserts if you ask me! Look for high-quality extracts rather than imitation ones; they contribute significantly to achieving that homemade taste we all crave.
- 1 tablespoon cornstarch. This is crucial for thickening our filling as it bakes—ensuring we don’t end up with a soupy mess underneath all that delicious topping! Cornstarch works wonders by absorbing excess juices without altering flavor.
- 1/4 cup all-purpose flour. Flour brings structure into play here; it combines with other dry elements to form our crispy topping while helping absorb moisture from fruits during baking—this ensures we achieve that perfect crunchy texture on top!
- 3/4 cup oats (old-fashioned rolled or regular or quick). Oats provide heartiness along with chewiness in our topping—they soak up some juices while still keeping their integrity as they bake away into golden perfection! Old-fashioned rolled oats are my personal favorite for their satisfying texture but feel free to use what you have handy.
- 1/2 cup almonds (sliced and toasted). Toasted almonds add an exquisite crunch alongside flavor richness—there’s nothing quite like that nutty taste harmonizing with our fruity filling! Toasting enhances their flavor immensely; just toss them into a dry skillet until fragrant but keep an eye on them; they can burn quickly!
- 1/2 cup brown sugar (for topping). We’ll be using brown sugar again here—it gives us an irresistibly sweet crispy layer on top—a true highlight of any fruit crisp worth its salt!
- 5 tablespoons salted butter (softened not melted). Just like before, softened butter ensures proper mixing without becoming greasy—allowing us to achieve ideal textures in our topping while enhancing flavors throughout!
Equipment You’ll Need:
Before we jump into creating magic in your oven, let’s make sure we have all the right tools at hand! While they might not be ingredients per se, having suitable equipment is essential for smooth sailing—and trust me, cooking should feel like joy rather than frustration!
- Mixing bowls – You’ll need these in various sizes for combining both your filling components as well as your topping mixture seamlessly together without any messes along the way!
- Measuring cups & spoons – Precision matters when baking—it guarantees consistent results each time you make this Peach and Blueberry Crisp! Invest in good-quality measuring tools so measurements are spot-on every time.
- Spatula – A sturdy spatula will help fold ingredients gently without breaking down any delicate fruits—a gentle touch goes far when working with such lovely produce!
- Baking dish (9×13 inches recommended) – A classic choice for crumbles like ours ensures even cooking throughout—the size allows ample room for bubbling juices while also ensuring crispy edges around each corner!
Step 1: Preparing Your Fruit Filling
To start preparing your luscious filling—which is really where all those beautiful flavors begin—you’ll want first to slice those peaches into wedges after coring them carefully. Aim for about eight slices per peach so they cook evenly while still holding their shape during baking; nobody wants mushy fruit here! Once done slicing up those gorgeous fruits (don’t forget about washing them thoroughly!), toss them gently together in one substantial mixing bowl alongside freshly measured blueberries—their vibrant hues already bring life into play within your kitchen atmosphere!
Now comes my favorite part: adding some magic through simple staples like brown sugar sprinkled generously overtop along with squeezed lemon juice plus cornstarch—all vital players here for achieving optimal sweetness balanced out perfectly against tartness present from berries plus thickening agent ensuring ideal consistency emerges post-bake! Use either hands or spatula gently folding everything together until combined nicely—this step aims solely toward coating every piece evenly without mashing anything unnecessarily since we want distinct bites later on too!
Step 2: Crafting That Irresistible Topping
With your fruity masterpiece ready set aside waiting patiently now comes time spent creating decadent crumbly goodness atop everything awaiting its turn inside oven soon after—we’re talking about bringing oats plus toasted almond slices blended seamlessly together alongside remaining flour plus two different sugars before incorporating softened butter next which will bind entire mixture together forming delightful clusters once baked off perfectly golden brown atop luscious layers below waiting patiently below surface eagerly anticipating warmth radiating forth any minute now!
Begin by combining oats along sliced almonds within separate larger bowl so they intermingle nicely then add flour plus sugars mentioned earlier next toward center mixing everything until distributed evenly throughout—it’s okay if clumps form here since variety creates textures upon baking later down line resulting ultimately yielding crunchier bites instead uniformity across board instead giving depth character overall experience enjoyed altogether later shared among family friends alike gathered around table happy enjoying every last morsel offered up lovingly crafted from scratch style love infused deeply within process itself beginning right now today…
Step 3: Assembling Your Crisp Before Baking
Once both filling plus topping have come together beautifully—it’s finally time assemble everything neatly within chosen baking dish ensuring no gaps remain between layers forming solid foundation supporting final baked product once placed hot oven awaiting transformation process begins shortly thereafter leading us closer toward delectable conclusion promised originally upon embarking journey today starting right now easily accomplished home thanks beautiful seasonal produce available locally nearby markets shops alike found everywhere around town filled bursting life offering possibilities endless waiting explore every inch thereof discovering hidden treasures unveiled month after month seasonally changing depending location climate patterns observed closely follow suit adjusting recipes accordingly whenever necessary adapting creativity embracing whatever nature provides gifts freely unconditionally truly celebrating essence summertime spirit shared openly amongst friends families gathered table rejoicing good company surrounding food made hearts happy uplifting spirits instantly recharging souls nourished feeding enjoyment happiness experienced through indulgence sensory delight offered tempting aromas wafting through air promising fantastic feast forthcoming ahead soon…
Step 4: Baking Until Golden Perfection
Now slide everything lovingly prepared previously nestled snugly onto middle rack preheated oven set temperature range between 350°F over course forty-five minutes approximately checking halfway mark lightly browning edges forming suggestive signs readiness coming forth anytime soon just watch closely peeking inside occasionally avoid opening door repeatedly releasing precious heat trapped safely within—I promise result will reward patience shown throughout entire process blending effortlessly showcasing visual appeal inviting everyone nearby come take notice drawn closer wanting partake festivities unfolding right there front row seats awaiting arrival first slice served warm atop bowl accompanied favorite scoop ice cream whether vanilla chocolate anything pleasing palate personally satisfied indulging moments savored shared lovingly among company dear friends gathered round remind ourselves why cooking matters greatly connecting lives through shared experiences joyfully celebrated often lovingly crafted inspired culinary adventures embarked upon journeys beginning today right now forever etched memories cherished held tight forevermore…
Step 5: Preparing the Fruity Filling
Now that you have all your beautiful peaches and blueberries ready, it’s time to create that luscious filling that will be the heart of your Peach and Blueberry Crisp. In a large mixing bowl, take those glorious peach wedges—imagine their soft, sun-kissed flesh—and toss them gently with the freshly squeezed juice from half a lemon. This little squeeze of citrus does wonders; it not only brightens the flavors but also helps to balance the sweetness of the fruit, ensuring every bite is a harmonious blend of sweet and tart. I promise you, the fragrance alone will transport you to a sunny orchard!
Next, add in the blueberries and sprinkle over 1 tablespoon of cornstarch. Why cornstarch, you ask? Well, this magical powder acts as a thickening agent, creating a delightful syrup as the fruit cooks down. It’s essential for achieving that perfect gooey texture without making it soupy. Then, pour in 1/3 cup of brown sugar and 1 teaspoon of vanilla extract; these two ingredients are absolutely paramount in elevating your crisp from delicious to extraordinary. Brown sugar introduces a deep caramel note that complements both fruits beautifully while vanilla adds an aromatic warmth that’s simply irresistible. Gently fold everything together until the fruits are well-coated—be delicate here; we want to preserve those lovely blueberries intact! Once combined, let this mixture sit for about 10 minutes to allow the juices to mingle and develop even more flavor before transferring it into your prepared baking dish.
Step 6: Crafting the Crunchy Topping
While your fruity filling is resting, let’s pivot our focus to crafting that unforgettable crunchy topping—trust me when I say this is what takes your Peach and Blueberry Crisp over the top! In another mixing bowl, combine 3/4 cup of old-fashioned oats (or quick oats if you prefer), 1/4 cup of all-purpose flour, and 1/2 cup of sliced almonds that you’ve thoughtfully toasted ahead of time. Toasting almonds brings out their nutty essence; it’s like awakening their full potential, giving your crisp an utterly intoxicating depth of flavor.
Now comes the fun part! Pour in those 5 tablespoons of softened butter—not melted but softened—along with another 1/2 cup of brown sugar. You want this topping to have a crumbly yet cohesive texture that gets delightfully crispy in the oven. Using your fingers or a pastry cutter (if you’re feeling fancy), mix everything together until it resembles coarse crumbs. This step is crucial because it ensures each bite has that satisfying crunch we all adore while still holding together beautifully when baked. As you work this mixture with your hands, feel free to channel all your love for baking into it—each crumb will carry that warmth right into your finished dish!
Step 7: Bringing It All Together
With both components beautifully prepared—the fruity filling brimming with flavor and that tantalizing topping ready to crown it—you’re now set to bring everything together for baking. Start by evenly spreading the peach and blueberry mixture into a greased baking dish; I love using an 8-inch square dish for this recipe because it gives just the right amount for sharing without leftovers (though who are we kidding? Leftovers would be divine!). Make sure you distribute the fruit evenly, ensuring every corner gets its fair share of those juicy peaches and plump blueberries.
Now, here comes a vital step: generously sprinkle your crunchy topping over the fruit mixture so every bit is covered. This not only creates an enticing visual appeal but also guarantees that each scoop comes with an equal balance of sweet fruit and crunchy goodness—a non-negotiable for any great crisp! Take a moment here to appreciate how vibrant everything looks; those colors alone are enough to make anyone’s mouth water in anticipation. Once you’ve covered all visible fruit with that golden topping, it’s time for our creation to head into a preheated oven at 350°F (175°C) for about 45 minutes. Keep an eye on it during baking; you’ll know it’s ready when the topping turns a beautiful golden brown and starts bubbling around the edges—a sight so rewarding!
Step 8: The Aroma That Fills Your Kitchen
As your Peach and Blueberry Crisp bakes away in the oven, prepare yourself for one of life’s most delightful experiences—the aroma wafting through your kitchen! You might find yourself tempted to peek inside earlier than necessary (I certainly do!), but trust me on this: patience is key here. The longer it bakes, the more those flavors meld together into pure bliss. When you finally pull it from the oven after 45 minutes, allow yourself a moment to revel in its beauty; golden-brown topping juxtaposed against jewel-toned fruits glistening under its buttery crust is nothing short of mesmerizing.
At this point, let’s talk about doneness—your crisp should have bubbles joyously breaking through its surface like tiny bursts of happiness! If you’re uncertain whether it’s done, gently poke at the center with a fork; if it’s soft but not mushy—that’s exactly what you’re aiming for! Another crucial tip: give it some time to cool before serving—about 15-20 minutes will do wonders as it allows everything to settle slightly while transforming from steaming hot dessert into something beautifully scoopable without losing structure.
Final Touches: Serving Your Masterpiece
Now comes my favorite part: serving up this masterpiece! After allowing it some time to cool just enough so no one burns their tongue (though I may or may not have done this many times out of sheer anticipation), grab some bowls or plates—whatever suits your fancy—and serve generous scoops alongside creamy vanilla ice cream or coconut whipped cream if you prefer dairy-free options. The warm Peach and Blueberry Crisp contrasts gloriously with cold toppings; it’s like embracing summer sunshine while enjoying winter warmth wrapped up in one dish.
As you dig in with friends or family gathered around—sharing stories or laughter—you’ll find that every bite resonates deeper than simple ingredients could convey alone; there’s magic in homemade food made with passion and love. I guarantee they’ll be begging for seconds—or maybe even thirds—and who could blame them? With each spoonful bursting with juicy fruit complemented by crunchy oat topping layered beneath buttery goodness… Oh dear friend, you’ve created something truly special here! So go ahead; indulge without reservation because life’s too short not to savor these moments together over something as delightful as Peach and Blueberry Crisp!
Storage and Enjoyment Tips for Your Peach and Blueberry Crisp
Now that your Peach and Blueberry Crisp is golden and bubbling, it’s time to dig in! The aroma wafting through your kitchen is simply irresistible, and I promise you, the first spoonful will be a revelation. But what happens when you have leftovers? Don’t worry; your delightful creation can still bring joy long after it’s fresh out of the oven. Let’s talk about how to keep this deliciousness alive!
Storing Leftover Peach and Blueberry Crisp
To ensure every bite of your Peach and Blueberry Crisp remains a taste of summer sunshine, store any leftovers in an airtight container. This keeps the crisp topping from becoming too soggy while allowing the flavors to meld beautifully. You can keep it in the refrigerator for about 3-4 days, but trust me when I say that it hardly lasts that long in my house! If you’re looking for a little pro tip, consider placing a slice of bread in the container with your crisp—this helps maintain moisture without sacrificing that lovely crunch. While the texture might change slightly after storage, the flavor only gets better as those sweet peach and blueberry notes deepen. When you’re ready to indulge again, simply reheat individual portions in the microwave or pop them back in a warm oven until heated through. It’s like bringing a piece of summer back to life!
Freezing Components for Later
If you’ve made a big batch (and why wouldn’t you?), freezing components of your Peach and Blueberry Crisp is an excellent way to enjoy this treat on a whim! Start by letting your crisp cool completely before transferring it to a freezer-safe container or tightly wrapping it in plastic wrap followed by aluminum foil. When stored properly, it can last up to three months in the freezer without losing its charm. When you’re ready for a comforting dessert experience, you can bake it straight from frozen—just add a few extra minutes to the baking time. Imagine pulling this beauty out of your freezer on a chilly day; it’s pure convenience wrapped in nostalgia! There’s something so rewarding about having this delightful dessert readily available at any moment, isn’t there?
Peach and Blueberry Crisp
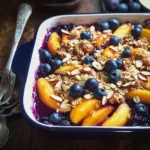
Peach and Blueberry Crisp is a delightful summer dessert that perfectly captures the essence of warm, sun-soaked days. With juicy peaches and sweet blueberries baked under a golden, crunchy topping of oats and almonds, each spoonful offers a satisfying blend of flavors and textures. This easy-to-follow recipe is not only a celebration of seasonal fruits but also an invitation to gather with loved ones, making memories over delicious food. Whether served warm with a scoop of ice cream or enjoyed on its own, this crisp is sure to become your go-to summer treat.
- Prep Time: 15 minutes
- Cook Time: 45 minutes
- Total Time: 1 hour
- Yield: Serves about 6 people 1x
- Category: Dessert
- Method: Baking
- Cuisine: American
Ingredients
- 4 peaches (cored, unpeeled, sliced into wedges)
- 12 oz blueberries
- 4 tablespoons salted butter (melted)
- 1/2 fresh lemon (squeezed)
- 1/3 cup brown sugar
- 1 teaspoon vanilla extract
- 1 tablespoon cornstarch
- 1/4 cup all-purpose flour
- 3/4 cup oats (old-fashioned rolled or quick)
- 1/2 cup almonds (sliced and toasted)
- 1/2 cup brown sugar (for topping)
- 5 tablespoons salted butter (softened not melted)
Instructions
- Preheat your oven to 350°F (175°C).
- In a mixing bowl, combine sliced peaches and blueberries. Add lemon juice, brown sugar, cornstarch, and vanilla extract. Gently fold until the fruits are well coated.
- Transfer the fruit mixture into a greased baking dish.
- In another bowl, mix oats, flour, toasted sliced almonds, melted butter, and an additional brown sugar until crumbly.
- Evenly sprinkle the topping over the fruit mixture.
- Bake for about 45 minutes or until the topping is golden brown and bubbly around the edges.
- Allow to cool slightly before serving for best texture.
Nutrition
- Serving Size: 1 cup (200g)
- Calories: 290
- Sugar: 22g
- Sodium: 150mg
- Fat: 12g
- Saturated Fat: 5g
- Unsaturated Fat: 7g
- Trans Fat: 0g
- Carbohydrates: 42g
- Fiber: 5g
- Protein: 4g
- Cholesterol: 20mg