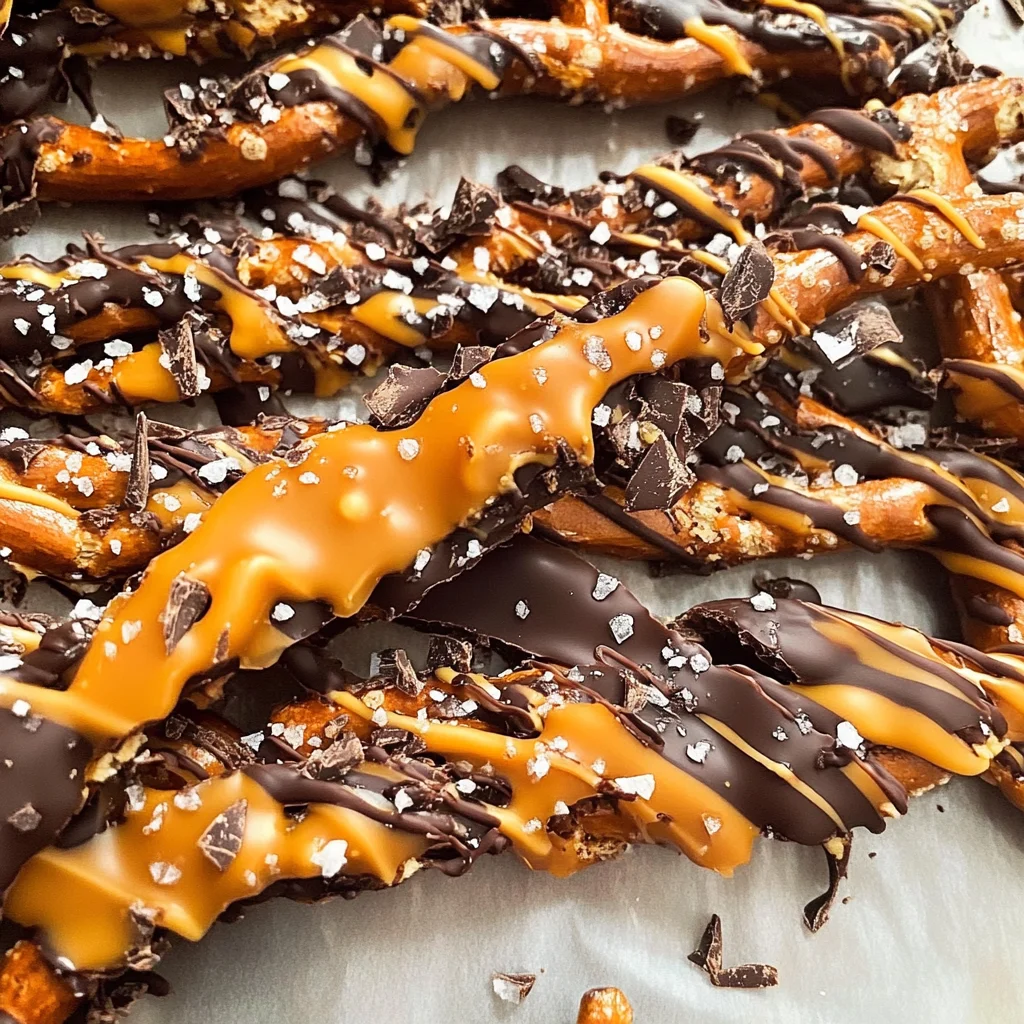
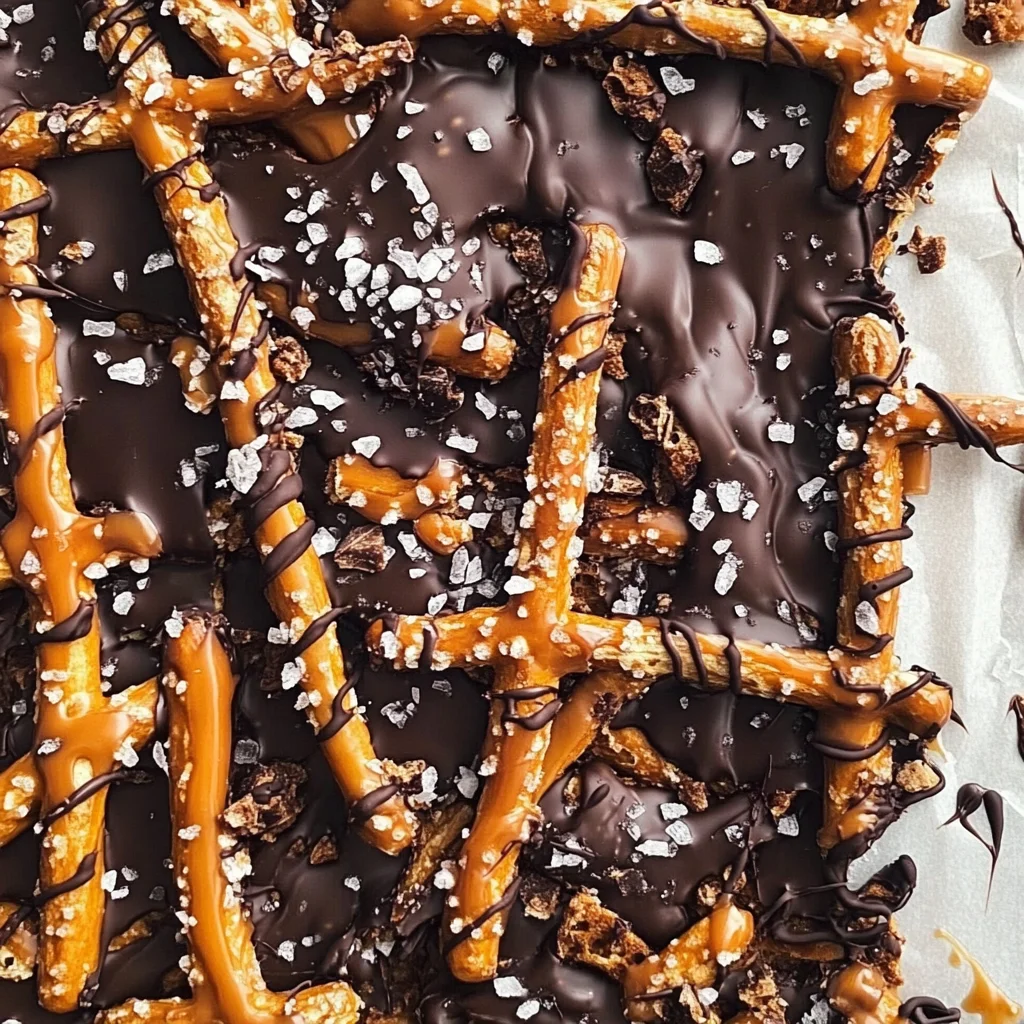
Salted Caramel Pretzel Bark
There’s something undeniably magical about the combination of sweet and salty, isn’t there? It’s as if each bite of Salted Caramel Pretzel Bark is a celebration of flavor, drawing you in with its rich, buttery caramel that envelops crunchy pretzel sticks—each mouthful an invitation to indulge. As I stand in my kitchen, the warm aroma of melting butter mingling with the sweetness of brown sugar fills the air, transporting me back to cherished moments spent with friends and family. This recipe is more than just a no-bake dessert; it’s a delightful symphony of textures and flavors that dances on your palate and ignites a deep sense of nostalgia. I promise you, once you experience this treat, it will become a cherished staple in your own culinary repertoire.
The beauty of Salted Caramel Pretzel Bark lies not only in its divine taste but also in its simplicity. With just a handful of ingredients and minimal effort, you can create something that feels truly special—perfect for gatherings or simply to satisfy that sweet tooth craving after a long day. This recipe speaks to the heart of home cooking: taking humble ingredients and transforming them into something extraordinary. Trust me when I say that every piece is like an edible hug—comforting and heartwarming. So let’s dive into this wonderful journey together!
Salted Caramel Pretzel Bark: A No-Bake Delight
Prepare yourself for an incredibly rewarding experience as we embark on making this irresistible Salted Caramel Pretzel Bark together! The crunchiness of pretzels meets the gooeyness of caramel in this delightful snack that’s perfect for any occasion. Whether you’re gathering with friends or simply treating yourself, this bark will surely shine.
Ingredients:
As we start our culinary adventure, let’s take a moment to appreciate the ingredients that will come together to create this luscious treat. Each one plays a pivotal role in achieving that perfect balance of flavors and textures.
- 4 cups pretzel sticks. These crunchy little gems are integral to our recipe. They provide not only texture but also a delightful contrast to the rich sweetness of our caramel. Stick pretzels work best because their shape allows for even coating and better distribution throughout the bark. When you bite into them, you’ll be greeted by that satisfying crunch followed by the decadent caramel—a truly joyous experience!
- 1 cup (2 sticks) unsalted butter, melted. Butter is where our journey begins! This golden liquid serves as the base for our salted caramel, creating a rich and creamy texture that’s absolutely essential for binding everything together. Unsalted butter gives us control over the saltiness in the final product, allowing us to balance flavors perfectly without an overpowering salty punch.
- 1 cup packed brown sugar. This ingredient is crucial for developing that deep caramel flavor we all adore. When heated, brown sugar melts into luscious pools of liquid gold, infusing our bark with its wonderfully sweet and slightly molasses-like notes. Be sure to pack it tightly into your measuring cup; this ensures we get all those delicious flavors without missing a drop!
- 1/2 cup granulated sugar. While brown sugar brings richness, granulated sugar adds sweetness without overwhelming other flavors—it’s like bringing harmony into our mixture! Together with brown sugar, these two sugars meld beautifully during cooking to create velvety caramel.
- 1 teaspoon vanilla extract. This simple addition elevates our bark to new heights! Vanilla extract enhances all the other flavors without stealing the spotlight—think of it as adding depth and warmth to our creation.
- 1 cup semi-sweet chocolate chips, melted for drizzling. Chocolate is always a welcome guest at any party! Here, semi-sweet chocolate provides just the right amount of richness while complementing both sweet and salty components wonderfully. Melting it creates a smooth drizzle that’s visually appealing as well as deliciously enticing.
- Sea salt, to taste. This is where we finalize our masterpiece! A sprinkle of coarse sea salt over the top not only enhances the flavor but also adds a beautiful finish—each grain sparkling like tiny diamonds against our glossy chocolate surface.
Now that we’ve gathered our ingredients, we’re prepared to create something truly extraordinary!
Equipment You’ll Need:
Before we jump into action, let’s make sure we have all the right tools at hand—having these essentials will make your baking process smoother and much more enjoyable!
- Medium saucepan – A sturdy medium saucepan is essential for making your salted caramel sauce smoothly without burning anything along the way. Look for one with thick walls; this helps distribute heat evenly so your sugars melt beautifully without turning too dark too quickly.
- Mixing bowl – You’ll need a large mixing bowl where you can combine those sweet ingredients comfortably! Opt for one made from glass or stainless steel because they retain heat better when mixing hot ingredients like melted butter and sugar.
- Rubber spatula – This versatile tool will help you scrape every last bit of goodness out from your mixing bowl when combining your ingredients or pouring out your warm caramel sauce into your pretzels! A rubber spatula will ensure nothing goes wasted while being gentle enough not to scratch any non-stick surfaces.
- Baking sheet lined with parchment paper – Using parchment paper prevents sticking while providing ease when removing your finished bark from its mold later on! It’s crucial because nobody wants their labor of love ruined by stubborn bits stuck on their baking sheet!
With everything prepped and ready to go, let’s get started on preparing our Salted Caramel Pretzel Bark!
Step 1: Melting Butter & Combining Sugars
First things first—let’s melt that unsalted butter! In your medium saucepan over low heat, add in 1 cup (or two sticks) of butter until it’s completely melted down to liquid form—a process known as gentle melting. It’s absolutely paramount not to rush here; maintaining low heat allows us full control over how quickly it transforms without burning or browning prematurely—avoiding bitter notes later on is key! Once melted, stir in both types of sugar: 1 cup packed brown sugar followed by ½ cup granulated sugar until combined beautifully into what resembles an inviting pool of liquid sunshine!
As you stir continuously over medium-low heat (this keeps things moving), you’ll notice how quickly those sugars dissolve into harmony with each other—the transformation from granulated crystals into syrupy goodness happens fast! Keep an eye on it; once everything bubbles joyously together—and trust me when I say bubbles mean magic—you’ll want to allow it simmer gently for about 3 minutes until it’s thickened slightly but still glossy enough not to strain itself too much under pressure.
Step 2: Adding Vanilla & Pouring Over Pretzels
Once you’ve achieved that lovely bubbling state after three patient minutes (you know it’s ready when it coats the back of your spatula), turn off heat immediately before adding 1 teaspoon vanilla extract straight away! The moment vanilla enters this fragrant mix—it releases an intoxicating aroma reminiscent almost like freshly baked cookies wafting through your home—such blissful notes arise as soon as they mingle together within those bubbling pools below!
Next comes one exhilarating moment—pouring this sticky delight directly over 4 cups prepared pretzel sticks laid out flat across your lined baking sheet awaiting their fate patiently beneath glistening drizzles formed above them—make sure every single stick gets coated evenly so no one misses out on enjoying its heavenly embrace later down the line!
Step 3: Spreading It All Evenly
Using your trusty rubber spatula again takes center stage here (it really does earn its keep!). Gently fold everything until each pretzel feels dressed appropriately in golden goodness before spreading them out evenly across your baking sheet—they should be nestled comfortably among each other without overcrowding entirely so they can cool off properly later on!
This step requires care; don’t rush it because ensuring even coverage translates directly into uniform bites later down during sampling time—we want everyone experiencing harmonious flavors throughout every morsel enjoyed without exceptions made at any point during tasting sessions ahead!
Step 4: Drizzling Chocolate
After achieving glorious coverage over those lovely pretzels beneath luscious caramel glory—we can’t forget about chocolate now can we? Melt down 1 cup semi-sweet chocolate chips either using microwave-friendly containers or double boiler methods depending upon preferences available toward achieving smooth silky drizzles above already laid foundations established earlier—we’re aiming here for ribbons flowing artfully across them making mouthwatering patterns left behind afterward so patience reigns supreme during melting times involved here too until desired consistency achieved entirely!
Using another clean rubber spatula or spoon carefully drizzle away atop perfectly set-up creations waiting patiently below—but watch closely how pretty shapes unfold & twirl throughout make hearts flutter immediately upon sight itself…isn’t food art simply wondrous?
And just like that—the process continues onward toward ultimate satisfaction guaranteed once cooled adequately allowing indulgence time soon thereafter arrives before anyone can resist temptation lingering nearby beckoning eagerly towards sampling fresh-made masterpieces before evening festivities kick-off officially announcing big reveal moments coming forth soon enough alongside friends/family around kitchen spaces filled laughter everywhere accompanied joyous memories shared forevermore by means crafted lovingly through these hands creating such deliciousness altogether…
Stay tuned as we wrap up our steps shortly—I promise it’s worth every minute spent crafting incredible treats designed solely meant bring smiles across faces everywhere enjoyed alike lasting impressions made everlasting memories formed anew each bite tasted thereafter guaranteed!!
Step 5: Creating the Caramel Bliss
With your pretzel base eagerly awaiting its delicious topping, it’s time to turn our attention to the pièce de résistance: the salted caramel. This isn’t just any caramel; it’s a luscious blend of buttery sweetness that will elevate your Salted Caramel Pretzel Bark to dizzying heights of flavor. Begin by melting 1 cup of unsalted butter in a medium saucepan over medium heat. As the butter transforms into a liquid gold, you’ll notice its lovely, creamy aroma filling your kitchen—this is when the magic starts! Once melted, add 1 cup of packed brown sugar and ½ cup of granulated sugar. Stir continuously with a wooden spoon or a silicone spatula, ensuring that the sugars dissolve completely into the buttery goodness.
Now, here comes the fun part: bring this mixture to a gentle boil! Keep stirring as it bubbles away for about 3-5 minutes until it thickens slightly and turns a warm, golden hue. This step is crucial because boiling helps to develop that deep, caramelized flavor we all crave. You’ll know it’s ready when it begins to bubble vigorously and has a smooth texture without any graininess from undissolved sugar. Trust me on this—resist the temptation to skip this boiling phase; it’s what gives our bark that profoundly satisfying depth of flavor. After about 5 minutes, take the saucepan off the heat and stir in 1 teaspoon of vanilla extract for an extra layer of warmth in your caramel sauce, then let it cool for just a moment before pouring it over those pretzels.
Step 6: Pouring on the Goodness
Once your beautiful caramel reaches that velvety perfection, it’s time to pour it over your pretzel sticks! This is where things get delightfully messy—and deliciously exciting! Gently drizzle or pour the warm caramel over the pretzels while they’re still in their lined baking dish. You want every pretzel stick to be generously coated with this sweet elixir, so don’t be shy! Use a spatula to spread any remaining caramel evenly across the surface if necessary. The contrast between the crunchy pretzels and the gooey caramel is simply mouthwatering at this stage; watch as that beautiful golden syrup oozes into every nook and cranny.
Now, allow this masterpiece to sit undisturbed for about 10-15 minutes at room temperature, which enables all those flavors to meld beautifully together before adding our final touch—the chocolate drizzle! While you wait, take a moment to appreciate how far you’ve come; I promise you’ll be amazed at what simple ingredients can achieve together! But patience is key here; letting the caramel set slightly allows for easier chocolate drizzling later on without everything sliding around like an uncoordinated dance party!
Step 7: The Chocolate Drizzle Extravaganza
Ah, now we arrive at one of my favorite moments—the chocolate drizzle! It adds not only visual appeal but also an utterly intoxicating flavor contrast that brings our Salted Caramel Pretzel Bark together harmoniously. Start by melting 1 cup of semi-sweet chocolate chips using either a microwave or a double boiler—choose whichever method makes you feel most comfortable! If using a microwave, place the chocolate chips in a microwave-safe bowl and heat them in short bursts (about 20 seconds), stirring well after each interval until fully melted and silky smooth.
Once your chocolate is melted and glossy, grab a fork or piping bag (if you’re feeling fancy) and start drizzling that luscious chocolate all over your slightly cooled caramel-covered pretzels. The visual beauty as that dark, rich chocolate cascades down over those golden nuggets is truly something special—it’s like creating edible art! Don’t rush through this step; take your time and make sure every inch gets its share of chocolatey goodness. It’s absolutely paramount for balancing out that saltiness from our pretzels and enhancing every bite with decadent richness.
Step 8: Finishing Touches & Chilling Out
Now comes one of my absolute favorite parts—sprinkling sea salt atop your masterpiece! This final touch is non-negotiable because it transforms your creation from simply tasty to tantalizingly addictive. Grab some flaky sea salt (like Maldon or fleur de sel) and sprinkle just enough over the top so every bite carries that delightful salty crunch against the backdrop of sweet caramel and rich chocolate. It might look like an unassuming detail now, but let me assure you—it’s this contrast that makes everyone beg for seconds!
Once you’ve adorned your creation with salt, it’s time for some patience again—yes, I know waiting can be tough sometimes! Carefully place your baking dish into the refrigerator for at least one hour (but feel free to leave it longer if you can resist temptation). This chilling period allows everything to set beautifully; trust me when I say there’s something magical about biting into chilled salted caramel with crunchy pretzels and dreamy chocolate all wrapped up in one bite. When ready to serve or indulge yourself further down this culinary journey of blissful indulgence, simply lift out your bark using parchment paper and cut into pieces according to your preferred size—small bites for sharing or larger ones for pure indulgence!
Final Touches on Your Salted Caramel Pretzel Bark
As you slice through your chilled creation with anticipation bubbling up inside you, I can almost hear those satisfied gasps from friends around you as they take their first bites. Each piece should reveal layers of salty-sweet perfection—a symphony of flavors dancing on their taste buds! Whether it’s served as an after-dinner treat or packed up as gifts for loved ones (though I won’t tell if you keep some all for yourself!), I promise you’ll find joy not only in making this easy no-bake dessert but also in sharing its delightful essence with others.
And there you have it—your very own Salted Caramel Pretzel Bark brimming with love and warmth straight from my heart to yours! Enjoy every single bite—and remember: cooking isn’t just about feeding ourselves; it’s about creating memories wrapped in flavors we cherish forever!
Storage and Enjoyment Tips for Your Salted Caramel Pretzel Bark
Now that your Salted Caramel Pretzel Bark is ready and looking absolutely divine, you might be wondering how to savor this delightful treat over the coming days. Whether you’re packing it up for a gathering or keeping it on hand for those late-night cravings, store your masterpiece with care to ensure every bite remains just as delicious as the first! I promise you, these tips will help maintain that perfect crunchy-salty-sweet balance that makes this dessert truly extraordinary.
Storing Leftover Salted Caramel Pretzel Bark
To keep your Salted Caramel Pretzel Bark fresh and tasty, the best approach is to store it in an airtight container. This not only protects it from air exposure but also helps maintain its signature crunch. If you can find a container with a tight seal, go for it! Just remember to place it in a cool, dry location away from direct sunlight—your pantry or kitchen cupboard should work perfectly. Under proper conditions, your bark will stay delightful for about a week. However, if you want to keep it even longer without sacrificing quality, consider placing a slice of bread in the container; it’s an old trick that keeps things nice and moist (but not too moist!). After storage, you’ll still enjoy that wonderful contrast between the creamy caramel and crunchy pretzels. When you’re ready to indulge again, simply take out a piece and allow it to come to room temperature; trust me, it’s worth the wait!
Freezing Salted Caramel Pretzel Bark for Later
If you’re planning ahead or just want to stash some away for a rainy day (or any day that ends in ‘y’), freezing your Salted Caramel Pretzel Bark is an excellent option! To do this properly, cut your bark into portions and lay them flat on a parchment-lined baking tray. Freeze them until solid, then transfer the pieces into a freezer-safe bag or container. Make sure you squeeze out as much air as possible before sealing—this is key for preventing freezer burn! You can keep them frozen for up to three months without losing any of their decadent appeal. When you’re ready to experience that salted caramel goodness again, simply pull out what you need and let it thaw at room temperature for about 15-30 minutes. The convenience of having this treat on hand is simply delightful; imagine surprising friends with homemade treats at a moment’s notice or treating yourself after a long day—it’s just fantastic!
Salted Caramel Pretzel Bark
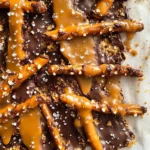
Salted Caramel Pretzel Bark is a delightful no-bake dessert that perfectly balances sweet and salty flavors in every bite. This easy-to-make treat combines crunchy pretzel sticks coated in rich, buttery caramel, drizzled with silky chocolate and sprinkled with sea salt. Whether you’re hosting a gathering or simply treating yourself after a long day, this indulgent bark will satisfy your cravings and become a staple in your dessert repertoire. With just a handful of ingredients and minimal effort, you’ll create an impressive treat sure to bring joy to any occasion.
- Prep Time: 20 minutes
- Cook Time: 10 minutes
- Total Time: 30 minutes
- Yield: Approximately 16 servings 1x
- Category: Dessert
- Method: No-Bake
- Cuisine: American
Ingredients
- 4 cups pretzel sticks
- 1 cup unsalted butter (2 sticks), melted
- 1 cup packed brown sugar
- 1/2 cup granulated sugar
- 1 teaspoon vanilla extract
- 1 cup semi-sweet chocolate chips, melted for drizzling
- Sea salt, to taste
Instructions
- Melt the unsalted butter in a medium saucepan over low heat. Stir in both sugars until fully combined.
- Increase heat to medium-low and let the mixture bubble gently for about 3 minutes until slightly thickened.
- Remove from heat and stir in the vanilla extract.
- Pour the caramel over the prepared pretzel sticks on a lined baking sheet, ensuring even coverage.
- Allow to cool for 10-15 minutes before drizzling melted chocolate over the top.
- Sprinkle with sea salt and refrigerate for at least one hour before cutting into pieces.
Nutrition
- Serving Size: 1 serving
- Calories: 180
- Sugar: 12g
- Sodium: 150mg
- Fat: 9g
- Saturated Fat: 5g
- Unsaturated Fat: 4g
- Trans Fat: 0g
- Carbohydrates: 24g
- Fiber: 1g
- Protein: 2g
- Cholesterol: 15mg