Southern Peach Bread
The smell of freshly baked bread wafting through the house is one of life’s simplest yet profound joys. It’s an aroma that wraps around you like a warm hug, inviting you to slow down and savor the moment. Today, I’m thrilled to share a recipe that embodies all of this and more: Southern Peach Bread. This isn’t just any ordinary quick bread; it’s a luscious blend of juicy peaches, soft texture, and sweet flavor that dances on your palate. Each bite transports you to sun-soaked orchards where the peaches hang heavy on the trees, waiting to be picked at their peak ripeness. I’ve always been captivated by how such humble ingredients can come together to create something utterly intoxicating, making this delightful loaf perfect for breakfast, snacking, or even dessert.
As we dive into this recipe, let me tell you about the heart behind it. Southern Peach Bread is not only a treat for your taste buds; it’s a celebration of summer’s bounty—a time when fresh peaches are abundant and bursting with flavor. This recipe has been passed down through generations in my family, each time lovingly made with the juiciest peaches we could find. The experience of slicing into that golden-brown crust to reveal its soft, moist interior is truly extraordinary. It’s as if each slice holds a story—a memory of laughter-filled gatherings and lazy afternoons spent with loved ones. Whether you’re enjoying it solo with a cup of coffee or sharing it at a picnic, I promise you that this Southern Peach Bread will make any moment feel special.
Southern Peach Bread: A Slice of Summer Joy
Let’s embark on this culinary journey together! Baking isn’t just about following steps; it’s about connecting with the ingredients and creating something beautiful. With simple ingredients and a bit of love, we’ll craft a soft, moist loaf that sings with the sweetness of ripe peaches.
Ingredients:
Before we begin mixing and baking, let’s gather our ingredients—each one plays a vital role in crafting our Southern Peach Bread. From the juicy peaches to the rich sour cream, understanding these elements will elevate your baking experience.
- 1 cup peaches (peeled and diced). The star of our show! Fresh peaches are essential for creating that sweet flavor profile and moist texture we’re after. Look for peaches that yield slightly to pressure; they should be fragrant and vibrant in color—these qualities ensure maximum juiciness and sweetness. If fresh peaches aren’t available, you can substitute them with high-quality canned or frozen peaches, but remember to drain them well to avoid excess moisture in your batter.
- 1/2 cup vegetable oil. This ingredient may seem simple at first glance, but it’s crucial for maintaining moisture in our bread while ensuring a tender crumb. Vegetable oil contributes fat without overpowering flavors—unlike butter—and helps create that delightful softness we love so much in quick breads. If you prefer an alternative, feel free to use melted coconut oil or applesauce for a lighter option.
- 1/2 cup sugar. Sugar not only sweetens our bread but also plays an integral role in creating that lovely golden crust through caramelization during baking. Granulated sugar is what we’re using here because it dissolves easily into the batter and helps achieve that perfect balance between sweetness and acidity from the peaches. You could experiment with brown sugar for a deeper flavor or coconut sugar for a healthier twist!
- 2 eggs. Eggs offer structure and stability to our bread while adding richness as they bind everything together beautifully. Using room temperature eggs is absolutely paramount here; they incorporate more evenly into the batter than cold eggs straight from the fridge, ensuring a smoother consistency overall.
- 1/2 cup sour cream. Ahh, sour cream—this ingredient adds not only moisture but also richness and tanginess that balance wonderfully with the sweetness of our peaches! It helps keep our bread incredibly tender while adding depth to the flavor profile. If you don’t have sour cream on hand, Greek yogurt makes an excellent substitute without compromising texture or taste.
- 1 tsp vanilla extract. Vanilla brings warmth and complexity to our Southern Peach Bread; it enhances all other flavors harmoniously! Always choose pure vanilla extract over imitation for its superior flavor—trust me; it’s worth it!
- 1 1/2 cups all-purpose flour. Flour is what gives our bread structure; however, too much can lead to dryness or dense texture which we definitely want to avoid! When measuring flour, spoon it into your measuring cup instead of scooping directly from the bag—this prevents packing too much flour and getting an inaccurate measurement.
- 1 tsp baking soda. This little powerhouse is what gives our bread lift! Baking soda acts as a leavening agent by reacting with acidic ingredients (like sour cream) which creates carbon dioxide bubbles during baking—resulting in that light fluffy texture we crave!
- 1/2 tsp salt. Salt is often overlooked but serves as an essential seasoning—it enhances sweetness while balancing flavors throughout our bread! A touch of salt amplifies every bite; it’s non-negotiable if you’re aiming for perfection!
Equipment You’ll Need:
Having the right tools on hand will make your baking experience smoother and more enjoyable—think of them as your trusty companions in this delicious adventure! Here are some essentials:
- Mixing bowls – A set of mixing bowls in various sizes will become your best friends during this process! Choose bowls made from glass or stainless steel as they’re sturdy enough for vigorous mixing without worrying about scratching or staining over time.
- Measuring cups & spoons – Accurate measurements are crucial when baking—it ensures consistent results every time! Invest in high-quality measuring cups (both dry & liquid) along with spoons for precise ingredient quantities—trust me; precision pays off!
- Rubber spatula – A good rubber spatula helps scrape every last bit of batter from your mixing bowl effortlessly while ensuring no precious ingredients go to waste! They’re also perfect for folding delicate mixtures without deflating air bubbles—a key component for achieving lightness in baked goods!
- Loaf pans (mini or large) – Depending on how you wish to serve this delightful bread—whether as mini loaves perfect for gifting or one large loaf for sharing—choose durable pans (preferably non-stick) so your bread releases easily after baking without requiring excessive greasing.
Preparing the Southern Peach Bread
Step 1: Preheat Your Oven & Prepare Your Pans
To kick things off properly, preheat your oven to 350°F (175°C)—the ideal temperature for baking quick breads like ours! Preheating ensures even cooking throughout which is crucial when aiming for perfectly baked goodness rather than half-baked centers or burnt edges later on. While that’s happening, grab those mini loaf pans—or one large pan—and give them a good greasing with vegetable oil or non-stick spray so nothing sticks once we pour our luscious batter inside!
Step 2: Combine Your Wet Ingredients
In a medium mixing bowl—preferably larger than you think—you’ll combine those juicy diced peaches along with vegetable oil, sugar, eggs (make sure they’re at room temperature!), sour cream, and vanilla extract until everything blends seamlessly together into what resembles liquid gold! This step is vital because it creates an emulsion; emulsifying allows fats (like oil) & water-based components (like sour cream) to mix harmoniously rather than separating later during baking—the result? A beautifully cohesive batter full of flavor!
Step 3: Whisk Dry Ingredients Together
Next up? Grab another bowl where we’ll whisk together all-purpose flour alongside baking soda & salt until evenly combined—we want these dry components integrated thoroughly before introducing them into our wet mixture later on—not rushing this step prevents clumps forming which could disrupt overall texture within our final product.
Step 4: Fold It All Together
Now comes one of my favorite parts—the magical moment when wet meets dry! Pour those dry ingredients into your wet mixture gradually while using gentle folding motions rather than fierce stirring which might overwork gluten development leading towards undesirable density later down line—we’re aiming for lightness here! As soon as there are no streaks left visible—that’s your cue—you’ve reached perfection without risking overmixing anything further!
Baking should be joyful—and I promise you’ll find blissful satisfaction in creating this Southern Peach Bread from scratch! The anticipation builds as you smell those irresistible aromas filling your kitchen while it bakes… Stay tuned for more steps where we discuss pouring batter into prepared pans and ultimately savoring each slice once cooled just enough beforehand!
The Joy of Baking Southern Peach Bread
Baking is an art form, and as we dive into the next steps of creating our Southern Peach Bread, you’ll find that each phase is not just about following a recipe; it’s about building flavors, textures, and memories. I genuinely believe that cooking should be an experience you savor, so let’s get right into the details that will make this loaf utterly extraordinary!
Step 5: Pouring the Batter Like Liquid Gold
Now that you’ve got your batter beautifully mixed—don’t you just love how those juicy peaches mingle with the other ingredients?—it’s time for the next essential step: pouring it into your prepared pans. This is where the magic truly begins! Grab your greased mini loaf pans or one large loaf pan and gently pour the batter in. As you do this, use a spatula or a spoon to coax every last drop from the bowl. Trust me on this; we want every bit of that peachy goodness in our loaves.
As you pour, take a moment to appreciate the thick, luscious texture of your batter—it should flow smoothly but hold its shape somewhat, like a decadent cake batter. Spreading it evenly is crucial because this ensures uniform baking; if you have one side fuller than the other, you might end up with unevenly cooked bread. An even layer allows for consistent heat distribution throughout the bread as it bakes in the oven. So take your time here; it’s worth it!
Step 6: Baking to Perfection
With our batter poured and smoothed out, it’s time to slide these beauties into the preheated oven. Set your timer for 25-30 minutes if you’re using mini loaf pans or 50-55 minutes for a large loaf. But don’t just rely solely on timing; pay attention to what’s happening inside that oven. As they bake, you’ll notice a delightful aroma wafting through your kitchen—a sweet scent mingling with hints of vanilla and peaches that will make your heart sing.
To test for doneness, insert a toothpick into the center of the loaf after about 25 minutes for mini loaves or around 50 minutes for a large one. If it comes out clean or with just a few moist crumbs clinging to it, congratulations! You’ve achieved what I like to call “the golden moment.” If there’s wet batter on the toothpick, don’t worry—just give them a few more minutes and check again. It’s perfectly normal to adjust baking times based on your oven’s temperament; every oven has its quirks! Stay patient here because underbaking can lead to a soggy middle—a fate I wouldn’t wish on anyone.
Step 7: Cooling – A Crucial Resting Period
Once baked to perfection, remove your loaves from the oven and let them cool in their pans for about 10-15 minutes before attempting to slice into them. This cooling step is absolutely paramount because it allows steam to escape and helps solidify the structure of your bread. Think of it as giving your Southern Peach Bread some well-deserved rest after all that hard work in the oven! It’s tempting to dive right in when you smell that mouthwatering aroma, but trust me—you’ll achieve better slices if you let them sit.
After they’ve cooled slightly in their pans, gently run a butter knife around the edges to help release them before turning them out onto a wire rack. This gentle nudging makes sure you’re not tearing any precious crusts or squeezing out those delightful fruit bits trapped inside! Placing them on a wire rack instead of directly onto plates helps prevent sogginess as air can circulate around them freely.
Step 8: Slicing and Serving – The Grand Reveal
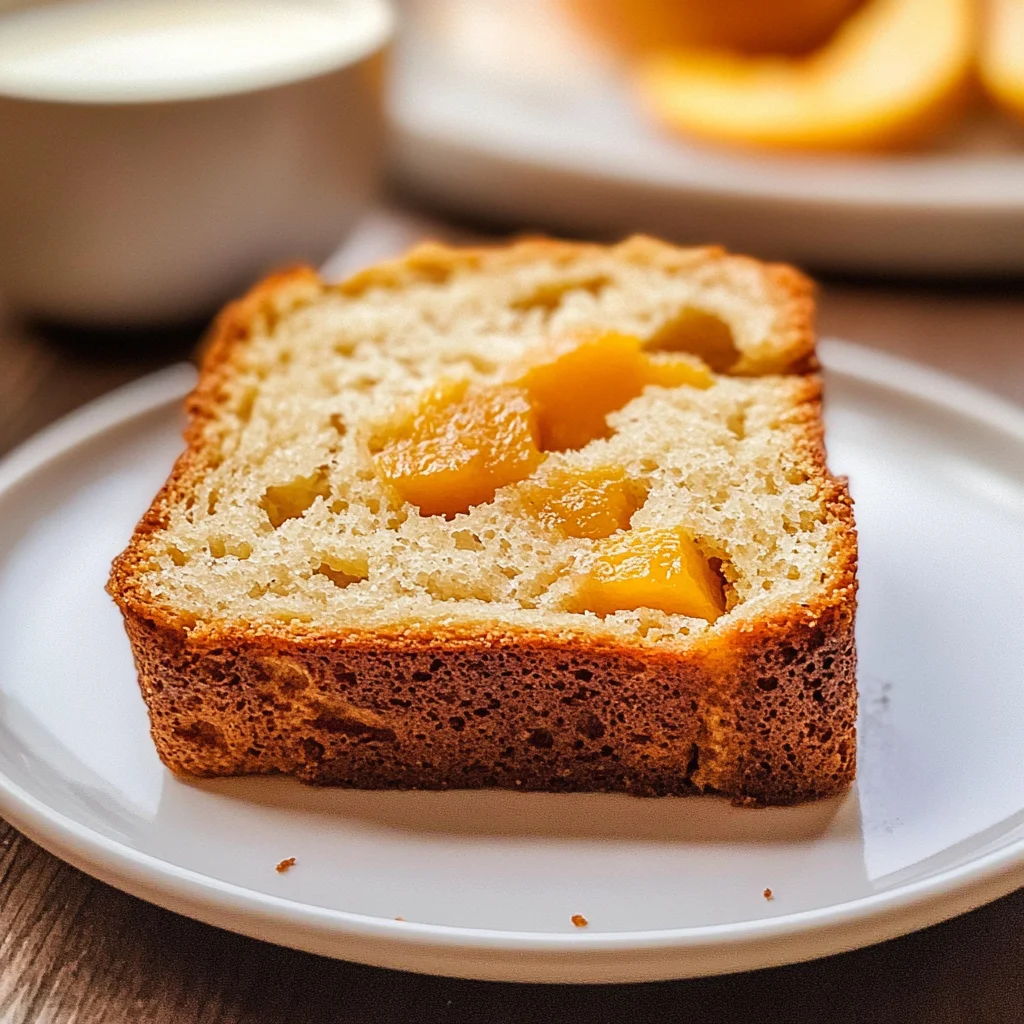
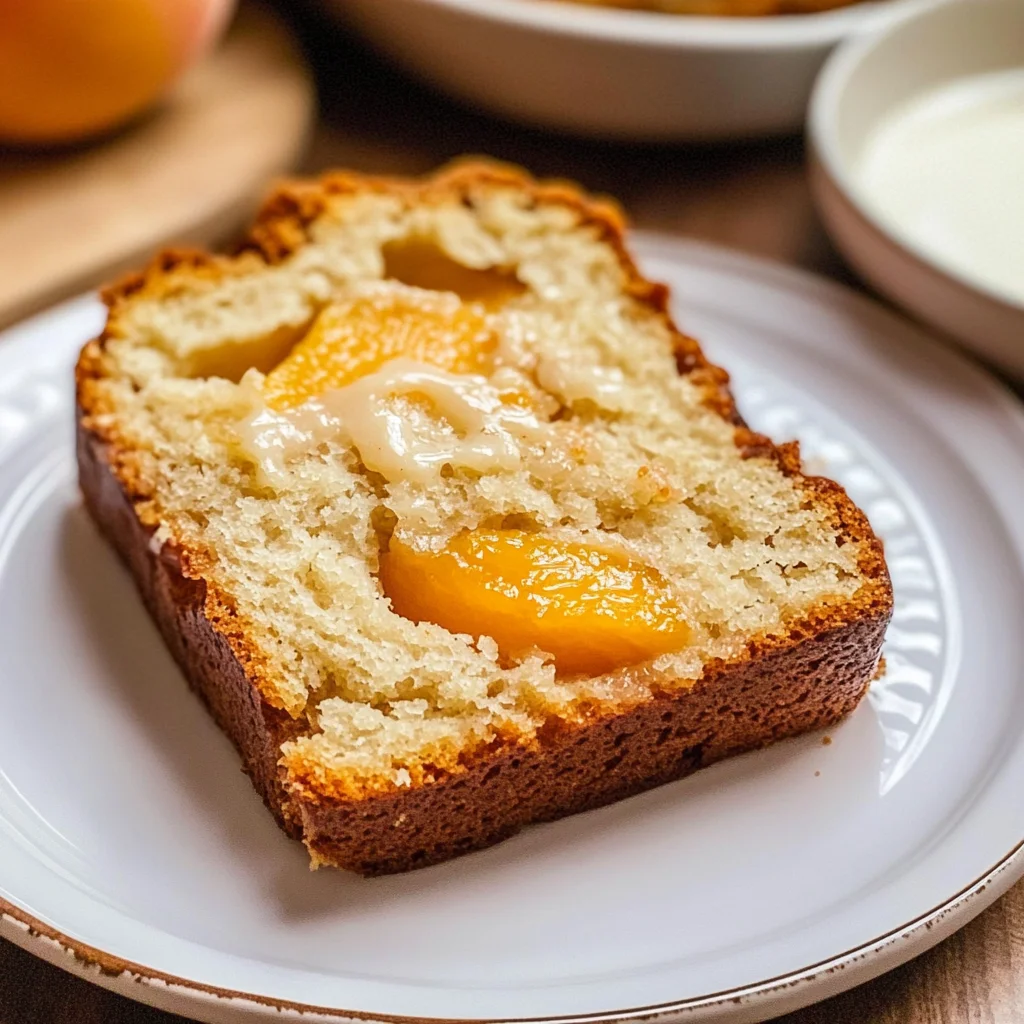
Now comes perhaps my favorite part—the grand reveal! After letting those glorious loaves cool completely (which can feel like an eternity), it’s time to slice into your masterpiece. Grab a serrated knife for clean cuts—this will help maintain that beautiful crumb structure we’ve worked so hard on without squishing everything together.
As you slice through, take note of how effortlessly the knife glides through—the soft, moist interior speckled with bits of juicy peach is simply irresistible! And oh my goodness, when you take that first bite? It’s like tasting summer captured in each slice—a symphony of sweetness balanced by rich vanilla notes and just enough tang from the sour cream.
If you’re feeling extra indulgent (and who wouldn’t?), consider serving warm slices with a dab of vegan butter melting over top or even fresh whipped coconut cream for dessert—now that’s what I call treating yourself! I promise you’ll be left craving more long after those last crumbs disappear.
Final Thoughts: Cherishing Every Bite
So there we have it—your very own Southern Peach Bread ready to be enjoyed at breakfast, as an afternoon snack with coffee, or even as dessert after dinner! Each bite tells a story of warmth and nostalgia, reminding us that food has an incredible way of bringing people together. Don’t forget to share this labor of love with friends and family; they’ll appreciate all your hard work—and they’ll likely want seconds!
I hope this recipe fills your home with joy and delicious scents while creating lasting memories around your table. Happy baking!
Storage and Enjoyment Tips for Your Southern Peach Bread
Now that you’ve created this delightful Southern peach bread, it’s time to revel in its warm, comforting embrace. Whether you slice into it fresh out of the oven or let it cool down to savor later, each bite is a reminder of summer sunshine and sweet, juicy peaches. But what happens if there’s some leftover? Don’t fret! This peachy treasure is just as enjoyable days later, and I’m here to share how you can keep it perfectly moist and delicious for as long as possible.
Storing Leftover Southern Peach Bread
To keep your Southern peach bread fresh and delectable, I recommend wrapping it tightly in plastic wrap or aluminum foil before placing it in an airtight container. This method helps lock in moisture while preventing any unwanted drying out. If stored properly at room temperature, it will maintain its scrumptious flavor for about 3-4 days. However, if you’re like me and want to savor every last bite even longer, consider refrigerating it where it can last up to a week. A pro tip: if you want to enjoy just a slice or two at a time without compromising the whole loaf’s quality, try slicing the bread before storing; this way, you can easily grab what you need without exposing the entire loaf to air every time. And trust me, this peach bread only gets better with time; those flavors meld together beautifully, creating a truly extraordinary experience when you finally take that next bite after storage. For a quick indulgence, pop a slice in the microwave for about 10-15 seconds—just enough to bring back that fresh-baked warmth!
Freezing Southern Peach Bread for Later
If you’re planning ahead or simply want to stock up on this delightful treat for those inevitable snack cravings, freezing is an excellent option! Just make sure the loaf is completely cooled before wrapping it tightly in plastic wrap followed by aluminum foil to prevent freezer burn—this double layer is absolutely paramount for maintaining quality. When frozen properly, your Southern peach bread can last up to three months! When you’re ready to indulge again, simply thaw it overnight in the refrigerator or at room temperature for several hours. You’ll be amazed at how wonderfully it retains its moistness and flavor even after freezing. This convenience factor allows you to have a slice of summer whenever you fancy—whether it’s breakfast on a busy morning or a sweet snack during your afternoon break.
I hope these tips inspire you to enjoy your Southern peach bread fully! It’s all about relishing every moment with this scrumptious creation.
Southern Peach Bread
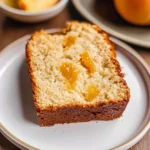
Experience the essence of summer with Southern Peach Bread, a delightful quick bread that captures the sweet, juicy flavors of ripe peaches. This moist and tender loaf is perfect for any occasion—whether enjoyed as a breakfast treat, an afternoon snack, or a dessert.
- Prep Time: 15 minutes
- Cook Time: 50 minutes
- Total Time: 1 hour 5 minutes
- Yield: Approximately 10 servings 1x
- Category: Dessert
- Method: Baking
- Cuisine: American
Ingredients
- 1 cup peaches (peeled and diced)
- 1/2 cup vegetable oil
- 1/2 cup sugar
- 2 eggs (room temperature)
- 1/2 cup sour cream (or Greek yogurt)
- 1 tsp vanilla extract
- 1 1/2 cups all-purpose flour
- 1 tsp baking soda
- 1/2 tsp salt
Instructions
- Preheat your oven to 350°F (175°C) and grease mini loaf pans or one large loaf pan.
- In a medium bowl, combine diced peaches, vegetable oil, sugar, eggs, sour cream, and vanilla extract until well blended.
- In another bowl, whisk together flour, baking soda, and salt.
- Gradually fold the dry ingredients into the wet mixture until just combined; avoid overmixing.
- Pour the batter evenly into prepared pans.
- Bake mini loaves for 25-30 minutes or a large loaf for 50-55 minutes until golden brown and a toothpick comes out clean.
- Allow to cool in pans for 10-15 minutes before transferring to wire racks.
Nutrition
- Serving Size: 1 slice
- Calories: 180
- Sugar: 8g
- Sodium: 95mg
- Fat: 7g
- Saturated Fat: 0.5g
- Unsaturated Fat: 6g
- Trans Fat: 0g
- Carbohydrates: 27g
- Fiber: 1g
- Protein: 3g
- Cholesterol: 35mg