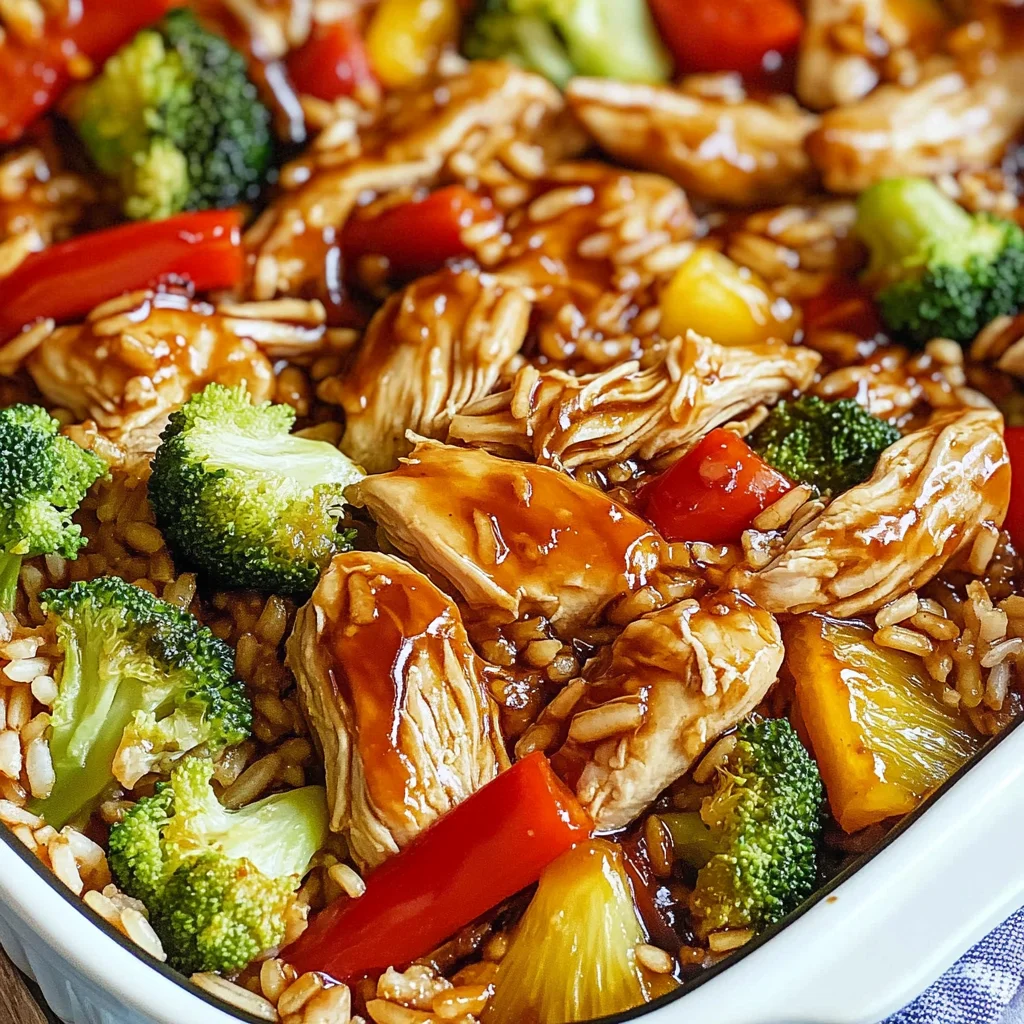
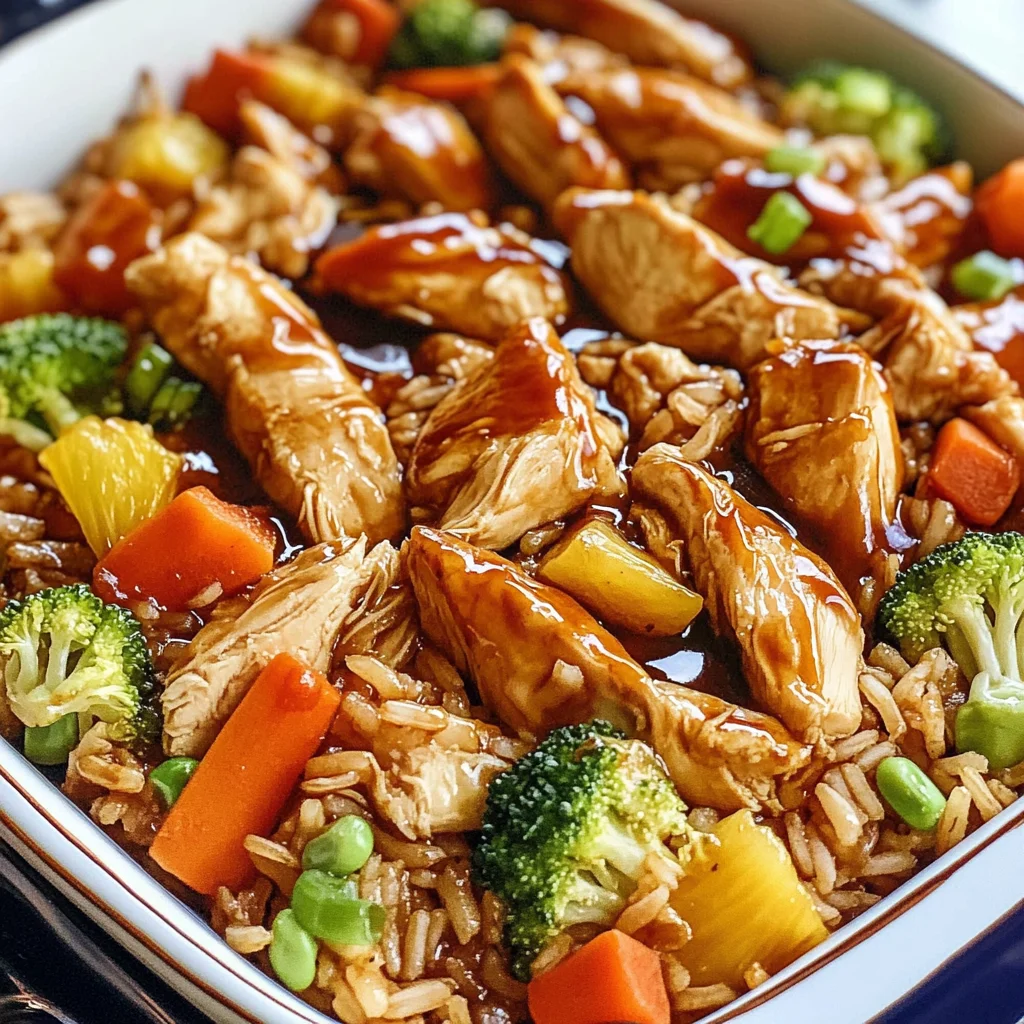
Teriyaki Chicken and Rice Casserole
There’s a certain magic that happens when you step into the kitchen, isn’t there? The way the aroma of sizzling chicken mingles with the sweet notes of teriyaki sauce can instantly transport you to a cozy corner of your home. This Teriyaki Chicken and Rice Casserole is more than just a meal; it’s a comforting embrace that warms your soul. Each bite carries with it the essence of home-cooked love, reminding us of family dinners where everyone gathers around the table, laughter echoing through the air. I promise you, this dish is a celebration of flavors—a harmonious blend of savory and sweet, with juicy chicken, vibrant veggies, and delightful pineapple all nestled together in one hearty casserole.
Imagine cutting into this golden-brown delight, revealing layers of tender chicken and perfectly cooked rice enveloped in a luscious teriyaki sauce that glistens like liquid gold. It’s truly extraordinary how something so simple can evoke such profound satisfaction. The beauty of this recipe lies in its simplicity and versatility; perfect for any occasion—from busy weeknight dinners to laid-back weekend gatherings. So grab your apron, and let’s embark on this culinary journey together—trust me, you’ll be glad you did!
Teriyaki Chicken and Rice Casserole: A Heartwarming One-Pan Wonder
This Teriyaki Chicken and Rice Casserole is an absolute crowd-pleaser! It’s designed for those days when you’re craving something comforting yet full of flavor without spending hours in the kitchen. The combination of succulent chicken, colorful vegetables, and sweet pineapple comes together beautifully under a thick homemade teriyaki sauce that truly elevates every ingredient involved. You’ll find that each spoonful is bursting with umami goodness—just what you need to bring joy to your dinner table.
Ingredients:
As we gather our ingredients for this delicious dish, I want you to feel excited about what these components will bring to our casserole. Each ingredient has its own role in creating that symphony of flavors—let’s dive into what makes them so special!
- 3/4 cup low sodium soy sauce. This ingredient serves as the backbone of our homemade teriyaki sauce, providing that rich umami flavor we all adore. Using low-sodium soy sauce is non-negotiable here; it allows us to control the saltiness while still delivering a bold taste. When shopping for soy sauce, look for brands that are brewed traditionally—they often have more depth in flavor compared to mass-produced versions.
- 1/2 cup water. Water acts as a balancing agent within our teriyaki sauce, helping to dissolve the sugar and blend all those delicious ingredients together seamlessly. It’s essential for achieving the right consistency—not too thick or too thin—creating that luscious glaze we want draping over our chicken.
- 1/3 cup packed brown sugar. This is where the magic happens! Brown sugar adds a deep sweetness that complements the savory elements beautifully while also giving our sauce an appealing caramelized quality as it cooks down. Make sure to pack it firmly when measuring; this ensures you’re getting every bit of sweetness required for our casserole.
- 1 tablespoon honey. Honey brings another layer of sweetness but with floral notes that brown sugar alone can’t provide. Its syrupy texture helps thicken our sauce naturally while adding complexity—plus, who doesn’t love a hint of natural sweetness?
- 3/4 teaspoon ground ginger. Ground ginger introduces warmth and spiciness into our dish—a hallmark of Asian cuisine! It’s important to use fresh spices whenever possible; they retain their potency longer than pre-ground varieties and elevate our dish profoundly.
- 1 teaspoon olive oil. While olive oil may not be traditional in Asian recipes, it offers necessary fat for sautéing garlic and enhances mouthfeel without overpowering other flavors in our casserole. Opting for extra virgin olive oil will provide even more robust flavor.
- 1/2 teaspoon minced garlic. Garlic infuses our teriyaki sauce with aromatic goodness—its pungent bite mellows out as it cooks down into something beautifully fragrant and savory! Freshly minced garlic makes all the difference here; it releases oils that dried garlic simply cannot match.
- 2 tablespoons cornstarch (for slurry). Cornstarch is essential for thickening our teriyaki sauce; it transforms from fine powder into a smooth slurry that gives body to our mixture without altering its flavor profile significantly. Always mix cornstarch with cold water first before adding it to hot liquids—this prevents clumping!
- 2 tablespoons water (for slurry). Just like before, this water works hand-in-hand with cornstarch to create that perfect slurry consistency we need for thickening up our sauce effortlessly.
- 1.5 pounds boneless skinless chicken breasts. Chicken breasts are lean yet juicy when cooked properly; they soak up flavors beautifully from our homemade teriyaki sauce while remaining tender throughout baking! Ensure you select high-quality poultry for optimal taste.
- 32 oz frozen mixed vegetables (unsauced Asian varieties). These colorful veggies add texture and nutrition without requiring any additional prep time—they cook perfectly alongside everything else! Look for blends featuring snap peas or bell peppers—they add crunch against softer textures like rice and chicken.
- 1 cup pineapple tidbits (drained, packed in juice). Pineapple brings vibrant sweetness paired with acidity—it cuts through richness while adding bright notes! Be sure to drain them well before adding them into your casserole so excess liquid doesn’t dilute your dish!
- 3 cups cooked brown rice. Brown rice provides whole grains along with nutty flavor compared to white rice—it’s heartier too! Cooking it ahead allows us quick assembly later on while ensuring even distribution across layers within our casserole.
Equipment You’ll Need:
Having the right tools at your disposal makes preparing this Teriyaki Chicken and Rice Casserole not just easier but also much more enjoyable! Let’s gather some trusty partners that will help us create something wonderful together.
- 9×13-inch casserole dish – This size is perfect for holding all your ingredients together comfortably without spilling over while baking evenly throughout! If you don’t have one handy, any large baking dish will do—the key is ensuring enough space for everything.
- Small saucepan – A reliable saucepan will be instrumental in cooking down your teriyaki sauce until thickened just right—it should hold heat evenly so nothing burns on one side while cooking!
- Mixing bowl – You’ll need this bowl primarily for combining cornstarch with water into slurry form before incorporating it into hot liquids—it ensures smoothness without lumps forming somewhere down the line!
- Measuring cups and spoons – Accurate measurements are fundamental when crafting flavorful dishes like ours! Investing in good-quality measuring tools saves time guessing amounts which could lead towards disappointment later on…
Preparing the Teriyaki Chicken and Rice Casserole
Step 1: Crafting Your Homemade Teriyaki Sauce
Start by gathering all those fragrant ingredients we just talked about! In a small saucepan over medium heat—combine the low sodium soy sauce, half a cup of water, packed brown sugar, honey, ground ginger, olive oil, and minced garlic together gently stirring until all sugar dissolves completely into syrupy blissfulness—that initial whiff will be utterly intoxicating! Once combined well enough—and trust me on not rushing this step—you’ll cover it lightly allowing those flavors melding beautifully as they come up towards boiling point which should happen within minutes depending on stove strength used here too…
Step 2: Thickening That Sauce
Once boiling occurs—which looks like bubbles forming rapidly across surface—you’ll want prepare yourself some cornstarch slurry now by whisking cornstarch together with two tablespoons cold water inside separate small bowl until fully incorporated NO lumps allowed friends!! Gradually pour this silky mixture back into bubbling pot whilst stirring constantly making sure every drop gets mixed evenly throughout… As soon as consistency thickens noticeably (think coating back spoon) remove from heat letting rest aside whilst we prep other elements next!
Step 3: Prepping Our Chicken
Now comes an exciting part folks—preheating oven at 350°F (175°C) meanwhile placing those beautiful boneless skinless chicken breasts directly inside prepared casserole dish in single layer just waiting eagerly alongside aromatic goodies awaiting their turn… Atop these lovely pieces pour generously one cup teriyaki concoction previously prepared ensuring full coverage across surface area—we’re aiming maximum flavor absorption here so don’t shy away from coating thoroughly!
Step 4: Getting Ready For Baking
With oven preheated properly now slide that casserole gently onto middle rack allowing space around edges facilitating air circulation needed during cooking process… Set timer anywhere between thirty-five minutes watching closely until internal temperature reaches safe zone around 165°F (74°C)—use meat thermometer if uncertain here because dry overcooked poultry isn’t what anyone wants… Afterward remove from oven carefully shred chicken directly inside pan using two forks creating bite-sized pieces ensuring even distribution before continuing onward assembly phase next…
Stay tuned as we continue unraveling this delightful recipe step-by-step next time—we’re almost there!
Step 5: The Art of Steaming Vegetables
While your chicken is basking in the oven, it’s time to turn your attention to those vibrant frozen vegetables that will add color, texture, and essential nutrients to your Teriyaki Chicken and Rice Casserole. I can’t stress enough how this step enhances not just the healthiness of the dish but also its overall appeal. You can steam or cook them according to the package instructions, but I encourage you to embrace steaming if you can. Steaming is a gentle cooking method that preserves the nutrients and vibrant colors of your vegetables, ensuring they remain tender-crisp instead of mushy.
If you’re using a microwave-safe dish, simply place them in a bowl with a splash of water, cover it (a microwave-safe plate works wonders), and zap them for about 4-5 minutes on high. Feel free to check halfway through; you want them bright green and just tender enough to sink your fork into without much resistance. This quick cooking method locks in flavors and textures that will complement the rich teriyaki sauce perfectly. Trust me on this—don’t skip this step! The freshness of these veggies balances the sweetness of the sauce and adds a delightful crunch.
Step 6: The Symphony of Shredding
Once your chicken is out of the oven, it’s time for one of my favorite parts—the shredding! Let me tell you why this step is absolutely paramount to achieving that comforting casserole you dream of. As you remove the chicken from the dish (make sure to grab some tongs; it will be hot!), take a moment to admire how juicy and tender it looks! This is where the magic happens. Using two forks or even your fingers (if you’re feeling bold), gently shred the chicken into bite-sized pieces right in the casserole dish.
Shredding not only makes it easier for everyone to eat but also allows those luscious flavors from our homemade teriyaki sauce to permeate every single piece of chicken. This is where texture plays a crucial role; when mixed with rice, veggies, and pineapple, each bite becomes an utterly intoxicating experience of flavors and sensations. Take care not to over-shred; you want those lovely chunks still intact for that perfect mouthfeel!
Step 7: Marrying All Components
Now comes one of my absolute favorite moments—bringing all these beautiful components together into one glorious dish! Go ahead and add your freshly shredded chicken back into that warm casserole dish. Next up are those colorful steamed vegetables we prepared earlier—don’t forget about their delightful crunch! Then, introduce your pineapple tidbits; they’ll bring brightness and sweetness that dances harmoniously with the savory elements in our teriyaki sauce.
Afterward, include your cooked brown rice—the wholesome base that will soak up all those gorgeous flavors. As you mix everything together gently but thoroughly, be mindful that each ingredient should get its moment in the spotlight—this isn’t just about combining; it’s about creating a harmonious blend where every bite brings joy! Now, pour most (but not all!) of that thickened teriyaki sauce over everything—you want just enough sauce to coat without drowning. Stir with love, ensuring every morsel gets dressed in that glossy liquid gold before we head back into the oven.
Step 8: Baking Your Flavorful Creation
With everything combined beautifully in your casserole dish, it’s time for our masterpiece to take a little trip back into the oven! Preheat your oven if you haven’t already—it should be set at 350°F (175°C)—and bake this concoction for about 15 minutes until everything is heated through. This step might seem simple but let me assure you: this gentle heating allows all those incredible flavors we’ve built up to meld together beautifully.
As it bakes away, you’ll start smelling that intoxicating aroma wafting through your kitchen—oh boy! It’s almost like hugging a warm blanket on a chilly day; it envelops you with comfort. Keep an eye on it as it bakes; after around 10 minutes, peek inside! You want everything bubbling slightly at the edges without drying out—if needed, cover it loosely with foil if it’s browning too fast before everything is warmed through. Remember: patience here pays off immensely when those flavors finally unite!
Final Touches: A Drizzle That Dazzles
As we near completion of our Teriyaki Chicken and Rice Casserole, it’s essential not to overlook one last finishing touch—a drizzle of that remaining teriyaki sauce we reserved earlier! After pulling it from the oven and letting it cool for just a couple of minutes (we wouldn’t want anyone burning their tongue), lightly drizzle across the top of your casserole before serving. Why is this step so special? Well, this final flourish not only enhances visual appeal but also reinvigorates flavor right at serving time.
This little act breathes life back into our dish after baking; it’s like giving your casserole its very own sparkly crown! I promise you’ll find yourself wanting more simply because each bite will be infused with fresh bursts of sweetness while still being comforting from all those warm ingredients underneath. So gather around with family or friends—and relish every delicious moment as they dig into their serving bowls filled with joyfully flavorful goodness!
And there you have it—a truly extraordinary Teriyaki Chicken and Rice Casserole that’s perfect for any occasion or simply when you’re craving something hearty yet satisfying. Enjoy every delectable bite!
Storage and Enjoyment Tips for Your Teriyaki Chicken and Rice Casserole
Now that your Teriyaki Chicken and Rice Casserole is hot out of the oven and bursting with flavors, it’s time to dig in! I can already imagine the delightful aroma wafting through your kitchen, enveloping you in a warm embrace as you gather around the table with loved ones. But what happens if you have leftovers? Fear not, my friend! This dish not only tastes divine fresh but also holds up beautifully when stored correctly.
Storing Leftover Teriyaki Chicken and Rice Casserole
To keep your Teriyaki Chicken and Rice Casserole at its best, transfer any leftovers into an airtight container or a glass dish covered tightly with foil. You’ll want to store it in the refrigerator, where it will stay delicious for about three to four days. Pro tip: For added moisture retention, consider placing a piece of bread inside the container before sealing it; this little hack can work wonders! The casserole will still taste wonderfully rich and flavorful after being stored, though I promise you, the magic happens when you reheat it gently in the oven or microwave. When reheating, just sprinkle a few drops of water over the top before covering it with a lid or plastic wrap—this helps to steam it slightly and keeps everything nice and moist.
Freezing Teriyaki Chicken and Rice Casserole for Later
If you find yourself with more than you can savor right away, freezing is a fantastic option! To freeze this delightful casserole properly, allow it to cool completely before transferring it into a freezer-safe container or resealable bag—make sure to eliminate as much air as possible to prevent freezer burn. It can safely stay frozen for up to three months. When you’re ready to enjoy it again, simply take it out of the freezer and let it thaw overnight in the refrigerator before popping it back into a preheated oven until heated through. Not only does freezing make meal prep a breeze, but it also ensures that you’ll always have this comforting dish ready when cravings strike—a truly convenient lifesaver on busy weeknights!
What’s not to love about having your favorite meal waiting patiently in the freezer? The anticipation builds as you wait for that first bite of savory goodness once again!
Teriyaki Chicken and Rice Casserole

Teriyaki Chicken and Rice Casserole is a delightful one-pan meal that brings together the savory flavors of tender chicken, vibrant vegetables, and sweet pineapple—all enveloped in a luscious homemade teriyaki sauce. This comforting dish is perfect for busy weeknights or casual gatherings, offering a satisfying blend of textures and tastes that will warm your heart and fill your belly. With just a handful of straightforward ingredients and simple steps, you can create a wholesome meal that the whole family will adore. Get ready to savor every bite of this flavorful casserole that not only delights the palate but also makes cleanup a breeze!
- Prep Time: 20 minutes
- Cook Time: 50 minutes
- Total Time: 1 hour 10 minutes
- Yield: Approximately 8 servings 1x
- Category: Dinner
- Method: Baking
- Cuisine: Asian
Ingredients
- 3/4 cup low sodium soy sauce
- 1/2 cup water
- 1/3 cup packed brown sugar
- 1 tablespoon honey
- 3/4 teaspoon ground ginger
- 1 teaspoon olive oil
- 1/2 teaspoon minced garlic
- 2 tablespoons cornstarch (for slurry)
- 1.5 pounds boneless skinless chicken breasts
- 32 oz frozen mixed vegetables (unsauced Asian varieties)
- 1 cup pineapple tidbits (drained)
- 3 cups cooked brown rice
Instructions
- Preheat your oven to 350°F (175°C). In a small saucepan over medium heat, combine soy sauce, water, brown sugar, honey, ginger, olive oil, and garlic. Stir until the sugar dissolves.
- Create a cornstarch slurry by mixing cornstarch with two tablespoons of cold water in a separate bowl; then add it to the saucepan while stirring continuously until thickened.
- Place chicken breasts in a greased 9×13-inch casserole dish and pour half of the teriyaki sauce over them.
- Bake for about 35 minutes or until chicken reaches an internal temperature of 165°F (74°C). Shred the chicken directly in the dish using two forks.
- Steam or microwave the frozen vegetables according to package instructions. Add them along with pineapple tidbits and cooked rice to the shredded chicken.
- Pour the remaining teriyaki sauce over everything and gently mix to combine.
- Bake for an additional 15 minutes until heated through.
Nutrition
- Serving Size: 1 serving
- Calories: 330
- Sugar: 12g
- Sodium: 610mg
- Fat: 6g
- Saturated Fat: 1g
- Unsaturated Fat: 5g
- Trans Fat: 0g
- Carbohydrates: 50g
- Fiber: 4g
- Protein: 24g
- Cholesterol: 70mg