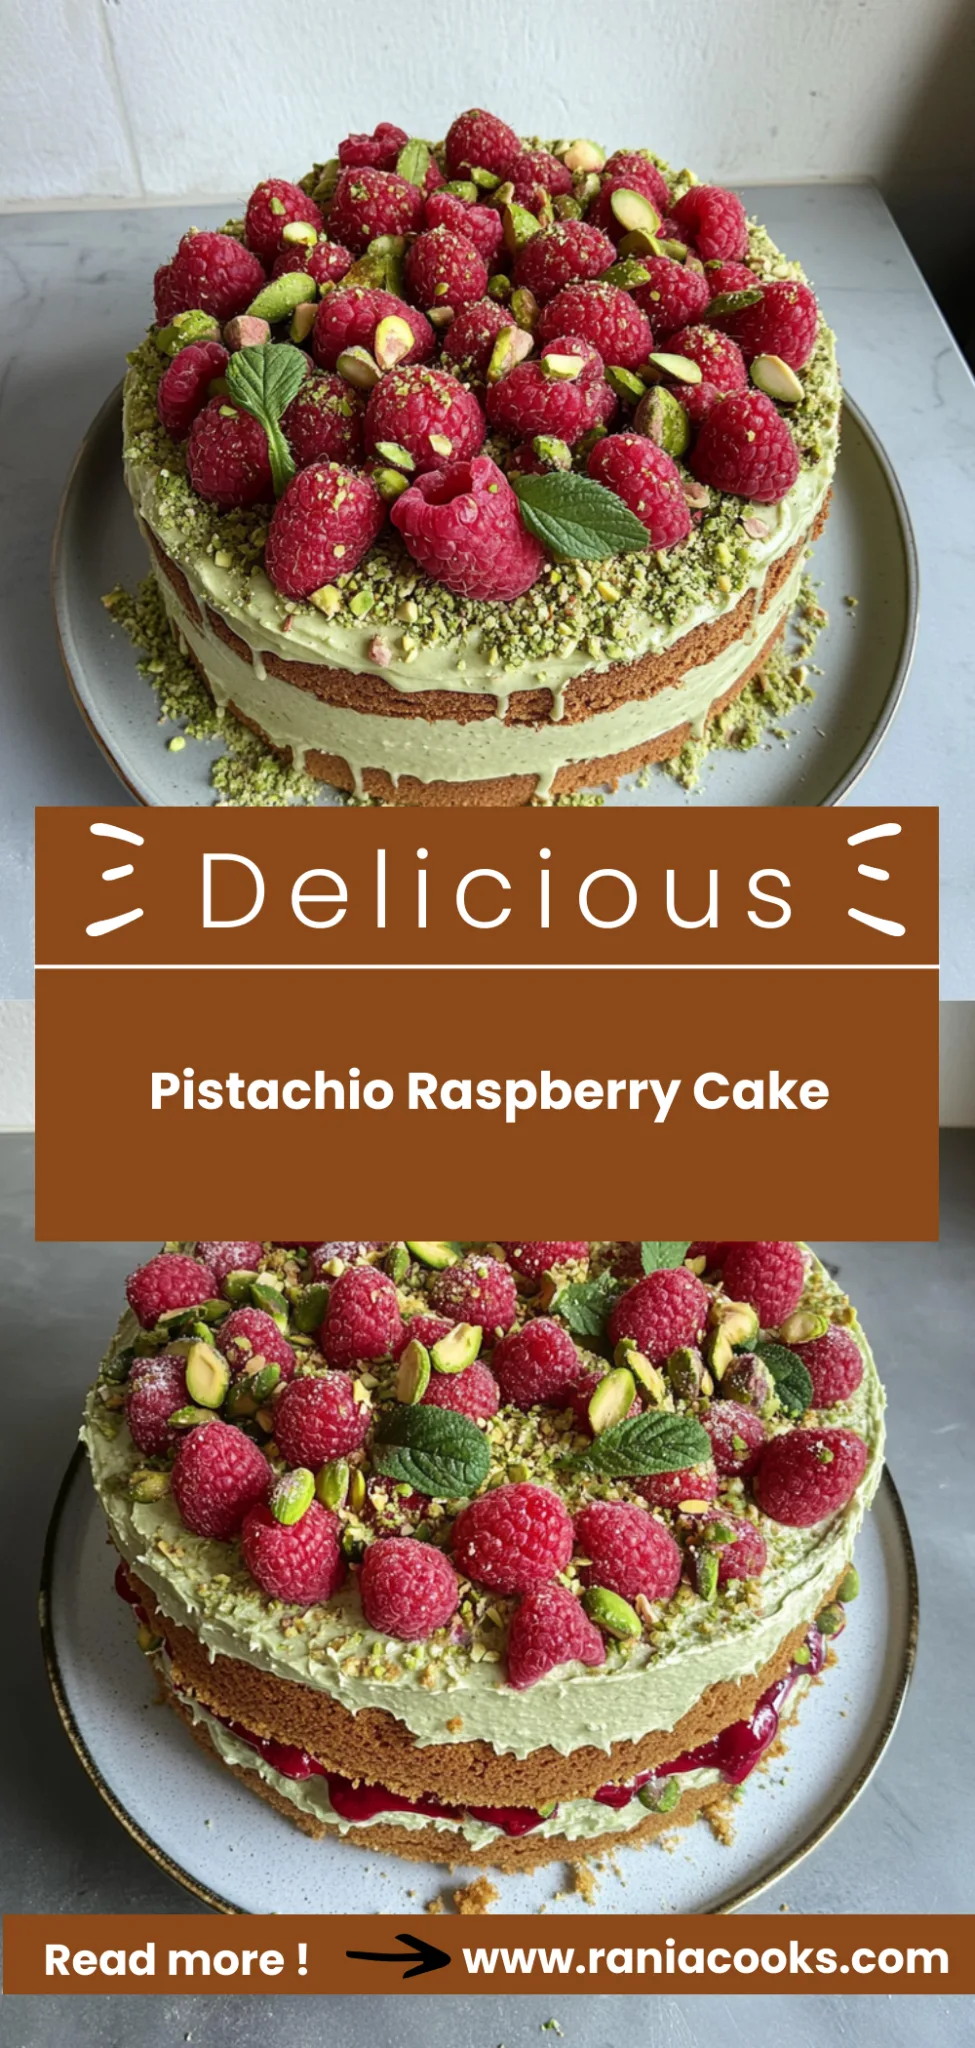
Pistachio Raspberry Cake: A Flavor Explosion Awaits!
There’s something undeniably magical about the combination of nutty pistachios and tart raspberries that creates a flavor explosion in every bite of this Pistachio Raspberry Cake. Imagine sinking your fork into a slice that’s light yet indulgent, with textures that are moist, crunchy, sweet, and fresh—all while packing a delightful 350 calories. I whipped up this recipe during one of those hectic weeks when meal prepping was essential, and I wanted to ensure my family enjoyed something special without sacrificing our love for protein-rich treats.
The first time I made this cake was a sunny Saturday afternoon for my daughter’s birthday. As the aroma filled the kitchen, my teenage son walked in and exclaimed, “What is that? It smells amazing!” The vibrant green from the pistachios and the bright red raspberries made it visually stunning as well. What sets this cake apart from others is the unique addition of almond flour, which gives it an extra layer of nuttiness while keeping it gluten-free. When I served it, my daughter asked for seconds with wide eyes, saying it was her new favorite dessert—now that’s what I call a win!
Ingredients You’ll Need
Each ingredient in this dish plays an essential role in flavor and texture. Here’s what you’ll need:
- 1 cup unsalted butter (softened): Provides a rich, creamy base for the cake.
- 1 cup granulated sugar: Sweetens the batter and contributes to a tender crumb.
- 2 large eggs: Act as a binding agent, adding moisture and stability.
- 1 teaspoon vanilla extract: Enhances the overall flavor profile with warmth.
- 2 cups all-purpose flour (sifted): Creates structure for the cake while keeping it light.
- 1 teaspoon baking powder: Helps the cake rise, ensuring a fluffy texture.
- 1 teaspoon baking soda: Works with the buttermilk to create a beautiful rise.
- 1/2 teaspoon salt: Balances sweetness and enhances all the flavors.
- 1 cup buttermilk: Adds tanginess and moisture, creating a tender crumb.
- 1 cup finely chopped pistachios: Introduces a nutty flavor and delightful crunch.
Step-by-Step Instructions
I recommend starting with the raspberry filling since it needs to cool completely before assembly, giving you a head start on the cake.
Step 1: In a saucepan, combine the fresh raspberries, granulated sugar, and lemon juice. Cook over medium heat for about 10 minutes, stirring occasionally until the raspberries break down and the mixture thickens. You’ll know it’s ready when it coats the back of a spoon. Once thickened, remove from heat and let it cool completely; this will enhance the flavor and allow for easier spreading later.
Step 2: Preheat your oven to 350°F (175°C) and grease and flour a cake pan. I usually use a 9-inch round pan for this recipe, as it provides the perfect height for layers. While the oven heats up, you can start making the cake batter to save time.
Step 3: In a mixing bowl, cream together the softened butter and granulated sugar until light and fluffy, which should take about 3-5 minutes. This step is essential because it incorporates air into the mixture, creating a lighter cake texture. Make sure to scrape down the sides of the bowl to ensure everything is well combined.
Step 4: Add the eggs one at a time to your butter-sugar mixture, mixing well after each addition. Stir in the vanilla extract after all eggs are incorporated. The eggs add moisture and structure, so don’t rush this step; mix until fully blended for best results.
Step 5: In another bowl, whisk together your sifted all-purpose flour, baking powder, baking soda, and salt. This helps evenly distribute the leavening agents throughout your dry ingredients. Gradually add these dry ingredients to your wet mixture in three parts, alternating with buttermilk. Start and end with the dry ingredients; this helps maintain a smooth batter without overmixing.
Step 6: Gently fold in the finely chopped pistachios until just combined. Be careful not to overmix at this stage; you want those pistachios distributed without losing all that air you’ve built up in your batter.
Step 7: Pour the batter into your prepared cake pan and smooth out the top with a spatula for an even bake. I find that tapping the pan gently on the counter helps release any air bubbles trapped inside.
Step 8: Bake in your preheated oven for 25-30 minutes or until a toothpick inserted into the center comes out clean or with just a few crumbs attached. Keep an eye on it towards the end of baking; you’re looking for a golden-brown top that springs back when lightly touched.
Step 9: After baking, allow your cake to cool in the pan for about 10 minutes before transferring it to a cooling rack to cool completely. This step is crucial because if you frost too early while it’s still warm, your frosting could melt off!
Step 10: While your cake cools, prepare your frosting by beating softened butter in a mixing bowl until creamy—this should take about 2-3 minutes. Gradually add powdered sugar while mixing on low speed until combined; then increase speed and add heavy cream and vanilla extract until fluffy. This will create a rich frosting that perfectly complements our cake’s flavors.
Step 11: Once your cake is completely cool, slice it in half horizontally using a serrated knife to create two layers. I suggest using toothpicks around the edge of each layer as guides for an even cut.
Step 12: Spread an even layer of raspberry filling on top of one layer before carefully placing the other layer back on top. This adds a beautiful tartness that balances well with the sweetness of both cake and frosting.
Step 13: Frost the top and sides of your assembled cake with your prepared frosting using an offset spatula for smoothness. Be generous! You want every bite to be deliciously coated.
Step 14: If desired, garnish with additional pistachios and fresh raspberries on top for added color and texture. This not only makes for an attractive presentation but also enhances those lovely flavors throughout each slice!
What to Serve with Pistachio Raspberry Cake
This cake is already incredibly filling and balanced, but these sides add extra variety and nutrition to round out your meal perfectly.
Mixed Green Salad with Lemon Vinaigrette: A refreshing mix of arugula, spinach, and baby kale tossed in a zesty lemon vinaigrette provides a crisp contrast to the rich sweetness of the cake. The bright flavors help cleanse the palate while echoing the tartness of the raspberries. Additionally, this salad is packed with vitamins A and C, making it a nutritious side that my family loves to enjoy before dessert.
Coconut Rice: Creamy coconut rice made with jasmine rice cooked in coconut milk brings a subtle sweetness that complements the tart raspberry filling beautifully. The texture of the rice adds a delightful creaminess that pairs wonderfully with the cake’s moist crumb. Plus, with healthy fats from the coconut milk, this dish keeps energy levels high for our busy afternoons.
Roasted Sweet Potatoes: Diced sweet potatoes roasted until crispy and seasoned with cinnamon and a touch of sea salt provide a warm, earthy flavor that contrasts nicely with the cake’s nuttiness. This side not only adds fiber but also delivers about 4 grams of protein per serving, making it a fantastic way to boost your meal’s nutritional profile. My kids love them as a comforting addition during family gatherings.
Avocado Toast with Smashed Peas: Whole-grain bread topped with smashed peas and ripe avocado is both hearty and nutritious, offering healthy fats and fiber that pair well with the Pistachio Raspberry Cake. The creaminess of the avocado echoes the butteriness of the cake while providing approximately 5 grams of protein per slice. This is often my go-to when prepping for brunches or afternoon get-togethers where I want something satisfying yet light!
Storage & Serving Tips
To store your Pistachio Raspberry Cake for meal prep, allow it to cool completely before placing it in an airtight container. The cake itself can be stored in the fridge for up to 5 days. For optimal freshness, keep the raspberry filling separate by storing it in a small, airtight container; this will help retain the tart flavor and prevent the cake from becoming soggy. Additionally, if you have any leftover frosting, place it in another airtight container and refrigerate it as well.
When reheating, it’s best to gently warm individual slices of cake in a 350°F oven for about 10 minutes or until just heated through; this will help maintain its texture. Avoid microwaving, as it can make the cake dense and unappetizing. If you’re craving that delicious raspberry filling again, you can reheat it on the stovetop over low heat for about 2-3 minutes until warm but not boiling. The frosting should be used at room temperature; simply let it sit out for about 15-20 minutes before spreading on your cake slices.
Pro tip: For effective meal prep, consider doubling the recipe on Sundays and portioning it into individual containers for grab-and-go treats throughout the week. Family members can easily self-assemble their own dessert bowls by layering slices of the cake with raspberry filling and a dollop of frosting. To mix things up, try swapping out pistachios with finely chopped walnuts or pecans in the cake batter for different nutty flavors. Also, instead of raspberries, you could use blueberries or diced strawberries in the filling; just remember to store these fresh fruits separately to maintain their quality until serving!
Conclusion
This Pistachio Raspberry Cake has become one of those recipes I make at least once a week because it delivers a delightful combination of flavors while packing 350 calories per slice. The finely chopped pistachios in the cake batter really elevate this dessert, giving it a unique nutty texture that sets it apart from traditional cakes. Give this one a try this week. I promise it’ll become a regular rotation treat in your house too.