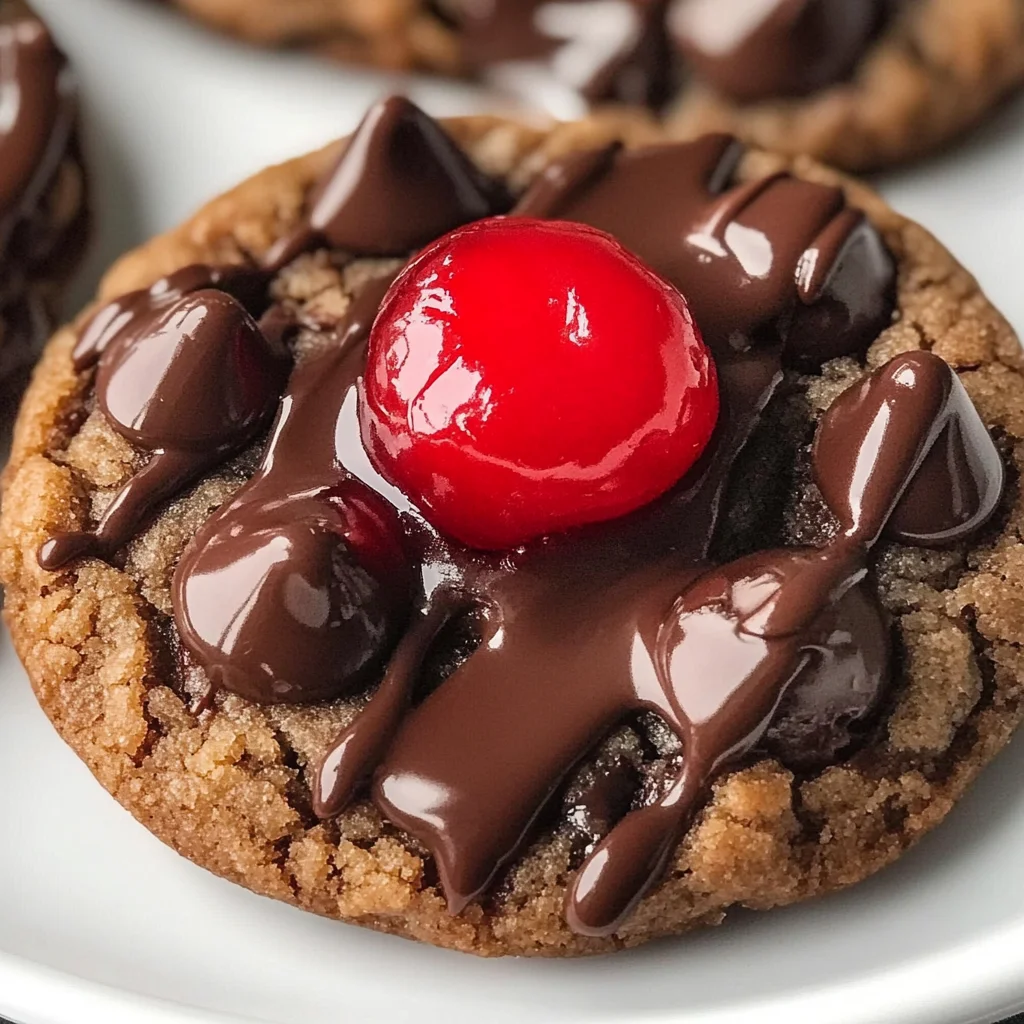
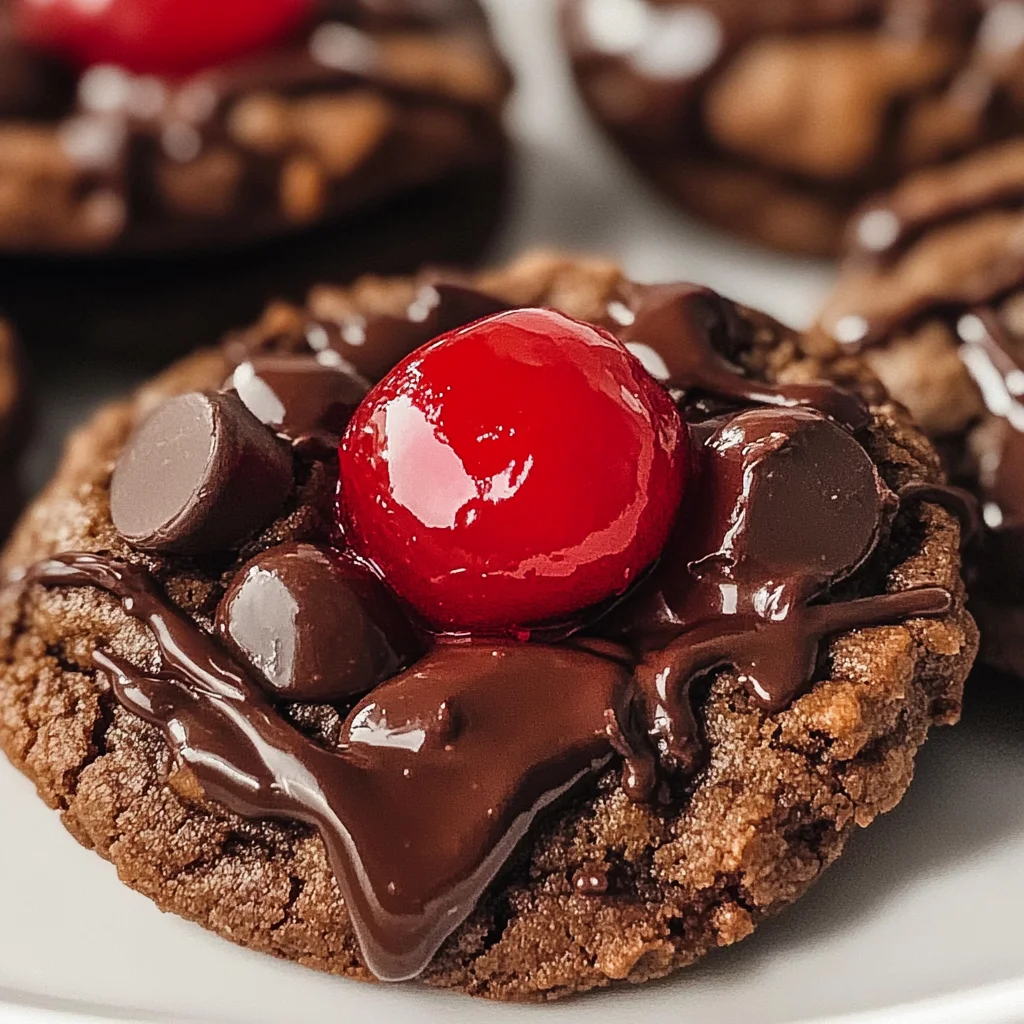
Chocolate Covered Cherry Cookies
There’s something truly magical about the aroma of freshly baked cookies wafting through the kitchen, isn’t there? It’s like a warm embrace on a chilly day, whispering sweet promises of comfort and indulgence. As I share this recipe for Chocolate Covered Cherry Cookies, I can’t help but feel that it transcends mere baking—it’s an experience, a delightful journey that blends tradition with a touch of surprise. Imagine biting into a soft, chewy cookie, only to discover a hidden cherry nestled within, its sweet juices mingling with the rich chocolate. This is not just a cookie; it’s a celebration of flavors that dance together in perfect harmony, evoking nostalgic memories of holidays spent around the table with loved ones.
Baking these cookies is not merely about the final product; it’s about the process itself. Each step you take in making these Chocolate Covered Cherry Cookies brings you closer to creating something profoundly satisfying. The combination of soft white cake mix and cream cheese creates an incredibly tender dough that holds the surprises within. And let’s not overlook those cherries! They add a burst of flavor and color that makes these treats irresistible—not just to your taste buds but also to your heart. Trust me, once you share these cookies with friends or family during your next gathering or holiday feast, they’ll become an instant favorite.
Chocolate Covered Cherry Cookies: A Festive Delight
Welcome to one of my favorite cookie recipes—a sweet treat that perfectly captures the essence of joy and celebration! These easy soft Chocolate Covered Cherry Cookies are sure to be the star on any dessert tray. With each bite revealing a delightful cherry surprise, they’re bound to bring smiles and happy memories as they disappear one by one. Let’s dive into this delicious adventure together!
Ingredients:
As we embark on this culinary journey, let me take you through each ingredient that will make our Chocolate Covered Cherry Cookies truly extraordinary.
- 1 white cake mix (15.25 ounces). This is the foundation of our cookies—a fantastic shortcut that provides a soft texture and delightful sweetness without needing to measure out individual flour and sugar components. When choosing your cake mix, look for one with simple ingredients and no artificial additives. If you’re feeling adventurous, you can even try using a yellow cake mix for a slightly different flavor profile; just remember that it might alter the final color.
- 8 tablespoons unsalted butter, softened (1 stick). Butter is essential for adding richness and flavor to our cookies while ensuring they have that melt-in-your-mouth quality we all adore. Make sure it’s softened to room temperature so it blends easily with other ingredients; if it’s too cold or melted, it’ll affect how well our cookies rise and spread during baking. Always opt for high-quality butter—it truly makes all the difference in both taste and texture!
- 1 large egg. Eggs serve as binders in baking, holding everything together beautifully while also contributing moisture and richness. When selecting eggs, try to use fresh ones from local farms if possible; their vibrant yolks will enhance both the color and flavor of your cookies significantly.
- 4 ounces cream cheese, softened. This ingredient is an absolute game-changer! Cream cheese adds a tangy richness that elevates our cookie dough’s texture beyond what you’d typically expect from standard cookies—think luscious and creamy! Be sure to soften it ahead of time so it can blend seamlessly with other ingredients; otherwise, you might end up with clumps instead of that smooth batter we want.
- 3/4 cup mini chocolate chips. These little gems are not just for decoration—they provide bursts of rich chocolate goodness throughout each cookie bite! Mini chocolate chips melt beautifully without overpowering other flavors in our cookies; plus, their smaller size ensures even distribution throughout the dough. If you’re feeling adventurous, try mixing in some dark chocolate chips for an intense flavor contrast!
- 2 – 10 ounce jars maraschino cherries. These cherries are our surprise element! Their bright red color adds cheerfulness while their sweetness complements the rich chocolate perfectly. Remember to drain them well before using; excess moisture can lead to soggy cookies—absolutely non-negotiable if we want crisp edges!
- 1/4 cup heavy whipping cream. This luscious liquid gold enhances our melted chocolate later on, creating a silky-smooth coating for our cookies that’ll have everyone swooning! When choosing heavy whipping cream, look for one with at least 36% fat content; this will yield the best results when creating your glossy topping.
- 1 cup semisweet chocolate chips. Finally, we need more chocolate because can there ever be too much? These chips will create a rich outer layer for our finished cookies—think decadent chocolate enveloping unsuspecting cherries within! Opt for high-quality semisweet chips; they should melt effortlessly into velvety perfection when heated.
Equipment You’ll Need:
Having the right tools makes all the difference when baking—trust me! While they may not be “ingredients,” these essential partners help ensure everything runs smoothly as we craft these delightful cookies together.
- Mixing bowls – A good set of mixing bowls allows you ample space to combine ingredients thoroughly without any spills or messes! Opting for glass or stainless steel is ideal since they are durable and easy to clean.
- Electric mixer (handheld or stand) – This tool is absolutely paramount in achieving that perfect creamed butter-and-sugar mixture quickly and efficiently! While you can use muscle power alone with a whisk or spatula if needed (I promise I’ve been there), an electric mixer makes life infinitely easier when dealing with thicker batters.
- Baking sheets – Sturdy baking sheets are essential for even heat distribution during baking—look for ones made from heavy-duty materials that won’t warp under high temperatures.
- Parchment paper or Silpat mats – Lining your baking sheets prevents any sticking issues while providing easy cleanup afterward—an absolute must-have if you want perfectly shaped cookies without frustration!
- Cookie scoop – Using a cookie scoop helps form uniform balls of dough so every cookie bakes evenly—a small detail that has significant effects on presentation!
Now that we’ve gathered everything we need let’s get started on preparing our delectable Chocolate Covered Cherry Cookies!
Step 1: Prepping Your Oven and Baking Sheet
First things first: preheat your oven to 350°F (175°C). This step is crucial because starting with an adequately heated oven ensures consistent cooking throughout every cookie batch—no one wants half-baked centers! While waiting for it to warm up nicely, line two baking sheets with parchment paper or Silpat mats; either option works wonders at preventing sticking while promoting even browning during bake time.
Step 2: Creating Your Cookie Dough Base
In your mixing bowl—which should feel nice and cozy at this point—combine the white cake mix along with softened unsalted butter, egg, and cream cheese until smooth dough forms seamlessly together into something heavenly! The process called creaming combines fats (like butter) effectively with sugars (from cake mixes), incorporating air bubbles as well—and those bubbles translate into fluffy textures once baked! Don’t rush this step—it takes patience but trust me: patience pays off big time when biting into those heavenly treats later!
Step 3: Introducing Cherries Into The Mix
Next up comes one of my favorite parts: adding those precious cherries! Carefully drain two jars’ worth before setting aside thirty-six whole cherries—the stars atop each glorious cookie later—and dicing any remaining ones into tiny pieces before patting dry gently with paper towels (excess moisture here can spell disaster!). Gently fold in both diced cherries alongside mini chocolate chips into that luscious dough until evenly combined without overworking everything—you want tender rather than tough results!
Step 4: Chill Out!
Now comes another important moment: place your bowl filled with cookie dough inside the refrigerator for about an hour—yes really! Chilling helps firm up softer batters allowing them easier handling as well as minimizing spreading during bake time which could ruin those beautiful shapes we worked hard on earlier—so trust me on this part!
Stay tuned as we continue crafting these wonderful Chocolate Covered Cherry Cookies through more steps full of love and deliciousness…
Baking Your Perfect Chocolate Covered Cherry Cookies
Step 5: Forming the Cookie Dough Balls
Now that your delightful dough has had a little time in the refrigerator to chill and firm up—trust me, this step is absolutely crucial for achieving the perfect texture—it’s time to form those adorable cookie dough balls. Using a cookie scoop or simply a tablespoon, you’ll want to portion out 36 even balls of dough. Imagine the anticipation as you roll them between your palms, feeling that soft yet slightly sticky dough give way to your touch. This tactile experience is not just about forming cookies; it’s about creating little packages of joy that are going to house those sweet cherries!
As you place 12 dough balls at a time onto your prepared baking sheet, leave enough space between each one—about 2 inches apart is ideal. This spacing ensures that each cookie can spread beautifully in the oven without merging into its neighbor, which would ruin that perfect round shape we’re aiming for. Plus, it allows for even baking, giving you those perfectly golden edges while maintaining a chewy center. Remember, patience is key here; don’t rush this step! Each ball should be about the size of a golf ball, and you can gently flatten them just a tad if you prefer a slightly less puffy cookie. However, I promise you that the puffiness adds to the charm!
Step 6: Baking to Perfection
With your cookies positioned just right on the baking tray, it’s time to slide them into that preheated oven. The magic happens here as the heat transforms those little spheres of dough into luscious cookies filled with flavor and surprise. Bake them for exactly 9 minutes—this precise timing is non-negotiable if you want that perfect balance between crispy edges and soft centers. Keep an eye on them during this brief time; they should start to puff up and maybe even crack slightly on top—that’s actually what we’re looking for!
When the timer goes off, resist the urge to dive in immediately! Instead, let them rest on the pan for about 2-3 minutes after removing them from the oven. This resting period allows the cookies to set up just enough so they don’t fall apart when you transfer them. You’ll notice how they continue to cook slightly from residual heat during this time, developing their flavor further and creating a beautifully chewy texture. After they’ve cooled just enough so you can handle them without needing an ice pack for your fingers, gently transfer each cookie onto a piece of parchment paper on your counter using a spatula.
Step 7: Adding Cherry Toppers
Now comes one of my favorite parts—decorating these delightful cookies with our reserved maraschino cherries! After all that baking magic has occurred, take those beautiful cherries and press one firmly into the center of each cookie while they are still warm but not hot; this will create a lovely indentation where those cherries will nestle in perfectly. Not only does this add an extra burst of cherry flavor with every bite, but it also gives these cookies their signature look—a vibrant pop of red against rich chocolatey goodness.
I encourage you to let these beauties cool completely before moving onto the next step because we want our chocolate coating to adhere perfectly without sliding off or melting into oblivion! If there’s one thing I’ve learned through countless batches of cookies over the years, it’s that patience pays off in every layer of flavor and texture we achieve here.
Step 8: Melting Chocolate Like a Pro
Next up is one of my favorite culinary techniques—melting chocolate! For our luscious topping, combine 1 cup of semisweet chocolate chips with 1/4 cup of heavy whipping cream in a microwave-safe bowl. Pop it in the microwave for about 30 seconds initially—this gentle heating helps prevent overheating our precious chocolate which can lead to a grainy texture (and nobody wants that!). Once it’s done, take it out and stir vigorously until everything is melted together into a silky-smooth mixture.
If needed, don’t hesitate to put it back in for another quick burst of heat—15-30 seconds should do it—but keep stirring until fully combined. The key here is ensuring everything melds beautifully into what I affectionately call “liquid gold.” If you see any lumps or unevenness, just keep stirring; patience really makes all the difference here! Once your chocolate mixture reaches that glossy sheen and smooth consistency—the very definition of decadent—you’re ready to cover those cookies.
Finishing Touches
Step 9: The Chocolate Coating Extravaganza
Now comes the moment we’ve all been waiting for—the grand finale where we shower our lovely cookies with melted chocolate! Using either a spoon or dipping method (if you’re feeling adventurous), generously drizzle or dunk each cookie into that velvety chocolate coating until they are fully submerged or adequately covered with an enticing layer of cocoa bliss. Make sure each cookie gets its fair share; after all, they deserve every bit of indulgence!
I strongly advise letting any excess chocolate drip off before placing them back onto parchment paper—this keeps things neat and prevents clumping together later on when storing. And let me tell you—the sight of those freshly coated treats is utterly intoxicating! Once you’ve coated all your cookies, allow them some time at room temperature so that chocolate can set properly—it may be tempting to rush this part because who can resist such baked beauty? But trust me on this; letting that chocolate firm up will elevate your cookie game exponentially.
Once set, store these incredible Chocolate Covered Cherry Cookies in an airtight container at room temperature (if they last that long!). They make delightful gifts during holiday seasons or any special occasion; sharing these treasures will surely evoke smiles from everyone around you! Whether enjoyed fresh out of the oven or after they’ve rested overnight (the flavors deepen beautifully!), each bite will remind you why these cookies hold such cherished memories in my heart—and soon yours too! So roll up your sleeves and enjoy creating these treasures; I promise you’ll love every moment spent making them!
Storage and Enjoyment Tips for Your Chocolate Covered Cherry Cookies
Now that your delightful Chocolate Covered Cherry Cookies are all baked, cooled, and drizzled in that luscious melted chocolate, it’s time to savor the fruits of your labor! But what happens if you find yourself with a few leftovers? Fear not! These cookies can be stored beautifully, allowing you to enjoy their rich, cherry-infused sweetness for days to come. Trust me when I say that every bite will still bring joy, even after a day or two.
Storing Leftover Chocolate Covered Cherry Cookies
To keep your cookies fresh and fabulous, simply place them in an airtight container—this is absolutely paramount for preservation. If you have one of those lovely containers with a tight seal, go ahead and use it; otherwise, a good quality zip-top bag will work just fine. Store them in a cool, dry place away from direct sunlight; they’ll be perfectly fine for about five to seven days. Now here’s a little pro tip: if you want to maintain that soft and chewy texture, toss in a slice of bread with your cookies! The moisture from the bread helps keep them soft without making them soggy. After storage, you’ll find that the flavors meld together even more profoundly, creating a cookie experience that’s almost even better than when they were fresh out of the oven. When you’re ready to indulge again, you can serve them as is or give them a quick 5-10 seconds in the microwave for that warm, gooey feel—just enough time for the chocolate on top to melt slightly again!
Freezing Chocolate Covered Cherry Cookies for Later
If you’re looking to stock up on these scrumptious cookies for future enjoyment—or perhaps save some for the holidays—freezing is an excellent option. To freeze these beauties properly, arrange your cookies in a single layer on a baking sheet and pop them into the freezer for about an hour until they’re solid. Once they’ve frozen firm, transfer them into an airtight container or a freezer-safe zip-top bag and label it with the date; they’ll stay deliciously preserved for up to three months! The great thing about freezing these cookies is that it allows you to enjoy this delightful treat whenever the craving strikes without having to bake from scratch each time. When you’re ready to enjoy one (or several), simply let them thaw at room temperature or warm them up gently in the microwave—this convenience factor is truly fantastic!
Chocolate Covered Cherry Cookies
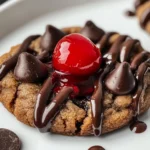
Indulge in the delightful experience of baking Chocolate Covered Cherry Cookies! These soft, chewy treats are filled with juicy cherries and enveloped in a rich chocolate coating, making them the perfect dessert for any occasion. With their vibrant appearance and mouthwatering flavors, these cookies not only satisfy your sweet cravings but also create cherished memories when shared with family and friends. Baking these treats is about more than just the end result; it’s a joyful journey that fills your kitchen with warmth and delicious aromas. Whether served at a festive gathering or enjoyed as a personal treat, these cookies are sure to be a hit!
- Prep Time: 20 minutes
- Cook Time: 9 minutes
- Total Time: 29 minutes
- Yield: Approximately 36 servings 1x
- Category: Dessert
- Method: Baking
- Cuisine: American
Ingredients
- 1 white cake mix (15.25 ounces)
- 8 tablespoons unsalted butter, softened
- 1 large egg
- 4 ounces cream cheese, softened
- 3/4 cup mini chocolate chips
- 2 jars maraschino cherries (10 ounces each), drained
- 1/4 cup heavy whipping cream
- 1 cup semisweet chocolate chips
Instructions
- Preheat oven to 350°F (175°C) and line baking sheets with parchment paper.
- In a mixing bowl, combine the cake mix, softened butter, egg, and cream cheese until smooth.
- Fold in diced cherries and mini chocolate chips gently.
- Chill the dough for an hour.
- Scoop dough into balls and place on prepared baking sheets, spacing them apart.
- Bake for 9 minutes; let cool slightly before transferring to wire racks.
- For the chocolate coating, melt semisweet chocolate chips with heavy cream until smooth; drizzle over cookies and top with reserved cherries.
- Allow chocolate to set before serving.
Nutrition
- Serving Size: 1 serving
- Calories: 180
- Sugar: 14g
- Sodium: 150mg
- Fat: 8g
- Saturated Fat: 5g
- Unsaturated Fat: 2g
- Trans Fat: 0g
- Carbohydrates: 24g
- Fiber: 0g
- Protein: 2g
- Cholesterol: 20mg