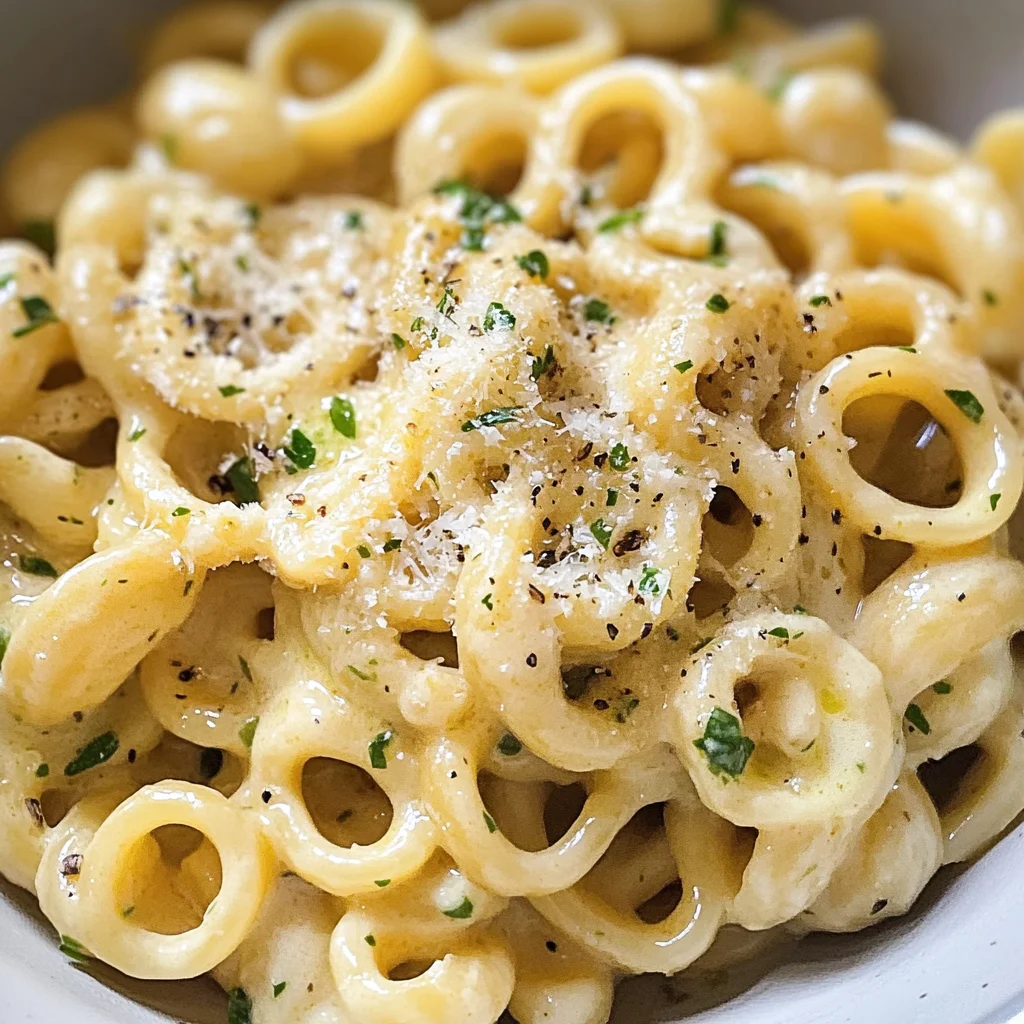
Garlic Butter Pasta (One Pot!)
I’m so excited to share this delightful Garlic Butter Pasta (One Pot!) recipe with you! You know, there’s something incredibly comforting about a bowl of pasta that just envelops you in warmth and flavor. This dish is not merely about filling your belly; it’s an experience, a little piece of joy stirred together in a single pot. Imagine the aroma of fresh garlic mingling with rich butter, a symphony of herbs dancing around as they infuse their essence into every nook and cranny of the pasta. It’s utterly intoxicating! Trust me when I say, this is a meal that not only pleases the palate but also nourishes the soul.
As we dive into this recipe, think of it as an invitation to slow down and savor the process. Cooking should be a joyful experience where the kitchen becomes your sanctuary, a place where you can express creativity and love through food. The beauty of this Garlic Butter Pasta (One Pot!) lies in its simplicity and elegance. With just a handful of ingredients, you’ll create something truly extraordinary—perfect for a cozy weeknight dinner or an impressive side dish for gatherings with loved ones. So roll up your sleeves; let’s embark on this culinary adventure together!
Garlic Butter Pasta (One Pot!): A Wholesome Comfort Food Delight
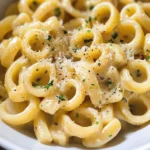
This Garlic Butter Pasta (One Pot!) is one of those recipes that feels like home—simple yet sophisticated, and bursting with flavors that warm your heart. The creamy sauce envelops each shellbow pasta piece, creating an exquisite harmony that makes each bite more delightful than the last. And the best part? It all comes together in just one pot! Not only does that mean minimal cleanup (which we all appreciate), but it also allows the flavors to meld beautifully as they cook together.
So, are you ready to whip up this deliciousness? Let’s gather our ingredients!
Ingredients:
As we begin our cooking journey together, let’s take a moment to appreciate each ingredient that will contribute to our Garlic Butter Pasta (One Pot!). Every single element has its own unique role in crafting this dish into something special.
- ¾ teaspoon dried basil. This herb brings a sweet yet slightly peppery flavor to our sauce, reminiscent of sun-drenched Italian summers. When selecting dried basil, look for bright green leaves; if they’re brown or faded, they may have lost their potency. Dried herbs are often more concentrated than fresh ones, making them perfect for infusing robust flavors in just one pot.
- ¾ teaspoon dried oregano. Another essential herb, oregano adds depth and a touch of earthiness to our dish. It harmonizes perfectly with basil and enhances the overall flavor profile without overpowering it. When using dried oregano, be sure to crush the leaves between your fingers before adding them; this releases their aromatic oils and maximizes their flavor.
- ¾ teaspoon dried parsley. Parsley is often overlooked but acts as a fabulous balance in this rich garlic butter sauce. Its mild flavor brightens up every bite and adds visual appeal with its vibrant green color. Fresh parsley would work too; however, if you’re using dried like we are here, ensure it’s still fresh and fragrant for optimal taste.
- ¾ teaspoon mustard powder. Now here’s where things get interesting! Mustard powder offers a subtle tanginess that elevates our sauce beyond ordinary pasta dishes. It works wonders by enhancing other flavors without being overtly noticeable—it’s like the secret handshake among our ingredients.
- ¼ teaspoon dried thyme. Thyme has such a beautiful aromatic quality that adds warmth and complexity to our dish without taking center stage. It pairs well with garlic and butter like old friends sharing stories over dinner—a must-have in our herb blend!
- ¼ teaspoon onion powder. This adds another layer of flavor without needing actual onions—a great trick when you want simplicity but don’t want to sacrifice taste! Onion powder provides sweetness and depth while keeping things smooth since we’re aiming for that creamy texture.
- ¼ teaspoon pepper. Freshly ground black pepper brings just the right amount of heat to balance the richness from butter and cream while highlighting all those wonderful flavors at play.
- 4 tablespoons butter (divided). Ahh… butter—the star of any comfort food dish! We’ll use it both for sautéing garlic initially and then again at the end for extra creaminess when it melts into our finished pasta masterpiece! Opt for high-quality European-style butter if possible; it has higher fat content which translates to richer flavor.
- 4 cloves fresh garlic (minced). Fresh garlic is absolutely paramount here—its pungent aroma transforms into something heavenly when sautéed in butter! Mince it finely so it can infuse throughout every nook of your pasta; trust me on this—you don’t want any big chunks ruining your smooth sauce!
- 2 ¾ cups chicken broth. This forms the base of our sauce—the liquid gold that binds everything together! For those avoiding animal products, feel free to substitute vegetable broth instead—it’ll still yield amazing results while keeping it plant-based.
- ¾ cup half-and-half. This creamy concoction adds richness like no other while ensuring our sauce remains velvety smooth rather than too thick or clumpy—this step is crucial!
- 1 teaspoon soy sauce. A hint of umami goodness from soy sauce enhances overall flavor without feeling overly salty—it rounds out all those beautiful herb notes wonderfully!
- ½ chicken bouillon cube (or vegetable bouillon cube). Using bouillon enhances depth even further; dissolve it into hot broth before adding everything else for maximum impact!
- ¾ cup Parmesan cheese (freshly grated)—Oh my goodness… cheese makes everything better! Freshly grated Parmesan will melt beautifully into our warm pasta dish creating an irresistibly cheesy experience—you simply cannot skip this!
- 2 tablespoons fresh lemon juice—A squeeze of acidity cuts through richness perfectly while brightening up all those buttery flavors—without lemon juice? You’d lose essential balance in taste!
- ½ lb shellbow pasta—Shellbow pasta shape holds onto sauces brilliantly thanks to its ridges—plus their fun shape makes eating even more enjoyable!
Now that we’ve gathered everything we need, let’s move on to getting these ingredients working their magic together!
Equipment You’ll Need:
Before we dive into cooking, let’s chat about some essential tools you’ll need for creating your Garlic Butter Pasta (One Pot!). Having these pieces on hand will make your cooking experience smoother and much more enjoyable—not to mention ensuring success in achieving that creamy perfection we’re after.
- Large soup pot: A sturdy pot is vital here because we’ll be boiling water while also sautéing ingredients together seamlessly—all in one vessel! Ensure it’s large enough so nothing spills over during cooking; nobody enjoys cleaning up after unnecessary messes!
- Silicone spatula: This tool isn’t just great for scraping down sides or folding ingredients gently—it’s also heat resistant which means no melting mishaps can occur while stirring away happily at medium heat! Trust me—you’ll want something flexible yet durable like silicone here.
- Measuring cups & spoon set: Precision matters when crafting delicious recipes! Measuring accurately ensures consistent results each time you recreate this meal—and who wouldn’t want repeat performances?
With everything organized so beautifully around us now… let’s get started on preparing that delectable Garlic Butter Pasta (One Pot!)!
Step 1: Assemble Your Flavorful Aromatics
First things first—let’s come together as we prepare ourselves mentally by measuring out those glorious seasonings from earlier: dried basil, oregano, parsley, mustard powder…and onward down the list until you’ve got them all neatly combined in one bowl waiting patiently beside you! This step helps keep everything organized since once we start cooking things move quickly—you won’t want any last-minute scrambling around looking for spices while your garlic burns away on high heat! Remember: preparation leads directly towards success here.
Step 2: Sautéing Perfection
Now we’re ready to start heating things up—add three tablespoons worth of butter into your large soup pot over medium heat until melted completely before tossing in minced garlic alongside measured herbs mixture prepared earlier along with onion powder too—we want those fragrant aromatics releasing their magic into melted buttery bliss surrounding them already… Stir continuously now until foaming begins occurring beneath stirring motion; trust me—the smell wafting through kitchen right now? Utterly intoxicating!
Step 3: Building Our Liquid Gold
Once bubbling occurs nicely underneath stirring motions happening harmoniously within pot’s depths—that’s when it’s time bring forth chicken broth then follow up immediately behind adding half-and-half next along with soy sauce plus crumbled bouillon cube joining party too… All these liquids mingling together creates what I like calling “liquid gold” because oh boy does it elevate any simple carbohydrate straight towards culinary heaven nestled warmly inside bowl waiting eagerly below surface tension awaiting discovery soon enough…
Step 4: Bringing It All Together
Letting mixture boil away gently before introducing shellbow pasta next which gets submerged completely within flavorful broth concoction simmering merrily atop burner beneath bubbling surfaces sparks joy across entire kitchen space surrounding us right now…it’ll cook uncovered according package instructions given on box label itself usually taking around 8–10 minutes depending brand chosen wisely beforehand… But don’t forget important part here either!! Use silicone spatula carefully running along bottom surface regularly lifting any stubborn pieces attempting settle below water line avoiding sticky situations emerging unexpectedly later down road…
Stay tuned as I guide you through each step toward transforming these wonderful simple components into something remarkable—we’re almost there!
Step 5: The Creamy Transformation
Now, this step is where the magic truly happens! Once your pasta has cooked to that perfect al dente texture—meaning it’s tender but still has a slight bite to it—you’ll want to reduce the heat to low. This is absolutely paramount because we’re about to introduce the star of our creamy show: the freshly grated Parmesan cheese. Gradually stir in the cheese, allowing it to melt into the rich sauce. You can already imagine how that beautiful, nutty flavor will enhance our Garlic Butter Pasta! As you stir, you’ll notice the sauce beginning to thicken and cling lovingly to each pasta shell—this is what we strive for!
But here’s a gentle reminder: don’t rush this process! The gradual addition of cheese not only ensures a smooth integration without clumps but also gives you that velvety texture that makes this dish so profoundly satisfying. Trust me, taking your time here will yield a result that’s nothing short of extraordinary. Keep an eye on the consistency; if it feels too thick, a splash more chicken broth or half and half can work wonders. And remember, taste is key! Give it a little sample and adjust seasoning if needed—a pinch more salt or pepper might just elevate it to new heights.
Step 6: A Zesty Lift
Once your pasta is enveloped in that luscious cheese sauce, it’s time for the finishing touch—a squeeze of fresh lemon juice! This step might seem simple, but I promise you, it’s what elevates this dish from delightful to utterly intoxicating. The bright acidity of lemon cuts through the richness of the butter and cheese, creating a harmonious balance that dances on your palate. It’s like adding sunshine to your plate!
Before you squeeze in that juice, make sure you’ve removed the pot from heat; we don’t want to cook off those vibrant flavors. Just squeeze about two tablespoons over your pasta—feel free to adjust based on your personal preference for tanginess. Use a fork or whisk to incorporate it well into the sauce. You should see a lovely sheen develop as the lemon blends with all those savory notes. It’s important not only for flavor but also for enhancing digestion; citrus aids in breaking down fats, making every bite feel lighter and more refreshing.
Step 7: The Finishing Flourish
Now comes one last buttery flourish that makes all the difference—adding that remaining tablespoon of butter. This step may seem small, but let me tell you, it’s non-negotiable! When you add the final pat of butter while covering the pot for a moment allows it to melt gently into our beautiful creation. The butter melts like liquid gold, enriching our Garlic Butter Pasta with an extra layer of creaminess that’s simply irresistible.
As you cover the pot, take a deep breath and let those wonderful aromas fill your kitchen—they’re an indication of deliciousness ahead! Allowing everything to rest for just another minute lets all those flavors meld together beautifully. When you lift off that lid and give everything a gentle stir before serving, you’ll see how everything has come together in sheer perfection—a symphony of flavors waiting to be savored.
Step 8: Time for Serving
Now that your pot is brimming with this delightful Garlic Butter Pasta masterpiece, it’s time to serve up this comforting dish! But before you do, let’s talk presentation—it really matters! Grab your favorite serving bowl (I always use one that’s slightly oversized; it makes everything look even more inviting), and gently transfer your pasta into it using tongs or a large spoon.
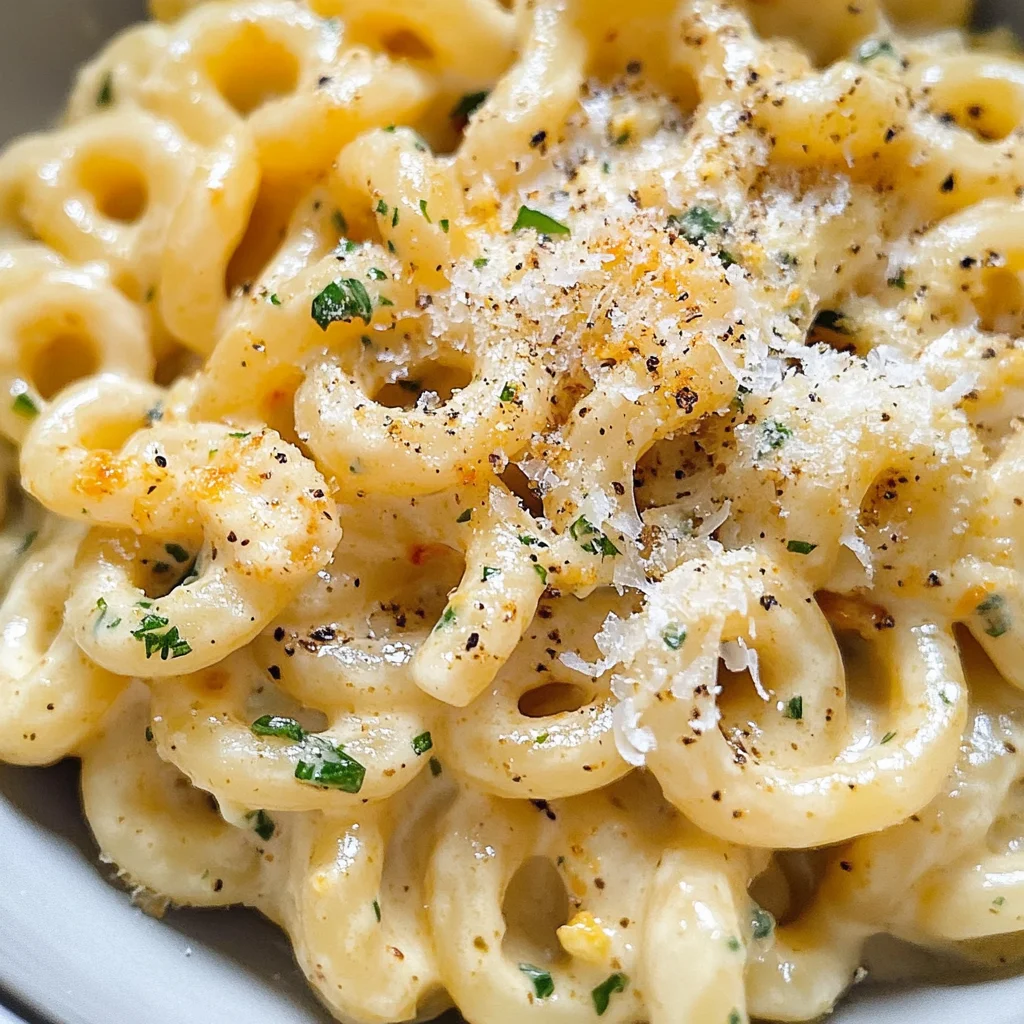
Take a moment here: as you twirl those shell-shaped pasta pieces onto plates or into bowls, consider garnishing with some additional freshly grated Parmesan and perhaps even some freshly chopped herbs like parsley or basil if you’re feeling fancy! This not only adds color but also brings freshness and brightness right before serving—a little visual treat for your guests (or yourself!). Trust me on this one; when you present food beautifully, it elevates even the simplest meals into something truly special.
And there you have it—your very own Garlic Butter Pasta (One Pot!) ready to be enjoyed! As you take that first bite, let yourself sink into those layers of flavor—the buttery richness dancing alongside herb-infused goodness with every forkful. I promise you will find every mouthful profoundly satisfying and utterly comforting just as I do every single time I prepare this recipe. Enjoy every moment; cooking is about sharing joy as much as flavors!
Bon appétit!
Storage and Enjoyment Tips for Your Garlic Butter Pasta (One Pot!)
Now that your kitchen is filled with the intoxicating aroma of your freshly made Garlic Butter Pasta, it’s time to sit down and truly savor this delightful dish! But what if you find yourself with a little extra? No worries at all—this recipe not only tastes incredible right off the stove but also offers some fantastic storage options that ensure every bite remains just as heavenly.
Storing Leftover Garlic Butter Pasta (One Pot!)
To keep your Garlic Butter Pasta as delectable as the moment it was cooked, I recommend transferring any leftovers into an airtight container. This simple step is absolutely crucial because it keeps moisture in and prevents drying out. Store it in the refrigerator, where it will stay fresh for about 3 to 4 days. Now, here’s a little pro tip: placing a slice of bread inside the container can help maintain moisture levels, ensuring your pasta remains wonderfully creamy rather than turning rubbery. The flavors will meld together even more during storage, creating an utterly intoxicating taste experience when you revisit it. When it’s time to enjoy those leftovers, simply reheat them on the stovetop over low heat; add a splash of half and half or broth to restore its original creaminess while stirring gently until warm. Trust me on this—your taste buds will thank you!
Freezing Garlic Butter Pasta for Later
If you want to take your meal prep game to the next level, freezing your Garlic Butter Pasta is an excellent option! Just allow it to cool completely before scooping portions into freezer-safe containers or bags, ensuring you remove as much air as possible before sealing—this is non-negotiable for preventing freezer burn! It can be stored in the freezer for up to 2 months without losing its luscious charm. When you’re ready to use it from frozen, simply let it thaw in the refrigerator overnight and then reheat gently on the stovetop as mentioned earlier—no one will ever guess it was previously frozen! This method not only saves time but also provides a comforting and satisfying meal option on those busy days when cooking feels like a daunting task. How wonderful is it knowing you have this culinary gem waiting for you?
Garlic Butter Pasta (One Pot!)
Garlic Butter Pasta (One Pot!) is a comforting, easy-to-make dish that brings warmth and flavor to your dining table. With its creamy sauce, infused with aromatic herbs and fresh garlic, this recipe guarantees satisfaction in every bite.
- Prep Time: 10 minutes
- Cook Time: 15 minutes
- Total Time: 25 minutes
- Yield: Serves 4
- Category: Main
- Method: Cooking
- Cuisine: Italian
Ingredients
- ¾ teaspoon dried basil
- ¾ teaspoon dried oregano
- ¾ teaspoon dried parsley
- 4 tablespoons butter
- 4 cloves fresh garlic (minced)
- 2 ¾ cups chicken broth (or vegetable broth)
- ¾ cup half-and-half
- ½ lb shellbow pasta
- ¾ cup Parmesan cheese (freshly grated)
- 2 tablespoons fresh lemon juice
Instructions
- In a large soup pot, melt three tablespoons of butter over medium heat. Add minced garlic along with the dried herbs and onion powder; sauté until fragrant.
- Pour in the chicken broth, half-and-half, soy sauce, and crumbled bouillon cube. Bring to a gentle boil.
- Add shellbow pasta and cook according to package instructions (about 8–10 minutes), stirring occasionally.
- Once cooked al dente, reduce heat to low and gradually stir in the Parmesan cheese until melted.
- Squeeze fresh lemon juice into the mixture and add the final tablespoon of butter for extra creaminess.
- Stir gently to combine and serve hot.
Nutrition
- Serving Size: 1 bowl (approximately 300g)
- Calories: 590
- Sugar: 3g
- Sodium: 700mg
- Fat: 32g
- Saturated Fat: 18g
- Unsaturated Fat: 10g
- Trans Fat: 0g
- Carbohydrates: 56g
- Fiber: 2g
- Protein: 20g
- Cholesterol: 70mg