Lemon Pizza
There’s something truly magical about food that transcends mere sustenance; it becomes a vessel for love, memories, and connection. This Lemon Pizza is not just a dish; it’s a symphony of flavors that dances on your palate, evoking the warm embrace of sunny days and laughter shared over a table with cherished friends. Imagine taking a bite of this pizza – the zesty brightness of lemon mingling with creamy mozzarella and aromatic garlic, all resting on a perfectly baked crust. It’s that moment when you realize cooking isn’t just about following recipes; it’s about crafting experiences that linger in our hearts long after the last slice has been devoured. As we dive into this delightful recipe together, I promise you will create not just a meal, but an extraordinary moment to savor.
Now, if you’re wondering what makes Lemon Pizza so special, let me take you on a little journey. This dish blends traditional Italian roots with a refreshing twist that feels both innovative and comforting. It’s perfect for gatherings or those quiet evenings when you crave something delicious yet uncomplicated. The balance between the tartness of lemon and the creaminess of mozzarella creates an irresistible allure that keeps everyone coming back for more. Each ingredient plays its part in this culinary masterpiece—it’s truly a celebration of flavors that invites you to enjoy life’s simple pleasures.
Lemon Pizza: A Zesty Twist on Tradition
This Lemon Pizza is more than just a recipe; it’s an invitation to experience the unexpected joy of combining bright citrus with rich cheese atop a crispy crust. Every bite is an explosion of flavor and texture, making it an unforgettable addition to your culinary repertoire. Whether you’re hosting a dinner party or enjoying a cozy night in, this pizza will surely impress.
Ingredients:
As we embark on this delicious journey to create Lemon Pizza together, let’s explore each ingredient’s unique role in bringing this dish to life. Each component is essential, contributing its own character and charm.
- 1 ball Easy pizza dough (or store-bought dough). The foundation of any pizza starts with the dough, which provides structure and holds all those magical toppings together. If you choose to make your own dough (which I highly recommend for its freshness), use high-quality flour for better elasticity and chewiness. Alternatively, store-bought dough can save time without sacrificing taste—just make sure it’s fresh from the fridge section for best results!
- 2 tablespoons extra virgin olive oil. This liquid gold is absolutely paramount in our recipe! Extra virgin olive oil adds depth and richness while enhancing the flavors of other ingredients. When drizzled over the crust before baking, it creates a beautifully crispy texture and adds an aromatic touch that’s simply irresistible. Always opt for high-quality olive oil; you’ll notice the difference in flavor!
- 1 tablespoon water. While it may seem like a minor player in our ensemble cast, water serves as the bridge between our dough components, activating the yeast (if using) and ensuring everything comes together beautifully. It also helps keep the crust moist during baking—just enough to allow it to rise without becoming soggy.
- 1 tablespoon fresh parsley, chopped. This vibrant herb brings freshness and color to our Lemon Pizza while providing a lovely herbal note that balances out the richness of cheese. When choosing parsley, look for deep green leaves without wilting; fresh herbs can elevate any dish from ordinary to extraordinary.
- 1 small garlic clove, grated. Garlic is synonymous with Italian cuisine; its pungent aroma fills your kitchen with warmth and comfort as it cooks. Grating allows the garlic to release its oils fully into our pizza mix, ensuring every bite carries its savory essence throughout—trust me; don’t skip this step!
- 1 teaspoon lemon zest. Ahh—the zest! This tiny bit packs such enormous flavor punch! The zest contains essential oils that bring out bright notes without adding acidity like lemon juice does. It’s crucial for creating that refreshing zing throughout each slice—so use only organic lemons if possible since you’ll be using their skin.
- 1 teaspoon lemon juice. Now we introduce another layer of brightness! Freshly squeezed lemon juice adds acidity that cuts through richness while tying all flavors together beautifully—it’s like sunshine on your plate! Always squeeze directly from fresh lemons for optimal flavor—it makes all the difference!
- ¼ teaspoon fine salt. Salt enhances every single flavor in our dish; it’s non-negotiable! Use fine salt here as it dissolves easily throughout your ingredients without leaving gritty textures behind—the right balance will elevate your Lemon Pizza into something truly extraordinary.
- ¼ teaspoon black pepper. Just like salt enhances flavors, black pepper introduces warmth and complexity—think of it as seasoning’s best friend! Ground fresh right before using ensures maximum flavor impact without bitterness creeping in; trust me on this one!
- 5 oz (150 grams) fresh mozzarella (or from ½ to ⅓ cup shredded firm mozzarella). Mozzarella is famous for its creamy texture and mild taste—perfect partners for our zesty toppings! If using fresh mozzarella (highly recommended), make sure it’s stored in brine or water until ready to use—it’ll melt beautifully while providing gooey goodness that’ll have everyone reaching for seconds!
- 1 tablespoon additional lemon juice (to finish). Adding more lemon juice at the end brings everything full circle—it amplifies aromas while keeping things bright even after baking! Drizzling right before serving ensures each bite bursts forth with vibrancy—you won’t want to miss this step!
- 2 tablespoons grated parmesan cheese. Parmesan delivers nutty depth with each sprinkle—perfectly complementing our other ingredients while browning slightly during baking creates delightful caramelization! Choose freshly grated over pre-packaged varieties whenever possible; quality makes all difference here.
- 1 tablespoon fresh parsley, for garnish at serving time adds color contrast against golden crusts plus freshness—you’ll want those inviting touches when presenting your masterpiece!
- Freshly ground black pepper, to taste enhances overall flavor profile harmoniously; feel free to add more per personal preference—cooking should always reflect who you are!
With these incredible ingredients gathered around us like dear friends waiting to mingle at a gathering—let’s turn our attention towards all necessary tools before diving into preparation.
Equipment You’ll Need:
Cooking can sometimes seem daunting if you lack proper tools—but fear not! Having reliable equipment makes every step smoother while allowing creativity to flow freely! These essential partners will help manifest your culinary vision into reality:
- Pizza stone or baking sheet – A pizza stone absorbs moisture during baking resulting in crispier crusts due to evenly distributed heat; however if unavailable don’t fret—a good quality baking sheet works wonders too! Just remember: preheating whatever surface you’re using ensures optimal results through proper heat retention.
- Rolling pin – Perfectly rolling out dough helps achieve even thickness across your base which translates directly into consistent cooking times across flavors celebrating harmony rather than chaos within every bite!
- Grater or microplane – Essential for prepping garlic cloves plus zesting lemons effortlessly—the fine grates release more oils yielding brighter flavors compared standard chopping methods would offer instead!
- Mixing bowl – A sturdy mixing bowl large enough accommodates all ingredients comfortably allowing thorough mixing without fear of spills—a crucial tool here so choose wisely!
Now that we’ve assembled everything needed let’s dive headfirst into crafting this delightful Lemon Pizza from scratch together—it’ll be worth every moment spent watching magic unfold before our very eyes!
Step 1: Preparing Your Dough
Begin by rolling out your pizza dough on a floured surface using your rolling pin until you reach an ideal thickness of about ¼ inch—it shouldn’t be too thick nor too thin but just right so toppings shine without overwhelming them entirely! If you’re using store-bought dough instead (which can save valuable time!) simply follow package instructions regarding resting times before stretching out properly onto prepared surfaces mentioned earlier—you want every inch covered evenly without tearing apart during transit into oven later on!
Step 2: Preheat Your Oven
While working away at shaping crusts ensure preheating oven reaches temperature around 475°F (245°C)—this process activates yeast within bread-like structures resulting crispy bases worthy indulgences deserving praise amongst family gatherings alike! Don’t rush this step; patience pays off big time when biting down crunchy edges contrasted perfectly soft centers beneath melted cheeses awaiting discovery within each slice served hot straight from oven directly onto plates eagerly awaiting devourment shortly afterward…
Step 3: Preparing Toppings
Time now turns toward preparing toppings where flavors meld harmoniously creating tantalizing symphony upon base laid down moments earlier… In small bowl combine grated garlic clove along chopped parsley along generous drizzle olive oil whisking gently until incorporated fully then set aside while zesting lemons next—we’re aiming brightness elevating overall taste sensation beyond imagination here so don’t skimp out on juicy goodness found within skins themselves either because they matter greatly too my friend!
Step 4: Assembling Your Masterpiece
Once oven has reached peak temperatures return back towards prepared surface laying freshly rolled-out dough down carefully before brushing generous amounts flavorful mixture prepared earlier across entire surface ensuring even distribution throughout corner edges alike… Next sprinkle layers mozzarella evenly atop followed immediately by grated parmesan adding savory nuances enhancing overall appeal enticing guests rightly anticipating first bites soon thereafter once everything’s ready baked golden perfection achieved moments later pulling forth vibrant colors emerging alongside intoxicating aromas filling air around us reminding why cooking matters most especially during times shared among loved ones celebrating life itself together…
And there we have begun crafting what promises become unforgettable experiences through unique blend citrus tang paired creamy textures embodying harmony found deeply rooted Italian traditions woven beautifully modern twists reflecting visions encapsulated inside heartwarming recipes passed down generations before us… Stay tuned as we continue exploring remaining steps leading finale glorious creation awaits eager palettes wanting indulge…
Step 5: Preparing the Flavorful Base
Now that our pizza dough has had a moment to rise and develop those lovely gluten strands, it’s time to prep the flavorful base that will take our Lemon Pizza to a whole new level. Begin by taking your mixing bowl and adding the extra virgin olive oil, which is not just any oil; it’s liquid gold that brings depth and richness to this dish. You’ll want to add in the grated garlic, allowing its pungent aroma to fill the air—trust me; this step is crucial because garlic adds a warm, savory note that complements the brightness of the lemon beautifully. Next, mix in one tablespoon of fresh parsley, chopped finely. This herb not only adds color but also an earthy freshness that balances out the richness of the cheese.
Now comes the citrusy magic! Stir in one teaspoon of lemon zest and one teaspoon of lemon juice. The zest is essential because it contains those aromatic oils that brighten up every bite with an invigorating kick, while the juice provides acidity that cuts through the creaminess of the mozzarella. Add a sprinkle of fine salt and black pepper to taste; these ingredients are non-negotiable as they enhance all the flavors we’re layering in. Give it all a good stir until you have a beautifully cohesive mixture that smells utterly intoxicating and promises to elevate our pizza experience. This step sets a flavorful foundation that’s absolutely paramount for achieving that symphony of flavors we crave.
Step 6: Assembling Your Masterpiece
With your base ready, it’s showtime! Preheat your oven to around 475°F (245°C), which is vital for achieving a crispy crust reminiscent of your favorite pizzeria. While that’s heating up, roll out your pizza dough on a floured surface into a circle about 12 inches wide or whatever shape suits your fancy—don’t stress if it’s not perfect! The beauty of homemade pizza lies in its character. Use your hands or a rolling pin, whichever feels most comfortable for you, ensuring it’s about ¼ inch thick for an ideal crunch.
Once shaped, carefully transfer your dough onto a baking sheet lined with parchment paper or onto a preheated pizza stone if you have one—it makes such a difference! Now, spread that delicious garlic and parsley mixture evenly over the surface of your dough. Don’t skimp here; this layer is where all those incredible flavors start their dance together! Then comes the mozzarella: tear it into pieces or sprinkle shredded mozzarella evenly across the top, ensuring every corner gets its fair share of melty goodness. Finally, sprinkle on two tablespoons of grated parmesan cheese; this creates a delightful cheesy crust when baked. I promise you this combination will make your taste buds sing!
Step 7: The Art of Baking
Once everything is assembled perfectly and looks like an edible work of art, it’s time to place your Lemon Pizza into the oven. Baking at such high temperatures for about 10-15 minutes transforms simple ingredients into something truly extraordinary. While it bakes, resist the urge to open the oven door too early; letting heat escape can prevent that gorgeous crust from forming properly. Instead, watch through the oven window as your pizza begins bubbling and turning golden brown—the sight alone is enough to make anyone salivate!
After around 10 minutes, start checking for doneness: look for melted cheese that’s slightly golden and edges that are crisp yet tender—this means you’ve achieved that ideal balance between texture and flavor. This moment is so rewarding because you know all those flavors have melded beautifully together during baking! If it’s not quite there yet after 15 minutes, give it another minute or two but keep an eye on it—burnt pizza is sad pizza!
Step 8: Finishing Touches That Elevate
Once out of the oven, let your Lemon Pizza rest for at least five minutes before slicing into it—this patience pays off because resting allows steam to escape while letting cheese firm up slightly so each slice holds together beautifully when cut. It’s important not to rush this step; think of it as giving your pizza some time to reflect on its culinary journey from raw ingredients to an irresistible masterpiece.
As you prepare to serve, drizzle just a touch more extra virgin olive oil over each slice for added richness—this little detail elevates everything from good to unforgettable! Finally, finish with fresh parsley sprinkled over top and freshly cracked black pepper according to taste; these final touches add bursts of flavor while also making everything visually appealing—after all, we eat with our eyes first! Now gather around with friends or family because I promise you this Lemon Pizza will be an instant hit at any gathering!
Final Touches: Enjoying Your Creation
Your Lemon Pizza is now ready to be devoured! Slice it generously into wedges and serve hot with perhaps a side salad dressed lightly with lemon vinaigrette—it complements this pizza beautifully by echoing those bright flavors. As you take that first bite, close your eyes and savor how each component works harmoniously together: creamy mozzarella mingling with vibrant lemon notes while garlic dances subtly in the background.
This dish isn’t just food; it’s an experience filled with laughter shared over slices around tables adorned with stories waiting to be told. So go ahead—enjoy every single mouthful knowing you’ve created something wonderful from scratch! And remember this recipe; it’s bound to become one of those cherished favorites you’ll return to time and again because who could resist such refreshing flavors? Happy cooking!
Storage and Enjoyment Tips for Your Lemon Pizza
Now that your Lemon Pizza is hot out of the oven, bubbling with melted mozzarella and adorned with bright flecks of lemon zest and fresh parsley, it’s time to dig in! This dish is not just a meal; it’s an experience bursting with flavors that will make your taste buds sing. But what if you find yourself with leftovers? Fear not, my friend! Let’s explore how to keep this culinary delight at its best for later enjoyment.
Storing Leftover Lemon Pizza
When it comes to storing your leftover Lemon Pizza, the key is to treat it gently so that every bite remains as delicious as when it first came out of the oven. I recommend using an airtight container or wrapping each slice snugly in parchment paper before placing them in a resealable bag. This method helps prevent moisture loss while keeping that delightful texture intact. You can store your pizza in the refrigerator for up to three days. Trust me on this: freshness is absolutely paramount! If you want to keep it even longer, consider placing those slices in the freezer. To maintain quality, try adding a slice of bread into the container or bag—this little trick absorbs excess moisture and helps keep the crust from getting soggy. When you reheat your pizza, simply pop it in the oven at 350°F (175°C) for about 10-15 minutes or until warmed through. The flavors will meld beautifully again, and you’ll be greeted by that utterly intoxicating aroma once more!
Freezing Lemon Pizza for Later
Freezing your Lemon Pizza is not only a smart move but an incredibly convenient one, especially when life gets busy. To freeze properly, allow the pizza to cool completely before wrapping each slice tightly in plastic wrap and then placing them in a sturdy freezer-safe bag or container. This way, they can last up to two months without losing their charm! The beauty of freezing is you can enjoy a gourmet meal anytime without any fuss—just pull a slice from the freezer and let it thaw in the fridge overnight before reheating. It’s like having a homemade restaurant-quality dish ready at your fingertips! Imagine coming home after a long day, and all you have to do is take out your frozen Lemon Pizza—how wonderful is that?
With these storage tips under your belt, you’re now equipped to savor every last bite of this refreshing dish!
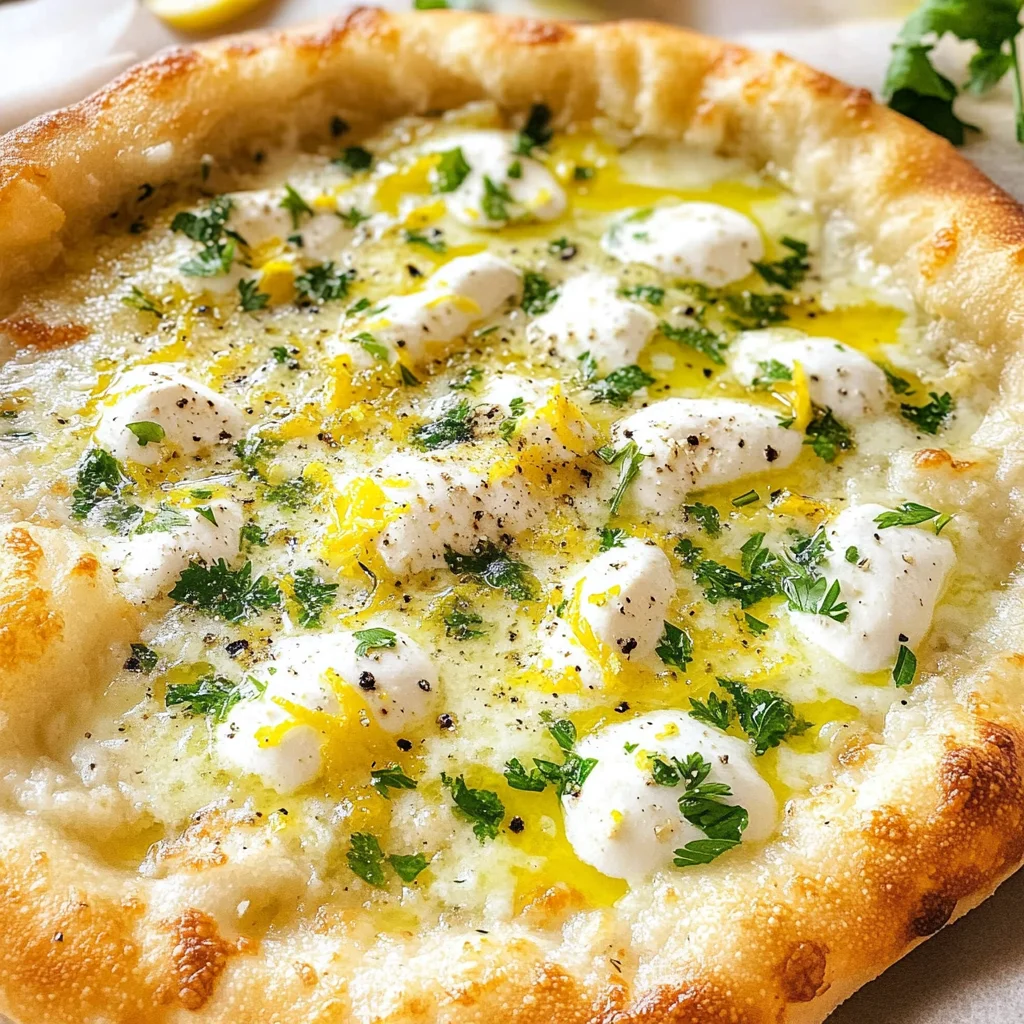
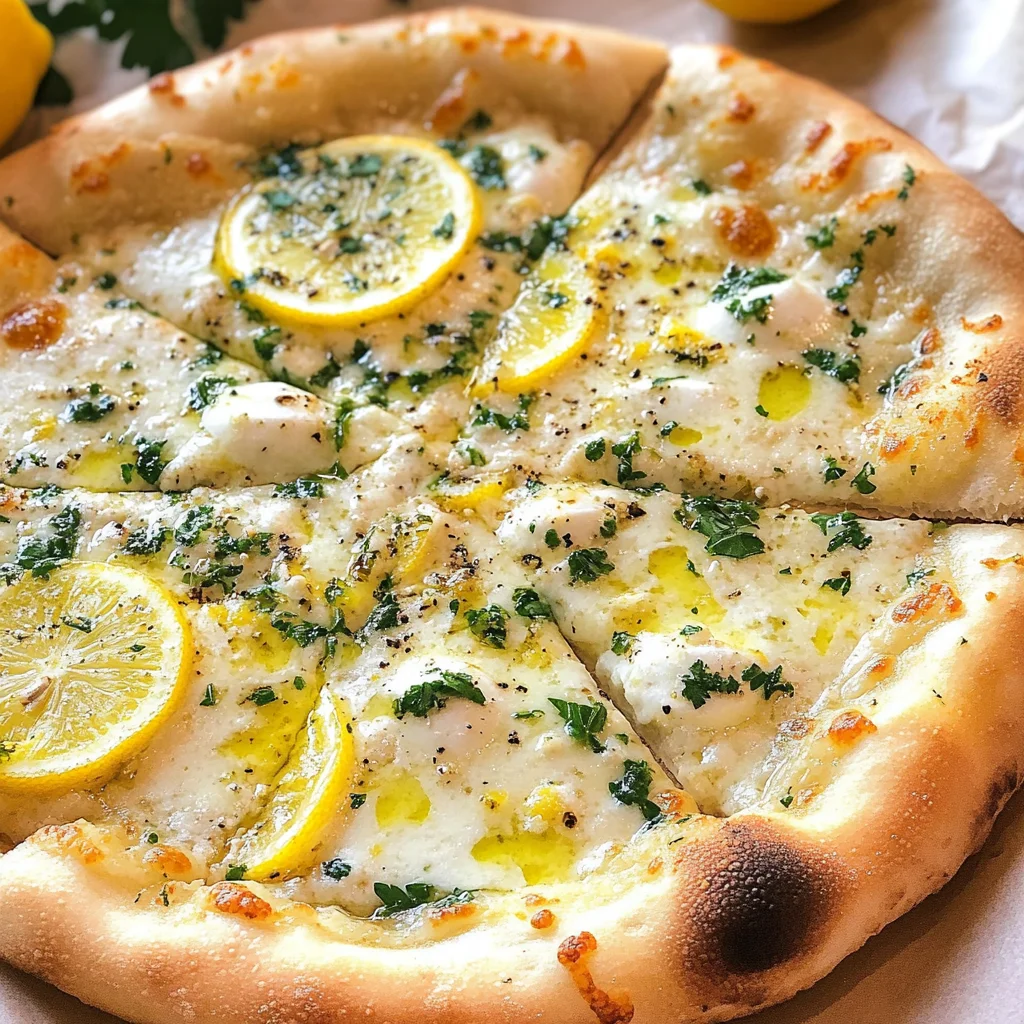
Lemon Pizza

Enjoy vibrant Lemon Pizza featuring creamy mozzarella and zesty lemon flavors—perfect for any occasion! Try it today!
- Prep Time: 15 minutes
- Cook Time: 12 minutes
- Total Time: 27 minutes
- Yield: Serves 4
- Category: Dinner
- Method: Baking
- Cuisine: Italian
Ingredients
- 1 ball easy pizza dough (or store-bought)
- 2 tablespoons extra virgin olive oil
- 1 tablespoon water
- 1 tablespoon fresh parsley, chopped
- 1 small garlic clove, grated
- 1 teaspoon lemon zest
- 1 teaspoon lemon juice
- ¼ teaspoon fine salt
- ¼ teaspoon black pepper
- 5 oz fresh mozzarella (or shredded)
- 1 tablespoon additional lemon juice (to finish)
- 2 tablespoons grated parmesan cheese
- Freshly ground black pepper (to taste)
Instructions
- Preheat oven to 475°F (245°C).
- Roll out the pizza dough on a floured surface until about ¼ inch thick.
- Mix olive oil, grated garlic, parsley, lemon zest, lemon juice, salt, and pepper in a bowl; spread evenly over the dough.
- Top with mozzarella and parmesan cheese.
- Bake for 10-15 minutes until cheese is melted and crust is golden.
- Drizzle with additional lemon juice before serving.
Nutrition
- Serving Size: 1/4 pizza (175g)
- Calories: 295
- Sugar: 2g
- Sodium: 365mg
- Fat: 14g
- Saturated Fat: 5g
- Unsaturated Fat: 8g
- Trans Fat: 0g
- Carbohydrates: 30g
- Fiber: 2g
- Protein: 12g
- Cholesterol: 20mg