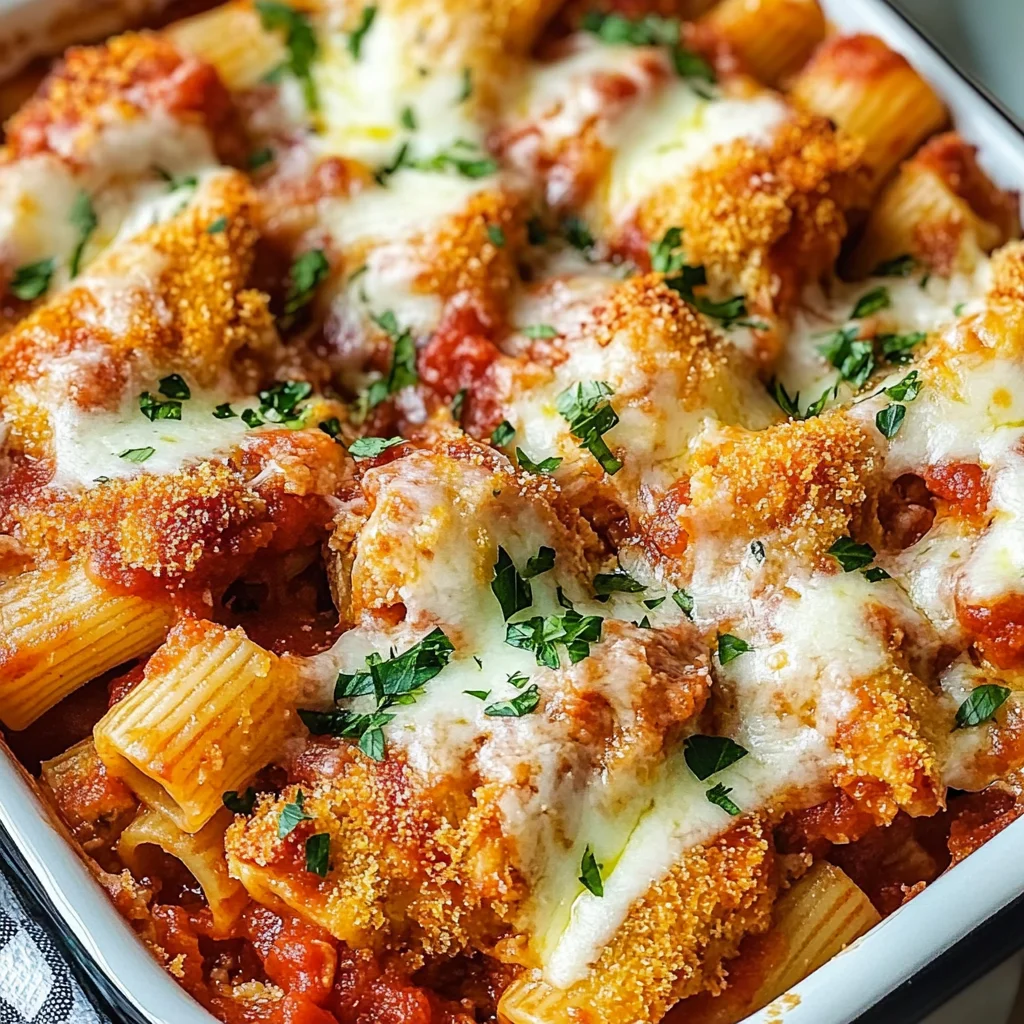
Chicken Parmesan Casserole
There’s something profoundly satisfying about a warm, cheesy casserole that wraps you in an embrace of comfort. When I think of gathering around the table with loved ones, I can’t help but reminisce about my childhood memories of sharing hearty meals that brought everyone together. This Chicken Parmesan Casserole is not just a dish; it’s a celebration of flavors and traditions, blending the rich essence of Italian cooking with the warmth of American comfort food. As the layers of crispy chicken, gooey mozzarella, and tangy marinara sauce meld together in this delightful creation, you’ll find that it becomes more than just a meal – it transforms into an experience that ignites joy and nostalgia.
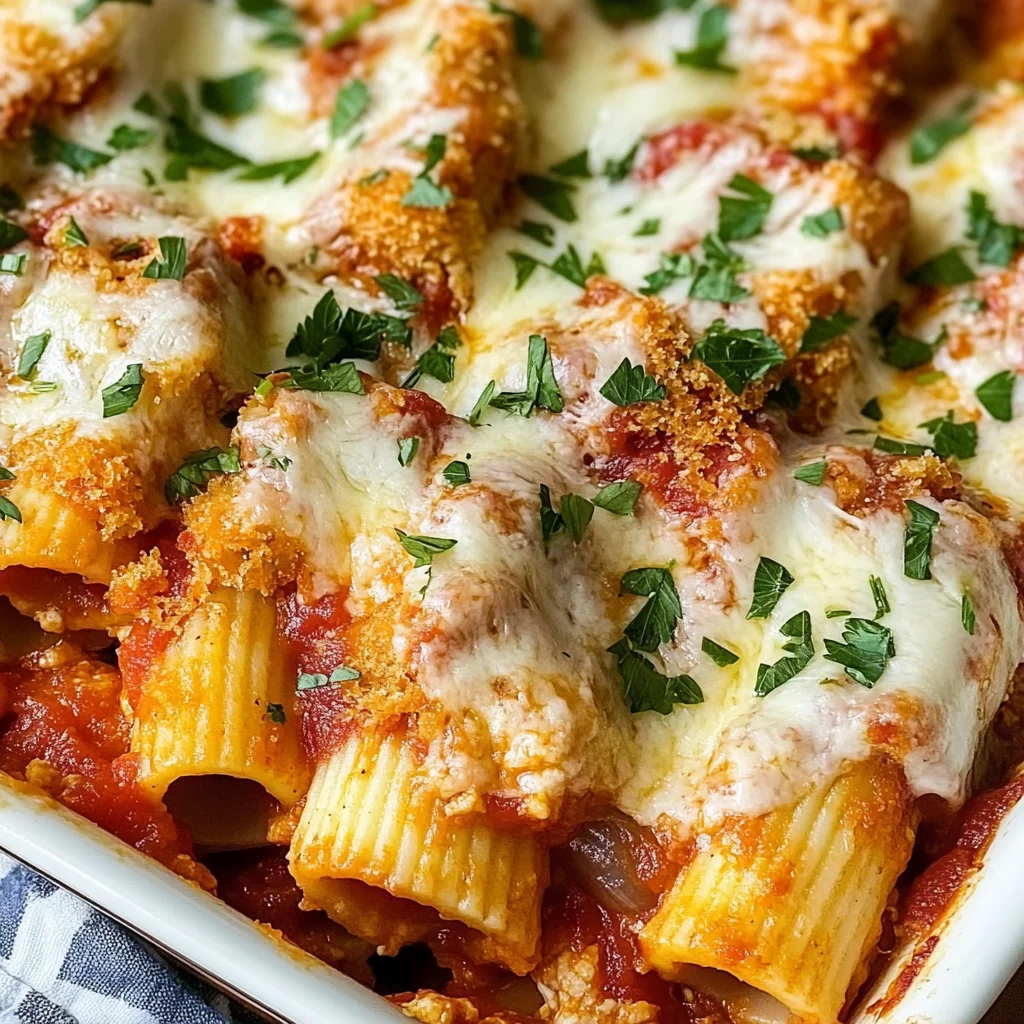
Imagine slicing into this beautifully golden-brown casserole, the steam rising with an intoxicating aroma that fills your kitchen. Each bite delivers a symphony of textures – the crunch from perfectly breaded chicken juxtaposed against the softness of rigatoni pasta, all drizzled with rich marinara sauce that oozes flavor. I promise you, this Chicken Parmesan Casserole will become a go-to recipe in your home. It’s versatile enough to accommodate homemade crispy chicken or even those frozen chicken tenders on busy weeknights. Whether you’re cooking for family gatherings or intimate dinners, this dish bridges the gap between convenience and culinary delight.
Chicken Parmesan Casserole: A Comforting Classic Reimagined
Get ready to embark on a culinary journey that marries tradition with simplicity! This Chicken Parmesan Casserole is destined to be a household favorite. With its easy-to-follow steps and delightful results, it’s perfect for any occasion. Plus, who can resist that bubbling cheese topping? Trust me when I say you’ll want to savor every last bite!
Ingredients:
As we dive into this comforting recipe, let’s gather our ingredients and get ready for some kitchen magic! Each component plays an essential role in creating depth and flavor, making our casserole utterly unforgettable.
- ¾ pound rigatoni pasta. This sturdy pasta shape is perfect for holding onto all that delicious sauce and cheese. Its ridges create pockets where marinara can cling tightly, ensuring each forkful bursts with flavor. Rigatoni’s robust structure means it holds up beautifully during baking without becoming mushy or overcooked–a crucial factor for our casserole.
- 32 oz. marinara sauce (or up to 48 oz. for saucier pasta). The foundation of our dish is this vibrant sauce, which adds acidity and sweetness to balance out the richness of the cheese and chicken. Whether you choose store-bought or homemade (and I encourage you to try making your own if you’re feeling adventurous), look for sauces made from high-quality tomatoes to ensure maximum flavor impact.
- 3 cups shredded mozzarella cheese (divided). Mozzarella’s melting properties make it the star ingredient here; it transforms into a gooey blanket that envelops everything in divine creaminess as it bakes. Opt for whole-milk mozzarella for richer taste and texture—even consider shredding your own if time allows! Pre-shredded varieties often contain anti-caking agents that inhibit melting beautifully.
- 1/3 cup grated Parmesan cheese (divided). This salty gem enhances our casserole’s complexity by adding a sharp bite that’s absolutely addictive when paired with mozzarella. Look for freshly grated Parmesan for optimal flavor—it’s so much better than the pre-packaged stuff!
- 2 small boneless skinless chicken breasts. The choice of chicken breast provides lean protein while allowing us to achieve that sought-after crispy crust when breaded properly. If you’re short on time or looking for convenience, feel free to swap in frozen chicken tenders or leftover rotisserie chicken; they work wonderfully in this recipe!
- ¾ cup flour. This simple ingredient serves as our base for breading the chicken—acting like glue when combined with eggs—and helps create a beautiful golden crust during frying. When choosing flour, all-purpose works best; however, if you’re gluten-free, consider using a suitable blend.
- 2 teaspoons seasoned salt. This seasoning mix elevates our breading process by infusing each layer with flavor right from the start—an essential step not to be overlooked! You can easily substitute regular salt mixed with Italian herbs if needed.
- ¼ teaspoon pepper. A little sprinkle goes a long way in enhancing flavors throughout our casserole while balancing out richness from cheese and sauce.
- 2 eggs. These are vital for binding our flour mixture to the chicken while also adding moisture—crucial steps toward achieving maximum crispiness without drying out! Make sure they’re at room temperature before using them; this aids in even coating.
- 1 ½ cups Italian breadcrumbs. These delightful nuggets add crunch and texture as they adhere to our chicken while frying; their herbaceous notes complement both the parmesan and marinara beautifully! For an extra layer of flavor, consider making your own breadcrumbs using stale Italian bread seasoned with garlic powder and herbs.
- ¾ cup vegetable oil. This will be used for frying which creates that coveted crunchy exterior on our chicken pieces! While vegetable oil is fantastic due to its high smoke point, feel free to use olive oil if you prefer its unique taste—it can elevate things even further!
- 2 Tablespoons butter. A final touch during baking adds richness as it melts into everything below; consider using unsalted butter so you can control salt levels better throughout your dish.
- Fresh parsley (to garnish). This lively herb doesn’t just elevate aesthetics—it brings freshness that counters all those rich flavors beautifully! Don’t skip garnishing; it adds vibrancy both visually and taste-wise!
Equipment You’ll Need:
Before we roll up our sleeves and start cooking, let’s chat about some essential tools you’ll need at hand—I promise having these will make your cooking experience smoother and more enjoyable!
- Large pot: A heavy-duty pot is key for boiling pasta—look for one with ample capacity so there’s plenty of room for water to circulate around those rigatoni noodles as they cook evenly without sticking together!
- Large skillet: An equally important partner in crime is your skillet where we’ll fry our chicken until golden brown perfection emerges! Choose one with good heat retention—the heavier models tend to distribute heat more evenly across surfaces.
- Baking dish: A deep 9×13-inch baking dish makes layering simple while also allowing all those glorious ingredients room to meld harmoniously together during baking!
- Mixing bowls: You’ll want a few sizes handy—for dredging flour & egg mixtures along with another bowl reserved solely for combining cheeses (this keeps things tidy).
- Tongs: These handy tools are perfect when flipping sizzling pieces of breaded goodness over without losing any precious coating—trust me there’s nothing worse than losing all your hard work!
Step 1: Boil Your Pasta
Start by bringing a large pot filled with salted water to a rolling boil—this sets the stage for perfect rigatoni noodles! Remember: salting water is absolutely paramount because it enhances flavor right from this first step rather than relying solely on sauce later on down the line (which often gets diluted). Once boiling vigorously away merrily enough where bubbles dance towards edges joyfully bouncing off each other—that’s your cue! Add in those rigatoni noodles gently so they don’t stick together initially but instead find harmony within themselves by swirling occasionally during initial cooking time until al dente—for around 8–10 minutes depending on brand instructions given on packaging since brands vary widely sometimes—but trust me when I say experimentation leads toward mastery here too!
Step 2: Prepare The Chicken
While waiting on those noodles happily bubbling away—which should take about 15 minutes total—you can multitask by preparing your chicken breasts next! Start off by placing them between two sheets of plastic wrap before giving them light taps using either mallet or rolling pin until they reach about half-inch thickness—this technique known as “pounding” tenderizes meat wonderfully while also ensuring even cooking throughout future steps ahead later down line too (plus who doesn’t love watching their frustrations melt away through gentle rhythmic motions?). Afterward season both sides generously using seasoned salt alongside freshly cracked pepper then set aside momentarily while whipping up egg wash mixture next involving whisking together two eggs inside separate bowl until thoroughly blended resembling sunshine yolks glistening invitingly back at you!
Step 3: Breading Process
Now comes one part truly magical—the breading process where we create layers upon layers of deliciousness enclosed within crispy exteriors around succulent meats inside! Begin by pouring flour onto shallow plate filling nearly halfway—it acts like glue binding everything beautifully together later alongside egg wash applied afterwards followed closely behind immediately getting dusted evenly across breadcrumb mixture also designed specifically infused distinctly flavored Italian-style breadcrumbs meant only enhance overall experience here fully embracing aromas wafting through air surrounding us enticing everyone nearby eagerly anticipating what lies ahead next once cooked together harmoniously soon enough afterward… Now dip each prepared piece gently first into flour coating lightly shaking off excess followed swiftly after straight into egg wash letting drips fall back before finishing off finally at last onto breadcrumb mixture pressing firmly against surface ensuring complete coverage achieved everywhere turning them golden brown once fried later following exact same method repeated over remaining batches until every single piece dressed appropriately ready hitting hot skillet below sizzling away soon thereafter…
Step 4: Fry The Chicken
Heat up about three quarters cup worth vegetable oil inside large skillet over medium-high heat until shimmering visibly radiating warmth beckoning us closer towards action pending ahead—we want sufficient temperature going strong enough achieving golden brown crust forming quickly without burning either side simultaneously too soon causing unbalanced textures developing throughout entire dish ultimately ruining experience intended altogether instead! Carefully place several coated pieces directly down onto heated surface not crowding pan otherwise risking uneven cooking occurring leading sadly toward soggy mess instead successfully achieving crispy perfection desired here instead—allow roughly four minutes passing by patiently before flipping pieces over noticing they’re beginning releasing themselves effortlessly revealing deep brown hues emerging underneath proudly showcasing success reached thus far already…
I can’t wait for you to experience this Chicken Parmesan Casserole just as I have—with love echoing through every bite shared among family and friends around dinner tables everywhere creating bonds lasting lifetimes longer beyond meals alone… Stay tuned as we continue crafting each layer within this masterpiece unfolding beautifully right before eyes soon after too!
Step 5: Bread the Chicken to Perfection
Now that your pasta is happily boiling away, let’s shift our focus to the chicken. This step is absolutely paramount because breading the chicken not only gives it a delightful crunch but also creates a flavorful barrier that seals in moisture. First, take your two small boneless skinless chicken breasts and slice them horizontally to create thin fillets. This technique is key; thinner pieces cook faster and become beautifully crispy without drying out. Once you’ve got your chicken prepped, set up your breading station. You’ll need three shallow bowls: one for the flour mixed with seasoned salt and pepper, another for the beaten eggs, and the last one filled with Italian breadcrumbs.
Now, don’t rush this step! Dredge each chicken piece in the flour mixture first, ensuring every inch is coated. This initial layer of flour helps the egg adhere better, creating a solid base for that delectable crunch we’re aiming for. Next, dip the floured fillet into the egg wash, letting any excess drip off before transferring it to the breadcrumbs. Here’s where you can get a little creative; press down firmly on each side to make sure they’re fully covered in breadcrumbs, giving you that extra layer of texture that will transform into an irresistible golden crust once cooked. Place the breaded chicken on a plate and set it aside while you heat up your oil.
Step 6: Sautéing for Golden Goodness
With your chicken ready for action, it’s time to heat the vegetable oil in a large skillet over medium heat—about ¾ cup of oil should do nicely. Allow it to get hot enough so that when you add a breadcrumb or small piece of chicken, it sizzles immediately. This step is crucial because if the oil isn’t hot enough, you’ll end up with soggy chicken rather than that crispiness we all dream about! Carefully place each piece of breaded chicken into the pan, making sure not to overcrowd it; you want to allow each piece room to breathe and fry evenly.
Cook each side for about 4-5 minutes until they turn a beautiful golden brown color—this is when those mouthwatering aromas will start wafting through your kitchen! If you’re unsure whether they’re done cooking through, use a meat thermometer; you’re looking for an internal temperature of 165°F (75°C). It’s important not just to rely on visual cues alone because undercooked chicken can be unsafe to eat. Once cooked, transfer them onto a paper towel-lined plate to drain any excess oil—this little detail makes all the difference in achieving that crispy finish without being greasy.
Step 7: Assemble Your Casserole
Now comes one of my favorite parts—the assembly! Preheat your oven to 375°F (190°C) while you prepare this delightful layering process. In a large baking dish (a 9×13 works perfectly), pour half of your marinara sauce across the bottom; this creates a lovely moist base that keeps everything from drying out during baking. Next, add your cooked rigatoni directly on top of the sauce—don’t worry if some pasta sticks together; it’s all going to meld beautifully during baking! Now sprinkle half of your shredded mozzarella cheese over the pasta; this melty goodness will bind everything together wonderfully.
Next up is placing those perfectly sautéed chicken pieces on top of the cheese layer. This is where you might want to take a moment to admire your handiwork! The contrast between the golden brown chicken and gooey cheese is utterly intoxicating—it’s like art on a plate! Finally, drizzle another layer of marinara sauce over everything and top it off with remaining mozzarella cheese and grated Parmesan cheese for that extra touch of richness. Trust me on this; while any cheese would work here, using high-quality mozzarella and Parmesan will elevate your dish from good to truly extraordinary!
Step 8: Baking Your Perfect Chicken Parmesan Casserole
Once everything is artfully layered in your baking dish, it’s time for this beauty to hit the oven! Slide it onto the middle rack and let it bake for about 25-30 minutes or until all that glorious cheese is melted and bubbly—what you’re looking for here are those beautiful golden edges around where the cheese meets sauce. It’s essential not just for aesthetics but also because those browned bits carry such intense flavor!
Keep an eye on it during those last few minutes as ovens can vary significantly in temperature; if yours runs hot or cold, you may need to adjust accordingly. To test if it’s done without cutting into it just yet—give it a gentle shake; if there’s minimal jiggle from underneath but everything seems firm and set on top, you’re good! For an added touch of perfection during the final moments of baking, consider turning on broil for just a minute or two at the end—watching closely as this will give you that gorgeous caramelization which makes every bite feel like a warm hug from inside out.
Final Touches Before Serving Your Chicken Parmesan Casserole
As soon as you pull this masterpiece out from the oven, let yourself bask in those aromas enveloping your kitchen—it’s nothing short of magical! But before diving right in (as tempting as that may be), allow it to rest for about 10 minutes. This brief pause is essential because it lets everything settle beautifully together; rushing could result in an overly saucy mess when serving instead of perfectly portioned layers.
While it’s resting, chop up some fresh parsley—a bright sprinkle adds an inviting pop of color as well as freshness against all that cheesy goodness waiting beneath! When ready to serve—using a sharp spatula or knife cut generous squares through each layer—you’ll see how beautifully this Chicken Parmesan Casserole holds its shape while still being creamy and comforting at heart.
As you dig in with family or friends gathered around—the laughter echoing through shared stories—each bite becomes profoundly satisfying as flavors meld together harmoniously creating memories you’ll cherish long after dinner plates are cleared away. Enjoy every delicious morsel knowing you’ve created something special that’s sure to be requested again and again at future gatherings!
Storage and Enjoyment Tips for Your Chicken Parmesan Casserole
Now that your Chicken Parmesan Casserole is bubbling away in the oven, filling your kitchen with the most glorious aroma, let’s talk about how to enjoy every last bite of this comforting dish! This casserole is not only a feast for the senses but also a practical choice for meal prep or cozy leftovers. So, whether you’re serving it right away or planning to store some for later, you’re in for a truly delightful experience.
Storing Leftover Chicken Parmesan Casserole
To keep your Chicken Parmesan Casserole fresh and delicious for days to come, it’s essential to store it properly. I recommend using an airtight container that allows for easy access yet seals in all that glorious flavor. If you have a family-sized portion left over, don’t worry; this casserole can be stored safely in the refrigerator for about 3 to 5 days. To maintain its quality, consider placing a slice of bread on top before sealing—this little trick absorbs excess moisture and keeps the breading crispy. Trust me on this—it’s non-negotiable when it comes to preserving that delightful texture! When you reheat your casserole, those layers of cheesy goodness will still be just as inviting as when it first came out of the oven. Simply pop it back into the oven or microwave until it’s heated through; I promise you’ll be greeted with that same intoxicating aroma.
Freezing Chicken Parmesan Casserole for Later
If you want to stock up on cozy meals ahead of time, freezing is an excellent option! To freeze your Chicken Parmesan Casserole properly, allow it to cool completely before transferring it into a freezer-safe container or wrapping it tightly with aluminum foil. This dish can be frozen for up to three months without losing its charm. When you’re ready to enjoy it again, simply take it out of the freezer and let it thaw in the fridge overnight or bake from frozen—just add some extra time to ensure everything heats through beautifully. The convenience factor here is absolutely paramount; imagine coming home after a long day and pulling out this soul-soothing casserole straight from your freezer! You’ll have a comforting dinner ready in no time, making those busy evenings feel like a warm hug.
Chicken Parmesan Casserole
Indulge in the ultimate comfort food with this Chicken Parmesan Casserole, a delightful blend of crispy chicken, gooey mozzarella, and rich marinara sauce layered over hearty rigatoni pasta. This easy-to-make dish is perfect for busy weeknights or family gatherings, bringing everyone together around the dining table. With its warm, inviting aroma and bubbling cheese topping, every bite is a satisfying experience that will surely evoke feelings of nostalgia and joy. Whether you’re whipping it up from scratch or using convenient ingredients like frozen chicken tenders, this casserole is versatile enough to fit any occasion. Get ready to create lasting memories with this deliciously comforting meal!
- Prep Time: 20 minutes
- Cook Time: 30 minutes
- Total Time: 50 minutes
- Yield: Serves approximately 6 people 1x
- Category: Main
- Method: Baking/Frying
- Cuisine: Italian
Ingredients
- ¾ pound rigatoni pasta
- 32 oz. marinara sauce
- 3 cups shredded mozzarella cheese
- 1/3 cup grated Parmesan cheese
- 2 boneless skinless chicken breasts
- ¾ cup flour
- 2 teaspoons seasoned salt
- ¼ teaspoon pepper
- 2 eggs
- 1 ½ cups Italian breadcrumbs
- ¾ cup vegetable oil
- 2 tablespoons butter
- Fresh parsley (for garnish)
Instructions
- Preheat oven to 375°F (190°C). Cook rigatoni in salted boiling water until al dente; drain.
- Prepare chicken by slicing into thin fillets. Season with seasoned salt and pepper.
- Set up a breading station with flour, beaten eggs, and breadcrumbs. Dredge each chicken piece in flour, dip in eggs, then coat with breadcrumbs.
- Heat vegetable oil in a skillet over medium heat and fry each breaded piece until golden brown on both sides; drain on paper towels.
- In a baking dish, layer half of the marinara sauce followed by cooked rigatoni and half of the mozzarella cheese. Place fried chicken on top and drizzle remaining sauce.
- Top with remaining mozzarella and Parmesan cheese. Bake for 25–30 minutes until bubbly and golden.
Nutrition
- Serving Size: 1 cup (240g)
- Calories: 450
- Sugar: 6g
- Sodium: 780mg
- Fat: 20g
- Saturated Fat: 9g
- Unsaturated Fat: 10g
- Trans Fat: 0g
- Carbohydrates: 44g
- Fiber: 3g
- Protein: 30g
- Cholesterol: 120mg