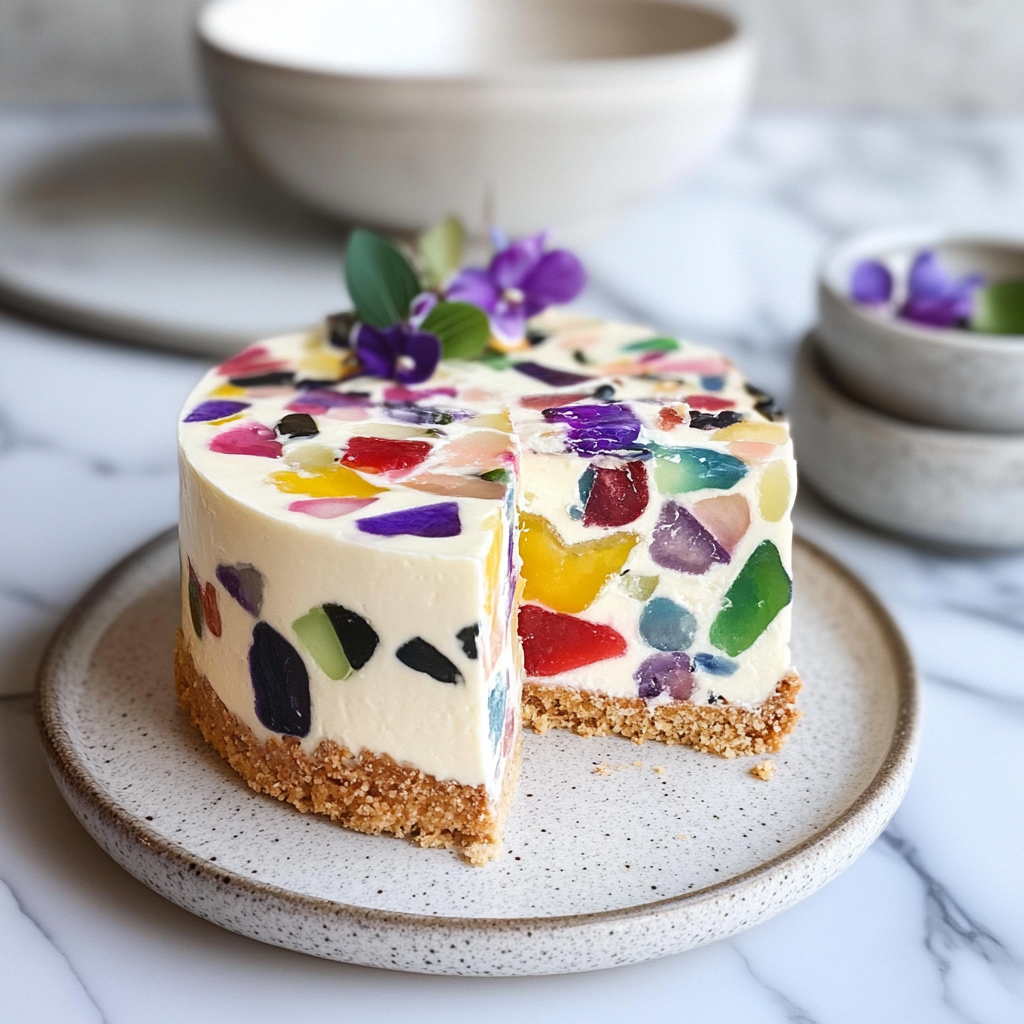
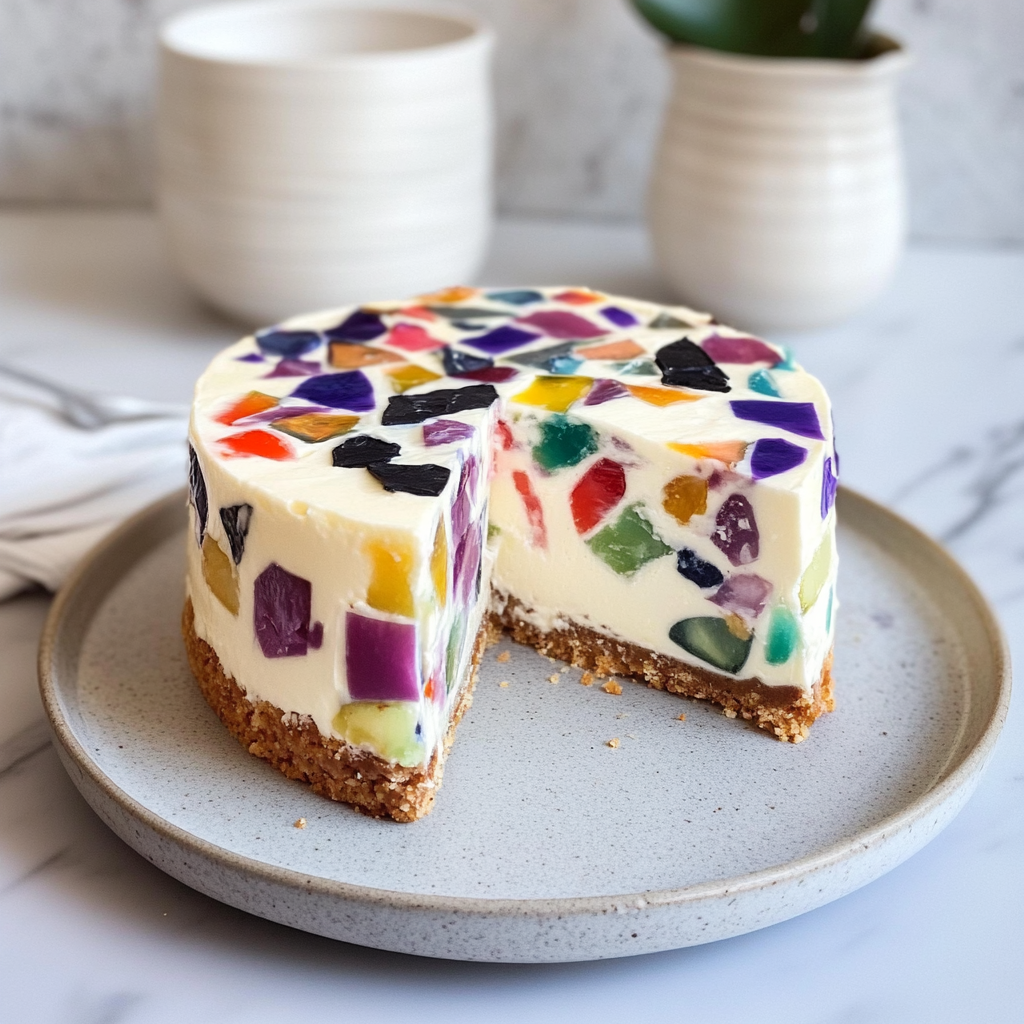
Terrazzo Cheesecake
There’s something absolutely enchanting about dessert, don’t you think? It’s not just about satisfying a sweet tooth; it’s about creating memories that linger long after the last bite. When I think of my favorite desserts, they often tell a story—of laughter shared around the table, of celebrations marked with joy, and of those quiet moments when you savor every mouthful as if time itself has paused. Today, I am thrilled to share with you a recipe that embodies all this magic: the Terrazzo Cheesecake. Inspired by the beautiful terrazzo patterns found in art and architecture, this cheesecake is not only a feast for the taste buds but also a visual delight that will leave your guests in awe.
This delightful dessert has its roots in Matklubben Trondheim, where it has captured hearts with its stunning appearance and heavenly flavor. Each layer of vibrant jello peeking through the creamy cheesecake resembles an artistic masterpiece—a true testament to how food can be both beautiful and delicious. What makes this cheesecake so special is not just its looks but its unique combination of flavors and textures. The tangy sweetness of the jello layers paired with the lush creaminess of the cheesecake creates a symphony of flavors that dance on your palate. I promise you, once you serve this at your next gathering, it will become an instant favorite among family and friends!
Terrazzo Cheesecake: A Vibrant Celebration in Every Slice
Welcome to your new favorite dessert adventure! This Terrazzo Cheesecake is not just another recipe; it’s an experience waiting to happen. Imagine cutting into that first slice, revealing the stunning layers of colorful jello nestled within a rich cream cheese filling. Each bite offers a delightful contrast between the smoothness of the cheesecake and the playful texture of the jello pieces. Trust me when I say that this is one dessert that will have everyone asking for seconds (and maybe even thirds). Let’s dive into this culinary journey together!
Ingredients:
As we embark on this delightful journey to create our Terrazzo Cheesecake, let’s take a moment to appreciate each ingredient that plays a role in bringing this masterpiece to life.
- 0.5 pack kiwi jello. The vibrant green hue and refreshing flavor of kiwi jello adds an exciting tropical twist to our cheesecake. This fruity element brightens up each slice with its tartness while providing a lovely contrast against the creamy backdrop. When selecting your jello, look for brands that offer natural flavors and colors—this ensures your cheesecake tastes as good as it looks.
- 0.5 pack lemon jello. Lemon jello brings zingy brightness to our dessert, enhancing the overall flavor profile beautifully. Its sharp citrus notes balance out the richness of cream cheese perfectly, creating a harmonious blend that keeps every bite light and refreshing. If you’re feeling adventurous, consider incorporating fresh lemon zest into your filling for an extra burst of flavor!
- 0.5 pack blueberry jello. Sweet yet slightly tangy, blueberry jello provides not only flavor but also adds depth with its rich color. It evokes those lazy summer days spent picking berries under sunny skies—what could be more delightful? Just like with kiwi jello, opt for high-quality options here; they truly make all the difference.
- 200 g digestive biscuit. These biscuits form the foundation of our cheesecake crust—a buttery base that’s both crunchy and flavorful. When crushed finely enough, they create an ideal texture that holds up well against our luscious filling without becoming soggy over time. If you’re looking for alternatives, graham crackers or even gluten-free biscuits can work wonders too!
- 75 g butter. Butter acts as the glue in our biscuit crust; it adds richness and helps bind everything together for that perfect crunch when you take a bite out of your cheesecake! Make sure it’s melted but not too hot—this prevents any unwanted melting or separation when combined with our dry ingredients.
- 1 tbsp brown sugar. Just a hint of brown sugar enhances our crust with warmth and complexity; it gives us that wonderful caramel note that pairs beautifully with our creamy filling later on! Feel free to adjust according to your taste preferences—I find it adds just enough sweetness without overpowering.
- 6 x vegan gelatin sheets. These little wonders are essential for setting our cheesecake filling without any animal-derived ingredients! They help achieve that perfect silky consistency we crave while ensuring everything holds together beautifully when serving slices later on.
- 100 g sugar. Sugar plays multiple roles in our recipe—it sweetens while also helping stabilize our filling alongside vegan gelatin sheets! Use granulated sugar here; it’s easily dissolvable and ensures even sweetness throughout your cheesecake.
- 1 dl pineapple juice. This liquid gold infuses our filling with tropical vibes while adding moisture necessary for achieving optimal texture! The acidity from pineapple juice balances out richness perfectly—trust me, don’t skip this component!
- 300 g 35% fat sour cream. Sour cream adds an intoxicating creaminess to our filling—a luscious mouthfeel that’s simply irresistible! Its tanginess complements sweetness perfectly while helping maintain stability within each slice after chilling.
- 200 g cream cheese. Cream cheese is key here—it lends velvety smoothness along with rich flavor making up most part of our decadent filling! Be sure it’s softened before mixing; cold cream cheese will create lumps instead!
- 3 dl heavy cream. Heavy cream contributes ultimate fluffiness once whipped into soft peaks; it’s what gives us that airy texture we desire! Make sure it’s chilled beforehand since warmer creams won’t whip properly resulting in less-than-perfect results.
- 1 x lemon (juice). Freshly squeezed lemon juice brightens every element in this recipe! Not only does it elevate flavors but also helps cut through richness keeping everything balanced—so don’t hold back here!
- 0.5 pack raspberry jello. Just like blueberry jello before it, raspberry brings another bold burst of fruity goodness into play! Its vibrant red color contrasts beautifully against yellows and greens already present within layers—a true feast for both eyes AND taste buds.
Equipment You’ll Need:
Having the right tools makes all the difference in creating something wonderful—so let’s gather what you’ll need before diving into preparation! These essential partners will ensure your baking experience runs smoothly while yielding fantastic results.
- Springform pan (22 cm) – A springform pan is crucial because its removable sides allow easy access when serving your gorgeous Terrazzo Cheesecake without ruining those beautiful layers you’ve worked so hard on! Ensure it’s properly greased or lined with baking paper before use to prevent sticking.
- Mixing bowls (various sizes) – You’ll need different sizes for mixing crust ingredients separately from fillings later on—having them handy streamlines processes making transitions seamless during prep time!
- Electric mixer or whisk – An electric mixer saves energy (and arm strength!) especially when whipping heavy cream into soft peaks—invaluable if making larger batches too! However if preferred manual methods exist at home feel free using good old-fashioned elbow grease instead!
With all these fantastic components ready at hand let’s get started preparing our gorgeous Terrazzo Cheesecake together…
Step 1: Setting Up Your Jello Masterpieces
Begin by preparing those colorful layers—the jellos should be made first since they require time to set properly before folding into creamy goodness later on! Follow package instructions diligently ensuring proper ratios are mixed accurately based upon desired flavors chosen; after all precision matters here! To save time consider making these layers night before so they’re fully chilled come assembly day—there’s nothing quite like anticipation building while waiting on deliciousness…
Step 2: Creating Your Biscuit Base
Next comes crafting that delectable biscuit crust which serves as foundation supporting entire cake—it needs love too! First line bottom springform pan using baking paper ensuring easy release post-baking then crush digestive biscuits until fine resembling sand-like texture—you want uniformity here folks! Melt butter gently mixing brown sugar right after joining forces bringing richness alongside crunch factor needed ultimately holding everything together nicely once pressed firmly into bottom pan surface—don’t rush this step as settling requires patience allowing flavors meld together effectively while resting inside fridge awaiting next phase…
Step 3: Dissolving Vegan Gelatin Sheets
While crust chills let’s focus on dissolving those vegan gelatin sheets—they’re vital accomplishing perfect consistency throughout cheesecake filling providing stability necessary during slicing presentation later down road too! Place sheets within bowl filled cold water allowing them soften up sufficiently before combining pineapple juice along granulated sugar heated gently over stovetop until boiling point reached—this activates magical properties held within gelatin enabling stabilization throughout process…
Step 4: Whipping Up Creamy Goodness
Now we reach climax moment: whisking together sour cream along heavy cream plus softened cream cheese until fluffy perfection achieved—we aim for lightness here folks so avoid over-mixing lest risk deflating air bubbles formed during initial mixing stages essential creating desired texture throughout cake itself…
With these steps set forth wonderfully already let excitement build further towards assembling masterpiece ahead! Stay tuned as next phases unfold leading glorious final product ready captivating tastebuds soon enough…
The Art of Creating Your Terrazzo Cheesecake
Ah, my dear friend! As we dive deeper into the world of our delectable Terrazzo Cheesecake, I can almost hear the whispers of excitement from the kitchen. This is not just a dessert; it’s a canvas of flavors and colors that invites everyone to gather around and indulge. So, let’s continue this culinary adventure together, shall we?
Step 5: The Magical Fusion of Creamy Ingredients
Once you have chopped your jello into delightful little pieces—some larger and some smaller to create that charming terrazzo effect—it’s time to bring together our creamy filling. In a large mixing bowl, combine the sour cream, heavy cream, and cream cheese. This mixture is crucial because it forms the luscious base of our cheesecake. Whisk these ingredients together until they are fluffy and well incorporated; this should take about 2 to 3 minutes of vigorous whisking. You want to achieve a light yet stable texture that will hold all those vibrant jello pieces beautifully.
Now, here’s where patience plays a key role: we need to add our pineapple juice mixture to this creamy concoction. Remember that you’ve boiled the pineapple juice with sugar and dissolved the vegan gelatin sheets in it—this blend brings not only sweetness but also a tropical flair that dances on your palate. Slowly pour this slightly cooled liquid into your whipped cream mixture while continuously whisking. Trust me on this; if you skip on the slow addition while whisking, you could end up with clumps instead of a silky smooth filling. Continue to whisk until everything is perfectly blended—this should take another minute or so—and don’t forget to taste! Adjust with lemon juice as desired; this bright acidity will elevate the creamy richness to extraordinary heights.
Step 6: Folding in the Jello Magic
Here comes one of my favorite parts: folding in those colorful jello pieces! With your creamy filling ready, gently incorporate the jello by using a spatula. This technique is vital because it allows us to maintain the aeration we achieved when whisking while also ensuring that each piece of jello is evenly distributed throughout the mixture without breaking apart too much. Think of it as tucking in colorful gems into soft clouds of cream—a truly beautiful sight!
As you fold, be mindful not to overmix; we want those vibrant colors and textures to shine through rather than disappear into a homogenous mass. Picture how stunning it will look when you cut into the cheesecake later—the bursts of color against the creamy backdrop will be nothing short of breathtaking! Once everything is combined beautifully—yet still distinctly jello-like—you can pour this dreamy mixture over your chilled biscuit base.
Step 7: The Chilling Process – A Crucial Waiting Game
Now that your filling is in place, we arrive at perhaps one of the most critical steps—the chilling process! Place your springform pan carefully into the refrigerator and allow it to set for at least four hours—but trust me when I say that overnight is even better if you have time. During this magical time in the fridge, something extraordinary happens: all those individual components meld together harmoniously. The flavors deepen, and textures firm up just right, transforming your cheesecake from a lovely batter into an indulgent slice worthy of celebration.
As you wait (and oh, I know it’s hard!), take a moment to appreciate why chilling is so important. The vegan gelatin needs time to do its magic; it works tirelessly during these hours to give structure while still allowing for that lovely creamy mouthfeel we adore in cheesecakes. So resist any urge to rush this step! When you finally unveil your cake after its well-deserved rest, you’ll be rewarded with a perfectly set cheesecake that holds its shape beautifully—an absolute joy for both eyes and taste buds.
Step 8: Unveiling Your Masterpiece
Finally! After what felt like an eternity (but really was just a few hours), it’s time for the grand reveal! Carefully run a knife around the edge of your springform pan before releasing it—this little trick ensures that nothing sticks and guarantees a clean release for your stunning Terrazzo Cheesecake. As you lift off the sides, take a moment for yourself; breathe in deeply—the aroma wafting from this masterpiece will entice anyone nearby!
Before serving, consider garnishing with fresh fruit or perhaps a drizzle of coconut cream for added flair; both options enhance not only aesthetics but also add layers of flavor that complement our cheesecake beautifully. Now slice into this enchanting creation—each piece revealing its mosaic pattern—and watch as smiles spread across every face around the table. It’s more than just dessert; it’s an experience filled with love and joy.
Final Touches on Your Terrazzo Cheesecake Journey
And there we have it—the journey from preparation to presentation has led us here! Your Terrazzo Cheesecake isn’t just food; it’s a labor of love infused with friendship and memories waiting to be created around it. Each bite offers not only an explosion of flavor but also warmth from shared moments around the table with loved ones.
So as you serve up generous slices dripping with delightfully captivating stories behind their creation, know that you’ve crafted something truly special—something worthy of celebrations big and small alike! Enjoy every moment, my friend—you’ve earned it!
Storage and Enjoyment Tips for Your Terrazzo Cheesecake
Ah, the moment we’ve all been waiting for! Your Terrazzo Cheesecake has set beautifully, its vibrant swirls beckoning with a promise of delightful flavors. But what if there’s a slice (or two) left over? Fear not! This cheesecake is as easy to store as it is to make, and you’ll want to ensure that every bite remains as delicious as the first. Let’s dive into some storage tips so you can enjoy this masterpiece long after you’ve made it.
Storing Leftover Terrazzo Cheesecake
To keep your leftover Terrazzo Cheesecake in pristine condition, transfer it to an airtight container or keep it in the springform pan, covering it tightly with plastic wrap. This helps preserve its creamy texture and prevents any unwanted odors from seeping in. If stored properly, your cheesecake will stay fresh for about 3 to 5 days in the refrigerator. Now, here’s a little pro tip: if you find yourself with leftovers that might linger longer than that, place a slice of bread in the container with the cheesecake! This little trick helps maintain moisture and keeps your dessert feeling fresh and delicious. After a few days in the fridge, you might wonder how the flavors hold up—let me tell you, they intensify beautifully! The fruity jello pieces meld wonderfully into the creamy filling, creating an even more harmonious taste experience. When you’re ready to serve it again, just pull it out of the fridge and let it come to room temperature for about 15-20 minutes; this really enhances its rich flavors.
Freezing Terrazzo Cheesecake for Later
If you’re looking to extend the life of your creation even further, freezing is a fantastic option! To do this properly, simply slice your cheesecake into portions and wrap each piece individually with plastic wrap. Then place them all in a freezer-safe container or bag—be sure to squeeze out as much air as possible before sealing. Your Terrazzo Cheesecake can be kept frozen for up to three months without losing any of its delightful charm! When you’re ready to enjoy a slice from the freezer, simply take it out and let it thaw in the refrigerator overnight. Trust me on this one; there’s something magical about pulling out a slice of cheesecake from the freezer—it feels like discovering treasure! Not only does this method give you convenience when cravings strike unexpectedly, but it also allows you to share a piece of joy with friends or family whenever you wish.
Terrazzo Cheesecake
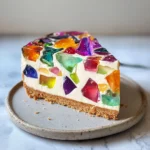
Indulge in the vibrant world of our Terrazzo Cheesecake—a delightful dessert that combines creamy richness with colorful bursts of fruity jello. This no-bake masterpiece is inspired by beautiful terrazzo patterns, making it not just a treat for the taste buds but also a feast for the eyes. Perfect for celebrations or simply to share with loved ones, each slice reveals stunning layers that evoke joy and creativity. The tangy notes of kiwi, lemon, blueberry, and raspberry harmonize beautifully with the luscious cream cheese filling, while a buttery biscuit crust holds it all together. With just the right amount of sweetness and a refreshing tropical hint from pineapple juice, this cheesecake is sure to become a family favorite. Dive into this culinary adventure and create unforgettable memories!
- Prep Time: 30 minutes
- Cook Time: N/A
- Total Time: 0 hours
- Yield: Serves approximately 10 slices 1x
- Category: Dessert
- Method: No-bake
- Cuisine: American
Ingredients
- 0.5 pack kiwi jello
- 0.5 pack lemon jello
- 0.5 pack blueberry jello
- 200 g digestive biscuits
- 75 g butter
- 1 tbsp brown sugar
- 6 vegan gelatin sheets
- 100 g sugar
- 1 dl pineapple juice
- 300 g sour cream
- 200 g cream cheese
- 3 dl heavy cream
- Juice of 1 lemon
- 0.5 pack raspberry jello
Instructions
- Prepare the jello layers according to package instructions and let them set in the fridge.
- For the crust, crush digestive biscuits finely and mix with melted butter and brown sugar; press into a greased springform pan.
- Soak vegan gelatin sheets in cold water, then dissolve in heated pineapple juice mixed with sugar.
- In a mixing bowl, whisk together sour cream, heavy cream, and softened cream cheese until fluffy.
- Slowly add the pineapple juice mixture while whisking continuously to maintain texture.
- Fold in chopped jello pieces gently to preserve their shape before pouring over the crust.
- Chill in the refrigerator for at least four hours or overnight until set.
Nutrition
- Serving Size: 1 slice (100g)
- Calories: 320
- Sugar: 32g
- Sodium: 150mg
- Fat: 20g
- Saturated Fat: 12g
- Unsaturated Fat: 6g
- Trans Fat: 0g
- Carbohydrates: 30g
- Fiber: 1g
- Protein: 4g
- Cholesterol: 40mg