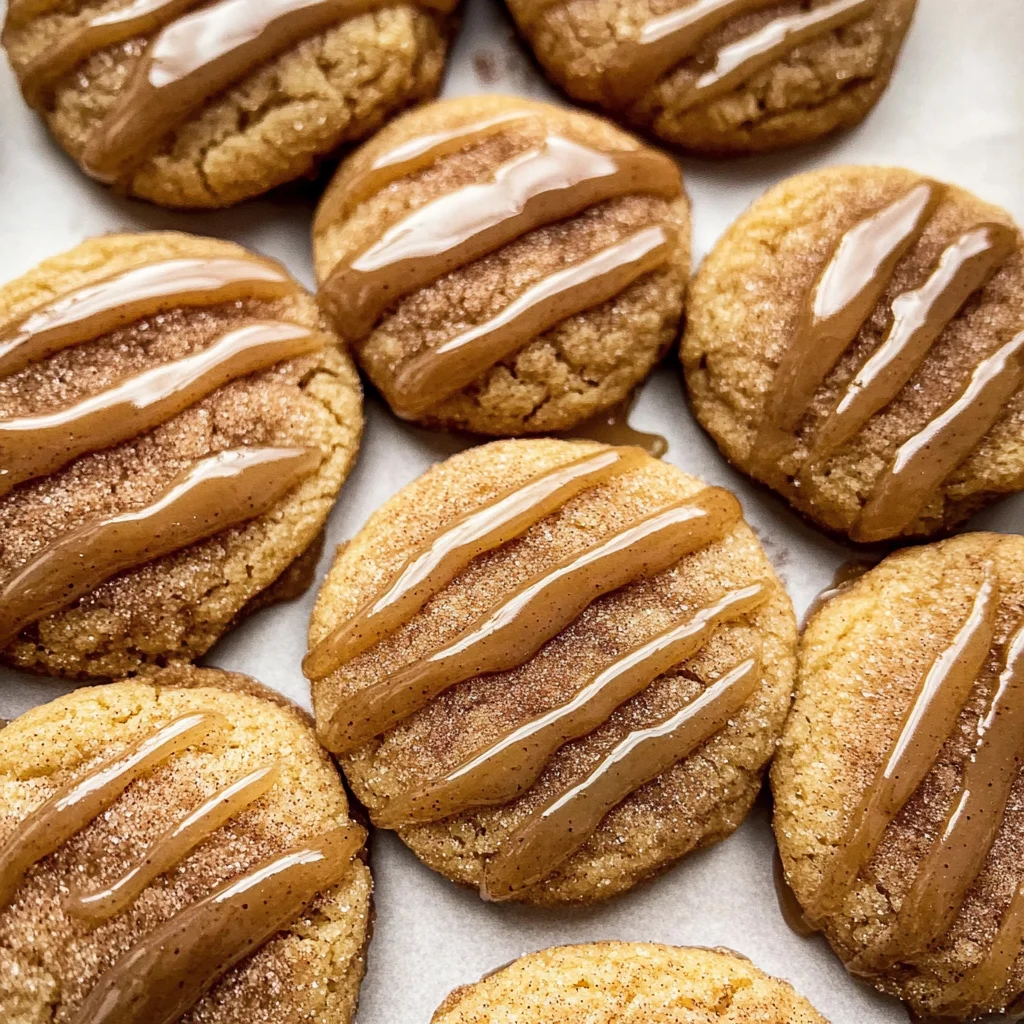
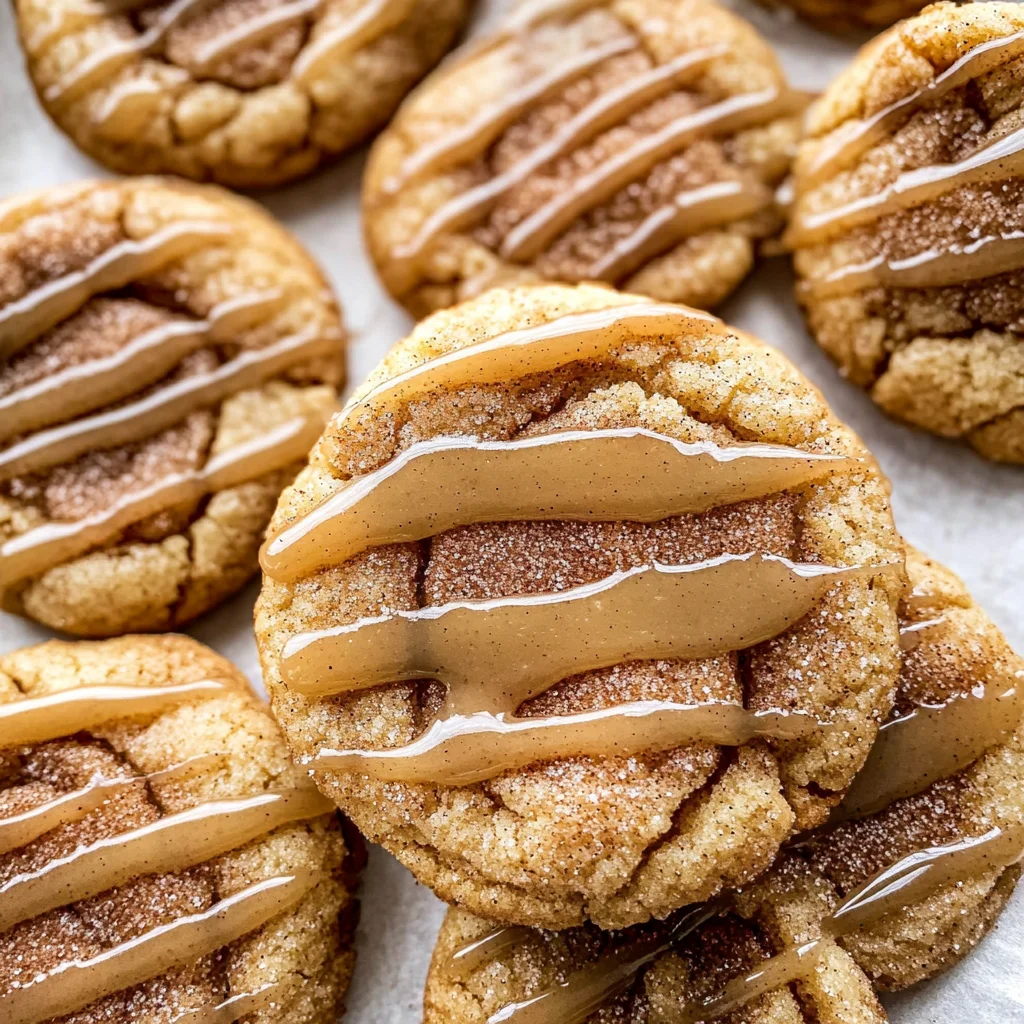
Apple Butter Snickerdoodles
Apple Butter Snickerdoodles have a special place in my heart, and I can hardly contain my excitement as I share this recipe with you. Imagine the warm embrace of freshly baked cookies, the tantalizing aroma of cinnamon wafting through your kitchen, and the sweet yet subtly spiced flavor of apple butter weaving its way into each soft, pillowy bite. It’s not just a cookie; it’s a moment—a delightful experience that transports you to cozy autumn afternoons, where laughter fills the air and every bite feels like a loving hug from an old friend. The melding of flavors is nothing short of a revelation, where traditional snickerdoodle meets the rustic charm of apple butter, creating something truly extraordinary—Apple Butter Snickerdoodles!
Why do we love these cookies so much? Perhaps it’s because they capture the essence of comfort food while also offering a twist—a delightful marriage between classic baking and the seasonal delight of apple butter. This recipe has roots deeply embedded in tradition yet takes a step towards innovation with its unique ingredient. They are perfect for gatherings with family and friends or simply as a sweet treat to enjoy during quiet evenings at home. Trust me when I say that once you take that first bite, you’ll understand why these cookies are more than just dessert; they are memories waiting to be made.
Apple Butter Snickerdoodles: A Cozy Embrace in Cookie Form
Let’s dive into making these heartwarming Apple Butter Snickerdoodles together! The blend of spices, the softness of the dough, and that delightful glaze will have everyone asking for seconds—and maybe even thirds!
Ingredients:
Embarking on this culinary journey requires gathering just the right ingredients to ensure our Apple Butter Snickerdoodles turn out perfectly delightful! Each component plays an essential role in crafting these soft, flavorful cookies that encapsulate everything we adore about baking.
- 2 cups all-purpose flour. This is your foundational building block for these cookies and plays a crucial part in achieving their structure. All-purpose flour has just the right protein content to provide balance—enough strength to hold everything together without making your cookies too dense. When measuring flour, it’s vital to spoon it into your measuring cup instead of scooping directly from the bag; otherwise, you might end up with too much and risk dry cookies!
- 2/3 cup cake flour. Now here’s where things get interesting! Cake flour is lighter and finer than all-purpose flour due to its lower protein content. Adding it helps create that tender, melt-in-your-mouth texture we’re aiming for in our snickerdoodles. The combination of both flours is what gives these cookies their beautiful lift while maintaining that pillowy softness.
- 1 1/2 tsp cream of tartar. This ingredient is non-negotiable! Cream of tartar not only stabilizes egg whites in other recipes but here, it serves to enhance the chewiness and adds that signature tangy flavor characteristic of traditional snickerdoodles. It reacts with baking soda to help create those lovely puffy shapes.
- 1 1/2 tsp cinnamon. Ahh, cinnamon—the spice of warmth! This aromatic wonder not only adds flavor but creates an irresistible aroma as your cookies bake away in the oven. Make sure to use fresh cinnamon for maximum potency; if yours has been sitting around for years (like many spices do), it might be time for a fresh batch!
- 1 tsp salt. Salt acts as a flavor enhancer; without it, your cookies would taste flat and one-dimensional. It balances out sweetness beautifully and elevates all those lovely flavors happening in this recipe.
- 1 tsp baking soda & 1/2 tsp baking powder. These two leavening agents work hand-in-hand but serve different purposes: baking soda provides lift while helping with browning due to its alkaline nature, whereas baking powder ensures your cookies rise uniformly throughout their bake time.
- 1/2 tsp nutmeg. Adding nutmeg introduces a warm depth that complements the cinnamon beautifully—it adds warmth without overwhelming other flavors. Just remember: a little goes a long way!
- 12 Tbsp unsalted butter, cold & cut into cubes. Cold butter is key here when starting off; it allows us to achieve that perfect crumbly texture before we cream it together with sugar later on. Ensuring it’s unsalted helps us control how much salt goes into our batter while keeping those flavors balanced.
- 1 1/4 cup dark brown sugar, packed tightly is essential for achieving that rich molasses flavor which pairs so well with apple butter—not to mention it contributes moisture which keeps our snickerdoodles wonderfully soft!
- 1/3 cup apple butter (I used store-bought). This luscious ingredient brings both moisture and natural sweetness into our cookie dough—it’s like liquid gold! If you want even more depth, feel free to make your own apple butter at home or find high-quality brands at farmer’s markets.
- 1 large egg yolk—this rich addition brings fat into play which enriches our cookie dough further while helping bind everything together effectively.
- 2 tsp vanilla extract—the beauty of vanilla lies within its ability to enhance flavors subtly without overpowering them; it rounds out all those warm spices beautifully.
- 2 Tbsp sugar & 1 tsp cinnamon (for rolling)—this mixture adds an enticing crunch on top while creating that iconic snickerdoodle look we all know and love!
- 2 Tbsp unsalted butter, melted—for glazing after baking; this will add richness back into our cookies along with powdered sugar for sweetness—and who doesn’t love buttery sweetness?
- 1 cup powdered sugar, because glazes should never skimp on sweetness!
- 2 Tbsp apple butter, again, bringing back some lovely moisture along with flavor!
- A pinch of salt retains balance even within sweet glazes—and finally…
- A splash of milk may be needed if your glaze turns out too thick—it can help reach desired consistency effortlessly!
Now that we’ve gathered everything we need—let’s continue onto crafting these cozy bites!
Equipment You’ll Need:
Having the right tools by your side makes all the difference when creating delicious treats like our Apple Butter Snickerdoodles! While they may not be ingredients, think of them as essential partners in cooking up something wonderful together.
- Stand mixer or hand mixer – A stand mixer fitted with a paddle attachment can save you time and strength by effortlessly creaming together butter and sugars until fluffy while ensuring every ingredient gets thoroughly mixed in without overdoing it—a handheld mixer works wonders too if that’s what you have on hand!
- Mixing bowls – A few good mixing bowls will keep things organized as we work through each stage—from mixing dry ingredients separately from wet ones—to combining them seamlessly later on.
- Measuring cups & spoons – Precision is key when baking; having accurate measuring tools ensures consistency across batches so each cookie turns out equally delectable!
- Cookie scoop or tablespoon – For uniformity in size amongst each cookie ball—these tools ensure even baking times across all cookies so no one ends up too small or too large.
- Parchment paper or silicone baking mats – Line your baking sheets easily with parchment paper or use reusable silicone mats—they prevent sticking while promoting even browning underneath each cookie—an absolute must-have for successful cookie-making!
With our ingredients lined up perfectly alongside trusty tools at hand—let’s dive deeper into preparing those glorious Apple Butter Snickerdoodles together!
Step 1: Prepping Your Baking Sheets
First things first—let’s get ready by lining two baking sheets with parchment paper or silicone mats! This step may seem simple but trust me—it’s absolutely paramount when it comes to ensuring easy release post-baking while preventing any unwanted sticking incidents during cooling time later on down the road.
Step 2: Whisking Together Dry Ingredients
In a large mixing bowl, take some time now to whisk together all-purpose flour, cake flour, cream of tartar, cinnamon, salt, baking soda, baking powder—and nutmeg until they’re combined beautifully! This process helps evenly distribute those leavening agents throughout our dry mix ensuring each cookie rises consistently during their bake time without any surprises popping up mid-bake—no one likes flat cookies after all! Set this mixture aside as we focus next on creaming our wet ingredients properly…
Step 5: Adding the Creamy Goodness of Apple Butter
Now that you’ve creamed together the butter and dark brown sugar, it’s time to introduce the star of our show: the apple butter. This ingredient is not just a flavor enhancer; it’s a game changer! I can’t emphasize enough how this luscious spread brings a warm, fruity sweetness to your cookies that is utterly intoxicating. The apple butter will add moisture and create that soft, pillowy texture we’re all craving in cookies. Trust me on this—this step is crucial for achieving that delightful chewiness!
Gently pour the apple butter into the mixing bowl with your creamed butter and sugar mixture. At this point, it’s important to blend them together thoroughly until they form a cohesive and creamy blend. You can use your stand mixer at medium speed for about 30 seconds to a minute. Watch as the mixture transforms into a velvety concoction, with the rich caramel tones of brown sugar melding beautifully with the golden hue of apple butter. Once combined, you’ll notice an almost magical transformation—one that promises incredible flavors in every bite.
Step 6: Incorporating the Egg Yolk and Vanilla
Next up, let’s bring in some depth with our egg yolk and vanilla extract. This combination is like adding a warm hug to your cookie dough—comforting and familiar! The egg yolk is essential here; it adds richness and helps bind everything together while giving structure to our cookies. It’s important to note that we’re using only the yolk because we want that luscious fat from it without adding too much liquid, which could compromise our cookie’s texture.
Add one large egg yolk along with two teaspoons of pure vanilla extract into your mixing bowl. The vanilla will enhance the overall flavor profile, lending its sweet, aromatic notes that harmonize beautifully with our apple butter. Mix these ingredients just until they’re incorporated—no need to overdo it here! Overmixing can lead to tough cookies, which we absolutely want to avoid. Instead, aim for a smooth batter that still has some flecks from the apple butter—that’s where all the magic lies.
Step 7: A Gentle Fold-in of Dry Ingredients
Now comes one of my favorite steps: folding in our dry ingredients! This is where the science of baking really shines through—properly combining these components ensures our cookies rise beautifully while maintaining a tender crumb. In your large bowl, you should have already whisked together all-purpose flour, cake flour, cream of tartar, cinnamon, salt, baking soda, baking powder, and nutmeg—a truly enchanting mix if I say so myself!
It’s now time to gradually incorporate these dry ingredients into your wet mixture. I recommend doing this in batches; start by adding about a third of your dry mix first and gently fold it in using a spatula or wooden spoon. Fold means you want to cut through the batter while turning it over gently—this helps maintain airiness without deflating our dough. Repeat this process until all dry ingredients are combined but remember: do not overmix! You’re aiming for just combined; there might be small streaks of flour left—that’s perfectly okay! Allowing those little pockets means more flavor and texture in every bite.
Step 8: Chilling Out – The Importance of Dough Resting
Ahh yes—the moment when patience truly pays off! Now that your dough is mixed and looking divine, let’s talk about chilling—it’s absolutely paramount for achieving perfectly textured Apple Butter Snickerdoodles! Chilling isn’t just an afterthought; it allows the flour to hydrate fully, resulting in a softer cookie while helping them maintain their shape during baking.
Using a 2-tablespoon cookie scoop (or even just two spoons), portion out your dough onto a plate or baking sheet lined with parchment paper. Make sure there’s enough room between them if you’re using a sheet since they will expand slightly as they chill! Cover them loosely with plastic wrap or simply place them in an airtight container before popping them into the fridge for at least 30 minutes—up to an hour or even overnight if you can hold off (I know it’s tough!). The longer they chill, the more developed those flavors become! So resist any urge to skip this step; trust me on this one—it makes such a difference!
Conclusion:
As we wrap up our delicious journey crafting these extraordinary Apple Butter Snickerdoodles, I can’t help but feel giddy with excitement about sharing this beloved recipe with you! From the moment we combined apple butter with those classic snickerdoodle flavors, it was clear this would become something truly special—a treat that captures cozy autumn afternoons and joyous gatherings alike. The marriage of soft textures and aromatic spices creates an experience that is nothing short of heavenly; each bite feels like wrapping yourself in a warm blanket while sipping on cider.
This recipe is not just another dessert; it’s an invitation to create memories in your kitchen. Whether you’re baking them for a festive gathering or simply enjoying them during an afternoon break, these cookies bring warmth and happiness wherever they go. Picture pulling tray after tray from the oven as laughter fills the room—everyone eagerly waiting to indulge in these sweet delights that taste like love itself.
To elevate your enjoyment further, imagine savoring one of these cookies alongside a steaming cup of tea or coffee; the luscious sweetness pairs beautifully with nutty undertones in your brew. For an afternoon pick-me-up, try pairing these cookies with a dollop of vanilla ice cream—creating an indulgent sundae that will leave everyone asking for seconds! And don’t forget—they make excellent gifts packaged beautifully; who wouldn’t smile upon receiving such heartfelt treats?
Feeling adventurous? This recipe is wonderfully adaptable! You could introduce chopped nuts or even swap out some apple butter for pumpkin puree when fall rolls around for an exciting twist on flavor! Or how about adding some dark chocolate chips? Each variation offers its own unique charm while staying true to that comforting essence we adore about snickerdoodles. I wholeheartedly encourage you to dive into this baking adventure—try it out yourself, share your creations with loved ones, and connect over these delightful moments created in your kitchen! Happy baking!
Apple Butter Snickerdoodles
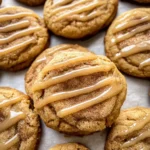
Apple Butter Snickerdoodles are a delightful twist on the classic cookie that combines the warmth of cinnamon with the rich sweetness of apple butter. Each bite is a soft, pillowy treat that evokes cozy autumn afternoons, making them perfect for gatherings or quiet evenings at home. The unique blend of flavors results in cookies that not only taste amazing but also fill your kitchen with an irresistible aroma. Whether enjoyed with a warm cup of tea or shared with friends, these cookies create moments worth savoring.
- Prep Time: 20 minutes
- Cook Time: 11 minutes
- Total Time: 31 minutes
- Yield: Approximately 24 cookies 1x
- Category: Dessert
- Method: Baking
- Cuisine: American
Ingredients
- 2 cups all-purpose flour
- 2/3 cup cake flour
- 1 ½ tsp cream of tartar
- 1 ½ tsp cinnamon
- 1 tsp salt
- 1 tsp baking soda
- ½ tsp baking powder
- ½ tsp nutmeg
- 12 Tbsp unsalted butter, cold and cubed
- 1 ¼ cup dark brown sugar, packed
- ⅓ cup apple butter
- 1 large egg yolk
- 2 tsp vanilla extract
- 2 Tbsp sugar and 1 tsp cinnamon (for rolling)
Instructions
- Preheat your oven to 350°F (175°C) and line two baking sheets with parchment paper or silicone mats.
- In a large bowl, whisk together all-purpose flour, cake flour, cream of tartar, cinnamon, salt, baking soda, baking powder, and nutmeg.
- In a separate bowl, cream together cold butter and dark brown sugar until fluffy. Mix in apple butter until well combined.
- Add the egg yolk and vanilla extract to the mixture and incorporate.
- Gradually fold in the dry ingredients until just combined; avoid overmixing.
- Chill the dough in the refrigerator for at least 30 minutes.
- Roll chilled dough into balls and coat in the cinnamon-sugar mixture before placing them on prepared baking sheets.
- Bake for about 10-11 minutes; cookies should look soft but slightly puffy.
- Allow cooling on baking sheets for about 10 minutes before transferring to wire racks.
Nutrition
- Serving Size: 1 cookie (30g)
- Calories: 120
- Sugar: 10g
- Sodium: 50mg
- Fat: 6g
- Saturated Fat: 4g
- Unsaturated Fat: 2g
- Trans Fat: 0g
- Carbohydrates: 16g
- Fiber: <1g
- Protein: <1g
- Cholesterol: <5mg