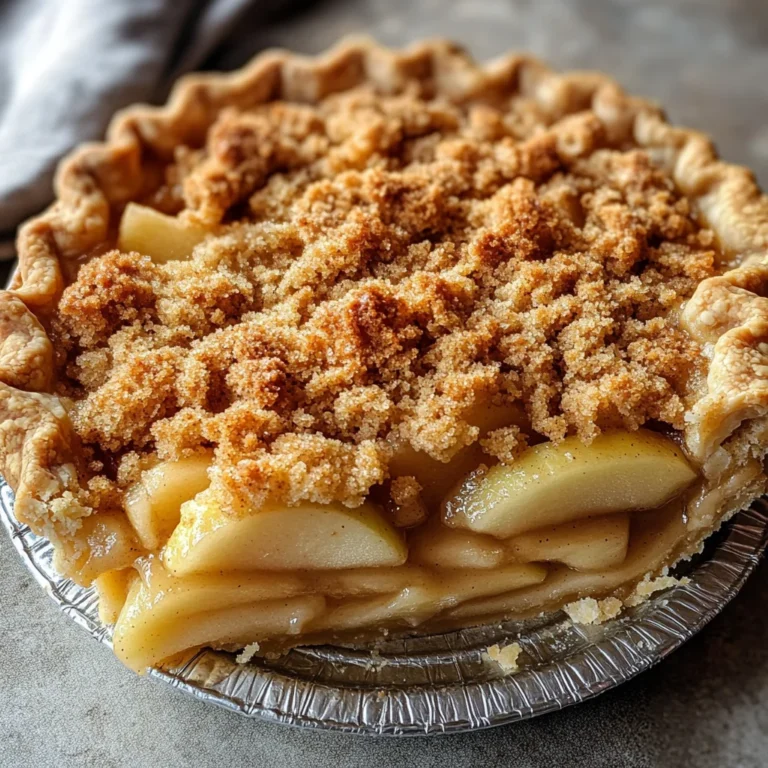
Salted Caramel Apple Pie
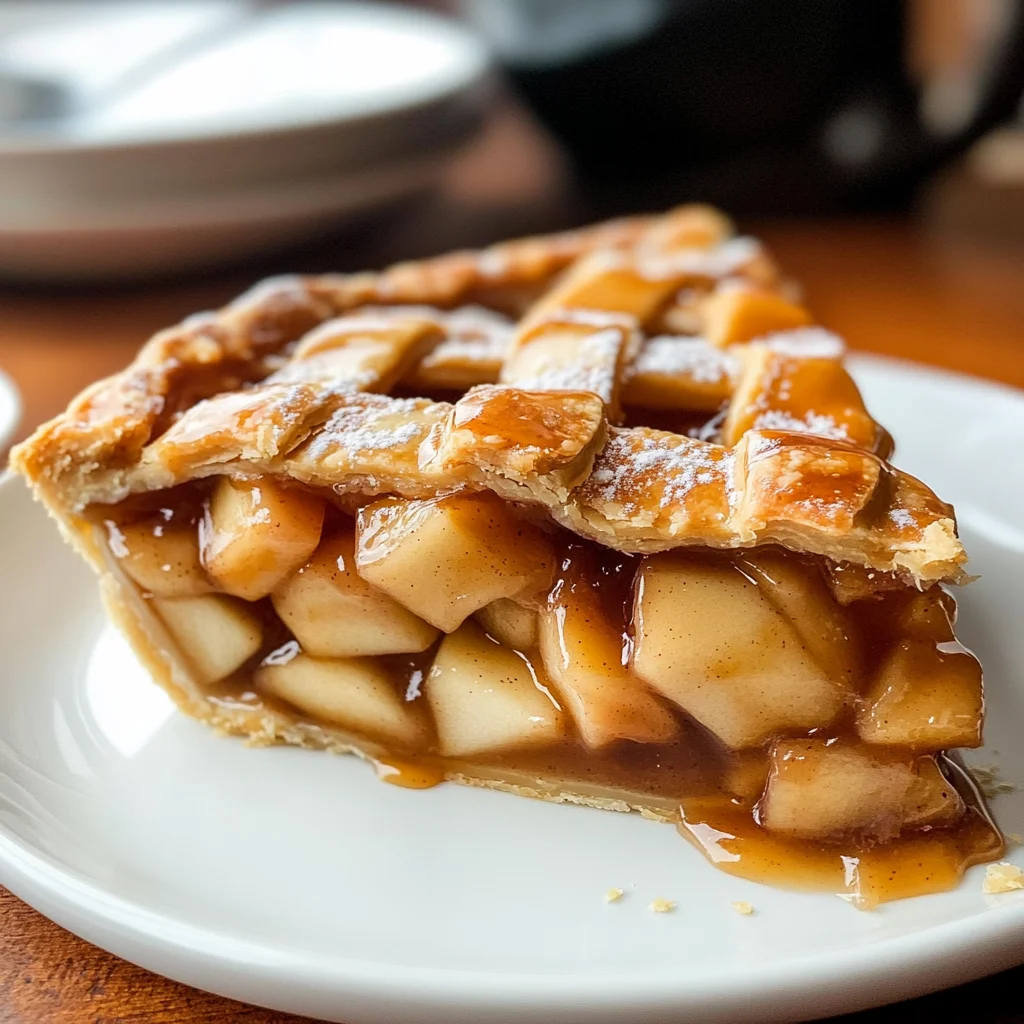
The smell of warm apples and sweet caramel wafting through your kitchen can evoke the most comforting memories of family gatherings and holiday celebrations. That’s exactly what my Salted Caramel Apple Pie does—it doesn’t just fill your belly; it fills your heart with joy. This isn’t just another dessert; it’s a truly extraordinary experience that brings together the familiar warmth of classic apple pie while introducing an indulgent twist with rich, gooey salted caramel. Imagine slicing into that beautiful lattice crust, revealing a filling that glistens with liquid gold, inviting you to take a bite. It’s not simply about satisfying a sweet tooth; it’s about creating magic in your kitchen and sharing that magic with those you love.
As we embark on this delicious journey together, I want you to know that every step is infused with thoughtfulness and care. The way the tartness of freshly sliced apples melds with the sweetness of caramel, accentuated by warm spices—it’s a symphony of flavors that dances on your palate. I promise you, when you take that first bite, it will feel like a warm hug from the inside out. This Salted Caramel Apple Pie is perfect for any occasion—be it a cozy family dinner or festive gatherings where laughter abounds. So roll up your sleeves, put on your favorite apron, and let’s create something unforgettable!
Salted Caramel Apple Pie: A Sweet Symphony of Flavors
Welcome to my cherished recipe for Salted Caramel Apple Pie! If you’re anything like me, the thought of buttery crust enveloping tender apples drizzled with salted caramel makes your heart skip a beat. With each slice, you’ll discover layers of flavor that keep you coming back for more. It’s a beautiful fusion of tradition and indulgence that’s sure to impress anyone lucky enough to share it with you.
Ingredients:
As we dive into this flavorful adventure, let’s take a closer look at each ingredient that plays a crucial role in crafting our beloved Salted Caramel Apple Pie.
- Homemade Pie Crust or All Butter Pie Crust (both recipes make 2 crusts). The foundation of any great pie begins with the crust—the unsung hero! Whether you choose to whip up my homemade version or opt for an all-butter store-bought option, this flaky layer is essential for holding all those luscious fillings together. A good pie crust should be tender yet sturdy enough to support the weight of juicy apples without getting soggy. If you’re making it from scratch, don’t rush the chilling process; letting the dough rest is vital to achieving that wonderfully flaky texture.
- 1 cup (290g) salted caramel sauce, divided. Ahh, the pièce de résistance! The salted caramel sauce adds depth and richness to our pie while balancing out the tartness of the apples beautifully. You can either use store-bought or make my homemade salted caramel sauce—trust me when I say nothing compares to the flavors when it’s made from scratch! The key here is to reserve half for drizzling over the finished pie; this extra touch transforms an already delightful dessert into something truly spectacular.
- 10 cups (1250g) 1/4-inch-thick apple slices (about 8 large peeled and cored apples). Now let’s talk apples—this is where we bring in the star ingredient! Using a mix of tart and sweet varieties will give you complexity in flavor; think Granny Smith combined with Honeycrisp or Fuji apples for balance. Make sure they are fresh because their juiciness will help create that mouthwatering filling we crave in an apple pie. Slice them evenly so they cook uniformly and maintain their shape during baking.
- 1/2 cup (100g) granulated sugar. Sugar not only sweetens our filling but also helps create that beautiful caramelization during baking which enhances flavor and gives our pie its golden hue. Keep in mind that different apple varieties have varying levels of sweetness; taste as you go! If your apples are particularly sweet, adjust the sugar accordingly—this flexibility ensures our pie is perfectly balanced.
- 1 Tablespoon (15ml) fresh lemon juice. A splash of fresh lemon juice is crucial here—it brightens up all those rich flavors while preventing our apple slices from browning too quickly before they hit the oven. The acidity cuts through some of the sweetness, creating an exquisite balance you’ll appreciate in every bite.
- 1/4 cup (31g) all-purpose flour (spooned & leveled). Flour acts as a thickening agent in our filling—it absorbs excess juices released by those beautiful apples as they bake down into a syrupy goodness we all adore. Make sure to spoon and level off when measuring so you don’t end up adding too much; otherwise, your filling may turn gummy instead of velvety smooth.
- 1 and 1/2 teaspoons ground cinnamon. Cinnamon adds warmth and depth—a quintessential spice in any apple dish! It pairs perfectly with both sweet and tart flavors while making your kitchen smell like heaven as it bakes away in the oven.
- 1/4 teaspoon ground allspice OR ground cloves (either is fine). This spice enhances our flavor profile by adding subtle warmth and complexity without overpowering other elements in our pie. You can choose either based on personal preference; both options are equally delightful!
- 1/4 teaspoon ground nutmeg. Just a pinch goes a long way! Nutmeg offers an aromatic quality that’s simply irresistible and complements cinnamon beautifully in this recipe.
- Egg wash: 1 large egg beaten with 1 Tablespoon (15ml) milk. This magical mixture will give our crust its golden brown finish—glossy and beautiful! Brushing it over before baking ensures we achieve that picture-perfect look while giving each slice an appealing shine.
- Optional: coarse sugar for sprinkling on crust. A sprinkle of coarse sugar elevates not only the visual appeal but also adds textural contrast against our tender flaky crust—a little crunch never hurt anyone!
Now armed with these ingredients full of promise, let’s gather our tools!
Equipment You’ll Need:
Having the right tools makes all the difference when navigating through any recipe—and this one is no exception! Each piece contributes uniquely to your success while making your experience smoother and more enjoyable.
- Mixing bowls – These are essential for combining ingredients seamlessly without creating messes everywhere! Opt for sturdy glass or stainless-steel bowls—they’re durable, easy to clean, and won’t retain odors like plastic might.
- Measuring cups & spoons – Precision is key when baking; having reliable measuring tools ensures accuracy in every scoop or pour—and trust me when I say it’s non-negotiable if you want consistent results!
- Rolling pin – A good quality rolling pin allows you to roll out dough evenly without sticking—a crucial step towards achieving that perfect crust thickness we’re after!
- Pie dish – Ideally made from glass or ceramic material rather than metal since they promote even cooking thanks to better heat retention properties—plus, they look lovely serving right from oven-to-table!
With everything ready at hand, let’s dive into preparing this spectacular Salted Caramel Apple Pie!
Step 1: Chill Your Dough
Begin by preparing either my homemade pie crust or using an all-butter variety if you’re short on time—and don’t forget this step requires chilling! Once you’ve mixed together flour with butter until crumbly bliss forms between your fingers (that light-touch technique), wrap tightly in plastic wrap before refrigerating at least 2 hours—or overnight if possible! Chilling allows gluten strands formed during mixing time settle down so they’ll relax once rolled out later—not rushing this step means achieving flakiness rather than chewiness once baked!
Step 2: Craft Your Salted Caramel Sauce
If you’re opting for homemade salted caramel sauce—a decision I wholeheartedly endorse—you’ll want to prepare it now so its cooling time aligns perfectly with your pie-making schedule! Start by melting granulated sugar over medium heat until amber liquid gold appears before gently swirling around pan—not stirring directly yet—to avoid crystallization issues ruining all efforts thus far! Incorporating butter slowly followed by cream creates luscious fluid harmony worth savoring long after dessert plates are cleared away!
Step 3: Prepare Your Apples
While waiting for dough’s chill or caramel sauce’s cooling moment arrives—it’s time we focus on prepping those lovely apples! Peel each one carefully before coring them out then slicing them into even quarter-inch rounds—this size allows even cooking throughout baking process while maintaining some structure against overly mushy bites later on; toss those slices joyfully within large bowl alongside measured amounts sugar/lemon juice/flour/spices till everything’s coated evenly—watch how colors pop visually enhancing final presentation too!
Step 4: Assemble Your Masterpiece
With chilled dough ready beneath fingers now softened by time spent resting—we’re poised upon assembly stage where flavors collide delightfully within layers beneath crisp topping awaiting golden browning finish ahead…. Roll out one disc onto floured surface first then gently transfer into prepared pie dish allowing edges hang slightly over sides before piling high generous spoonfuls fragrant apple mixture atop bottom layer whilst drizzling half reserved salted caramel evenly across surface—it may seem excessive—but trust me here: more equals merrier when indulging palates eager devouring what’s about transpire ahead!
Stay tuned as we continue weaving together this beautiful creation—I can hardly wait for you to taste it!
Step 5: Filling the Pie with Love and Flavor
Now that your pie crust is ready to embrace a delicious filling, let’s dive into the heart of this Salted Caramel Apple Pie — the filling itself! In a large mixing bowl, you’ll want to combine your apple slices (about 10 cups or roughly 8 large peeled and cored apples) with 1/2 cup of granulated sugar. This step is not just about sweetening; it draws out the natural juices from the apples, creating that syrupy goodness we all crave. Don’t forget to add in the fresh lemon juice—just 1 tablespoon—because it brightens the flavor profile beautifully, balancing the sweetness and enhancing the overall taste. Next, sprinkle in 1/4 cup of all-purpose flour; this acts as a thickening agent that will help bind everything together as it bakes, ensuring your filling doesn’t turn into a soupy mess.
As you gently fold these ingredients together with love and care, take a moment to appreciate the intoxicating aroma wafting through your kitchen. You’ll also want to add 1 and 1/2 teaspoons of ground cinnamon, along with either 1/4 teaspoon of allspice or ground cloves and nutmeg. Each spice contributes its unique warmth — cinnamon brings sweetness, while allspice or cloves add depth. I promise you, this combination will create a symphony of flavors that dances on your palate! Once everything is well combined, set this mixture aside for a few moments. Trust me on this: letting it sit allows the flavors to meld together beautifully before they nestle into their buttery bed of crust.
Step 6: Crafting Your Lattice Masterpiece
With your filling ready, it’s time to bring out the second disc of dough from the refrigerator — chilled and firm from its time in the cold. On a floured work surface, roll out this dough until it reaches approximately 12 to 14 inches in diameter. This is crucial because we want enough overhang to ensure our lattice top will hug those delicious apples snugly. As you roll out the dough, remember to turn it a quarter turn every few rolls; this technique helps prevent sticking and ensures an even thickness throughout your crust.
Now comes the fun part: cutting strips for your lattice! Using a sharp knife or pastry wheel, slice your rolled-out dough into strips about 1/2-inch to 3/4-inch wide. Don’t worry if they’re not perfect; homemade charm is part of what makes this pie so special! Carefully weave these strips over and under each other atop your apple filling. If you’ve never made lattice before, it may seem daunting at first, but with practice, you’ll find that each strip fits perfectly into place like a puzzle piece! Once you’ve created a beautiful lattice design (and take pride in how stunning it looks), trim any excess dough with kitchen shears or a paring knife. Fold any overhanging edges back towards the center and pinch them together with your fingers. This sealing process is non-negotiable; it keeps all those precious juices from leaking out as they bubble and caramelize during baking.
Step 7: Gilding Your Creation
Before we send our pie off to its warm embrace in the oven, we need to give it that beautiful golden sheen by applying an egg wash. In a small bowl, whisk together one large beaten egg with one tablespoon of milk until it’s smooth and homogenous — think of it as giving your pie a lovely spa treatment! Using a pastry brush (or even your fingers if you’re feeling adventurous), lightly coat both the top and edges of your pie crust with this mixture. The egg wash isn’t just for looks; it helps create that irresistibly golden brown finish while also providing added moisture so that every bite remains tender and flaky.
If you’re feeling extra indulgent (and who wouldn’t be?), sprinkle some coarse sugar over the top before baking for an extra touch of sweetness and crunch that elevates each bite. Now here’s where patience comes into play: let your pie chill in the refrigerator for about 20–30 minutes while your oven preheats to ensure that everything stays perfectly formed during baking. Chilling not only solidifies any melting butter in the crust but also helps maintain its shape when exposed to heat — think of it as giving your pie time to gather its thoughts before taking center stage!
Step 8: Baking Your Perfect Salted Caramel Apple Pie
Now comes one of my favorite parts: watching our creation transform in the oven! Place your pie on a large baking sheet (this catches any potential spills) and bake at an initial temperature of 425°F (220°C) for about 25 minutes. During this time, keep an eye on how beautifully golden those crust edges are becoming! After those first crucial minutes have passed, lower your oven temperature down to 375°F (190°C) without removing the pie — this gradual change allows for even cooking without burning.
This next phase is where patience truly pays off: continue baking for another 35-40 minutes until you see those delightful bubbles forming around the edges of your filling. This bubbling action is absolutely paramount because it signals that all those wonderful flavors are melding together inside! If you’re feeling precise (and I totally encourage you), use an instant-read thermometer inserted into the filling; when it reads around 200°F (93°C), you’ll know it’s done! Remember though, don’t rush this step: under-baking can lead to firm apples rather than luscious ones coated in gooey caramel sauce.
If at any point you notice that gorgeous lattice top getting too brown before it’s finished baking — don’t panic! You can easily use a homemade pie crust shield or simply tent aluminum foil over just the top portion of the pie toward the end of baking time. This simple trick prevents over-browning while allowing those bubbling juices to work their magic underneath!
Conclusion:
As we wrap up this delightful journey through making your Salted Caramel Apple Pie, I can’t help but feel excited about what you’ve created! This recipe is not just about baking; it’s about infusing love into every layer, from that buttery flaky crust to the warm spiced apple filling glistening with luscious salted caramel. What truly makes this pie stand out is how those warm spices dance alongside each other while mingling with the rich caramel—it’s not just food; it’s a heartfelt experience crafted within your kitchen.
Now let me tell you why this pie is undoubtedly a must-try: besides its delectable flavor profile, which combines sweetness and just enough saltiness for balance, it’s an accessible recipe that anyone can master regardless of skill level. Perfectly suited for holidays or family gatherings, imagine pulling it out of the oven—the aroma wafting through your home feels like a warm hug on a chilly day! Watching loved ones gather around as they take their first bites will fill your heart with joy; it’s moments like these that remind us why we bake.
When thinking about serving suggestions, picture this: savoring a slice accompanied by a generous dollop of freshly whipped cream or even vanilla bean ice cream melting atop—each spoonful becomes an utterly intoxicating experience! For an afternoon pick-me-up with coffee or tea, there’s nothing quite like pairing them together while enjoying good company. And let’s not forget how decadent it feels when drizzling extra salted caramel over each slice right before serving—pure bliss awaits!
Feeling adventurous? This recipe is wonderfully adaptable! Consider swapping out some apple varieties for pears or even adding cranberries for a tart twist if you’re feeling bold—each variation brings its own charm while maintaining that signature salted caramel essence. Don’t hesitate to experiment and make this pie truly yours! So roll up your sleeves, dive into those flavors, and don’t forget to share your experience with friends and family; I can’t wait to hear how it turns out!
Salted Caramel Apple Pie
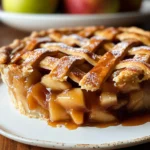
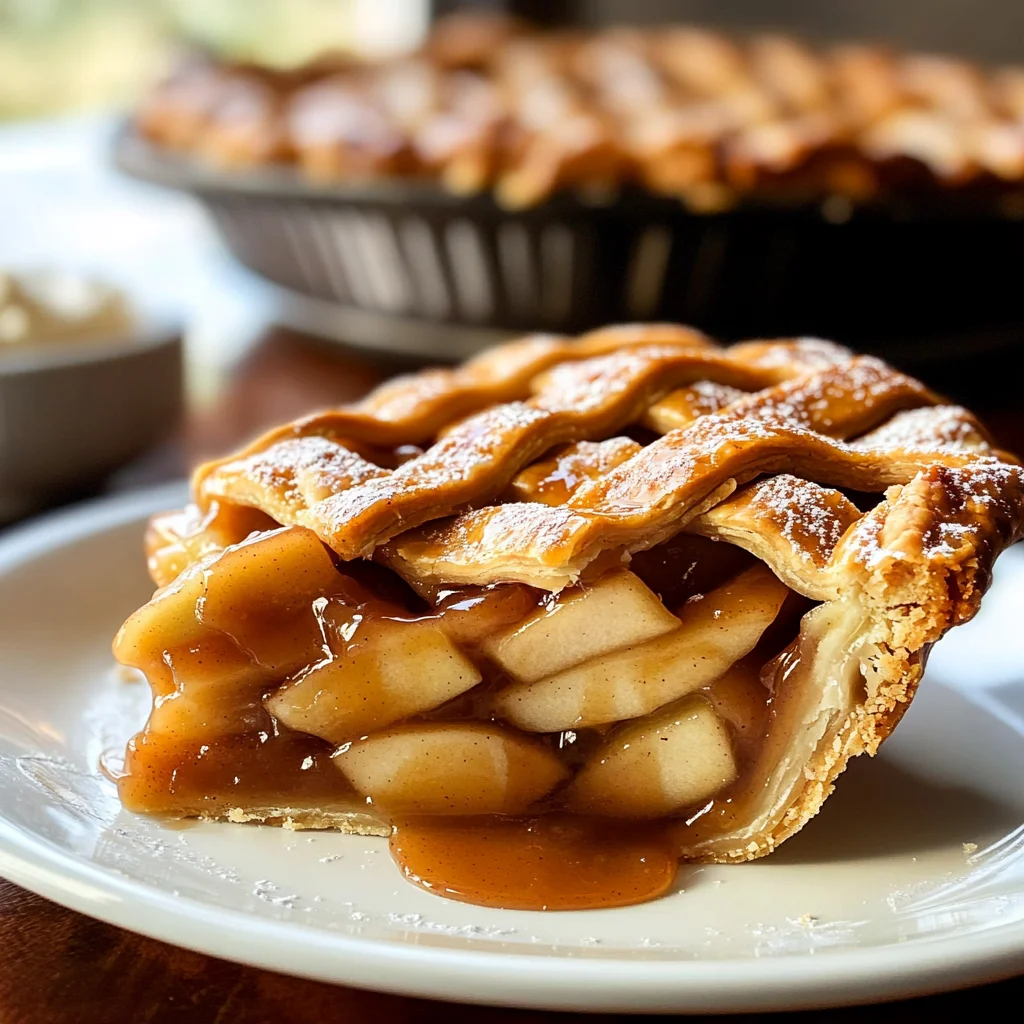
Indulge in the heartwarming experience of homemade Salted Caramel Apple Pie, where the classic flavors of spiced apples meet rich, gooey caramel for an unforgettable dessert. This delightful pie features a buttery, flaky crust that cradles tender apple slices mixed with just the right amount of sweetness and warmth from cinnamon and spices. Topped with a beautifully woven lattice crust and drizzled with extra salted caramel, each slice is a comforting embrace that brings joy to any gathering.
- Prep Time: 30 minutes
- Cook Time: 65 minutes
- Total Time: 1 hour 35 minutes
- Yield: Approximately 8 servings 1x
- Category: Dessert
- Method: Baking
- Cuisine: American
Ingredients
- Homemade or all-butter pie crust
- 1 cup (290g) salted caramel sauce, divided
- 10 cups (1250g) peeled and sliced apples (about 8 large)
- 1/2 cup (100g) granulated sugar
- 1 tablespoon (15ml) fresh lemon juice
- 1/4 cup (31g) all-purpose flour
- 1 and 1/2 teaspoons ground cinnamon
- 1/4 teaspoon ground allspice or ground cloves
- 1/4 teaspoon ground nutmeg
- 1 large egg beaten with 1 tablespoon (15ml) milk
- Optional: coarse sugar for sprinkling on crust
Instructions
- Prepare your pie crust, either homemade or store-bought, and chill for at least 2 hours.
- If making salted caramel sauce from scratch, prepare it now to cool.
- Peel, core, and slice apples; mix with sugar, lemon juice, flour, and spices in a bowl.
- Roll out one disc of chilled dough into a pie dish; fill with apple mixture and drizzle half the salted caramel over top.
- Roll out the second dough disc into strips for a lattice top; weave over the filling.
- Brush top with egg wash and sprinkle with coarse sugar if desired.
- Chill pie for 20–30 minutes while preheating the oven to 425°F (220°C). Bake for 25 minutes at this temperature, then reduce to 375°F (190°C) for an additional 35–40 minutes until bubbly.
Nutrition
- Serving Size: 1 slice (110g)
- Calories: 350
- Sugar: 22g
- Sodium: 150mg
- Fat: 16g
- Saturated Fat: 10g
- Unsaturated Fat: 5g
- Trans Fat: 0g
- Carbohydrates: 47g
- Fiber: 3g
- Protein: 2g
- Cholesterol: 35mg