Lattice Apple Pie
The act of baking a Lattice Apple Pie is so much more than just a culinary task; it’s a heartfelt tradition that evokes nostalgia and joy. As the aroma of spiced apples and buttery crust wafts through the air, it transports me back to my childhood, where every holiday gathering was marked by the warm glow of the kitchen and laughter shared over slices of pie. This Lattice Apple Pie is not merely a dessert; it’s an experience that encapsulates the essence of togetherness and gratitude. With each bite, you’re enveloped in a symphony of flavors—crisp, sweet Honeycrisp apples mingling with tart Granny Smiths, all bathed in a luscious caramel-like sauce that dances on your palate. The flaky, golden crust cradles this delightful filling, making it not just visually stunning but utterly intoxicating.
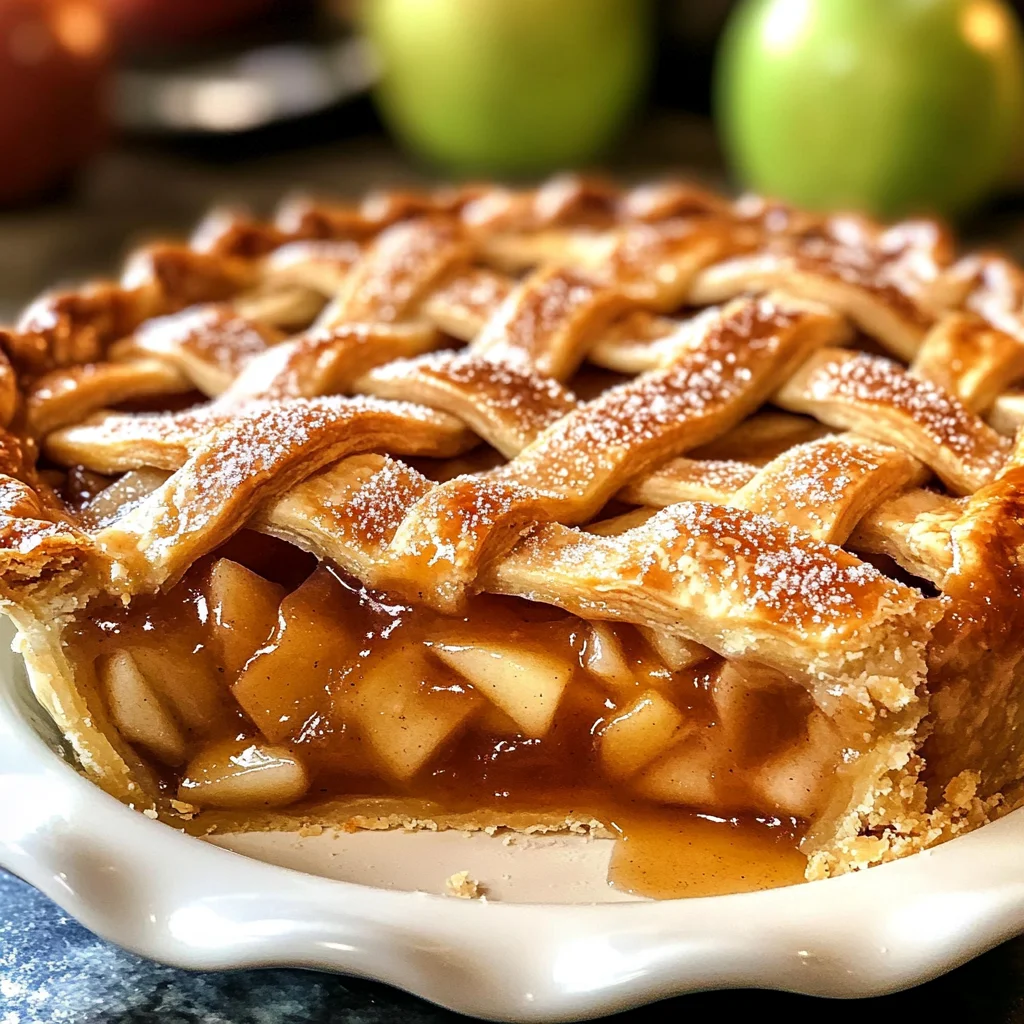
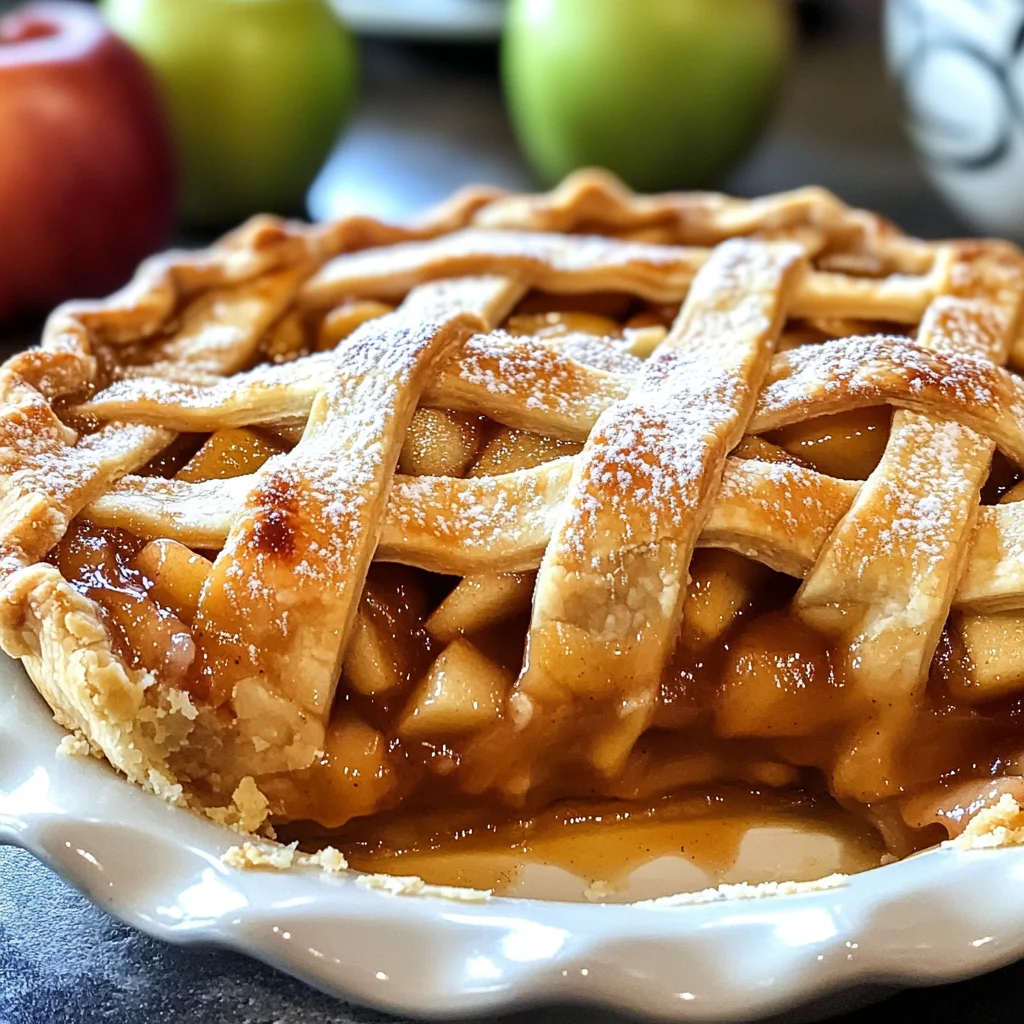
And let’s talk about the lattice top! It’s that beautiful woven pattern that not only allows the filling to peek through but also creates an enticing visual appeal that beckons everyone to dive in. This Lattice Apple Pie is perfect for any occasion—Thanksgiving, birthdays, or simply a cozy Saturday afternoon when you want to treat yourself and your loved ones to something extraordinarily special. The balance of sweet and tart apples harmonized with warm spices creates a pie that feels both classic and innovative—a true testament to the enduring love for homemade desserts.
Lattice Apple Pie: A Slice of Tradition with a Twist
Welcome to my favorite pie adventure! I can hardly contain my excitement as I share this foolproof recipe for Lattice Apple Pie with you. This recipe has been passed down through generations in my family, evolving slightly but never losing its charm or deliciousness. I’ve tweaked it just enough to make it even more approachable without compromising on flavor or texture. Trust me; once you master this pie, you’ll find yourself making it time and again, creating new memories each time!
Ingredients:
As we embark on this delightful culinary journey together, let’s take a moment to appreciate each ingredient that plays a crucial role in our Lattice Apple Pie. Each component contributes its unique characteristics, enhancing the overall experience of this beloved dessert.
- 2 recipes Homemade Pie Crust: A good pie starts with a fantastic crust—flaky, buttery, and tender. For this recipe, you’ll need one dough for the bottom crust and another for the lattice top. Trust me when I say that homemade crust makes all the difference! It gives you complete control over texture and flavor; plus, there’s something truly satisfying about rolling out your own dough.
- Egg wash: 1 egg beaten with 1 TB heavy cream (may sub milk): This magical mixture serves two purposes: it helps create that gorgeous golden color on your crust while also acting as glue to hold your lattice strips in place. If you’re looking for an alternative that’s lighter but still effective, milk works well too!
- Optional: Coarse raw sugar for sprinkling on lattice topping: While not strictly necessary, sprinkling coarse sugar on top provides an irresistible crunch and adds an inviting shimmer to your finished pie. It’s those little touches that elevate your dessert from ordinary to extraordinary.
- 3 1/2 pounds Honeycrisp apples: These apples are known for their perfect balance of sweetness and tartness—just what we need for our filling! Their crisp texture holds up beautifully during baking while infusing your pie with flavor. When selecting Honeycrisp apples at the market, look for firm fruit with vibrant skin; they should be free from blemishes or soft spots.
- 1 1/2 pounds Granny Smith apples: The tart counterpart to our Honeycrisps! Granny Smiths add depth and contrast to the sweetness of other apples while maintaining their shape during cooking. Their acidity helps brighten up the flavors in our filling. Opt for bright green apples that feel firm to ensure they’re fresh.
- 2/3 cup packed light brown sugar: This ingredient brings warmth and depth to our apple filling with its rich molasses notes. It helps caramelize beautifully during baking, creating that coveted gooey sauce we all love in apple pies. Make sure it’s packed tightly in your measuring cup for accurate sweetness!
- 1/2 cup granulated sugar: This adds additional sweetness alongside the brown sugar while helping create that lovely bubbling sauce we desire within our pie. Don’t hesitate to adjust based on your taste preferences—if you like things sweeter, feel free to add a little extra!
- 1/3 cup + 1 TB all-purpose flour: Flour is essential here as it thickens our apple juices into a luscious filling rather than leaving it runny or soupy—a common pitfall in many pies! By using just enough flour combined with sugar and spices, we achieve a perfectly balanced texture that’ll have everyone coming back for seconds.
- 2 tablespoons lemon juice (divided): Lemon juice brightens up our apple mixture by adding acidity which enhances flavor while also helping prevent oxidation (browning). We’ll use half during cooking and half just before assembling our pie—this two-step process maximizes freshness!
- 1 1/2 teaspoons ground cinnamon: Cinnamon is synonymous with apple desserts—it brings warmth and coziness into every bite! It complements the natural sweetness of our apples beautifully while infusing comforting aromas into your kitchen.
- 1/2 teaspoon EACH ground ginger, ground nutmeg, allspice: These spices add layers of complexity to our filling—ginger brings warmth without overwhelming sweetness; nutmeg offers earthy undertones; and allspice introduces hints of clove-like richness—all working together harmoniously!
- 1/8 teaspoon salt: A pinch of salt enhances all flavors by balancing sweetness without being detectable itself—it’s absolutely paramount in achieving overall harmony within our dish!
- 1 teaspoon vanilla extract: Lastly but certainly not least—a splash of vanilla rounds out those wonderful flavors! It adds depth while contributing an irresistible fragrance as it bakes away inside your oven.
Equipment You’ll Need:
Before diving into creating this masterpiece, let’s gather some essential tools that will make our baking experience smoother and infinitely more enjoyable. Having the right equipment ensures everything comes together seamlessly—and who doesn’t want less stress when preparing such an extraordinary dessert?
- Mixing bowls – A set of various-sized mixing bowls will come in handy when combining ingredients like sugars or spices together before adding them directly into your apple mixture or dough.
- Measuring cups & spoons – Accurate measurements are non-negotiable! Invest in reliable sets so you can confidently measure everything from flour to spices without second guessing yourself.
- Pastry cutter or food processor – This tool helps cut butter into flour quickly if you’re making pie crusts from scratch—ensuring nice flaky layers instead of overmixing by hand which can lead to tough results!
- Rolling pin – A sturdy rolling pin is essential for rolling out dough evenly so you’ll achieve consistent thickness throughout both bottom crusts as well as lattice strips.
- Baking sheet – Placing your pie on a rimmed baking sheet protects against spills while catching any delicious drippings during baking—for easy cleanup later (because who wants extra dishes?!).
Step 1: Prepare Your Flaky Pie Crust
To begin crafting this masterpiece known as Lattice Apple Pie, we first need to whip up some homemade pie crusts—you’ll need two recipes total; one for the bottom layer where those beautiful apples will nestle snugly beneath—and another destined for weaving atop like delicate ribbons!
Start by following whichever pie crust recipe you’ve chosen until step six where you’ll be fully prepped (I recommend chilling them beforehand!). Once ready—the key here is ensuring everything remains cold throughout…the colder your ingredients are when combining them leads ultimately towards flakier results after baking!
Now is also an excellent time (and totally worth it) if you prefer prepping pies ahead; feel free keep them chilled until needed later down line—just make sure they’re tightly wrapped if stored longer than few hours!
Step 2: Create Your Bottom Crust
Once you’ve got one batch ready—it’s time roll out dough gently onto lightly floured surface until reaching about twelve inches wide allowing us enough room edge flute later on without risking tearing apart edges from excess manipulation throughout process hereafter…so don’t rush this step!!
Lightly brush bottom sides only—not edges—with egg wash mixture prepared earlier before placing into pan—you want seal well against potential leaks caused by juicy fruits bubbling within afterwards!! Afterward cover loosely again refrigerate until needed next phase assembly point where everything comes together perfectly!
Step 3: Roll Out Lattice Top Dough
For those delicate lattice strips adorning top—we’ll roll second batch similarly onto parchment paper dusted generously with flour before transferring onto baking sheet (=easier transport!). Aim roughly eleven inches square shape keeping thickness even throughout preventing breakage when slicing later down line…
Once laid out straightened edges—evenly cut into one-inch-wide strips using ruler/pizza cutter whatever tool suits best suited needs at hand…this helps maintain uniformity between pieces ultimately leading towards success weaving pattern desired once starts layering atop filled base below!
Step 4: Slice Those Apples
Now comes arguably most fulfilling part—prepping deliciousness itself!! Start peeling three-and-a-half pounds Honeycrisp peeled skins off exposing bright white flesh underneath…then slice carefully around core leaving four quarters behind discardable waste thereafter laying flat against board proceed cutting down further thinly creating eighth-inch slices uniformly across entire batch ensuring even distribution upon baking surface once sent forth oven-bound shortly thereafter!!
As each piece transferred directly large Dutch oven keep workspace tidy—it’s important maintain cleanliness especially during busy moments ahead…next sprinkle mixture sugars/flour/spices/lemon juice over freshly sliced beauties stirring gently until coated evenly prior heating ‘medium’ setting stove allowing flavors meld slowly bringing forth magic aromas permeate kitchen before long…
I can’t wait for you to try this recipe! Stay tuned as we continue breaking down each step toward creating this spectacular Lattice Apple Pie together!
The Art of Creating a Lattice Apple Pie
Oh, the allure of a freshly baked Lattice Apple Pie—its golden crust, the tantalizing aroma of spiced apples wafting through the kitchen, and that first slice revealing a beautiful weave of dough cradling luscious fruit. Each time I make this pie, it feels like I’m sharing a piece of my heart with those I love. Trust me when I say that this is not just any pie; it’s an experience, a celebration of flavor and texture that elevates gatherings to something extraordinary. Let’s dive into the details, shall we?
Step 5: Crafting Your Lattice Strips with Love
Now that your dough is chilled and ready for action, we’re going to create those eye-catching lattice strips that will crown your pie with elegance. Begin by taking your chilled dough from the freezer; it should be firm but pliable enough to work with. Lay out a large piece of parchment paper on your counter or baking sheet and generously dust it with flour—this will prevent sticking and ensure each strip comes away cleanly. Roll out the dough into an 11×11-inch rectangle; you want it to be about 1/8 inch thick.
Why do we chill the dough before cutting? This crucial step helps maintain its structure, making it easier to handle without becoming too soft and sticky. Once you’ve rolled out your dough, cover it again and pop it back in the freezer for about 20-30 minutes. This not only firms up the dough but also makes it much easier to cut precise strips without tearing them apart. After chilling, grab a ruler and your favorite cutting tool—be it a pizza cutter or a sharp knife—and slice the dough into 1-inch-wide strips. A gentle hand is key here! Cover these strips with plastic wrap or parchment paper as you prepare to weave them into a beautiful lattice top.
Step 6: Preparing Those Juicy Apples
As you wait for your lattice strips to chill, let’s turn our attention back to those glorious apples! You’ll need about 3 ½ pounds of Honeycrisp apples for their sweetness and texture paired beautifully with 1 ½ pounds of Granny Smith apples for that necessary tartness. Start by peeling each apple and slicing around the core in four segments; this method ensures maximum yield and minimal waste! Once you’ve got those segments, lay them cut-side down on your board and slice them into thin, even pieces—about 1/8-inch thick.
Why is uniformity important? Even-sized slices cook at the same rate, ensuring that every bite contains perfectly tender apples without any mushy surprises. As you slice them up, transfer these beauties directly into a large Dutch oven; this keeps your workspace tidy while also preparing for cooking later on. Once all apples are in their pot, sprinkle in the sugars (both brown and granulated), flour, lemon juice, spices (think cinnamon warmth mingling with ginger’s zest), salt, and vanilla extract. Stir gently until every slice is coated in this heavenly mixture—this not only enhances the flavor but also begins creating that wonderfully thick syrup that holds our filling together.
Step 7: Cooking Down Your Apple Filling
Now comes one of my favorite parts—the cooking process! Set your Dutch oven over medium heat and cover it with a lid after giving everything a gentle stir. Allow those apples to cook down for about 15-20 minutes, stirring occasionally to ensure they don’t stick or burn at the bottom. What you’re looking for are slightly softened apples that still hold their shape—a perfect fork-tenderness without turning mushy.
This step is absolutely paramount because cooking your filling beforehand allows excess moisture to evaporate rather than creating a watery mess once baked. You want that filling bubbling beautifully when it hits the oven! As you stir occasionally, keep an eye on how they soften; they should be tender yet structured enough to give you some delightful bites later on. Once they’ve reached your desired tenderness (think al dente pasta), remove from heat and stir in another splash of lemon juice along with that dreamy vanilla extract right at the end—it brightens everything up! Transfer this luscious mixture onto a lined baking sheet so they can cool down completely while you finish prepping.
Step 8: Cooling Your Apples – Patience Makes Perfect
Let’s talk cooling! It might seem tempting to skip ahead during this stage because after all, who wouldn’t want to dive straight into assembling their pie? But hear me out—cooling your apple filling is essential for achieving that non-runny consistency we all crave in a great pie! If you rush this step by adding hot filling straight into your crust, you’ll end up with soggy bottoms which no one desires.
Spread those apple slices along with all their caramel-like juices onto your prepared baking sheet lined with parchment paper or silicone mat (easy cleanup alert!). Pop this tray into the fridge or even freezer for about 25 minutes until they reach room temperature—this will help them set nicely before we layer them into our pie shell later on. You’ll notice how much easier they are to handle once cooled; trust me on this one!
Final Touches – Baking Your Perfect Lattice Apple Pie
Now comes the moment we’ve all been waiting for—the assembly and baking of our masterpiece! First things first: preheat your oven while we get everything ready so it’s nice and hot when it’s time to bake.
Step 9: Assembling Your Pie Like a Pro
Once your apple filling has cooled sufficiently (remember patience!), take out that beautiful chilled bottom crust from the refrigerator where you’ve kept it firmed up nicely after brushing it with egg wash earlier on; now it’s time to fill it! Carefully scoop all those gorgeous apple slices along with their caramel sauce straight into that shell you’ve lovingly prepared—layer them horizontally as you go so they fit snugly together like old friends reuniting at a party!
But wait—before we weave our lattice top over this delightful filling, take another moment here to rearrange any slices if needed; compact them tightly so they’ll hold up beautifully during baking instead of sinking down as they cook further in the oven. The visual appeal alone will have everyone drooling before they’ve even taken their first bite!
Step 10: Weaving Your Lattice Top – A Labor of Love
With our filling snugly nestled inside its crusted haven, it’s time for one last flourish—the lattice weaving! If you’ve noticed any stiffness in those beautiful strips from earlier due to chilling too long in the fridge/freezer (which can happen!), simply let them rest on the counter for about ten minutes while we catch our breath from all this excitement.
To start weaving: Lay five horizontal strips evenly spaced across the top of your pie—center that middle strip like royalty among its subjects! Then carefully fold back every other strip (the first third and fifth) so we can sneak in our first vertical strip on one side before unfolding those previously folded ones back over again gently but confidently—it’s like dance choreography but tastier! Repeat this process until every inch has been beautifully covered—all ten strips woven together creates such mesmerizing textures while allowing those warm apple slices peeking through!
Step 11: Sealing & Finishing Touches – Golden Brown Perfection Awaits!
Once you’ve finished weaving (you should feel proud!), gently press down around where each strip meets its crust edge so everything seals tight—that’s going nowhere during baking! Now let’s add some personality by crimping or fluting edges however suits your fancy because presentation matters just as much as taste!
A final brush stroke over both edges of braided lattice using leftover egg wash gives us that shine which translates magnificently once baked—we’re talking liquid gold here! For an extra crunchy surprise when biting into each piece later on sprinkling coarse raw sugar atop adds delightful sweetness during caramelization without overwhelming flavors inside.
Don’t forget—we need our unbaked pie chilled again before hitting heat which helps prevent shrinking while also avoiding shattered glass pans if using one (I learned from experience!). Pop this beauty back into refrigeration for thirty minutes while preheating oven ensures everything’s optimal when finally placed inside.
Step 12: Baking – Transforming Ingredients Into Magic
With our oven now roaring at 425 degrees F (you’ll know it’s ready when there’s heat radiating), place an empty rimmed baking sheet on its bottom rack as well—that’ll catch any drips happening below ensuring easy cleanup later without fussing over burned spots stuck onto surfaces later (thank me later!).
Carefully transfer chilled pie onto heated baking sheet then bake initially at high temp for twenty-five minutes—keep watchful eyes open because timing can vary depending upon ovens’ quirks too! Reduce heat downwards towards three seventy-five afterwards continuing bake between thirty-five-to-forty-five more minutes until bubbling emerges around edges—a sign indicating sweet success!
To prevent possible browning disasters use shields around edges if needed covering top loosely with foil if necessary—but do allow chance seeing bubbling magic happen since that’s non-negotiable criteria determining doneness level here!
Step 13: Cooling Down – Letting Flavors Settle In Harmony
After what feels like forever watching through glass door waiting impatiently—it’s finally done! Once removed from oven place carefully onto cooling rack allowing resting period lasting four hours minimum—yes I know four hours seems long but trust me there lies beauty within patience during cooling stages allowing flavors settle harmoniously together creating unforgettable moments every bite brings forth thereafter.
If time isn’t entirely on side popping directly fridge/freezer speeds things up too though remember letting sit longer builds complexity more deeply ingrained flavors uniting effortlessly amongst crusts alongside fillings alike forming marriage destined last lifetimes beyond mere moments shared around tables filled laughter memories swirling midst delicious aromas flooding air surrounding hearts gathered close together sharing love within desserts crafted ourselves…
And there you have it—the complete journey of crafting an exquisite Lattice Apple Pie from start-to-finish filled rich traditions passed down through generations sprinkled joyfully among family gatherings shared fondly creating new stories made memorable whenever indulging amongst loved ones celebrating life’s sweetest moments together… So what are you waiting for? Go forth and make yours today—you won’t regret immersing yourselves fully within delightful experiences unleashed once everyone savors each mouthwatering slice awaiting devoured eagerly amidst laughter echoing endlessly throughout homes filled warmth love shared amongst family friends gathered near… Happy Baking!
Storage and Enjoyment Tips for Your Lattice Apple Pie
Now that your kitchen is filled with the intoxicating aroma of freshly baked Lattice Apple Pie, it’s time to savor every delightful slice! This pie not only looks stunning with its beautifully woven lattice top but also offers a symphony of flavors that will warm your heart. Whether you’re serving it at a family gathering or enjoying a quiet evening at home, knowing how to properly store and enjoy your Lattice Apple Pie will ensure that every bite is just as delicious as the first.
Storing Leftover Lattice Apple Pie
To keep your leftover Lattice Apple Pie tasting as heavenly as it did fresh from the oven, store it in an airtight container at room temperature if you plan to eat it within a couple of days. For longer preservation, pop it into the refrigerator, where it can last up to five days. Here’s a little tip: placing a slice of bread in the container can help maintain its moisture and prevent the crust from becoming too dry—trust me, this trick works wonders! After storage, the flavors meld together even more, creating a truly satisfying experience when you take your first bite again. When you’re ready to indulge in another slice or two, simply reheat it in the oven; tent the pie with foil to avoid over-browning and warm it gently until it’s just right.
Freezing Lattice Apple Pie for Later
If you want to prepare ahead or just save some for later enjoyment, freezing your Lattice Apple Pie is a fantastic option! To freeze properly, make sure the pie has cooled completely after baking, then wrap it tightly in plastic wrap followed by aluminum foil to prevent freezer burn. It will keep well for up to three months in the freezer. When you’re ready to enjoy this delectable dessert again, simply let it thaw overnight in the refrigerator before reheating in the oven for that fresh-baked taste. The convenience of having a homemade pie ready at your fingertips makes this such an exciting option—just imagine pulling out a slice on a chilly evening and letting those warm spices fill your home once more!
Lattice Apple Pie

Lattice Apple Pie is a timeless dessert that captures the essence of home and nostalgia with every bite. This delightful pie features a beautifully woven lattice crust that allows the mouthwatering filling of sweet Honeycrisp and tart Granny Smith apples to peek through, creating an irresistible visual appeal. Infused with warm spices like cinnamon and nutmeg, this pie is not just a dessert; it’s a celebration of flavors that brings family and friends together at any gathering. Whether it’s Thanksgiving or a cozy weekend dinner, this Lattice Apple Pie will enchant your taste buds and leave everyone craving more. Let’s embark on this baking adventure together!
- Prep Time: 30 minutes
- Cook Time: 65 minutes
- Total Time: 1 hour 35 minutes
- Yield: Serves approximately 8 slices 1x
- Category: Dessert
- Method: Baking
- Cuisine: American
Ingredients
- 2 recipes Homemade Pie Crust
- 3 ½ lbs Honeycrisp apples
- 1 ½ lbs Granny Smith apples
- 2/3 cup packed light brown sugar
- ½ cup granulated sugar
- 1/3 cup + 1 tbsp all-purpose flour
- 2 tablespoons lemon juice (divided)
- 1 ½ teaspoons ground cinnamon
- ½ teaspoon ground ginger
- ½ teaspoon ground nutmeg
- ½ teaspoon allspice
- 1/8 teaspoon salt
- 1 teaspoon vanilla extract
- Egg wash: 1 egg beaten with milk (may sub milk)
Instructions
- Prepare your pie crusts by following your favorite homemade recipe.
- Slice the Honeycrisp and Granny Smith apples thinly, mixing them with sugars, flour, spices, and lemon juice in a large bowl.
- Cook the apple mixture in a Dutch oven over medium heat for about 15-20 minutes until slightly softened.
- Roll out one pie crust for the bottom layer and fill it with the cooled apple mixture.
- Cut the second crust into strips to weave a lattice top over the filling.
- Seal the edges and brush with egg wash for a golden finish.
- Bake at 425°F for 25 minutes, then reduce heat to 375°F for an additional 35-45 minutes until bubbling.
Nutrition
- Serving Size: 1 slice (125g)
- Calories: 290
- Sugar: 22g
- Sodium: 110mg
- Fat: 15g
- Saturated Fat: 6g
- Unsaturated Fat: 9g
- Trans Fat: 0g
- Carbohydrates: 37g
- Fiber: 3g
- Protein: 2g
- Cholesterol: 30mg