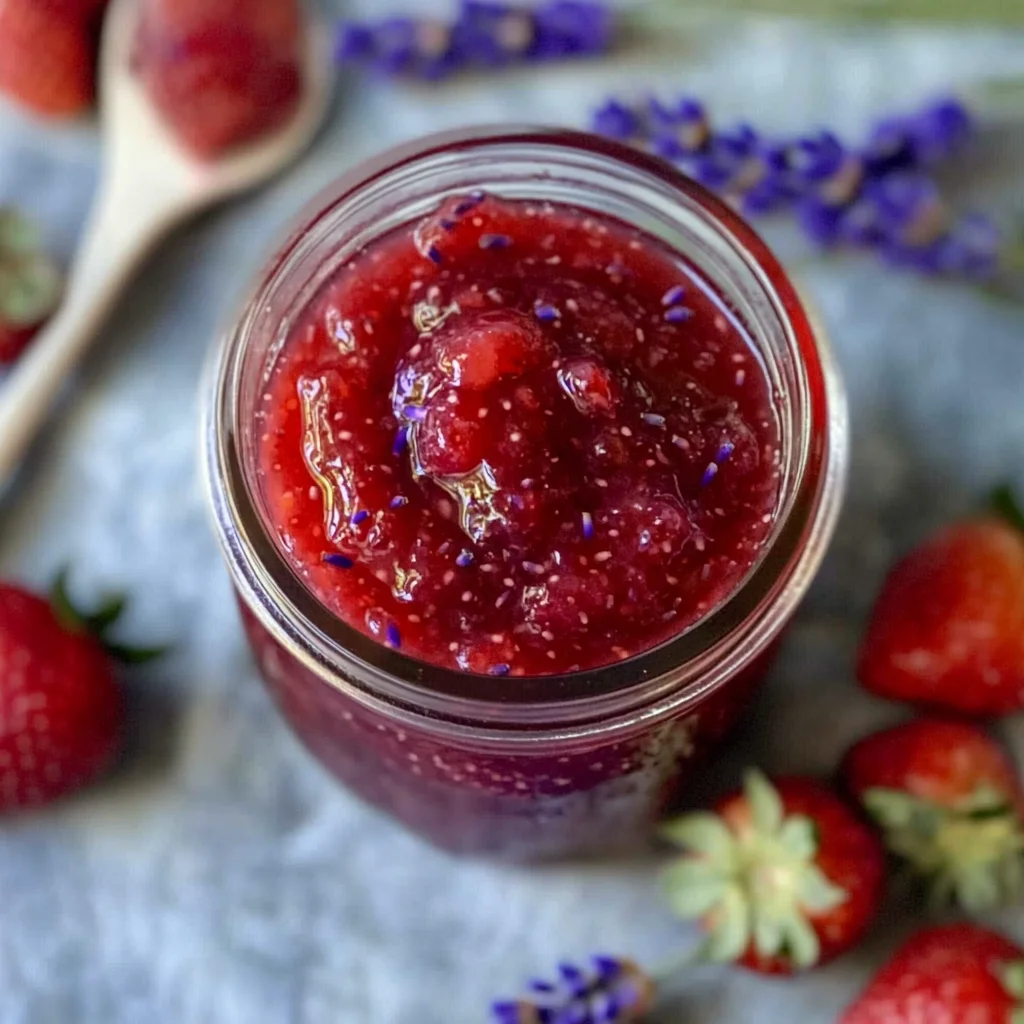
Strawberry Lavender Jam
There’s something utterly magical about the act of creating a jam, especially one as enchanting as Strawberry Lavender Jam. It’s not just about preserving fruit; it’s about crafting a vibrant slice of summer to savor all year long. Imagine a sun-drenched kitchen filled with the intoxicating aroma of fresh strawberries mingling with delicate hints of lavender, awakening your senses and transporting you to an afternoon picnic in a blooming garden. This recipe is more than just a method; it’s a heartfelt invitation to slow down, enjoy the process, and create something beautiful. As we embark on this culinary journey together, I promise you will discover how this strawberry jam transforms into liquid gold when infused with the subtle floral notes of lavender, making it an irresistible addition to your breakfast table or dessert spread.
The allure of Strawberry Lavender Jam lies not only in its flavor but also in its ability to evoke memories and sentiments. Each jar encapsulates the essence of summer—long days spent outdoors, laughter shared over freshly baked scones, and warm toast slathered with homemade goodness. The use of chia seeds adds a modern twist by acting as a natural thickener while keeping sugar levels low. And let’s not forget about the lavender; it brings an unexpected depth that harmonizes beautifully with strawberries, elevating this jam from simple to extraordinary. So whether you’re looking to impress guests at brunch or simply want to treat yourself, this delightful jam is sure to become a staple in your home.
Strawberry Lavender Jam: A Symphony of Summer Flavors
This recipe for Strawberry Lavender Jam is not just about preserving fruits; it’s about creating memories and delightful experiences that linger long after the last spoonful has been enjoyed.
Ingredients:
As we prepare to dive into this delightful endeavor, let’s take a moment to appreciate each ingredient that will play a vital role in our Strawberry Lavender Jam.
- 500 g (17.6 ounces) strawberries. Strawberries are undoubtedly the star of our show! When selecting strawberries, look for vibrant red berries that are firm yet slightly yielding to pressure—you want them fresh and fragrant for that perfect balance of sweetness and tanginess. The flavor profile deepens as they cook down, releasing their juices and creating an exquisite base for our jam. Remember, quality matters here; organic strawberries can often provide richer flavors since they’re grown without synthetic pesticides.
- 1 tablespoon juice from 1/2 lemon. Lemon juice isn’t just for brightness; it acts like magic by enhancing the natural sweetness of strawberries while preventing oxidation. The acidity from lemon juice helps balance the sugars in our jam and adds a refreshing zing that makes each bite sing! Trust me on this—it’s non-negotiable for achieving that perfect flavor harmony.
- 2 tablespoons chia seeds. These tiny powerhouses are going to work wonders in our jam! Chia seeds swell when mixed with liquids, creating a gel-like consistency without needing traditional pectin or excessive sugar. They’re also packed with fiber and omega-3 fatty acids, making this jam not only delicious but also nutritious! Just make sure they’re fresh—old seeds can lose their gelling ability.
- 2 tablespoons raw sugar or honey. Sweetener choices can be personal! Raw sugar brings caramel-like notes alongside its sweetness while honey infuses floral undertones into the mix—both options are wonderful here. The key is moderation; we’re utilizing just enough sweetness to enhance our fruit’s natural flavors without overpowering them.
- 2 tablespoons lavender (fresh or dried). Oh, lavender—the aromatic herb that has captivated hearts for centuries! Adding lavender introduces an ethereal quality to our jam that transcends ordinary breakfast spreads. Whether you choose fresh or dried lavender, ensure it’s food-grade quality; this is absolutely paramount for achieving that delicate floral note without any bitterness.
Equipment You’ll Need:
Before we get cooking, let’s gather some essential tools that will make your experience seamless and enjoyable—because trust me, cooking should always feel like an adventure rather than a chore!
- Medium saucepan – This will be your trusty companion throughout the cooking process! A medium saucepan allows enough space for the strawberries to release their juices without boiling over while maintaining even heat distribution—a crucial factor in preventing scorching.
- Wooden spoon or silicone spatula – You’ll need something sturdy yet gentle for stirring our bubbling concoction! A wooden spoon is perfect for coaxing out those strawberry juices while giving you control over every swirl—plus there’s nothing quite like the feel of wood against metal.
- Measuring spoons – Precision matters when it comes to flavor balance! Having measuring spoons on hand ensures you’ll add exactly what’s needed without guesswork—especially important when working with potent ingredients like lemon juice and lavender.
- Sterilized jars or glass containers – Once our jam is ready, we’ll need a safe place to store it! Sterilizing jars is crucial for long-term preservation—you want your hard work rewarded with freshness every time you reach for a jar!
Preparing the Strawberry Lavender Jam
Step 1: Wash and Prepare Your Strawberries
First things first—let’s give our strawberries some love! Rinse them under cold running water until they’re free from dirt and any lingering stems—that freshness is essential! Gently pat them dry with a clean kitchen towel before removing their leafy tops. This step may seem straightforward but remember: each strawberry carries traces of nature’s charm within its bright red skin; treating them kindly ensures we capture all those flavors intact.
Once cleaned up, slice your strawberries in half or quarters depending on their size—aiming for uniformity helps promote even cooking later on. As you cut through those vibrant berries, notice how they glisten against your cutting board; isn’t it mesmerizing? Set them aside now because we’re about to unleash their delicious potential!
Step 2: Cooking Down Those Juicy Berries
Now comes one of my favorite parts—the cooking! Add your prepared strawberries into that medium saucepan over low heat. As they begin heating slowly, you’ll hear gentle whispers as their juices start escaping; stir occasionally so nothing sticks or burns on the bottom—this process takes patience but trust me—it’s worth every moment spent at the stove!
Allow those beautiful berries to cook down for approximately 30 minutes—during which time they will transform into syrupy delightfulness as they bubble away blissfully on your stovetop! You’ll notice how vibrant red hues deepen while aromas waft through your kitchen—it truly feels like magic unfolding right before you!
Step 3: Sweetening Your Creation
Once bubbling begins—that’s our cue to sweeten things up! Add in those two tablespoons of raw sugar (or honey if you opted) gently mixing until dissolved completely before we move further along our path toward perfection. The sweetness combines effortlessly during this stage because we’ve taken time allowing those luscious berries ample opportunity to release their flavors—this step is crucial as it’s setting us up for success down the line!
As everything melds together harmoniously in your pan—a momentary pause will help absorb all these glorious scents dancing around you—it feels wonderfully satisfying knowing you’re crafting something extraordinary from scratch!
Step 4: Stirring Up Some Texture
As soon as bubbling resumes vigorously after adding sweetness—we’re ready for chia seeds action! Lower the heat slightly while incorporating two tablespoons into our mixture—they’ll immediately start thickening things up beautifully once stirred through thoroughly—it feels almost transformative watching everything come together right before your eyes!
This technique known as “thickening” creates texture while ensuring no additional pectin needs added later on—it paves way toward achieving those velvety qualities reminiscent of traditional jams without excessive sugar content too! Keep stirring gently until well combined—and don’t rush this step either; allowing chia seeds time expands ensures optimal consistency when cooled later.
With each stir—the excitement builds knowing we’re closer than ever toward capturing summer essence inside jars ready waiting patiently at home…
And there we have it—a glimpse into just how special making Strawberry Lavender Jam really becomes when approached wholeheartedly with care and intention… Stay tuned as we continue diving deeper into crafting one unforgettable spread together!
Step 5: Stirring the Symphony of Flavors
Now that you’ve got your bubbling mixture, it’s time to elevate this creation into something truly extraordinary by adding those vital chia seeds. These tiny powerhouses aren’t just for health nuts; they’re essential to achieving that luscious, spreadable consistency we all yearn for in a jam. As you sprinkle in the two tablespoons of chia seeds, take a moment to appreciate their transformative nature. They absorb liquid and swell up, creating a gel-like texture that mimics traditional pectin without any of the fuss! Trust me on this: the moment those chia seeds hit the hot strawberries, they’ll start working their magic almost immediately, thickening your jam beautifully.
As you stir gently but thoroughly, keep an eye on the mixture. You’ll notice it becoming thicker as the chia seeds absorb the strawberry juices—this is a sign that you’re on the right track! If you feel like the consistency isn’t quite where you want it to be after stirring in those chia seeds for a minute or two, don’t hesitate to let it simmer for an additional minute or so. Just keep stirring! This step is absolutely paramount because it ensures that each spoonful of your Strawberry Lavender Jam will hold its shape and spread effortlessly over your favorite morning toast or desserts. After about five minutes of simmering with those chia seeds, you should see a noticeable change; it’s becoming more jam-like already!
Step 6: Adding Zest and Brightness
Next up is a key ingredient that ties all these flavors together beautifully: lemon juice. With one tablespoon freshly squeezed from half a lemon, you’re not just adding acidity; you’re introducing brightness and balancing out the sweetness of your strawberries and sugar. Why do we do this? Well, lemons contain citric acid which acts as a natural preservative while also enhancing flavor profiles. A touch of acidity can make sweet things taste even sweeter! So don’t skip this step—your taste buds will thank you later.
As you pour in that lovely lemon juice, continue stirring gently but consistently. You’ll feel how this simple addition brings an entirely new dimension to your jam—watch closely as it becomes even more vibrant in color and aroma! The fragrant notes of strawberry mingle with the zesty brightness, creating an utterly intoxicating scent that fills your kitchen. Take a moment to inhale deeply—it’s one of life’s simple pleasures! Let this mixture simmer for another couple of minutes until well incorporated; you’ll know it’s ready when everything is harmoniously blended and has achieved that silky smooth texture.
Step 7: Infusing with Floral Elegance
Now comes one of my favorite parts—the addition of lavender! This is where your Strawberry Lavender Jam begins to transform into something truly magical. Whether you’ve chosen fresh or dried lavender, simply sprinkle in those two tablespoons now for an aromatic infusion that will elevate your jam from delightful to divine. Lavender brings with it a soft floral note that complements the sweetness of strawberries so beautifully; it’s like summer captured in a jar!
After adding lavender, remove the saucepan from heat immediately. This step is crucial because lavender can quickly become overpowering if cooked for too long—think delicate perfume rather than cloying potpourri! Stir gently as you allow those floral flavors to meld into your fruity concoction for about five minutes off heat; during this time, you’ll notice how the fragrance deepens and fills your kitchen with an inviting warmth reminiscent of sunny afternoons spent outdoors. I promise you, resisting this alluring scent will be nearly impossible!
Step 8: Pouring Into Perfection
Finally, it’s time to transfer this vibrant Strawberry Lavender Jam into its final resting place—a sterilized jar or glass container! This part might seem straightforward but has its nuances worth noting for success. First, ensure your jars are clean and properly sterilized by either boiling them in water or running them through a hot cycle in your dishwasher; this guarantees that no unwanted bacteria spoils what you’ve lovingly created.
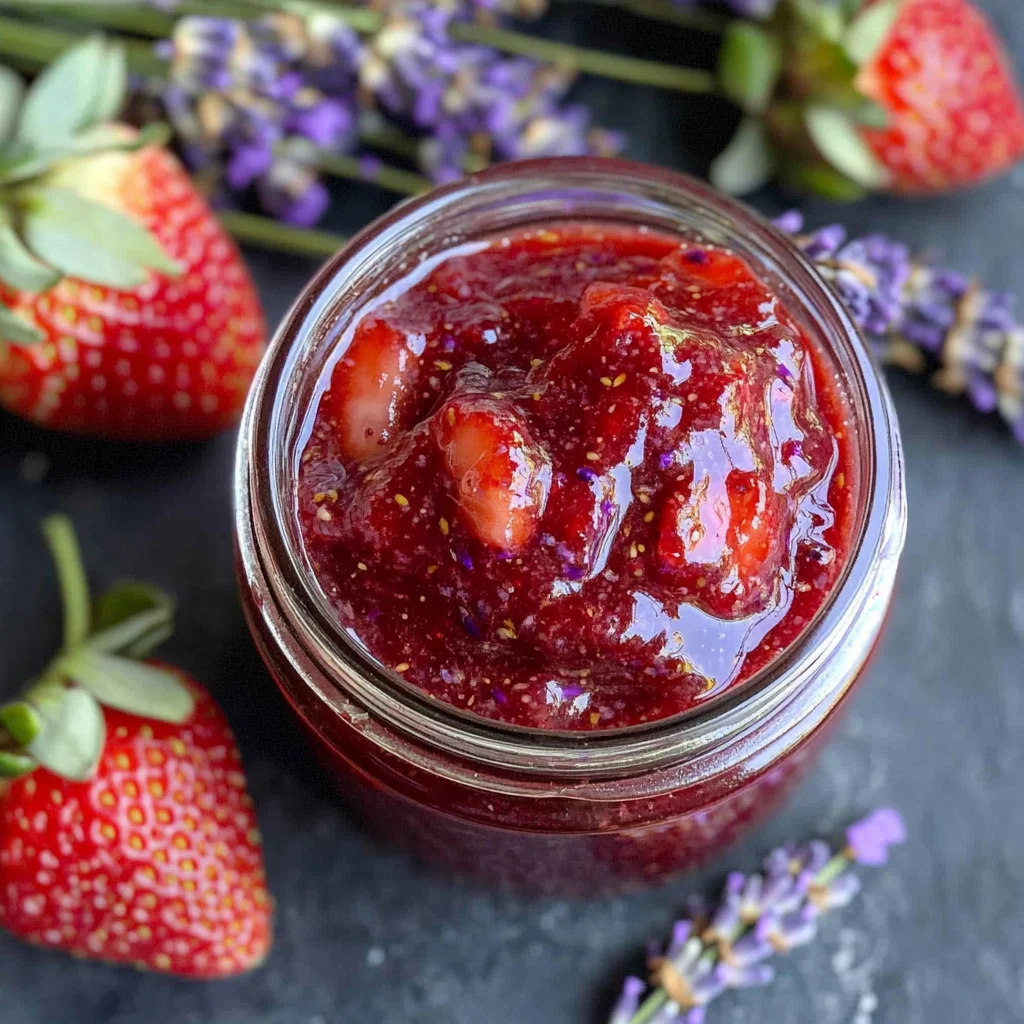
Once you’ve prepared your jars, carefully pour in the warm jam using a funnel if necessary—this helps avoid messy spills (and trust me, nobody wants sticky countertops!). Fill each jar leaving about half an inch from the top; this allows space for expansion as it cools down. As you pour, watch for any chunks of strawberry or flecks of lavender making their way into the jars—these little treasures are what give homemade jams their character and charm! Once filled, let them cool at room temperature before placing them in the fridge for at least an hour. This chilling process isn’t just about temperature; it allows all those flavors to marry beautifully together and settle into their final form.
Final Touches: Preserving Your Culinary Masterpiece
As we wrap up our journey through creating this exquisite Strawberry Lavender Jam, let’s talk about what happens next after chilling. Once it’s been sufficiently cooled in the fridge (trust me—it’s worth waiting!), you’ll notice how wonderfully thick and spreadable your jam has become—a glorious transformation indeed! Before sealing up those jars tight, I recommend giving each jar a gentle shake to redistribute any settled ingredients before placing them securely in storage.
This jam isn’t just meant for toast; think outside breakfast! It pairs exquisitely with cheeses on charcuterie boards or can be swirled into yogurt for an indulgent treat any time of day. The possibilities are endless! And remember: if stored properly in sterilized jars and kept refrigerated, this delightful concoction can last up to three weeks—but I doubt it’ll last that long once you’ve tasted its allure!
So go ahead—spread some joy today by sharing your homemade Strawberry Lavender Jam with family and friends; it’s bound to bring smiles and delight at every gathering! Enjoy every scrumptious bite knowing you’ve crafted something truly special from heart and home—and perhaps consider jotting down your thoughts on how you plan to use it next because I assure you—it will inspire future culinary adventures!
Storage and Enjoyment Tips for Your Strawberry Lavender Jam
Now that your kitchen is filled with the intoxicating aroma of your freshly made Strawberry Lavender Jam, it’s time to talk about how to keep this delightful concoction at its best! Trust me when I say you’ll want to savor every drop of this liquid gold, so let’s ensure it stays delicious for as long as possible. Storing your jam properly not only preserves its vibrant flavors but also maintains that luscious texture we all love.
Storing Leftover Strawberry Lavender Jam
For optimal freshness, transfer your jam into a clean, sterilized glass jar with a tight-sealing lid. I always recommend using a glass container because it doesn’t absorb flavors like plastic can and allows you to see that beautiful ruby-red hue shining through. If stored in the refrigerator, your Strawberry Lavender Jam should stay delicious for about two weeks—though I promise it won’t last that long! To maintain quality, consider placing a slice of bread on top of the jam before sealing; this little trick will help keep moisture levels in check and prevent spoilage. And let’s be honest—the flavor actually improves after a day or two in the fridge as the lavender infuses beautifully with those sweet strawberries, creating an utterly intoxicating experience. When you’re ready to indulge again, simply take out what you need and enjoy it straight from the jar or gently reheat it on the stove over low heat to bring back that velvety consistency if needed.
Freezing for Later
If you find yourself with more Strawberry Lavender Jam than you can devour within two weeks—first, congratulations on making such a fabulous batch! Second, freezing is an excellent option that allows you to enjoy this treat even longer. To freeze properly, pour your cooled jam into freezer-safe containers or silicone ice cube trays for portion control; just make sure to leave some room at the top for expansion. When done right, your jam can last up to six months in the freezer without losing its dreamy taste or texture! The convenience factor here is key—you can easily pop out a few cubes when you’re craving a burst of summer flavor in wintertime yogurt or a quick breakfast smoothie. Just allow it to thaw overnight in the refrigerator or warm it gently over low heat when you’re ready to use it again. This way, no matter the season, you’ll always have access to that unique blend of strawberry sweetness and floral notes.
Strawberry Lavender Jam
Experience summer year-round with our irresistible Strawberry Lavender Jam—perfect for spreading joy on toast or swirling through desserts!
- Prep Time: 15 minutes
- Cook Time: 30 minutes
- Total Time: 45 minutes
- Yield: Approximately 16 servings 1x
- Category: Dessert
- Method: Canning
- Cuisine: American
Ingredients
- 500 g strawberries (fresh)
- 1 tablespoon lemon juice
- 2 tablespoons chia seeds
- 2 tablespoons raw sugar or honey
- 2 tablespoons lavender (fresh or dried)
Instructions
- Wash and slice strawberries into halves or quarters.
- In a medium saucepan over low heat, cook strawberries for about 30 minutes until they release juices.
- Stir in raw sugar (or honey) until dissolved.
- Add chia seeds and stir continuously for a few minutes until thickened.
- Remove from heat and mix in lemon juice and lavender; let steep off heat for five minutes.
- Pour into sterilized jars and allow to cool before sealing.
Nutrition
- Serving Size: 1 serving
- Calories: 34
- Sugar: 6g
- Sodium: 1mg
- Fat: 0g
- Saturated Fat: 0g
- Unsaturated Fat: 0g
- Trans Fat: 0g
- Carbohydrates: 9g
- Fiber: 1g
- Protein: 0g
- Cholesterol: 0mg