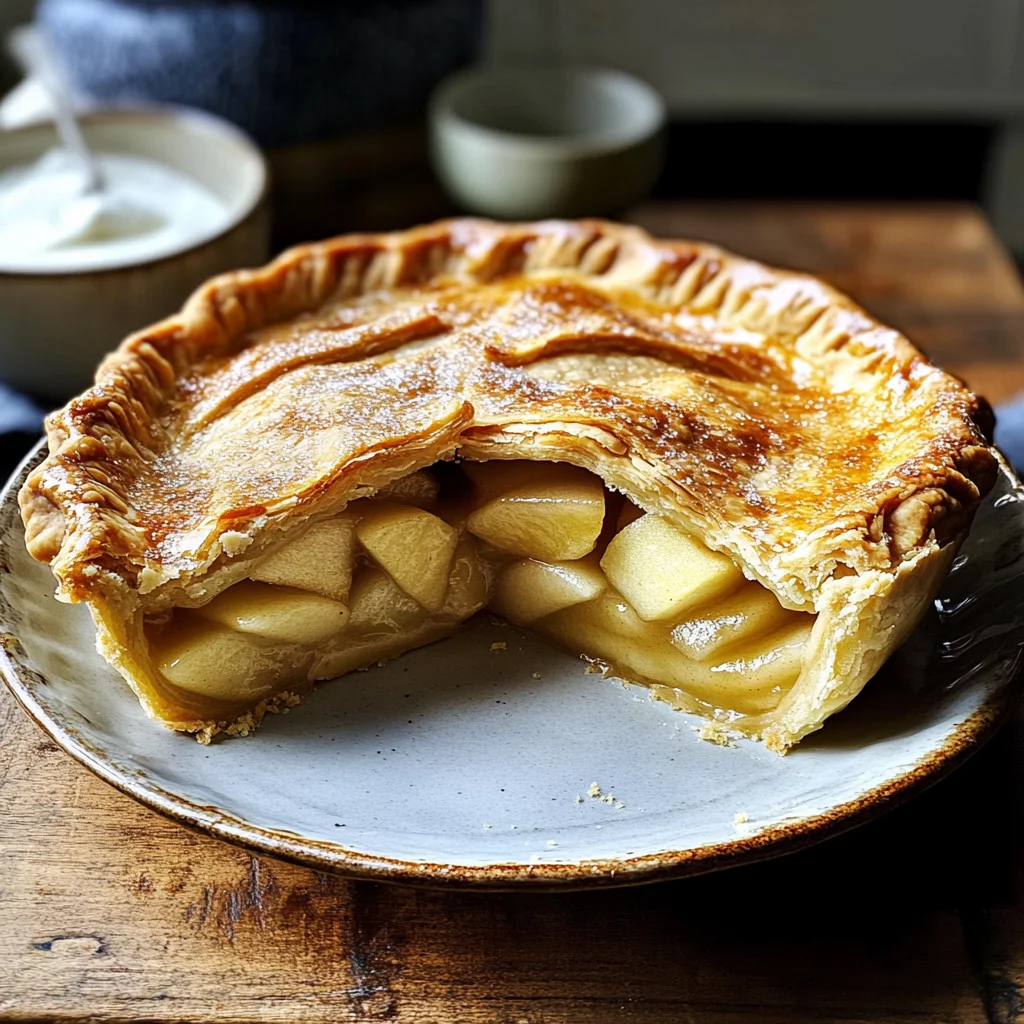
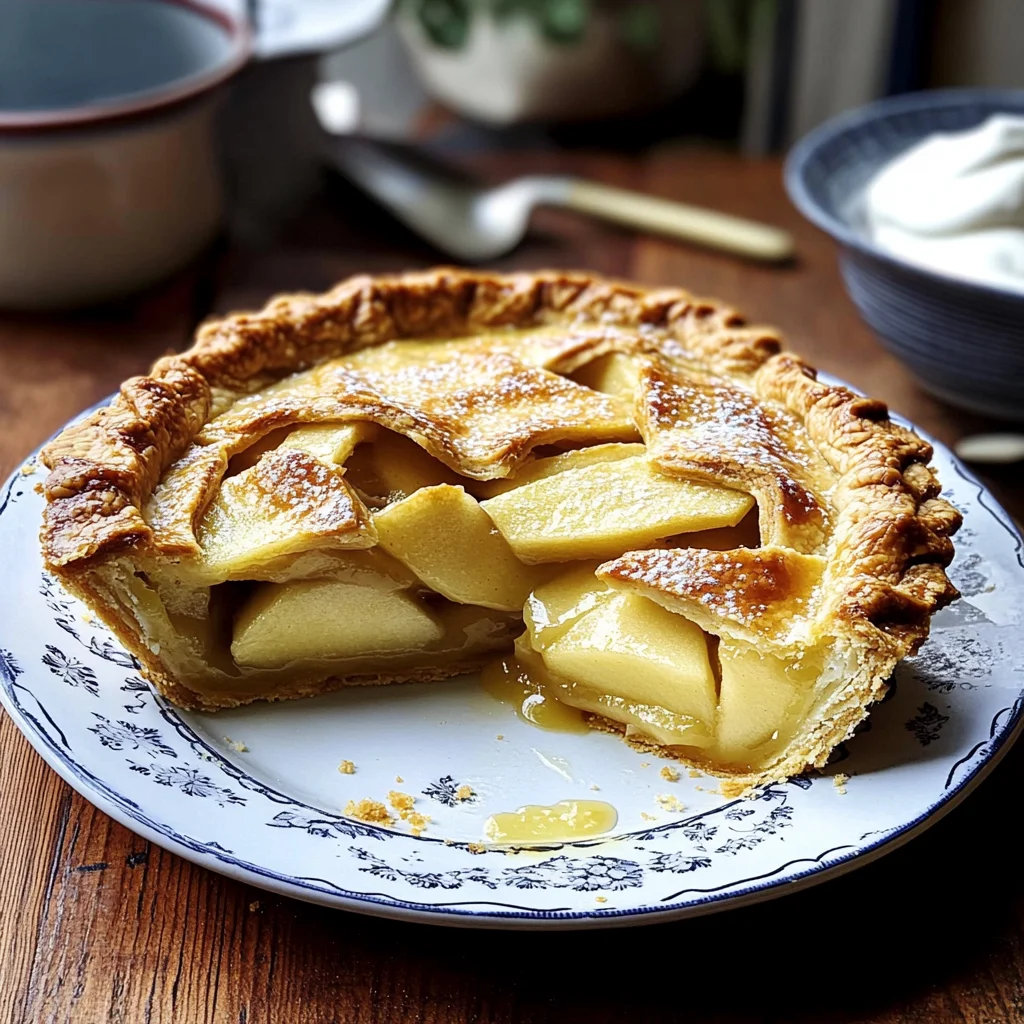
My Favorite (British) Apple Pie
There’s something utterly captivating about the aroma of freshly baked apple pie wafting through your home. It’s more than just a dessert; it’s a warm embrace, a nostalgic journey back to cherished moments spent in the kitchen with loved ones. My Favorite (British) Apple Pie is that very embodiment—a symphony of flavors and textures that unites tradition with the sweet simplicity of everyday life. Imagine the buttery pastry cradling tender, spiced apples, each bite revealing layers of love and care that resonate deeply with anyone who has ever savored a slice. Trust me, when you take that first bite, it’s as if time stands still and you’re transported to a cozy cottage in the English countryside.
What makes this apple pie truly special is its striking balance between sweetness and tartness, courtesy of the crisp Granny Smith apples. They lend just the right zing to harmonize with the rich buttery crust. It’s a classic recipe that whispers stories of family gatherings, rainy afternoons spent baking, and laughter shared over warm slices topped with thick cream or homemade custard. Each ingredient plays a crucial role in crafting this masterpiece, and I can’t wait to share every little detail with you! So let’s roll up our sleeves and embark on this delightful culinary adventure together—because nothing brings people closer than sharing comfort food made with love.
My Favorite (British) Apple Pie: A Slice of Comfort in Every Bite
Let’s dive into this delightful journey of creating my favorite British apple pie! You’ll find that each step is infused with passion, tradition, and just enough magic to ensure success. Grab your apron; we’re about to make something absolutely extraordinary!
Ingredients:
As we gather our ingredients for this heartwarming pie, know that each one plays a pivotal part in creating that beloved flavor profile we all crave. From the sharpness of the apples to the richness of the butter, every element is essential. Let’s explore what you’ll need:
- ½ tsp salt – Salt might seem like a humble addition, but it’s absolutely paramount in enhancing flavors within both your filling and crust. It brings out the natural sweetness of ingredients like apples while also balancing their acidity. A pinch here will elevate your pie from good to unforgettable!
- 8 oz butter (cold, unsalted) – Butter is truly where magic happens! Using cold, unsalted butter ensures that we have precise control over both flavor and texture without any unnecessary saltiness interfering with our delicate pie balance. The cold temperature helps create flaky layers in our crust—a texture you simply can’t replicate with melted butter. I always recommend using high-quality butter for that rich flavor; it makes all the difference!
- 1 Tbsp sugar – Just a tablespoon of sugar in our dough acts as an extra layer of flavor while also aiding in browning during baking. This subtle sweetness provides balance when paired with tart apples, ensuring our crust has a gentle sweetness that complements rather than overwhelms.
- 4 cups flour – Flour is the backbone of any good pastry! Choosing all-purpose flour gives us just the right amount of gluten formation for structure while keeping everything tender yet sturdy enough to hold those lovely apple pieces. When measuring flour, be sure to spoon it into your measuring cup instead of scooping directly from the bag; this prevents packing and ensures accuracy!
- 5 large Granny Smith apples (peeled, cored, and sliced into about 12 pieces each) – Oh, these beauties! Granny Smith apples are my go-to for pies due to their perfect tartness that cuts through sweetness beautifully. Choose organic whenever possible; they’re typically fresher and have more vibrant flavors! Peeling them allows their juicy goodness to shine through without any bitterness from skin—trust me on this step!
- Juice of half a fresh lemon – Fresh lemon juice adds brightness and zing to our filling while preventing those beautiful green apple slices from browning too quickly before they hit the oven. It enhances flavors beautifully without overpowering them; think of it as nature’s secret seasoning!
- 3 Tbsp sugar (more or less to taste) – This sugar sweetens our apple filling just right! Since everyone has different preferences for sweetness—and apples vary in their natural sugars—this is where you get to adjust based on taste preference. Don’t hesitate to take a little taste after mixing; it should feel harmonious without being cloyingly sweet.
- 1 egg white (slightly beaten with 1 tsp water) – Brushing your crust with egg wash not only gives it an enticing sheen but also helps achieve that gorgeous golden-brown color everyone loves! This step is non-negotiable if you want visual appeal alongside deliciousness.
- Thick cream (or custard) – To serve alongside your pie is an experience unto itself! Thick cream mimics what double cream offers across the pond—smooth and luxurious over warm pie slices—or opt for homemade custard for an added touch of nostalgia! Both choices bring added richness that perfectly complements every bite.
Equipment You’ll Need:
Having the right tools makes all the difference when embarking on any cooking adventure! These essential partners will ensure your baking process runs smoothly so you can focus on creating something wonderful without stress.
- Food processor – This handy gadget takes much of the elbow grease out of making pastry dough by quickly combining flour and butter until crumbly—it saves time while ensuring consistency throughout your crust!
- Rolling pin – A rolling pin is key for achieving even thickness in your pastry dough—a crucial factor for consistent baking results! If you don’t have one handy, even a clean wine bottle could do in a pinch.
- Pie dish – Opt for a sturdy glass or ceramic pie dish so you can easily monitor browning as well as keep heat distribution even throughout baking—it makes such a difference when it comes time for serving!
- Sharp knife – A sharp knife will not only make peeling those apples easier but will also help slice through baked goods effortlessly once they’re ready to enjoy—no one wants jagged edges on their lovely pie!
- Pastry brush – This simple tool allows you to apply egg wash evenly across your crust for that beautiful finish—never underestimate how important presentation can be when sharing food!
Now that we’ve gathered everything needed for our My Favorite (British) Apple Pie let’s dive into preparing this delightful treat together!
Step 1: Preheat That Oven!
First things first—preheat your oven to 400º F (200º C). This initial step may seem trivial but trust me; starting off at just the right temperature ensures optimal baking conditions from start to finish! We need intense heat right away so our crust puffs up beautifully while sealing in moisture from those luscious apple slices we’ll soon be adding.
Step 2: Prepare Your Apple Filling
In a medium pot over medium-low heat—a gentle approach here is key—combine all apple filling ingredients: sliced Granny Smiths along with lemon juice and sugar. Cook slowly while tossing every few minutes until they begin softening yet remain firm enough not lose shape completely—not mushy like baby food but tender enough where they feel plush under pressure from your fork! This method unlocks maximum flavor without compromising texture—as true perfection lies somewhere between crispy rawness and fully cooked mushiness.
Step 3: Crafting Your Crust
While those heavenly aromas dance around you from simmering apples, turn attention towards creating pastry dough! In your trusty food processor combine flour along with salt followed by cold butter cubes cut into small pieces—this process known as “cutting” helps distribute fats evenly throughout flour so gluten remains minimalized resulting flaky layers once baked up golden brown later on! Pulse several times until mixture resembles coarse crumbs before slowly adding ice water bit by bit until dough begins forming cohesive ball—don’t rush this stage or you risk toughening dough due overmixing!
Step 4: Rolling Out The Dough
Once formed into disk shape wrap tightly in plastic wrap then chill briefly while prepping other elements—we’re looking at about 15 minutes max here just enough time for flavors meld within filling whilst making sure dough stays cool enough during rolling phase ahead which yields those desirable flaky results later down line! Once chilled lightly flour surface area then roll out half portion till thin enough fit inside pie dish comfortably yet thick enough avoid tearing upon transfer—it should feel pliable under pressure but not stick excessively either due lack moisture content remaining intact throughout entire process!
With these foundational steps laid down solidly we’re well on our way towards crafting something remarkable together—stay tuned for more details as we complete each segment leading us closer towards enjoying slice after slice laden generously creamy toppings atop freshly baked perfection brought forth lovingly all thanks efforts put forth today…
Step 5: Sealing the Flavors with Precision
Now that your pie base is ready, it’s time to prepare for the grand finale—sealing in all that delicious apple goodness! Take your rolling pin and gently roll out the remaining piece of pastry on a lightly floured surface. Aim for a thickness of about 1/8 inch; this is crucial because you want a sturdy yet tender top crust that won’t become soggy from the filling. As you roll, think about how each gentle press is bringing life to your pie. Once rolled out, it’s time to add some magic to the edges. Grab a small bowl of ice water and dip your fingertip into it, then lightly wet the edge of the bottom crust. This creates a glue-like effect when you place the top crust over it, ensuring that everything stays sealed together during baking.
Now comes the fun part—carefully lay the rolled-out pastry over the filled pie dish. This is where you can really express yourself! Trim any excess pastry hanging over the edges with a sharp knife, using the edge of the dish as your guide. It’s important not to leave too much extra crust because we want a beautiful, clean finish rather than an overly thick edge. With your fingers or a fork, crimp those edges together however your heart desires—this not only looks lovely but also prevents any filling from leaking out during baking. Remember, this step isn’t just about aesthetics; crimping helps create texture and allows steam to escape, which is essential for achieving that perfectly baked pie.
Step 6: Letting Creativity Shine with Ventilation
Before we move on to what will be one of the most delightful aspects of this pie—the aroma wafting through your kitchen—we must ensure proper ventilation for our apple masterpiece! Using a sharp knife or even decorative pastry cutters if you’re feeling fancy, cut a small hole or several slits in the center of your top crust. Why is this so important? Think of it as giving your pie a little breathing room; this lets steam escape while helping to prevent that dreaded sogginess we all fear in our pies. Plus, it allows those gorgeous juices from our apples to bubble up beautifully and create an enticing visual when you slice into it later.
As you make these cuts, feel free to get creative! A simple cross or even a heart shape can add that personal touch that makes every bite feel extra special. I promise you, this attention to detail transforms an ordinary dessert into something truly extraordinary. Just imagine cutting into that golden-brown crust and seeing those luscious apple slices peeking through—it’s enough to make anyone’s mouth water!
Step 7: Achieving Golden Perfection
Now for one of my favorite parts—giving your pie that irresistible golden color! In a small bowl, combine one egg white with a teaspoon of water and whisk them together until they’re frothy and well blended. This simple mixture will serve as an egg wash; brushing it over the top crust before baking is non-negotiable if you want that stunning golden hue that catches everyone’s eye at first glance. Using a pastry brush—or even just your fingers if you’re in a pinch—gently apply the egg wash all over the surface of the pie. Make sure every inch is covered; this not only enhances color but also adds flavor and texture.
Brushing on this wash is more than just cosmetic; it acts like a protective layer against moisture from escaping during baking, ensuring your crust remains flaky instead of turning chewy or soggy. Plus, when baked at high temperatures, proteins in eggs create that beautiful sheen we all adore on pastries. So take your time here—don’t rush this step! I promise you; it pays off when you pull out that perfectly baked pie from the oven, glistening like liquid gold.
Step 8: Baking Your Perfect My Favorite (British) Apple Pie
Ahh, it’s finally time to slide your creation into the oven! Preheat it to 400º F (200º C), ensuring it’s nice and hot before placing your pie inside; this initial blast of heat helps set everything beautifully right from the get-go. When you’re ready—and trust me on this—you’ll want to place your pie on the lower rack for about 20 minutes initially; this allows the bottom crust to cook thoroughly without burning while creating a supportive base for those tender apples above.
After those first crucial minutes have passed, carefully transfer your pie to the center rack for another 10-20 minutes until it’s gloriously golden brown across its entire surface—this transition allows for even cooking throughout while creating an enticingly fragrant atmosphere in your kitchen that’s utterly intoxicating! Keep an eye on it during these last moments; ovens can vary dramatically in temperature accuracy. You’ll know it’s done when you see little bubbles forming through those vent holes and when lightly tapping on top gives back just enough resistance without feeling mushy—a perfect balance!
Once you’ve reached golden perfection—or what I like to call pie zen—remove it from the oven and let out an audible sigh of relief as you admire its beauty! Allowing it some cooling time afterward will help settle all those luscious juices within before serving.
Conclusion:
As we wrap up our delicious journey through making My Favorite (British) Apple Pie, I can’t help but feel an overwhelming sense of excitement about sharing this cherished recipe with you. This isn’t just any pie; it’s truly extraordinary—the combination of tart Granny Smith apples dancing harmoniously with just the right amount of sweetness and spices creates a symphony of flavors that will make your taste buds sing! The buttery crust enveloping those perfectly cooked apples adds texture and richness that elevates each bite far beyond ordinary dessert.
I genuinely believe this recipe is a must-try for anyone who loves the experience of baking as much as they love indulging in delicious treats. There’s joy in creating something from scratch—a moment when flour dust fills your kitchen and anticipation builds as you wait for it to bake. Imagine pulling this golden beauty from your oven, its enticing aroma wrapping around you like a warm hug; it’s perfect for family gatherings, cozy evenings by the fire, or simply when you’re craving something sweet after dinner. Each slice not only satisfies a sweet tooth but also brings people together over shared memories and laughter.
Serving suggestions truly abound with this classic dessert; imagine savoring one warm slice topped with a generous drizzle of thick cream or pouring rich custard over it until it pools around each piece—a decadent experience that feels like pure indulgence. For an afternoon pick-me-up, pair it with steaming cups of tea or coffee; trust me when I say there’s nothing quite like enjoying this comforting treat while chatting away with friends. And if you’re feeling particularly adventurous? Try adding unique toppings like chopped nuts or even a scoop of dairy-free ice cream on top—it adds another layer of flavor and texture that makes every bite even more exciting!
Feeling adventurous? This recipe is wonderfully adaptable! If you’re looking to switch things up, consider experimenting with different apple varieties—Honeycrisp or Fuji apples bring their own delightful sweetness into play—or adding spices like nutmeg and cardamom for a twist on tradition. You could even try incorporating dried fruits such as cranberries or raisins into the filling for an added depth of flavor. Whatever path you choose, I invite you to dive into this culinary adventure. Try making My Favorite (British) Apple Pie today, share your experiences in the comments below, and connect with fellow baking enthusiasts! I can’t wait to hear how yours turns out!
My Favorite (British) Apple Pie
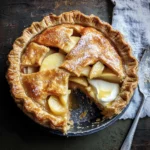
There’s nothing quite like the aroma of freshly baked apple pie to evoke feelings of warmth and nostalgia. My Favorite (British) Apple Pie is a delightful blend of sweet and tart flavors, thanks to crisp Granny Smith apples enveloped in a flaky, buttery crust. This classic dessert not only captures the essence of comfort food but also encourages gatherings around the table, creating cherished memories with family and friends. Each slice is an invitation to savor life’s simple pleasures—perfectly paired with thick cream or homemade custard for an unforgettable experience. Ready to embark on this culinary adventure? Let’s get baking!
- Prep Time: 30 minutes
- Cook Time: 40 minutes
- Total Time: 1 hour 10 minutes
- Yield: Serves 8
- Category: Dessert
- Method: Baking
- Cuisine: British
Ingredients
- ½ tsp salt
- 8 oz cold unsalted butter
- 1 Tbsp sugar
- 4 cups all-purpose flour
- 5 large Granny Smith apples (peeled, cored, and sliced)
- Juice of half a fresh lemon
- 3 Tbsp sugar (to taste)
- 1 egg white (beaten with 1 tsp water)
- Thick cream or homemade custard for serving
Instructions
- Preheat oven to 400º F (200º C).
- Prepare the apple filling by combining sliced apples, lemon juice, and sugar in a medium pot over medium-low heat until slightly softened.
- In a food processor, mix flour and salt; then incorporate cold butter until crumbly. Add ice water gradually until dough forms.
- Chill the dough briefly before rolling out half for the bottom crust and placing it in a pie dish.
- Fill with prepared apple mixture and roll out the remaining dough for the top crust, sealing edges together.
- Cut slits for ventilation in the top crust and brush with egg wash.
- Bake for about 30-40 minutes until golden brown.
Nutrition
- Serving Size: 1 serving
- Calories: 210
- Sugar: 12g
- Sodium: 150mg
- Fat: 10g
- Saturated Fat: 6g
- Unsaturated Fat: 4g
- Trans Fat: 0g
- Carbohydrates: 31g
- Fiber: 2g
- Protein: 2g
- Cholesterol: 20mg