Firecracker Cake
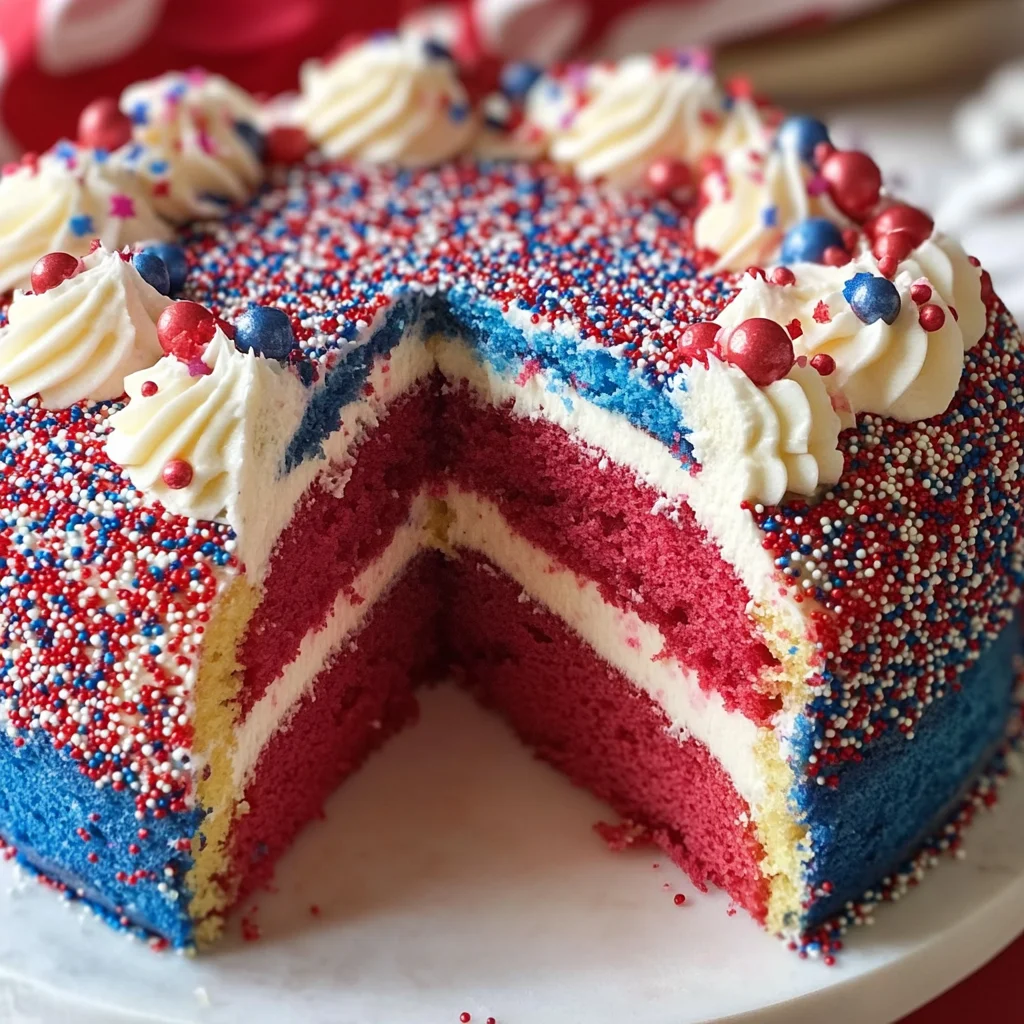
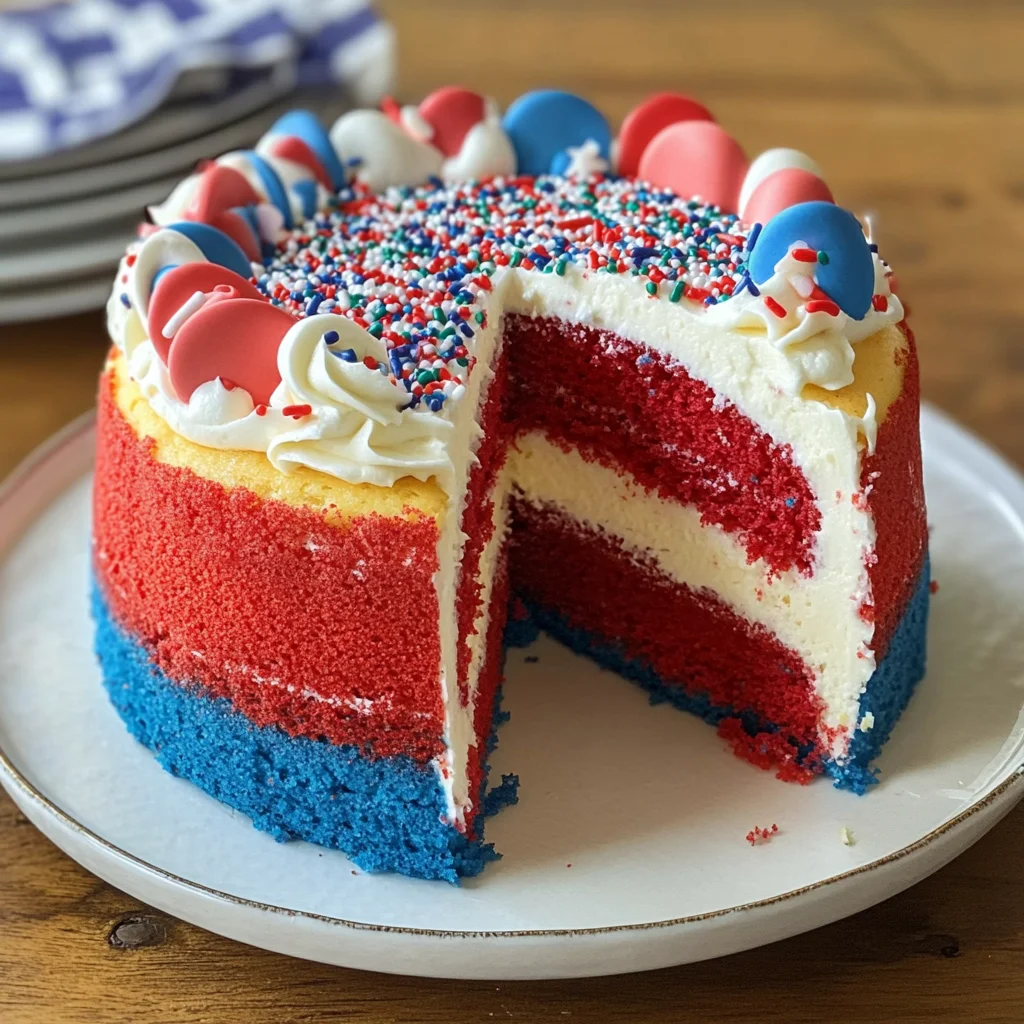
There’s something undeniably magical about a cake that captures the essence of celebration, isn’t there? The Firecracker Cake is not just a dessert; it’s an experience that ignites joy and patriotism in every layer. Picture this: slicing into a beautifully swirled cake, revealing vibrant ribbons of red, white, and blue that mirror fireworks lighting up the summer sky. The excitement in the air as you gather with loved ones to share a slice makes this creation feel like a heartfelt tradition. I’ve always been captivated by how food can connect us, bridge generations, and create memories – and this cake does just that. Whether it’s for Memorial Day, the 4th of July, or just because you want to celebrate life, I promise you this Firecracker Cake will be the centerpiece of your gathering.
Baking this cake is more than mixing ingredients; it’s about crafting a moment filled with laughter and love. As you whip together the layers of flavors, let yourself be swept away by the colors and textures that come alive in your kitchen. There’s an undeniable thrill in watching as vibrant colors meld together while still holding their distinct identities—just like us! This cake embodies the spirit of unity and celebration, reminding us to cherish our shared experiences. So grab your apron, clear a spot on your counter, and let’s dive into making this stunning Firecracker Cake!
Firecracker Cake: A Sweet Symphony of Colors
If you’re ready to embark on a delightful culinary adventure that’s as fun to make as it is to eat, then you’ve found your recipe! This Firecracker Cake bursts with color and flavor, promising to be the star of any summer celebration. With its striking appearance and scrumptious taste, it’s perfect for gatherings where laughter fills the air and everyone shares in the joy of good food. These layers of sweetness invite everyone to take part in something truly extraordinary!
Ingredients:
As we gather our ingredients for this patriotic masterpiece, think of each one as a crucial player in our delicious symphony. Each element contributes its own unique flavor and texture to help create something beautiful that stands out.
- 1 box white cake mix (15.25 oz.) – This convenient box mix serves as our foundation for the Firecracker Cake. While homemade cakes have their charm, using a quality boxed mix ensures consistent results without sacrificing taste or texture. It simplifies our process so we can focus on adding those spectacular colors! When choosing your cake mix, look for one without artificial flavors or preservatives for the best overall outcome.
- Water – Essential for bringing our batter together! It hydrates the dry ingredients from the cake mix so they can combine effectively during mixing. Using room temperature water is key here because it helps create an even batter without sudden temperature changes that could affect mixing.
- Vegetable oil – This ingredient adds moisture and tenderness to our cake, giving it that loving softness we all crave when biting into a slice. Oil keeps cakes moist longer than butter does due to its higher fat content which means no drying out quickly after baking! Just remember: don’t skimp on quality; opt for light oils like canola or sunflower that won’t alter the flavor profile dramatically.
- Egg whites – We’ll be using egg whites instead of whole eggs to achieve a lighter texture in our cake while keeping it beautifully white inside! Separating the eggs allows us to whip these whites into soft peaks before folding them into the batter if desired (though it’s optional). Egg whites also provide structure while still ensuring our final product remains airy.
- Red food coloring – This vibrant hue brings life (and fun!) into our cake design! The choice of gel-based food coloring is best since it provides rich color without adding too much liquid into our mixture—ensuring we maintain the right consistency throughout.
- Blue food coloring – Just like its red counterpart, blue food coloring enhances not only appearance but also plays an essential role in achieving that striking patriotic theme! Again, gel-based options work best here for consistent coloring without compromising batter integrity.
- 1 container white frosting (12 oz.) – Our fluffy frosting will serve as both decoration and deliciousness atop this show-stopping creation! Opting for a classic vanilla-flavored frosting keeps things simple yet effective; however, feel free to experiment with flavors if you want something different! Look for brands made without preservatives or high fructose corn syrup for excellent taste.
- Red, white and blue sprinkles (optional) – These little gems add an extra layer of festivity! They’re not just pretty; they also provide delightful crunchiness against the soft texture of your cake once baked—an irresistible combination!
Equipment You’ll Need:
Now let’s talk about our trusty kitchen companions—the equipment that will make creating this masterpiece smoother than ever! Having these tools at hand will ensure you have everything you need for success while baking your Firecracker Cake!
- 12-cup bundt pan – This beauty is essential for achieving that iconic shape we associate with bundt cakes. Their unique design allows heat circulation around all sides evenly while baking—leading to perfectly baked edges along with a moist interior every time! Be sure to generously grease and flour your pan before pouring in any batter; this crucial step prevents sticking later on when we flip it over onto a cooling rack.
- Mixing bowls – A good set of mixing bowls is non-negotiable when preparing multiple batters at once like we will here! Using separate bowls allows us greater control over color distribution—crucial for achieving those stunning layers—while ensuring easy cleanup afterward too!
- Electric mixer or whisk – An electric mixer speeds up mixing times significantly compared to manual whisking which saves precious time when preparing batters! However, if you prefer arm workouts (and perhaps some nostalgia), using a good ol’ whisk works perfectly fine too; just keep mixing until everything comes together seamlessly!
- Microwavable bowls – We’ll need several small microwave-safe bowls later on for melting our frosting smoothly before drizzling over finished cakes—a critical step in achieving that stunning visual appeal we’re going after here!
Now that we have gathered all our ingredients and tools together let’s get ready to prepare this glorious Firecracker Cake!
Preparing the Firecracker Cake
Step 1: Preheat Your Oven & Prepare Your Pan
The first important step is preheating your oven according to package directions found on your cake mix box—this ensures even baking throughout once we pour in our colorful concoction! Preheating typically takes around 10–15 minutes depending upon individual ovens but trust me—it’s worth every second spent waiting—you want that perfect golden crust forming outside while keeping everything fluffy inside!
While waiting for warmth enveloping your kitchen space (the anticipation builds!), generously grease and flour your bundt pan with either cooking spray or butter followed by dusting flour around its interior surfaces thoroughly until coated evenly everywhere inside those curves—the last thing we want after all this effort is having parts stick stubbornly when flipping out afterward!
Step 2: Prepare Your Batter
Next comes one of my favorite moments—the mingling dance among colors within bowls as you create vibrant batters bursting forth from ordinary white mixes into exciting shades reminiscent of summer celebrations ahead! Following instructions provided on-box carefully whisk together water alongside vegetable oil plus egg whites until fully blended before dividing off two cups worth into smaller separate bowls designated solely for red & blue hues respectively.
Add drops upon drops—stirring gently until these shades are well-mixed without compromising texture—as patience during this phase yields profound rewards later down line showcasing gorgeous layered visuals across every slice served forth!
Step 3: Layering Time!
Once all mixtures are ready becomes time now putting them into action through layering methodically inside prepared bundt pan itself—starting off gently pour those crimson waves at bottom allowing them nestle comfortably down below before topping off atop next layer consisting pure white batter flowing right over top gently avoiding any mixing between layers since intention rests firmly holding distinct lines across entire height formed throughout baking process ahead.
After laying down white layer follow suit pouring blue batch next over resting sweet pillow created thus far letting gravity pull everything downward maintaining orderliness intact until lastly reaching edges nearing rim level itself—we’re almost there now friends!
Step 4: Bake & Cool
Pop that colorful creation directly onto center rack nestled comfortably within warmed oven now letting heat do its magic transforming raw materials into heavenly confection awaiting discovery shortly after timer rings signaling completion approximately thirty-five minutes later—keep watch though since every oven varies slightly so checking often through toothpick inserted near center should come out clean indicates readiness achieved successfully!
Once satisfied remove from oven letting cool briefly about ten minutes cooling down naturally before carefully flipping onto rack placed above cookie sheet below catching potential drips left behind post-baking escapade whilst awaiting full cooldown period lasting thirty-to-forty-five minutes further ensuring nothing rushes prematurely through decorative stages awaiting next steps soon enough afterwards!
Stay tuned as we continue diving deeper into frosting preparation along with decoration shortly thereafter—we’re nearly there toward unveiling masterpiece worthy celebrations ahead dear friends!
Step 5: Drizzling the Frosting with Love
Once your cake has cooled to a wonderfully inviting temperature, it’s time to transform that plain white frosting into something truly extraordinary. The first thing we need to do is divide the frosting evenly into three separate microwavable bowls. Trust me on this; having each color in its own bowl allows us to create distinct layers of flavor that’ll leave everyone guessing about how we achieved such a beautiful masterpiece! Now, pop the first bowl into the microwave and set it for just a few seconds on high. You’re looking for that perfect consistency—smooth and pourable, yet still thick enough to cling lovingly to the cake. Don’t rush this step! A well-drizzled frosting creates an enticing visual appeal and provides that delightful contrast between the vibrant colors.
As you drizzle the first bowl of melted frosting over your cake, envision your creation taking shape. Start by holding your spoon above the cake and moving it back and forth in a lovely striping pattern. It’s essential to create an even distribution, as this ensures every bite will be bursting with flavor. The warm frosting will cascade down the sides, forming beautiful rivulets that mix just slightly with the cake’s moist surface. This step is crucial because it not only enhances appearance but also adds a touch of sweetness to each slice. Continue drizzling until you’ve used all of the first bowl; you’ll want it to look like an abstract masterpiece—colors dancing together in harmony!
Step 6: Adding Vibrancy with Blue
After completing that lovely first drizzle, it’s time for round two! Take out your second bowl of frosting and repeat the melting process—microwave until it’s smooth and silky, then stir in a few drops of blue food coloring until you achieve that deep ocean hue that’s so visually striking! This step is not just about aesthetics; blue adds depth to our flavor profile, creating a striking contrast against the sweetness of the white frosting. As you drizzle this blue frosting over your cake, think about how each layer tells a story—the red embodies passion, while blue evokes tranquility. The interplay between these colors is what makes this Firecracker Cake feel like a celebration of life itself.
While drizzling, don’t hesitate to let some of that luscious blue frosting intertwine with the previous layer. It creates an inviting visual effect that draws everyone closer to find out what’s inside! Remember: less is more when it comes to drizzling technique—allow gravity to do its work rather than forcing too much frosting at once. You’re aiming for a tantalizing look where each color remains distinct yet beautifully blended together—a balance akin to harmony in music.
Step 7: The Grand Finale with Red
Now onto our final flourish! Grab your last bowl of frosting and give it a quick zap in the microwave until it’s just right—smooth and ready for action. Stir in red food coloring until you achieve that vibrant cherry red shade that screams celebration! This part is where we can really let our creativity shine; as you drizzle this luscious red frosting over your cake, think about how this final touch captures all those moments spent celebrating with friends and family during summer barbecues or festive gatherings.
As you sprinkle this bright red hue atop your cake, I encourage you to be bold! Allow it to cascade over edges but also aim for strategic splashes across surfaces already adorned with white and blue. This technique ensures every slice will be bursting with flavor while remaining visually appealing from every angle—trust me, guests won’t be able to resist reaching for seconds when they see such vibrancy on display! And if you like a little extra crunch and festivity (who doesn’t?), consider adding some optional red, white, and blue sprinkles atop your frosted masterpiece. These tiny gems add texture and an extra burst of sweetness while enhancing that celebratory feel!
Step 8: Letting Your Cake Rest – The Importance of Patience
Now comes one of those often-overlooked yet absolutely paramount steps—letting your cake rest at room temperature before serving. I know how tantalizing it looks right now—it practically begs you to dive right in—but patience truly pays off here! Allowing your Firecracker Cake to sit undisturbed gives both the flavors time to meld beautifully together while ensuring that gorgeous frosting sets perfectly on top without sliding off when cut into slices.
This resting period typically spans around 30 minutes but can stretch up to an hour if you’re feeling particularly patient (or waiting for guests!). During this time, any lingering warmth from the cake will gently soften those frostings into a heavenly glaze over your creation. What should you watch for? Well, when you see that delightful sheen appear on top as everything melds into one harmonious layer—that’s when you know you’re onto something special! It’s also essential not to place it straight into the fridge; chilling can cause condensation which might ruin all those lovely layers we’ve worked so hard on achieving.
Baking Your Perfect Firecracker Cake
Step 9: Cutting Into Your Masterpiece
Finally—the moment we’ve been dreaming about arrives! As you prepare to cut into this magnificent Firecracker Cake, take a moment to admire all those vibrant layers peeking through each slice. Use a sharp knife dipped in hot water for clean cuts; this technique helps prevent tearing through all those delicate layers we’ve painstakingly built up together throughout this process. Each slice should reveal an inviting cross-section showcasing stunning reds, whites, and blues harmoniously blended together—a true showstopper!
As you serve each piece onto plates adorned with fresh berries or whipped cream (if desired), don’t forget about presentation—it adds another layer of elegance and excitement! Encourage everyone around you not only to admire their slices but also savor every bite slowly—because trust me when I say there’s nothing quite like enjoying homemade desserts made from scratch surrounded by loved ones sharing laughter and stories around festive tables filled with joy.
This Firecracker Cake isn’t just dessert; it’s a memory waiting to be made—a delicious reminder of shared celebrations filled with love and laughter year after year. So go ahead—slice into that beautiful creation you’ve crafted with such care—and watch as smiles light up every face around you! Enjoy every moment—you deserve it!
Storage and Enjoyment Tips for Your Firecracker Cake
Now that your Firecracker Cake has come out of the oven, beautifully layered in vibrant reds, whites, and blues, it’s time to revel in that moment of sheer joy! I can just imagine you slicing into that glorious creation, and it’s hard not to feel a rush of pride as you present it to your friends and family. But what happens if you have any leftovers? No worries – this cake is just as delightful the next day and even holds well for future gatherings. Let’s explore how to keep that festive spirit alive with some savvy storage tips!
Storing Leftover Firecracker Cake
To keep your Firecracker Cake fresh and scrumptious, place it in an airtight container at room temperature. If you’ve got a cake dome or a large resealable bag, those work wonders too! Just make sure the cake isn’t exposed to air; otherwise, it might dry out or lose its delightful flavors. This cake will stay delicious for about 3-4 days when stored properly. If you’re nervous about maintaining its softness, try placing a slice of bread in the container with the cake – trust me on this one! The moisture from the bread helps keep the cake moist while it sits cozy in its little home. And let me tell you, this cake tastes almost as good after a day or two because those flavors have had time to meld together, creating a profound satisfaction in every bite. When you’re ready to enjoy some more, simply serve it at room temperature or give it a quick pop in the microwave for about 10-15 seconds for that freshly baked feeling!
Freezing Firecracker Cake for Later
If you find yourself with an abundance of cake (or perhaps you’ve made two because you just couldn’t resist!), freezing is a fantastic option. To freeze your Firecracker Cake properly, wrap each slice tightly in plastic wrap or aluminum foil before placing them in a freezer-safe container or resealable bag. This helps prevent freezer burn and preserves that vibrant flavor profile. The cake will keep beautifully frozen for up to three months! When you’re ready to relish another piece, simply transfer it from the freezer to the fridge overnight to thaw gently – no need for any drastic changes here! The convenience of having this show-stopping dessert ready at a moment’s notice makes it so worthwhile. Imagine pulling out a slice on a whim and enjoying that burst of celebratory colors once again; it’s like bringing a little piece of summer right back into your day!
Firecracker Cake
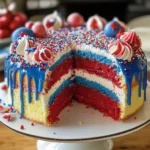
Firecracker Cake is a vibrant celebration of colors and flavors that brings joy to every gathering. This delightful dessert features layers of fluffy cake adorned with rich, patriotic red and blue hues, making it the perfect centerpiece for summer festivities like Memorial Day or the 4th of July. The combination of soft vanilla cake and sweet frosting creates a mouthwatering experience that everyone will enjoy. Whether you’re celebrating with friends or family, this cake is sure to ignite smiles and create lasting memories.
- Prep Time: 20 minutes
- Cook Time: 35 minutes
- Total Time: 55 minutes
- Yield: Approximately 12 servings 1x
- Category: Dessert
- Method: Baking
- Cuisine: American
Ingredients
- 1 box white cake mix (15.25 oz.)
- Water
- Vegetable oil
- Egg whites
- Red food coloring
- Blue food coloring
- 1 container white frosting (12 oz.)
- Optional: Red, white, and blue sprinkles
Instructions
- Preheat your oven according to the cake mix package directions and generously grease a 12-cup bundt pan.
- In a mixing bowl, combine the cake mix with water, vegetable oil, and egg whites until well blended.
- Divide the batter evenly into three bowls; add red food coloring to one bowl and blue food coloring to another, leaving one bowl uncolored.
- Layer the batters in the prepared bundt pan: start with red, followed by white, then blue. Repeat until all batter is used.
- Bake according to package instructions (approximately 35 minutes) or until a toothpick inserted in the center comes out clean.
- Allow cake to cool before flipping it onto a cooling rack.
Nutrition
- Serving Size: 1 serving
- Calories: 220
- Sugar: 18g
- Sodium: 160mg
- Fat: 9g
- Saturated Fat: 1g
- Unsaturated Fat: 8g
- Trans Fat: 0g
- Carbohydrates: 34g
- Fiber: 0g
- Protein: 2g
- Cholesterol: 0mg